
I'm not worthy.
Navigation
Install the app
How to install the app on iOS
Follow along with the video below to see how to install our site as a web app on your home screen.
Note: This feature may not be available in some browsers.
More options
Style variation
You are using an out of date browser. It may not display this or other websites correctly.
You should upgrade or use an alternative browser.
You should upgrade or use an alternative browser.
Build When your inner voice speaks, you need to listen.
- Thread starter SHIfTHEAD
- Start date
Member Builds and Stories
This site may earn a commission from merchant affiliate
links, including eBay, Amazon, Skimlinks, and others.
Yeah that guy has seriously topped the ante here.I'm not worthy.
This is some next-level, Picasso artistry type s***, right here. I take back my initial comment about it being a parts rig. From this moment forward, there is no such thing as rusty parts rigs, only lazy bums with low motivation and non-running 60s.
- Thread starter
- #124
I appreciate the kind words fellas! ")
The core support is off, but it put up a fight. I need to start compiling a list of all the hoses and fasteners I'm gonna need to put this puzzle back together.
Also, I intend to POR15 the outside of the frame, and thinking of using the Eastwood inner frame spray to complete the job. Anyone have any experience with that product? Or would recommend a different solution?
I've used the Eastwood inner frame coating on my truck. No real long term test only a few years. But the applicator wands are awesome and it stinks to high heaven so to me that's a good product. Anyway seems like a good product to me definitely coats well.
Just keep in mind por15 needs a top coat because it doesn't have uv protective stuff in it i have used por15 to paint the chassis axles springs xmembers and top coated everything if the Eastwood has the uv protective in it would be better or i will say less work but you are use to not working lol great job on the landcruiser they also like said above have spray cans with wands to spray inside the chassis they meaning eastwood also if you use por15 top coat you have to thin it the por15 i brushed on it lays flat and comes out shinny just watch for runs i used about a half a gallon on all those things i mentioned and used about a gallon of top coat using a hvlp paint gun.
- Thread starter
- #127
So if I use their Chassis Black I still need to put a top coat? Or maybe I don't really understand the POR15 process... I guess I'll be reading up on the whole process to make sure I do it right.Just keep in mind por15 needs a top coat because it doesn't have uv protective stuff in it i have used por15 to paint the chassis axles springs xmembers and top coated everything if the Eastwood has the uv protective in it would be better or i will say less work but you are use to not working lol great job on the landcruiser they also like said above have spray cans with wands to spray inside the chassis they meaning eastwood also if you use por15 top coat you have to thin it the por15 i brushed on it lays flat and comes out shinny just watch for runs i used about a half a gallon on all those things i mentioned and used about a gallon of top coat using a hvlp paint gun.
I've applied a lot of POR. It's a very specific procedure. Sandblast or at least get rid of every spec of loose rust, dirt. Use their Marine Clean or whatever they call it today. Use the Metal Prep which is phosphoric acid. Rinse really well with water. Let it get dry dry dry. Then 2 coats of regular POR 15 then one coat of the Top Coat for UV resistance. If done right it's permanent. Guys have had issues but I bet it's related to prep or application.
Never used the Eastwood chassis saver or whatever but guys report good success with that too.
Never used the Eastwood chassis saver or whatever but guys report good success with that too.
The chassis black is the top coat regular por15 needs the top coat por15 is the rust encapsulator the chassis black isn't and follow there directions and use there process cleaner then metal prepSo if I use their Chassis Black I still need to put a top coat? Or maybe I don't really understand the POR15 process... I guess I'll be reading up on the whole process to make sure I do it right.
- Thread starter
- #130
Ok, so would have screwed that up for sure. Thanks guys.
I don’t think any of us are really all that... but definitely we display varying degrees of confidence and gumption. I’ve come to really dislike the threads of ‘how bad is bad’ because so many jump the gun on rust saying it’s beyond saving.no such thing as rusty parts rigs, only lazy bums with low motivation and non-running 60s
Last edited:
Next time someone asks "How much is is going to cost to fix this rust?" I'm sending them straight the F here.
Wow...I completely retract my comment about this rig being too far gone and a parts vehicle. It's already been said a ton in this thread, but absolutely incredible and inspiring work that you're doing here! Really puts a new perspective on what we all perceive as too far gone. Subscribed! Keep up the amazing work
I meant no offense. There are countless people here, yourself included, who have done loads of inspiring work. I work in the antique/vintage industry where anything is rarely too far gone, so it's nice to see that philosophy applied here. I honestly just though when I first saw this rig that it had sailed far past the point of no return.I don’t think any of us are really all that... but definitely we display varying degrees of confidence and gumption. I’ve come to really dislike the threads of ‘how bad is bad’ because so many jump the gun on rust saying it’s beyond saving.
- Thread starter
- #135
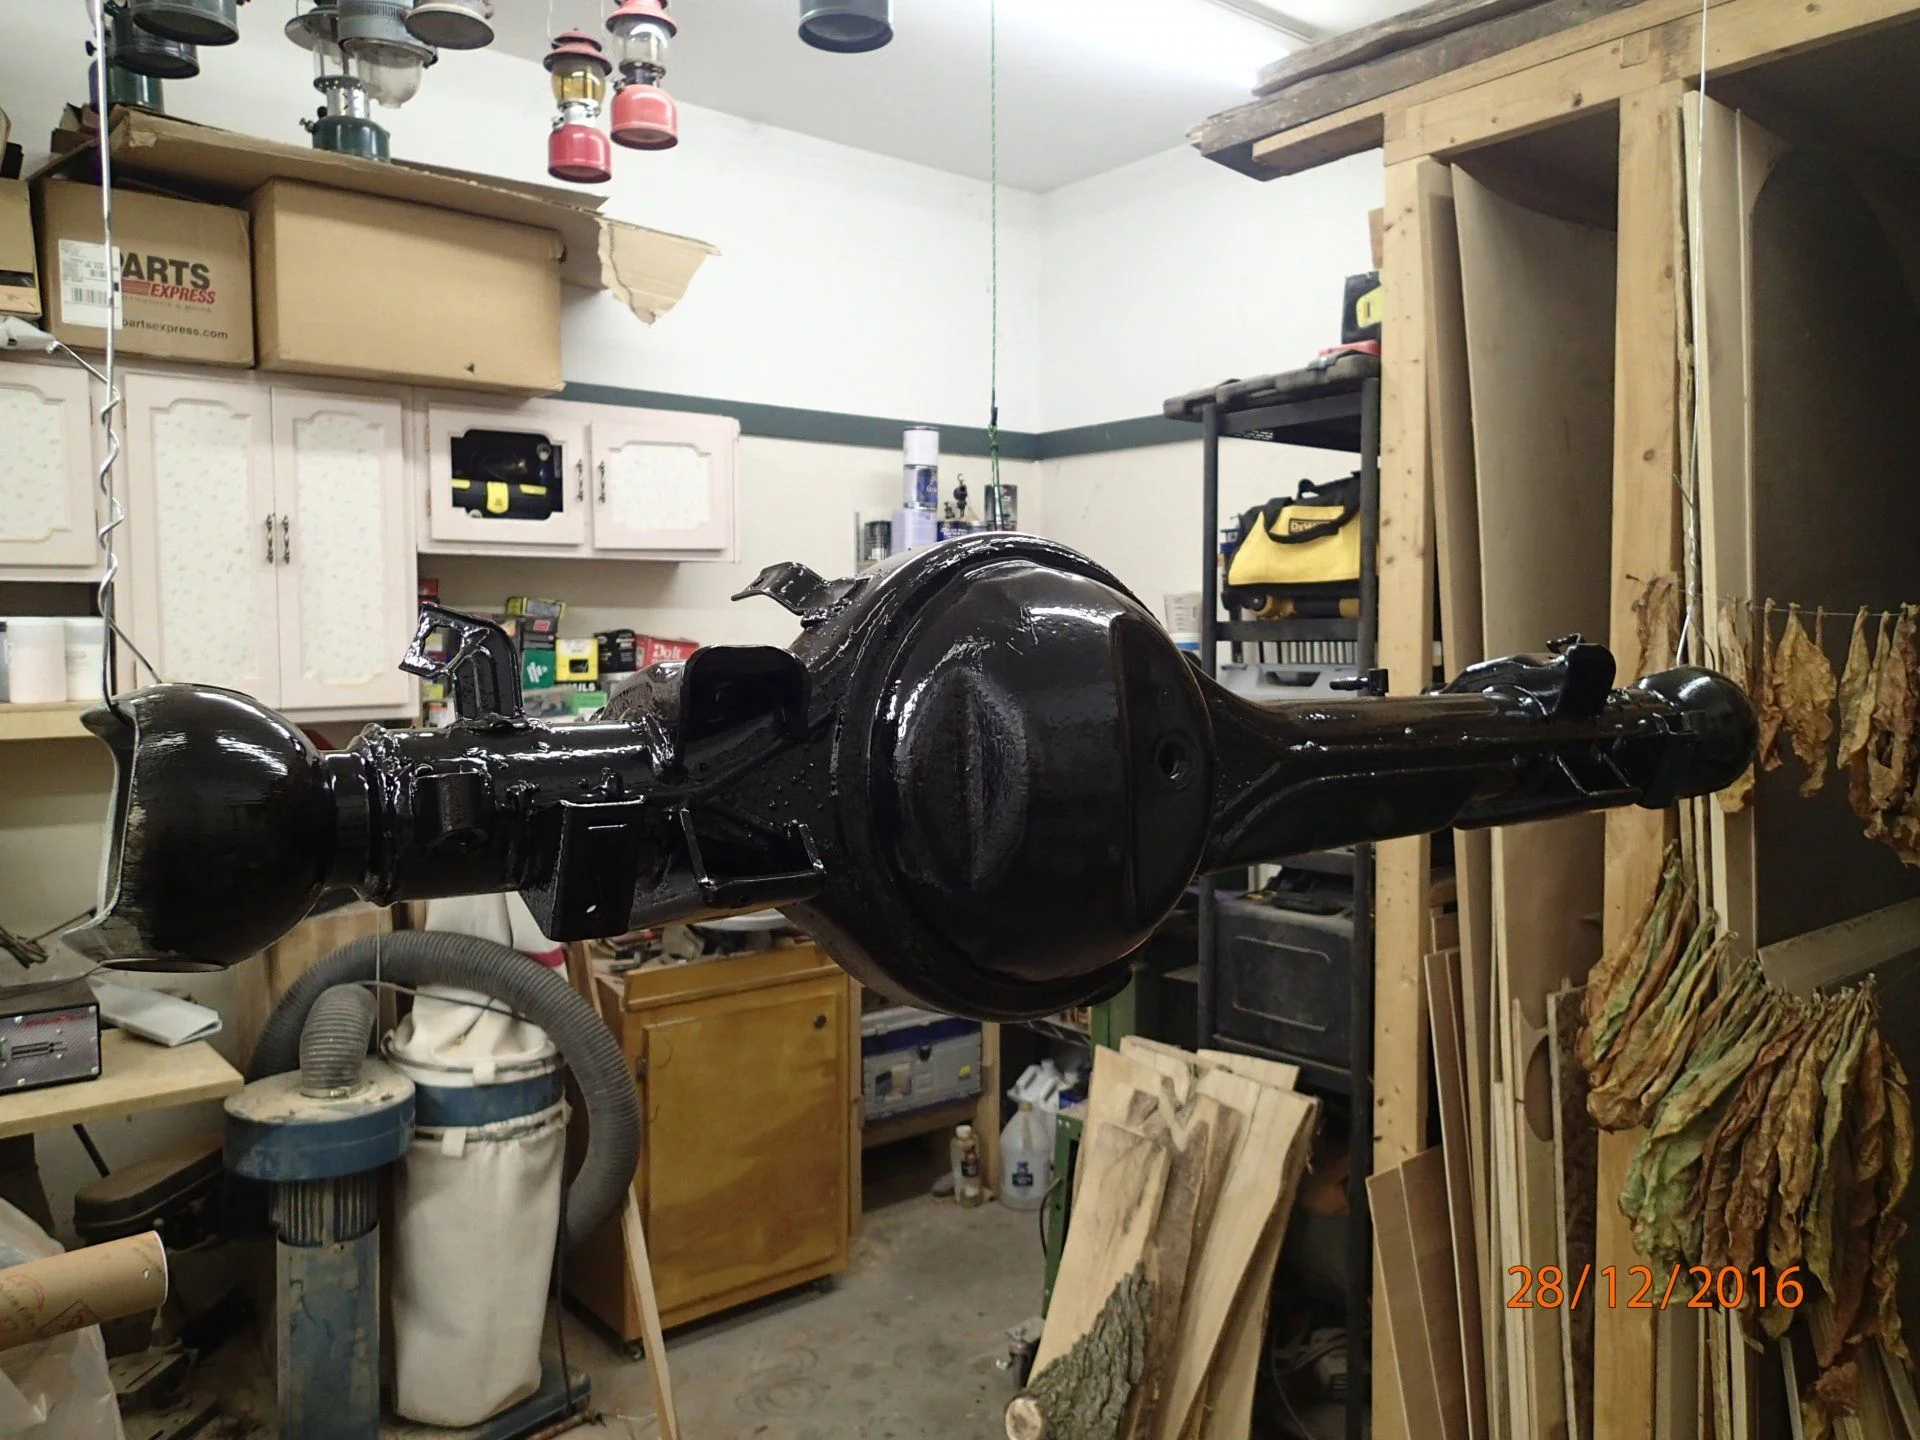
I'm in the midst disassembling the frame, and it's putting up a bit of a fight. I've gotten tired of trying to coerce various bolts to move that I just started cutting them off. The AC condenser is toast, the radiator looks like it's past its sell by date, pretty much every hose looks like crap, etc. etc. etc. I got the core support out after a long fight with a couple of pretty corroded frame bolts. Then once the engine was out of the way I moved on to getting the front axle unhooked. More rusty fasteners meant more cutting wheels. The rear bolts were a real bitch to cut out, but there was no amount of PB Blaster that was going to free it.
I've got to say, having the engine/trans/xfer case hanging eye level as I tried to get the engine hoist to swing around was a bit nerve wracking. That whole package is a giant lump of a thing.


I've got to say, having the engine/trans/xfer case hanging eye level as I tried to get the engine hoist to swing around was a bit nerve wracking. That whole package is a giant lump of a thing.
- Thread starter
- #136
Space has turned into a very scarce commodity in the shop, but alas, I'm still hard at work on the frame and dealing with a few issues. First is after 30 years the spring bushings are very, very stuck. I've got the front ones out, but the rear ones are really putting up a fight. I'm also dealing with rust at the rear of the frame. I knew the C Channels at the rear were going to need to be replaced and have the Trail Tailor C Channel kit, but I didn't know what an absolute P.I.T.A. it was going to be to get the old ones out. They have been, without question, the most physically difficult part of this (or any other) project I've ever done. Mind you, I've only done three, but dayum! those f**kers do not want to come out. I suspect part of that is because the rust is quite bad back there. Others have been able to cut off the heads of the rivets and drive them out without too much of an issue, but these are not going without a fight. Nevertheless, with liberal use of a cutting wheel to remove the top and bottom of the "C" I was able to get them both out. BTW, you simply MUST have an air hammer/chisel to do this job. Go get one at Harbor Freight ($15) and get the 7" long set of chisels ($8). I tried without an air chisel first. Uhm, no. That's not going to work. I bent my 24" long pry bar. I got the air chisel in there and it made short work of the job, by comparison. It's still a long hard job with the chisel, but at least it's doable. Also the air chisel is great at removing rust scale.
I'm also dealing with the insides of the frames. There is a metric s*** ton of crap inside the frame rails. From rust scale to mouse bedding, and everything in between. Using my shop vac and a couple types of 1/2" ID radiator hose I'm spending copious amounts of time fishing the hose down the access holes along the frame to suck it all out. It's a real pain since the hose gets clogged about every 30 seconds. Also, once I get all the crap out I will hit the outside of the frame, in that area, with the air chisel to dislodge any unseen rust scale inside the rails and then work to get that all removed. I've got about 4 hours on just the passenger side so far, but it's about cleaned out now. Once I get them both cleaned out I will use the Eastwood inner frame sealer to keep them clean going forward.
The C Channels, as I mentioned, a serious PITA job. If the body was on the truck I'd probably have given up by now. But while I was back there I saw the bulging hint of rust at the very rear cross member. This is where the straight cross brace and the angled cross brace come together. A perfect recipe for rust, and it didn't disappoint. Of course it's all towards the bottom of the two pieces, where the grime would have settled, so I was able to cut out the bad stuff without completely removing the entire bracing. That way I don't have to worry about the dimensions getting out of whack while I patch that area.
Anyway, progress is slow now, but I've got to spend the time getting these fundamental bits right so the truck is solid and true and will be that way for a nice long time. Here's the evidence:
- Joined
- Jul 22, 2012
- Threads
- 639
- Messages
- 17,562
- Location
- Winter Park, Florida
- Website
- www.cruisermatts.com
Yeah, those C-channels are a bitch. I gave up on mine and reasoned that if they lasted this long they're still ok in there for another 30 years. I would do it if I had the body off for sure though.
- Thread starter
- #138
Well based on the fact it took me two HARD days of beating the living hell out of them to get them out, even as rusty as they were, I'd say you're probably right.Yeah, those C-channels are a bitch. I gave up on mine and reasoned that if they lasted this long they're still ok in there for another 30 years. I would do it if I had the body off for sure though.
Similarly of my rusty frame. It’s bad, I know it is and it needs to get patched at minimum but when I consider the hard wheeling I did only last winter on it, I know it can take a s*** ton of abuse.
Weather is better here but I’ve yet to hook up the wires and gas tubing to the welder.... I think I’m a tad nervous. The first opening of the gas tank is a big step. I deal w/ O2 tanks all the time at work, never saw one take off but had a few start blowing gas when a line came off and it’s amazubg how that loud blowing can really make the heart skip a few beats!
Weather is better here but I’ve yet to hook up the wires and gas tubing to the welder.... I think I’m a tad nervous. The first opening of the gas tank is a big step. I deal w/ O2 tanks all the time at work, never saw one take off but had a few start blowing gas when a line came off and it’s amazubg how that loud blowing can really make the heart skip a few beats!
Similarly of my rusty frame. It’s bad, I know it is and it needs to get patched at minimum but when I consider the hard wheeling I did only last winter on it, I know it can take a s*** ton of abuse.
Weather is better here but I’ve yet to hook up the wires and gas tubing to the welder.... I think I’m a tad nervous. The first opening of the gas tank is a big step. I deal w/ O2 tanks all the time at work, never saw one take off but had a few start blowing gas when a line came off and it’s amazubg how that loud blowing can really make the heart skip a few beats!
You've got that right! You must work in the medical field lol. Ask me how I know