Uh oh. You got a picture of the bolts?
The longest one has been installed. The three short ones are the one still not installed.
Can you identify what are those bolts?
Follow along with the video below to see how to install our site as a web app on your home screen.
Note: This feature may not be available in some browsers.
This site may earn a commission from merchant affiliate
links, including eBay, Amazon, Skimlinks, and others.
Uh oh. You got a picture of the bolts?
View attachment 3221038
The longest one has been installed. The three short ones are the one still not installed.
Can you identify what are those bolts?
AC line bracket across the top of the radiator shroud?

The pointy tipped fastener is a body bolt… possibly to a steering lines clamp???View attachment 3221038
The longest one has been installed. The three short ones are the one still not installed.
Can you identify what are those bolts?
 Luckily it was just the return line hose. Quick trip to O'Reilly, got a few feet of transmission cooler hose, switched the lines, and good to go. I think I am all leak free at this point. By far the most difficult and drawn out maintenance project I've done to date, but plenty of new skills acquired!
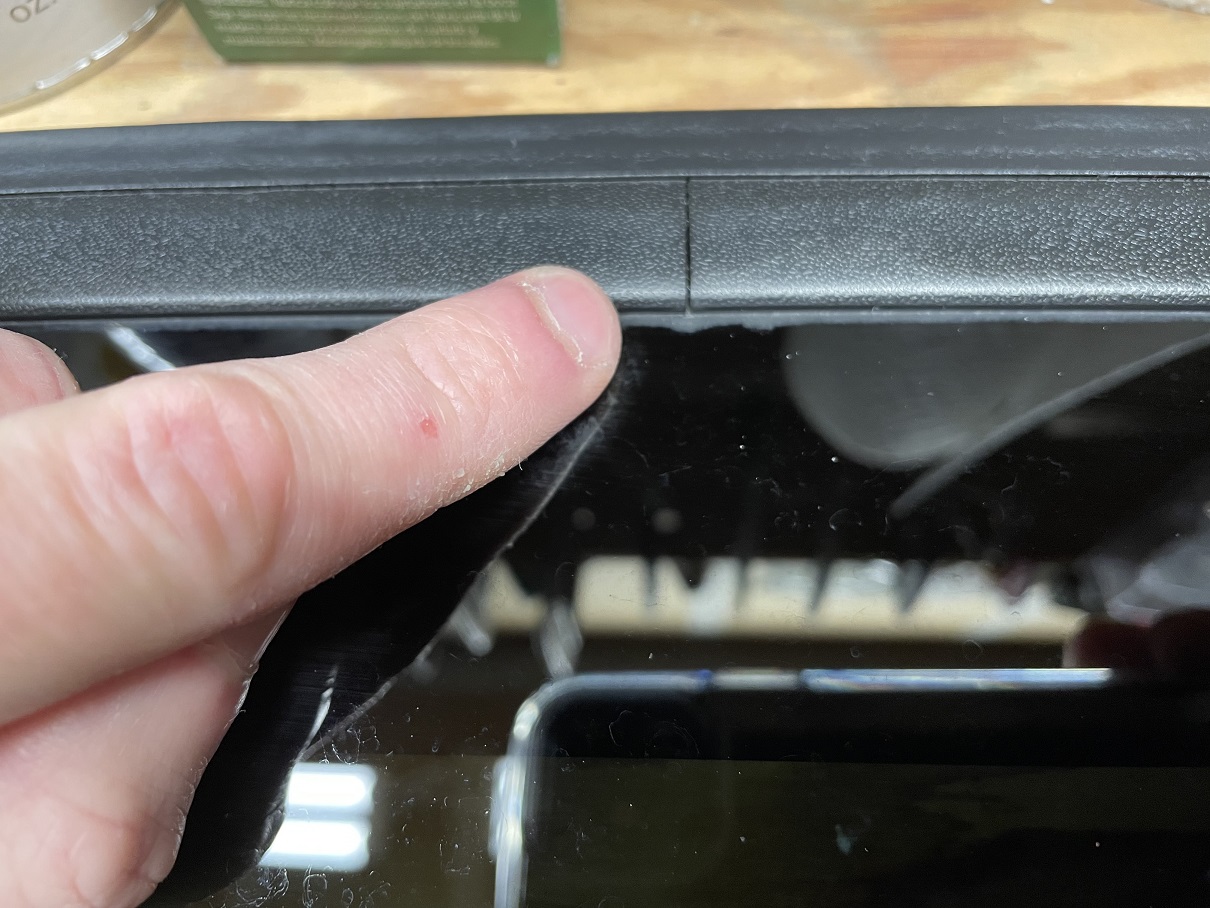
What type of sealant did you use to complete this project?For those of you up here in the PNW with me, you'll be able to relate to the recent fun of the "atmospheric river" we've been experiencing, AKA days on end of dumping rain. I noticed a drip to the interior from both front corners of my sunroof that wasn't the seal to the truck body. It turned out to be the inner seal bonded to the glass itself. Water gets between the inner rubber and the glass and runs down into the front plastic bezel piece. Once enough water has built up there, it drips out the seam where the front and side interior trim bezels meet.
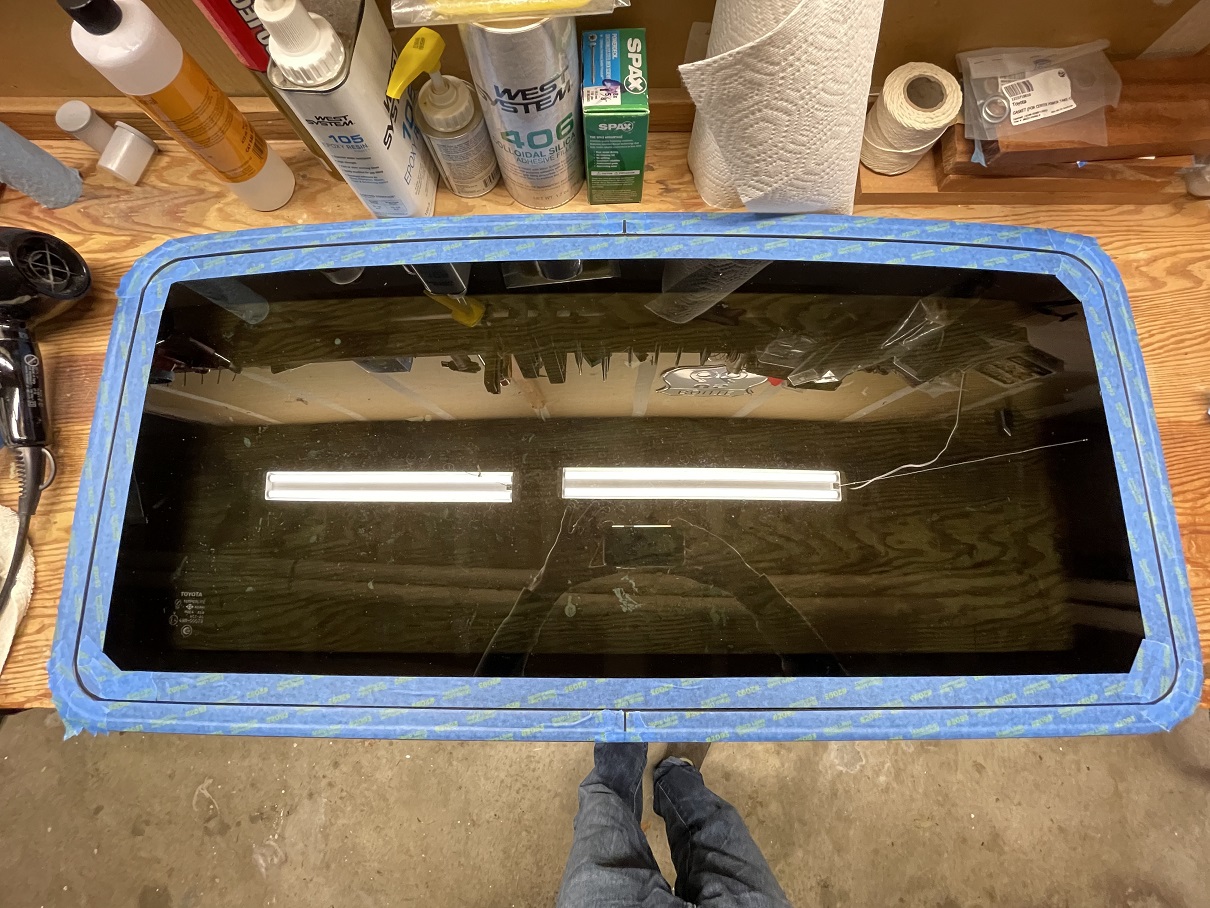
I was all ready to pull the trigger on a new glass as you can't get this rubber separate, but it looks like Mr. T wants $750 MSRP for one now, ouch! I'm going to try a bit of sealant first and see if that'll be enough to do it. If not, it looks like an early xmas gift for the cruiser.
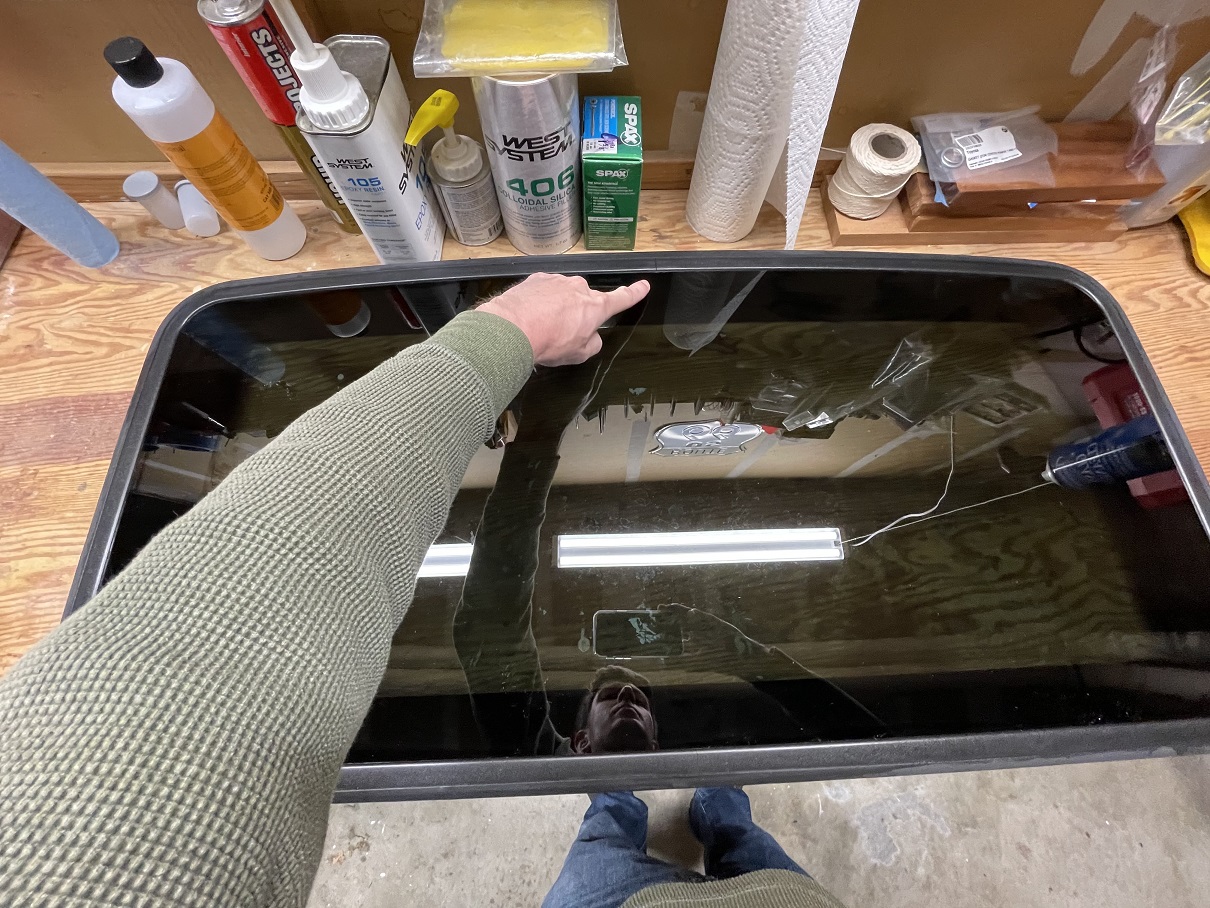
Separation was the worst at the front center where the two pieces of this rubber meet. My driveway is level and with the forward rake of the suspension, this is always sitting underwater whenever it rains.
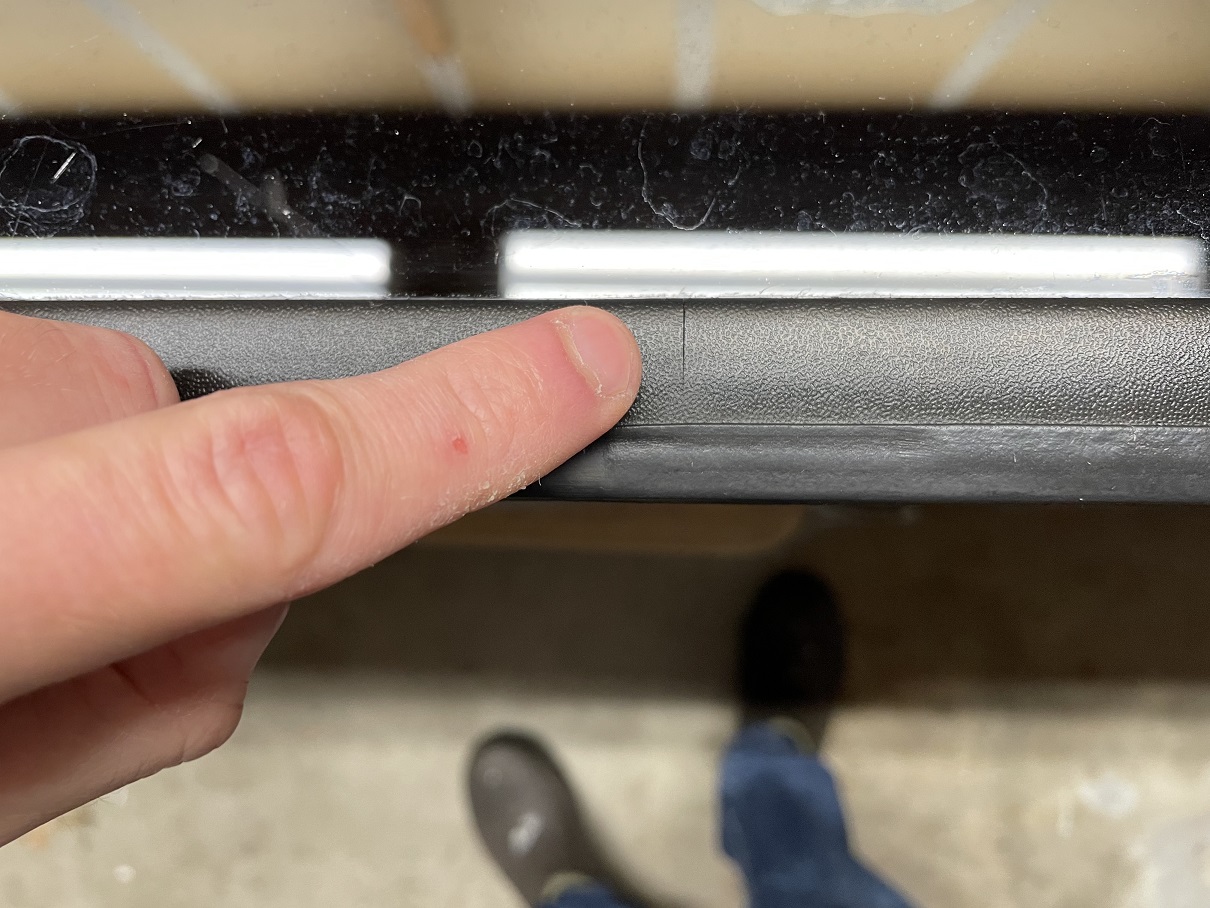
The rear join is just starting to separate, but not yet as bad as the front.
Long one looks like one of the two long throttle body Screws.View attachment 3221038
The longest one has been installed. The three short ones are the one still not installed.
Can you identify what are those bolts?

I am totally stealing the idea with the ARB bumper floods conversion!Back in 2021 I bought some stock headlights that had been retrofitted with Morimoto HID's from @TnTnola. Despite the awesome packing job one headlight arrived with a broken tab. I finally got around to buying a plastic welder to reattach the tab and installed the headlights!
I also installed Stedi LED high beam bulbs to complement the Morimoto projectors. And for fun I installed amber LEDs in those parking lights in the edge of the headlights. In the 7 years I've owned this cruiser those lights have never worked.
Replaced the Xprite fog lights I had with Stedi fog lights designed for the ARB deluxe bumper. Also replaced the ARB turn signal housing with some flush mount white LED flood lights that come on with the spots.
View attachment 3220571
View attachment 3220563
Finally, the 100 has decent headlights. The old oil lamps were long past their prime.
View attachment 3220576
And I stole the idea from somebody hereI am totally stealing the idea with the ARB bumper floods conversion!
 The trick is finding a light with the right spacing between the holes if you want to use the ARB mounting points.
It was an emergency repair at the time for me, so I just used what I had laying around my garage, dynaflex 230. I would not recommend that sealant, it has held up just fine over the year plus, but the cure time was way too slow and I dealt with it re-liquifying each time it got wet for the week or so after I applied it. I'd go for something faster curing, maybe polyurethane based? Sikaflex 295 UV might be just the ticket?What type of sealant did you use to complete this project?
Has the sealant held up a year or two now?
Got another one of those atmospheric rivers flowing into the PNW, seems I am getting the same issue in my 2000 LX470.
Well dang...that was my best guess.View attachment 3222204
I don't think I missed any bolts on top of the fan shroud. I checked pictures I took during the process, those bolts were definitely taken out at early stage of the process. Somewhere around the taking the radiator out. Hopefully it won't affect any critical component operation.
I bought the TYC radiator, it works almost perfect except the coolant tank hole doesn't line up with the radiator. I can only use one bolt. Also the radiator cap is little bit too far from the coolant tank. Original hose just barely enough to be clamped in.
Does anybody know which bulb is this for the rear quarter window switch? I ordered the
Dorman 639-041 but they are too big. That!View attachment 3223374
these look really good... wanna do mine?Sand blasted and powder-coated my factory wheels.
View attachment 3223035
This is now a dedicated PC oven.
View attachment 3223036
Hot coat
View attachment 3223038
the finished product.
The caps are not exact, but close enough and great for a rattle-can match to the wheel.
View attachment 3223040
Wheels finished in prismatic powders triple bronze.
The rattle can caps are finished with #SP-301 Brown Hammered Gloss done with a few light coats (bypassing the hammered effect).
View attachment 3223041
")
I replaced the entire brake, booster assembly, heater, tees, and AHC fluid. She’s going to need ball joints, so that’s coming up next month.I am new to the 100 series. Coming from the 40 forum OCD Bettle has a really successful, fun thread where we post a pic of wheeling, a fix, a new part, etc. for our trucks.
It's neat to see the mix of projects, daily driving issues, weekend wheelin reports, etc.
I thought the 100 forum could use one...
I'll start...today I ordered an Iron Man 2 inch lift kit for my 99'.
I need to expand the oven a little, LOL, it takes a few hours to queue them up one at a time.these look really good... wanna do mine?