Witchcraft!!!!!!Stock headlight have same output as a dying candle, so something must be done.


Navigation
Install the app
How to install the app on iOS
Follow along with the video below to see how to install our site as a web app on your home screen.
Note: This feature may not be available in some browsers.
More options
Style variation
You are using an out of date browser. It may not display this or other websites correctly.
You should upgrade or use an alternative browser.
You should upgrade or use an alternative browser.
What have you done to your 100 Series this week?
- Thread starter SHUSH
- Start date
This site may earn a commission from merchant affiliate
links, including eBay, Amazon, Skimlinks, and others.
The Nacho Libre upgrade is done.
AJT did a great job on these.


AJT did a great job on these.
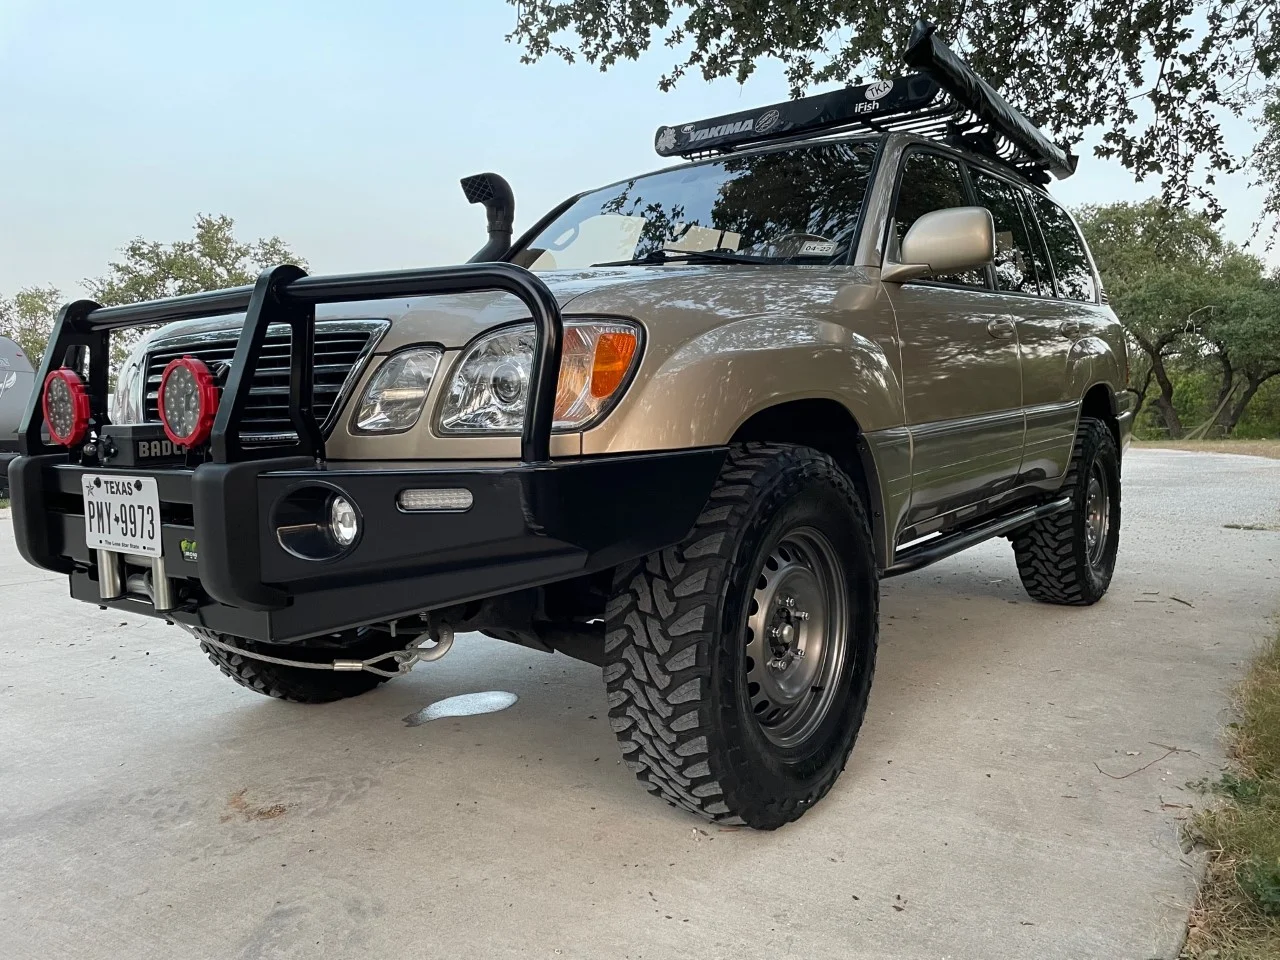
Rigid E2 10"
Maybe overkill but got a deal on offer up. Does not hit hatch when open.


Maybe overkill but got a deal on offer up. Does not hit hatch when open.
That doesn’t look bad at all. What’s the material on this shell? Still waiting for mine from yotaMD 1 week down, 2 to go.The Nacho Libre upgrade is done.
AJT did a great job on these.
View attachment 2775052
View attachment 2775053
It's plastic.That doesn’t look bad at all. What’s the material on this shell? Still waiting for mine from yotaMD 1 week down, 2 to go.
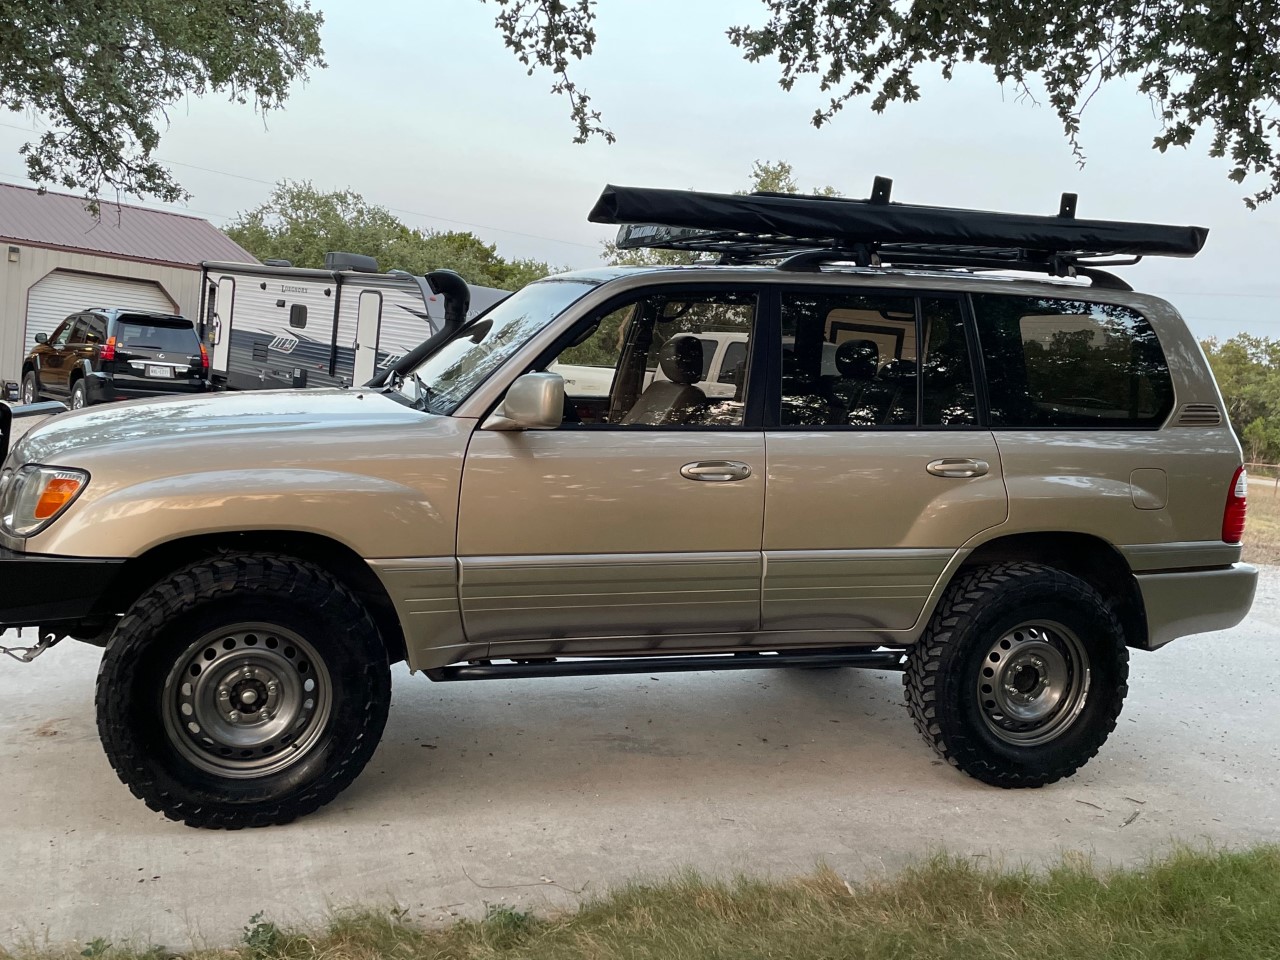
Threw on my slee sliders. nothing wrong with my old metal tech sliders but I've always loved the minimalist design the slee's have.

Last edited:
What size tires you running in those pics? 315/75? I'm switching to those 16" wheels soon but haven't decided on a tire size.Threw on my slee sliders. nothing wrong with my old metal tech sliders but I've always loved the minimalist design the slee's have.
@xXsnowXx yeah those are 315/75/16.
- Joined
- Jan 4, 2014
- Threads
- 94
- Messages
- 3,042
- Location
- Little Rock, Arkansas
- Website
- www.facebook.com
More progress and crappy cell phone pictures of the interior cargo rack. Need to fine tune the mounting brackets a little more to raise the passenger side about 3/8". Also need to work on the headliner contour of the vertical barrier to make it hug it a little better in the middle and on the ends. Disregard the cluttered cargo area, currently moving into a new house and transporting tool boxes and other messy equipment. Going to be sending it out to powdercoat here soon to get a better idea of how the finished design will look.Been working on a new interior attic rack design for a while and finally got the second prototype installed. Still have some tweaks to make and several other accessory components (vertical barriers and quarter panel grids) to finalize but it’s getting close!
View attachment 2771659
Get it sorted/leveled out and count me in for one. Nice job.More progress and crappy cell phone pictures of the interior cargo rack. Need to fine tune the mounting brackets a little more to raise the passenger side about 3/8". Also need to work on the headliner contour of the vertical barrier to make it hug it a little better in the middle and on the ends. Disregard the cluttered cargo area, currently moving into a new house and transporting tool boxes and other messy equipment. Going to be sending it out to powdercoat here soon to get a better idea of how the finished design will look.
View attachment 2775471
View attachment 2775475
View attachment 2775472
View attachment 2775474
This looks stellar. Really innovative and well-made. However, I would be highly concerned about anyone over 6’ sitting in the second row with that installed. That leading edge of the rack has “skull crusher” written all over it. Imagine that thing making even moderate contact with the back of occupants’ heads whether from a rear end collision or a rollover accident. Ouch. Something to consider.More progress and crappy cell phone pictures of the interior cargo rack. Need to fine tune the mounting brackets a little more to raise the passenger side about 3/8". Also need to work on the headliner contour of the vertical barrier to make it hug it a little better in the middle and on the ends. Disregard the cluttered cargo area, currently moving into a new house and transporting tool boxes and other messy equipment. Going to be sending it out to powdercoat here soon to get a better idea of how the finished design will look.
View attachment 2775471
View attachment 2775475
View attachment 2775472
View attachment 2775474
- Joined
- Jan 4, 2014
- Threads
- 94
- Messages
- 3,042
- Location
- Little Rock, Arkansas
- Website
- www.facebook.com
Valid point I definitely hear you on that. I actually had that in mind during the design phase so instead of making that rear cargo barrier one flat piece, I broke the bottom 7/8" so it curls underneath and actually acts as a ledge for the two panels to sit on. This mitigates a sharp edge and as an added bonus it further reinforces the panels. It also has the same bend radius as that front reinforcement L-bracket in the 3rd pic (1/32" inside / 0.1" outside).This looks stellar. Really innovative and well-made. However, I would be highly concerned about anyone over 6’ sitting in the second row with that installed. That leading edge of the rack has “skull crusher” written all over it. Imagine that thing making even moderate contact with the back of occupants’ heads whether from a rear end collision or a rollover accident. Ouch. Something to consider.
Right now everything except the panels are made of 14ga, the panels themselves are 16ga. In the end everything will be 14ga. but even without that this system is RIGID. Has no play in it in any direction at all. Also, there will be a large amount of adjustability. The holes on the edges of the panels that the brackets mount to will in the end be slots running the majority of the width, allowing the user to position the rack as far towards the front or rear of the truck as they desire. At the farthest rearward position it'll be 6+" behind the headrests.
Last edited:
@TheForger looks well thought out and designed.
@TheForger , following your progress closely, this is something I'm definitely interested in. Only change I would suggest is to use the same perforations for the upright on the front as on the shelf (if possible) for better visibility. I'll be curious to see if I can make one of these work with my cargo barrier.....
- Joined
- Jan 4, 2014
- Threads
- 94
- Messages
- 3,042
- Location
- Little Rock, Arkansas
- Website
- www.facebook.com
Already on it! I have a large assortment of different designs built into the model that I can suppress and unsuppress depending on what I (or you) want. This just happened to be the one that I cut at the time but I will eventually cut all of them to give everyone an idea of what they will look like. I have these slanted slots, the same molle pattern that's on the shelf panels, alternating orientation corner-rounded triangles (shown below), etc... I will also provide the option for complete customization of the entire pattern and/or the center section where a name, business, logo, etc... could be placed for an additional charge. The customization will also apply to the shelf panels if a solid bottom is preferred over molle.@TheForger , following your progress closely, this is something I'm definitely interested in. Only change I would suggest is to use the same perforations for the upright on the front as on the shelf (if possible) for better visibility. I'll be curious to see if I can make one of these work with my cargo barrier.....
Enjoying that new, new OEM TOYOTA windshield and refurbished A-pillar. More importantly, I’m thrilled to have this old gal back. It’s been 16 long days…
I’ll post a separate windshield + rust repair saga thread to document everything in one place.


I’ll post a separate windshield + rust repair saga thread to document everything in one place.
I asked him Lexus or GM

Put the big tires on. Toyo MT in LT295/70/18 on Tundra Steelies. So far, no rub but I haven't flexed on the Mall curbs yet. Also have 1.25 inch Bora spacers for a little poke.