TWT -- The Wrenching Thread (1 Viewer)

This site may earn a commission from merchant affiliate
links, including eBay, Amazon, Skimlinks, and others.

The fact that they hold up to the kinds of abuse that they do is exactly why we like them. Drive it/fix it/abuse it repeat!

Weld her up and go do it again :beer:

That's the plan!! Somebody at GSMTR asked me, after seeing the broken frame, if I thought it was time to retire the 4Runner. Umm...hell no!! After all the blood, sweat, money, tears, sweat, and money I've put into this truck.....not even close.
 
After looking at it again today and chatting with @mtweller about it, I think we're going to plate from the motor mount to the front of the front crossmember with 1/4"plate on the inside, after repairing the cracks of course. Just a gnarly break.

Got the sleeping platform ready for HC. Not a finished project, but done enough for this weekend! Should be comfy. Made it so the platform slides forward from the "stowed" position about a foot after the front seats are folded down to give me a solid 7' of bed length. Expecting that to be plenty.

IMG_20170530_171625.jpg

IMG_20170530_171620.jpg

IMG_20170530_172911.jpg

IMG_20170530_184500.jpg

IMG_20170530_184509.jpg
 
The quest for "Relic Run Readiness" -Part 1:

Had a big weekend of wrenching to try to get my Relic somewhat ready to Run... Or at least to reliably get me to the outpost safely. Big thanks to @fj40alex for dedicating so many hours, tools, and patience to getting my rig drivable again... An enjoyable milestone after months of shoddy bodywork and collecting dust.

The water pump replacement was a much bigger deal than I could have imagined, snapped a bolt in the block even after days of PB blasting. Long story short its in and I no longer have puddles of glowing liquid on my floor. I do have a five gallon bucket full of rusty, chunky, bug infested, 30ish year old mountain juice though. I didn't drain the block because I'm doing a flush treatment, plus just getting the radiator flushed was a huge improvement.

So I thought getting the bolts from the block was prettying tough, and I was thrilled once the wp was out, only to realize how challenging the fan clutch bolts are.... that was a game of chessboard and brut force and creativity... I wish the diy guides were more clear on that front.. I bet the fsm is/was...


,
image.jpeg


image.jpeg


My one shiny part! I did scratch of some dirt and oil build up to see a bit of shine on my valve cover... maybe one day I will get to it...

image.jpeg
 
Last edited:
The quest for "RelicRun Readiness"-Part 2:

For many months I've been slowly digging out bindi to see how much rust was hidden. Mainly in the DS quarterpanel areas and wheel well top, which coincidentally was where the PO stored his open bag of rock salt...

Long story short I finally stitched it together to have enough structure and support to safely attach the rollbar. I also had to cut out and patch in new metal on the wheel well sides where the braces were spot welded. My welds are ugly, and not ground down, because I'm still very much in the middle of the repairs but the new wheel well top is in, the rollbar support braces from realsteel are stitched in, and the new holes for the rollbar are drilled with bolts. I'll still need to do some more welding for the braces for further strength and to attach captive nuts etc. also need to repair one leg of the rear seat and to attach to wheel well top with to-be fabbed brace.

Leading up to this point, in previous months I fabbed up a new silk horn & body mount, lower quarter patch, and lots and lots of patches for the quarter panel. It's till raw, ugly and a work in progress, but the general shape and structure is there. I still have lots of pinholes to fill and dolly work to do before primer and skimcoat etc.

I ran out of wire and also my welds were getting bad due to needing a new tip... so I called it a mini-milestone and sprayed the raw steel and put on the rollbar and started drilling holes.

Ugly as sin, but probably the safest the truck has been since I've owned it... still got lots to do though.

Even installed my tire carrier for the first time!

The before:

IMG_4716.JPG


The middle and after:
image.jpeg


image.jpeg


image.jpeg


image.jpeg
 
Last edited:
After looking at it again today and chatting with @mtweller about it, I think we're going to plate from the motor mount to the front of the front crossmember with 1/4"plate on the inside, after repairing the cracks of course. Just a gnarly break.

Sounds like a plan. Let me know when you'll have time to work on it and I'll be over there!
 
When Eric and I flushed the brake fluid several weeks ago I noticed one of the rear brake cylinders was leaking. As I wanted to be in good shape for the Carolina Relic Run, I ordered rebuild kits from Kurt (@cruiseroutfit ) and lured Sam (@elkaholic ) to come over and "supervise" me in rebuilding both cylinders on that wheel. Not surprisingly, Sam did more work than I did. Thankfully Rafael (@Roxx ) told me about a shortcut, as compared to Coolerman's approach, and we had it buttoned up in about 90 minutes.
IMG_7185.JPG
 
Nothing huge or even cruiser related today. Giving the TDI some live since andre a decided to drive it again and therefore keep it. Last week I noticed a little more smoke under hard acceleration, lack of power and a powder turbo sound.

Found the boost leak at the intake hose to manifold connection.

Seems it's a common problem around a bad BE design and Perms TDI has a kit to kit it.

What the hose is supposed to look like all snug

How it currently sits

The nubs that wear down over time on the collar of the intake hose


Installed


Old hardware


So basically the thing is held in by metal nubs and a compression spring thing. When the nubs wear out the spring allows for a ton of movement and a large boost leak while letting unfiltered air in aswell. New kit uses a better viton o ring, and a metal collar with bolts to snug the intake hose into place and not let it move.

20170604_133146.jpg


20170604_133148.jpg


20170604_133240.jpg


20170604_134425.jpg


20170604_134434.jpg
 
looks like an old K&N filter. as long as there are no tears or holes, and the filter media is a cloth and not paper it can be cleaned and re oiled. you can generally get the cleaner at most auto part stores.
 
^^ Thanks Eric. Advance had the kit for $10. Now to find the time to get it done before Friday.

Also, I called FAT for the back glass struts/shocks...what ever they are called. $140 Each!!! WTH
Not a dig on FAT just amazed they cost that much. May have to find someone parting out an FJ60. But this weekend, PVC pipe for the win!
 
Not sure if this is for the Wrenching thread or the Rant thread...

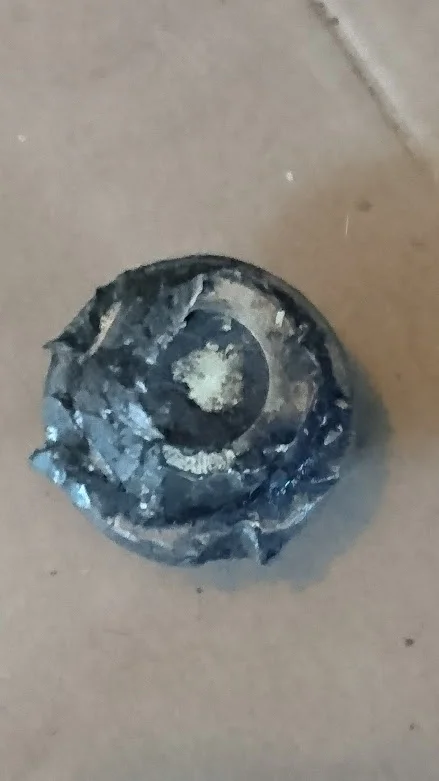
Do you think if I whack a few more grooves around the perimeter with a chisel, this transfer case fill plug will be usable for another several years?

 
Not sure if this is for the Wrenching thread or the Rant thread...

Do you think if I whack a few more grooves around the perimeter with a chisel, this transfer case fill plug will be usable for another several years?

ouch
 
Don't recall seeing a drain plug that buggered in the past
 

Users who are viewing this thread

Back
Top Bottom