Builds The new FJ 73 Build (1 Viewer)

This site may earn a commission from merchant affiliate
links, including eBay, Amazon, Skimlinks, and others.

high clearance mounts sorted,
IMG_7375_zpslympsk3l.jpg


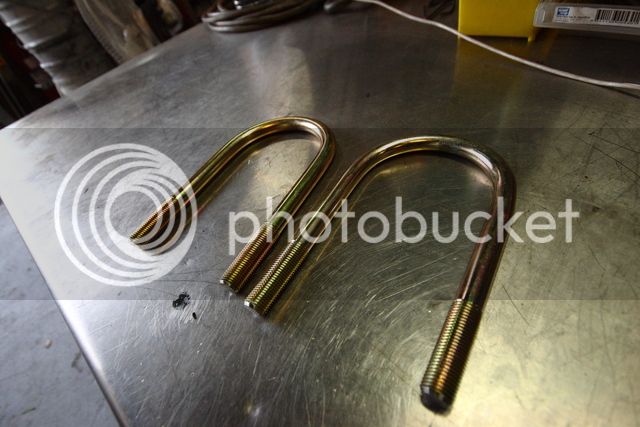
New U bolts, will be changing the fronts to over the axle style to accomadate the new mounts, they are usually square and mount laterally along the axle on a few mounts.

IMG_7372_zpsvbh3d16i.jpg


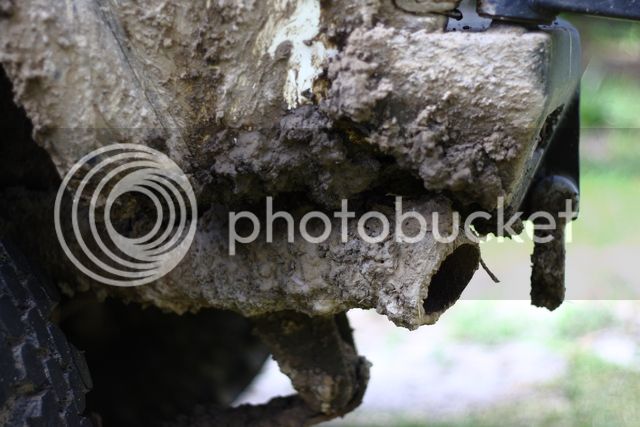
Nuts sit up nice and high.

IMG_7367_zpsocglue0q.jpg


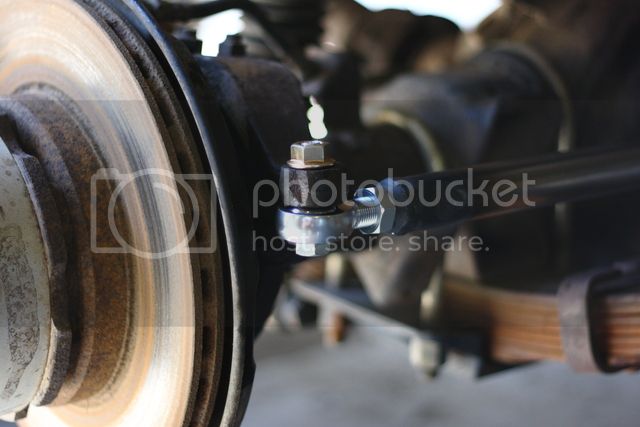
Shock mount, will weld the bolt on when i have decided on the correct length.

IMG_7380_zpsyjdi8eyx.jpg


turns out something like this.

IMG_7385_zpscjximm4g.jpg


IMG_7391_zpsuukwbifu.jpg
 
I've got pretty much identically made recessed U-Bolt plates like those on my fj40 they make a significant difference over the standard ones they slide over s*** a lot easier without getting hooked up, nice work on all the modifications you've been doing mate :)
 
Been a busy week on all fronts,
Trying to get the truck ready for a week away.

Fitted up an Air on Board compressor and tank kit. Very nice kit comes witheverything needed and seems to pack quite a punch.

Shoehorned the compressor beside the draws, this is with the cover taken off.

IMG_7394_zpscownqyra.jpg


Manifold with pressure switch, outlet, air release and guauge.

IMG_7399_zpsbvpbtsol.jpg


Mounted on the inner side of the timber.

IMG_7403_zpswk5mzo08.jpg


IMG_7416_zpsnvif01vx.jpg


Plumbed the 9L tank, this is the medium size in there range.

IMG_7408_zpsuhccpkrx.jpg


Cleaned up the positive terminal and lengthened the bolt.

IMG_7410_zpsuvgxgftk.jpg


IMG_7488_zpszb7l8tpy.jpg


Switch fits in quite well,

IMG_7494_zpsbophvxof.jpg


Mounted, a little close to the exhaust but its the only good spot for it.

IMG_7421_zpsf1aap0fe.jpg


The Bilsteins also landed, i ordered 33-230382 12 inch with eyes top and bottom and 33-230399 with eye and stud, very nice looking units.

IMG_7427_zpszwbz7szd.jpg


Welded the pins on the hoop.

IMG_7428_zps9tbrgyg1.jpg


Had to make some cupped washers as evrywhere i looked and spoke to couldnt help out.

IMG_7429_zpsesgehi2o.jpg


Machined a dished reccess and a plug and pressed some normal hd washers with around 10t of pressure.

IMG_7435_zpspifi9cof.jpg


IMG_7430_zpsqdtypbqv.jpg


IMG_7431_zpskpkj4xjm.jpg


Welded M16 bolts.

IMG_7437_zpsylduuaqy.jpg


IMG_7440_zpsf6ku4tav.jpg


IMG_7442_zpsz1odipjp.jpg


Chopped u bolts.

IMG_7443_zpssujsvuck.jpg
 
Todays mission was the fronts.

Could have possibly just got away with the factory top mounts position but didnt want to take the chance of it being to long.

Built some extensions for the stock hangers.They raised the mount by 60mm.

IMG_7505_zpsub3eucf3.jpg


IMG_7511_zpsm7zwpwrm.jpg


Chopped off the old mounts, the passengers side had a large crack trravelling from the mount hole to the outer edge.

IMG_7508_zpspie4abxo.jpg


IMG_7513_zpsbtd4bsxq.jpg


Front passengers side, out with the sqaure u bolts the new u bolts now go over the axle not over the mount that you can see on the leading edge of the axle.

IMG_7520_zpsjciegsp0.jpg


Had to weld a spacer to push the u bolt up the hill to try and keep it parralel.

IMG_7518_zpslebg1qmt.jpg


Old and new.

IMG_7525_zps8u9ipeaj.jpg


The old set had absolutely no rebound at all , no wonder the front end felt so bouncy and rubbish.

IMG_7527_zpssgdvprox.jpg


Loving the high clearance,

IMG_7533_zpsrd9exd8v.jpg


IMG_7528_zpsizofo2md.jpg


Peek a boo, back on the ground.

IMG_7541_zps4wmfgpnj.jpg
 
Big thanks to Josh at AllShocks for sorting the shocks,

Unfortunately its way cheaper for me to buy from the States than local,
Great service price and shipping.

AllShocks.com - Bilstein Offroad Shocks

Sized up the bump stop extensions, at 25mm.This left about 45mm of shock travel left,

IMG_7543_zpsvfgyje3s.jpg


So all the calculations worked out pretty spot on,Very happy with the outcome, cant wait to get out on the trails.

Fully compressed.

IMG_7545_zpstntul3nt.jpg


Rear ends a treat , still need to lighten the rear springs.

IMG_7547_zpsa497sfvf.jpg


Pretty tight on full compression but enough room all round.

IMG_7553_zpsyeghpazm.jpg


Big droop now.

IMG_7548_zpsszrcv8mz.jpg


And massive droop on the front.

IMG_7549_zpsxjf50lr0.jpg


IMG_7555_zpsbxd7g72o.jpg


Small amount of space.

IMG_7556_zpswdalrqgq.jpg


IMG_7559_zpsgkuahzep.jpg


rear end working well now.

IMG_7562_zpswqt6ski0.jpg


Extended bump stop.

IMG_7568_zpshlqmdnlm.jpg


Front foot well false floor, kept getting sick of getting my foot caught in betwwen the ribs

IMG_7564_zpsmpnk6ekp.jpg


IMG_7570_zpsxv1curfm.jpg


IMG_7573_zpshxc7roos.jpg
 
Had a massive wobble from the tyres at about 20 to 40km,
Did some research and found the best method for balancing was with beads,
Lined up a tyre joint to do it but on arrival they didnt want a bar of it and only had the sand/powder.
Which is no good for deflating and so on.
I found an Austrlain mob doing ceramic balancing beads called ABC Beads, a quick trip out to The Ulimate suspension i picked up 4 8oz bags.

Now i was a bit sceptical but thought its worth a go and after seeing the below video was impressed( think its the powder in the video but same principle.


IMG_7575_zpsd2nhxvj2.jpg


very serious bead, super hard to break, had the hole of the steel bench floating at one stage.


IMG_7585_zpsmmqrzbty.jpg


IMG_7579_zpszl9rxxly.jpg


Still needed tyre leavers to open the bead a little.

IMG_7578_zpslutilzlq.jpg


IMG_7589_zps9j4v92g9.jpg


Gotta say, first drive around the block and instrantly the wobble is gone, very impressed.
Another great feature is they adjust to mud on the tyres or wheels and continually adjust.
 
Just back from a week away,
Clocked up 1000 odd km on the truck and evrything went pretty well, went for a drive evry day for a week running.
Had a few little problems with a blown fuse and so on and an idle problem late in the trip but on the tracks supension and tyre wise it went amazing.
Its fairly good on the highway cruising at just over 100km it stils on around 85 degrees with a nice steady oil pressure and alternator charge.

Next on the list is to give the steering a birthday, there is a good amount of play in most of the balljoints and really need a stronger robust set up.

High clearance doing there work,

IMG_7625_zpspaf9zujs.jpg


IMG_7630_zpsgez4tqbr.jpg


Thers an exhaust under there somewhere

IMG_7628_zpsscpwme3p.jpg


Super grease,

IMG_7611_zpszjw9edpc.jpg


very impressed,

IMG_7608_zpsm5nrbygd.jpg


IMG_7613_zpslq35iov7.jpg


Not suited for the soft stuff but at 10psi they definately worked,

IMG_7610_zps6yuqmn2k.jpg


Under a large fallen trees root ball,

IMG_7595_zpsjsojhr9s.jpg


IMG_7632_zpsdzwahmpy.jpg


The clean up,

IMG_7641_zpslaje5ehv.jpg
 
Last edited:
Had known the rear drums were pretty shot but what was inside suprised even me.

IMG_7645_zpswer5sjfa.jpg


Stripped and cleaned,

IMG_7649_zpsymohpf6b.jpg


Rooted shoes

IMG_7661_zpsupunqaol.jpg


New shoes cylinder adjustor rod and spring kit,

IMG_7646_zpsodcgztoy.jpg


bit better,

IMG_7657_zpsxvh14ziz.jpg


IMG_7655_zpsywyribec.jpg


All dialed in and working a treat, handbrake even works , winning.

IMG_7652_zpsst3darcn.jpg
 
Got out yesterday to Ourimbah State forest for a few hours,
Truck is going very well, have the bits on the way for tierod and drag link build.

Looking forward to getting back up ther for a full day.

 
Got the spherical bearing rod ends in for new tie rod and drag bar.

The tie rods will be 5/8 ends and the drag bar 3/4 with high mis align spacers taking it back to 5/8 bolt size,
I also sourced some 5/8 unf bolts and conelock nuts to suit.
Have some 30mm 1045 bright solid bar that will suit nicely.

20160204_194505_zpsu2jbtrsx.jpg


20160204_194433_zpso1qow1qa.jpg
 
That's some heavy duty hardware Alex, nice work on ALL mods, i wish I had your skills.
Make sure you replace those conelocks after one or two uses as they're really only a one use item......after that they tend to loose their grip.:)
The compressor you put in behind the rear wheel arch, does it make much noise?
 
Cheers pal.
I have some half nuts too that I might introduce to be sure to be sure.
The compressor is pretty quiet but having said that the truck is far from a peaceful environment, not insulation or carpeted and fairly load motor and exhaust.
It's mounted on some rubber grommets so vibration is reduced a little.
I aired up from 22 to 32 the other week and each tyre was fairly quick.
Very happy with the setup.
 
Made a start on the tie rod, waiting on some hi misalignment spacers for the drag bar.
Popped the driverside tie rod end and the tapered hole is almost perfect to be drilled out to 5/8 so I got started on prepping the solid bar for the sockets.

Started by boring it out to 24mm

IMG_7675_zpsdjm2dlaf.jpg


Final cut with the small boring bar.

IMG_7677_zpsvdfal3xt.jpg


Cut a nice chamfer on the leading edge for nice penetration.

IMG_7685_zps6wsnpxuz.jpg


Snug as a bug.

IMG_7681_zpsxxy8jyk3.jpg


Also cut some holes to plug weld it, to be sure to be sure.

IMG_7705_zpsajwje3nl.jpg


That should hold it lol

IMG_7708_zpsqnmxp8pd.jpg


Test fit with a M12 bolt, will be drilling out the arms to 5/8 to receive the new hardware.

IMG_7710_zpswfzunujv.jpg


IMG_7713_zpsm1cdhtdd.jpg


Wanted to make some venting for the hood as the engine temps get pretty hi. so knocked this up.
Mainly using 50x25m angle and variously flat bar.

IMG_7687_zpschhkbvum.jpg


chopped the hood and used the leading edge to transition into the vents.

IMG_7693_zpsdvhnttx6.jpg


IMG_7699_zpsv1lsp0dl.jpg


Added some mesh to stop any debris and or little fingers.

IMG_7701_zpsmlktpxwn.jpg


Gave it the textured treatment.

IMG_7732_zps73egbdbb.jpg


IMG_7719_zpsmcbfolfs.jpg


Subtle enough.

IMG_7720_zps5zjubxv2.jpg


Very happy with the finished product.

IMG_7728_zpsgjkwjggf.jpg


IMG_7735_zps0ctqdyme.jpg
 

Users who are viewing this thread

Back
Top Bottom