Builds PLC build (1 Viewer)

This site may earn a commission from merchant affiliate
links, including eBay, Amazon, Skimlinks, and others.

Joined
Feb 8, 2006
Threads
52
Messages
2,523
Location
Vancouver (not BC), WA (not DC)
Hey everybody! Welcome to my 40 build!

While this may not be as hardcore as some builds in this section, I'm putting it here because the 40 series section has been taken over by purists. This build is far from stock. And it seems our club forum has become defunct, which is where this build previously resided. Besides, most of the guys that were on our club forum hang out in this section.

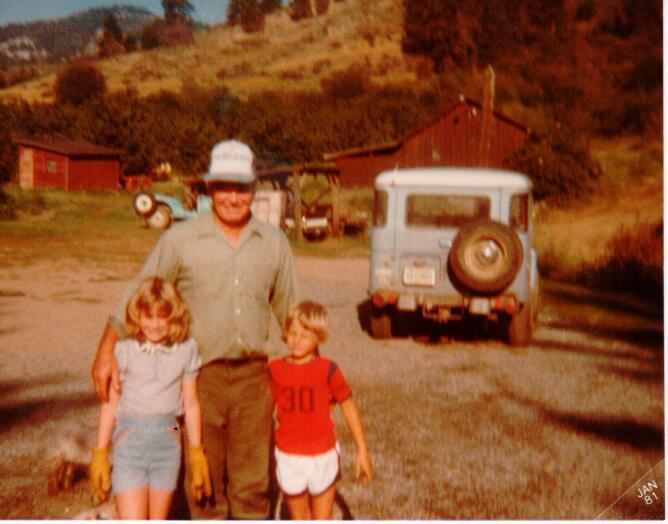
First off, the name of the build. PLC stands for Pampa's Land Cruiser. All the grandkids and great grandkids called my grandfather Pampa. My oldest cousin pronounced grandpa as "pampa", and the name stuck. Pampa bought this 1971 Land Cruiser from a friend in 1972. It's been in the family ever since. Here's a picture of my sister and I posing with Pampa and the Land Cruiser in the summer of 1980.

GkEIv6T-t13DVfHvrBCq4R9fs7XSdWRPml6YQeXVraKLGA2VsDBy88dewt61JGjVMQZjtFvXEo9ZB0aPYBfqjV4Myh28N9HUqa_rZT_0o1waVsLEpB_eoV1m75n2IU9e8zB9VI8fIQ=w2400


His name still resides on it...


mVsIO4CqpDhdr1orHN2ilK9bU7pBDg1HF_cT3K1ydXNsX8nGz8nqKMwu4yvzH9FnlBeJhwfKvQMAPtuCslK3eAQjjdfljmvk_ZYe7cgcqtATqTlciffLgssGKNPwWRZ0DDTdimvjJA=w2400


I started rebuilding this in 2005. I did an ROTW in the 40 section years ago and somewhat kept it up to date. If you are interested, there's a link in my sig.


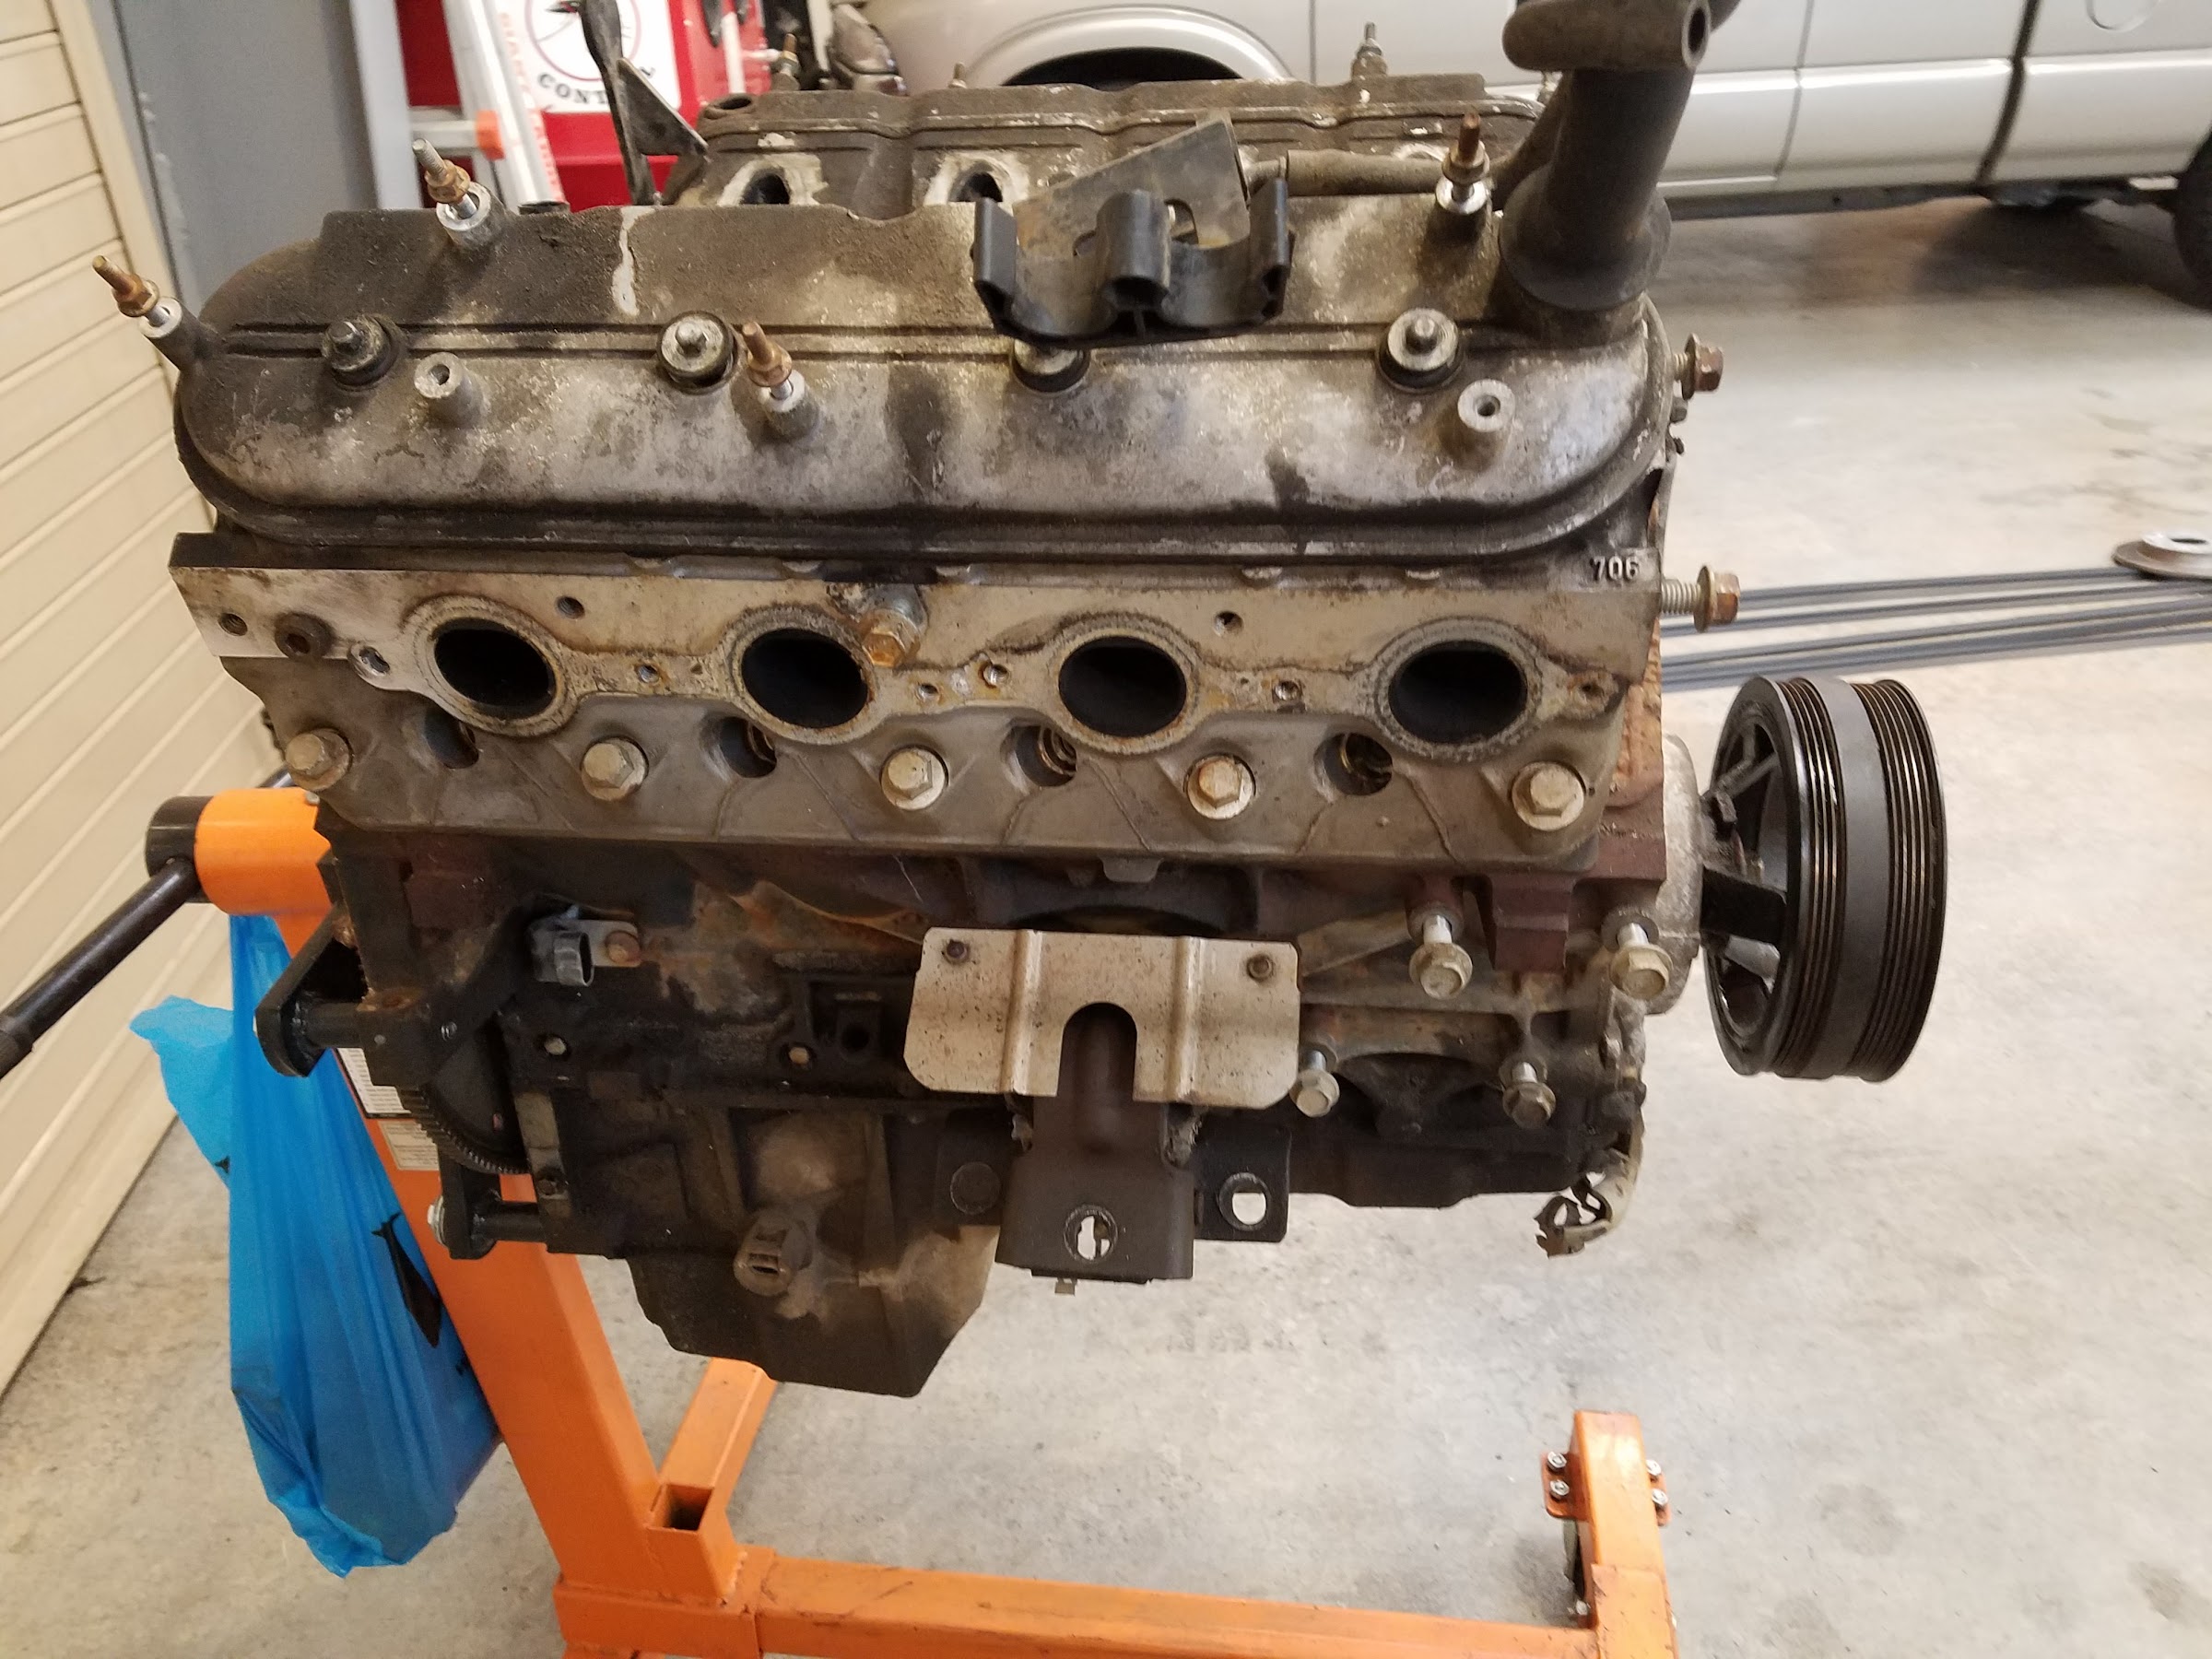
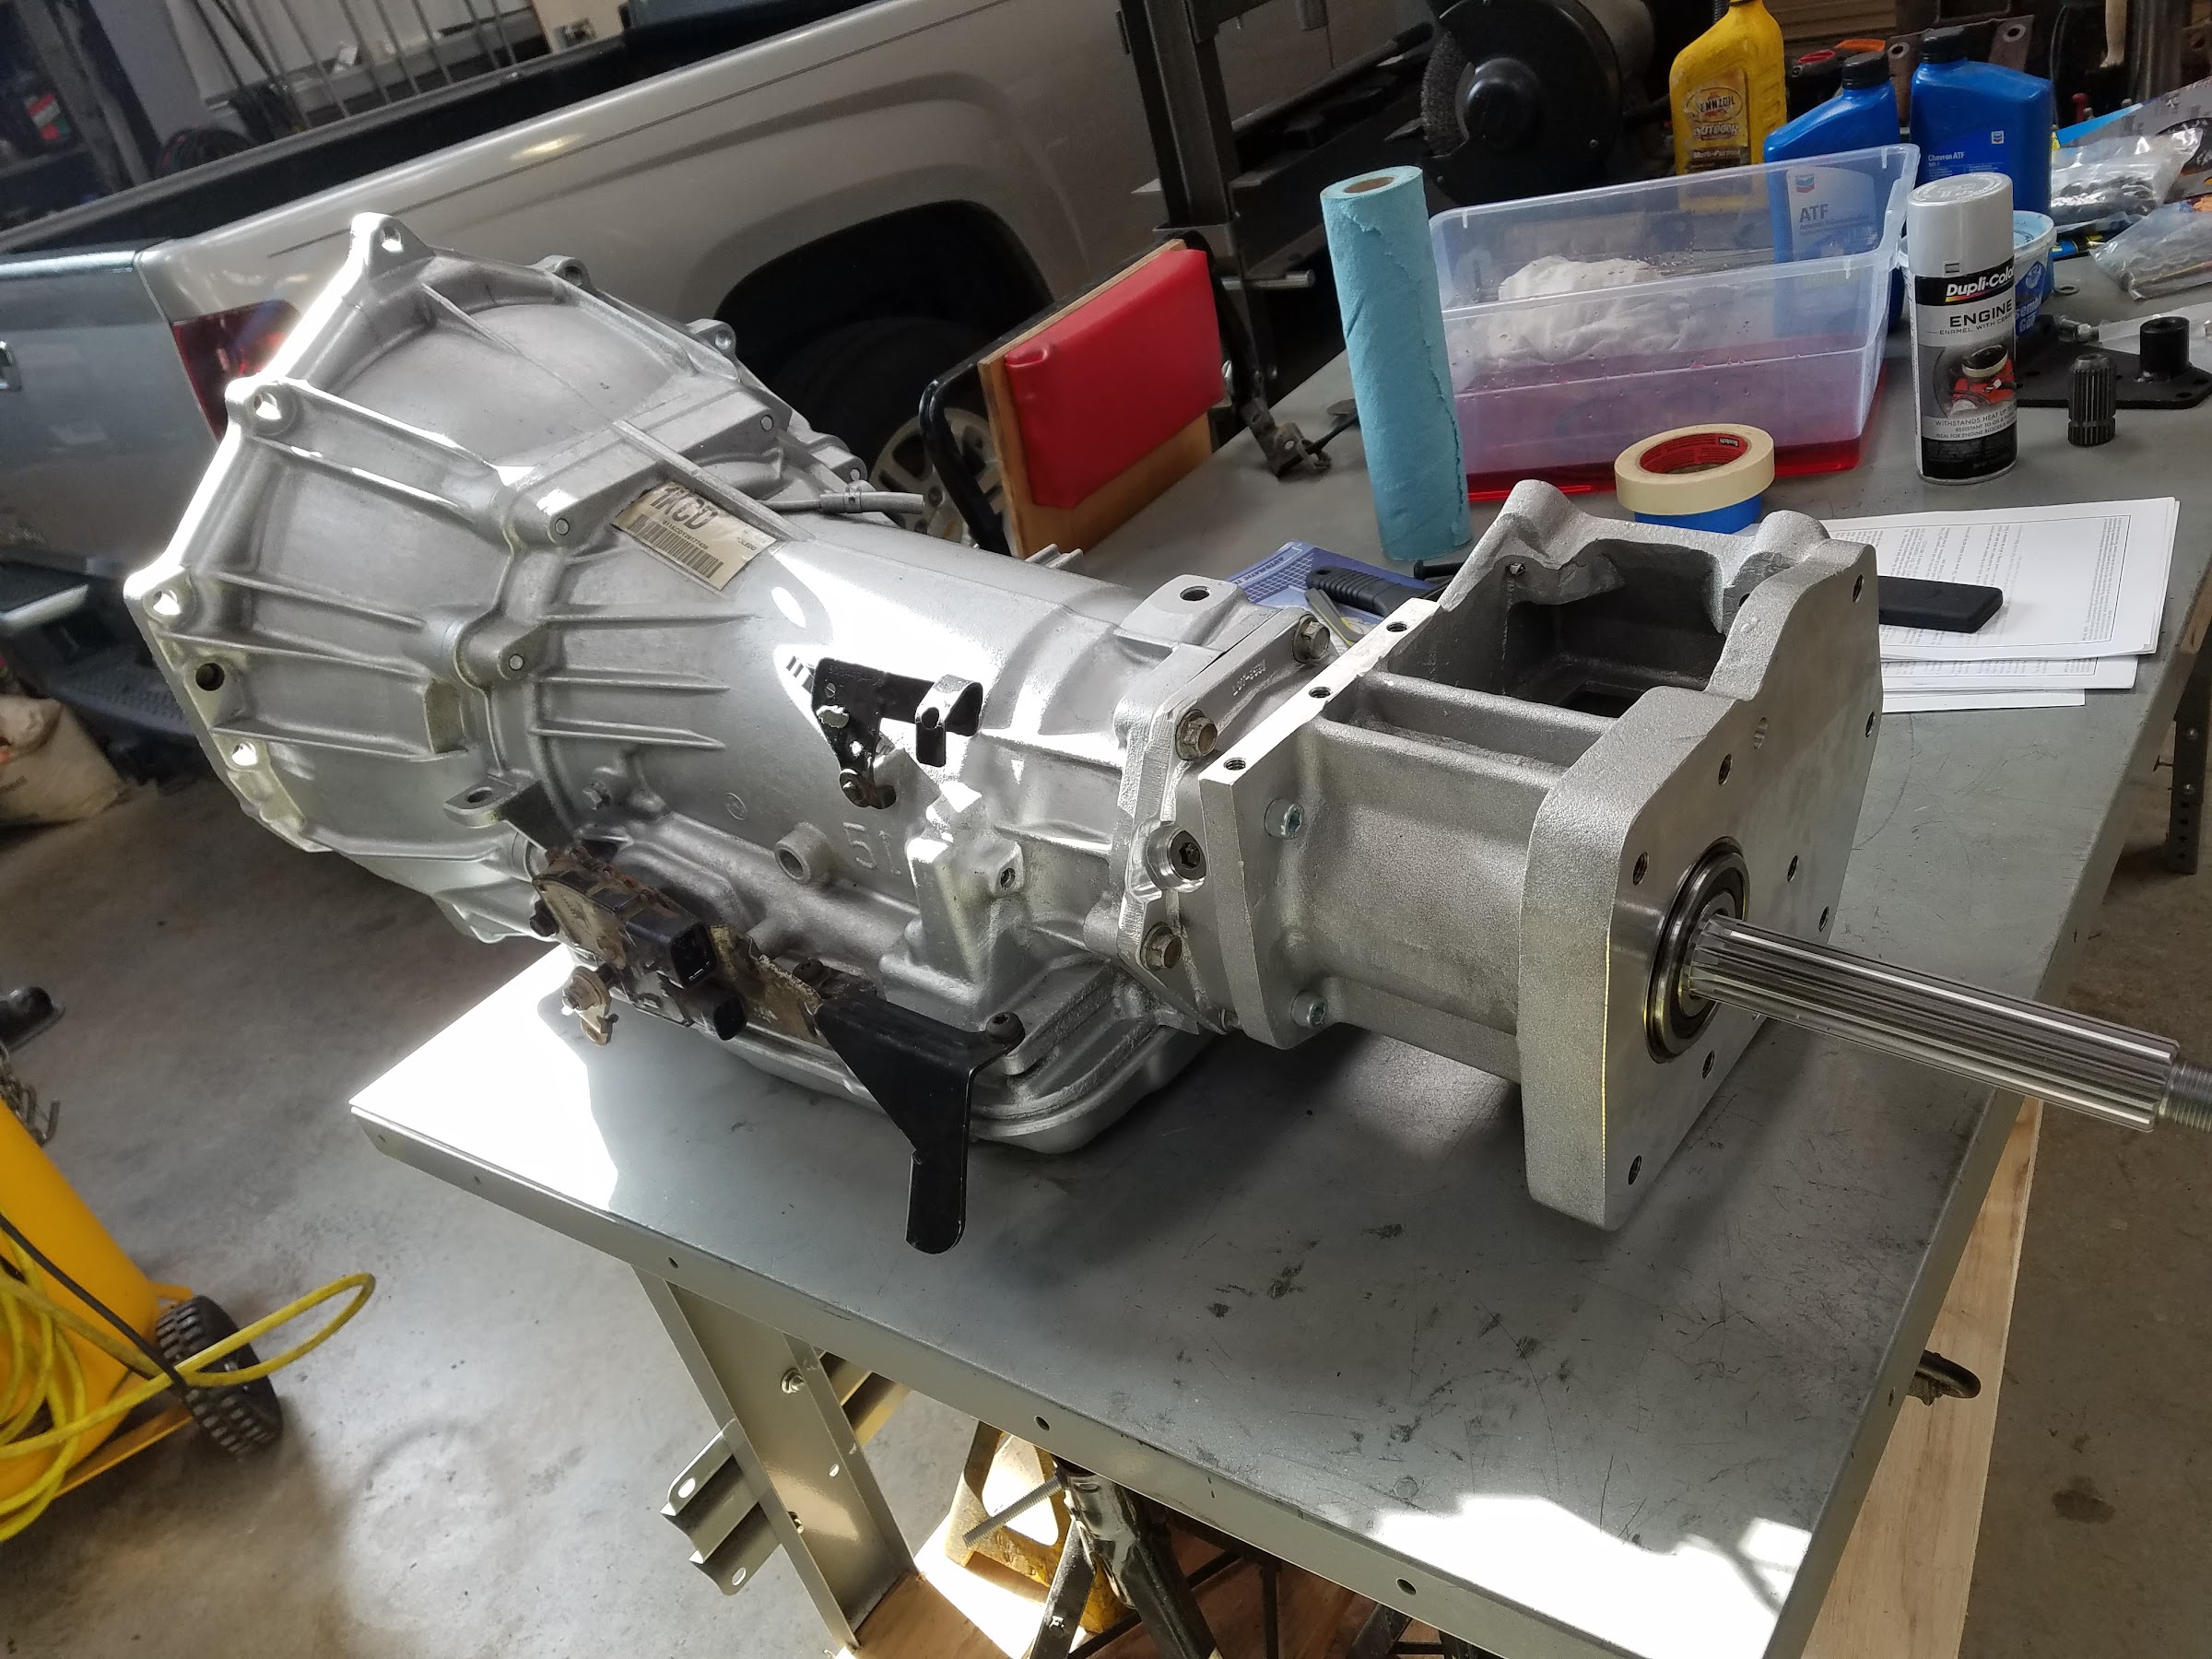
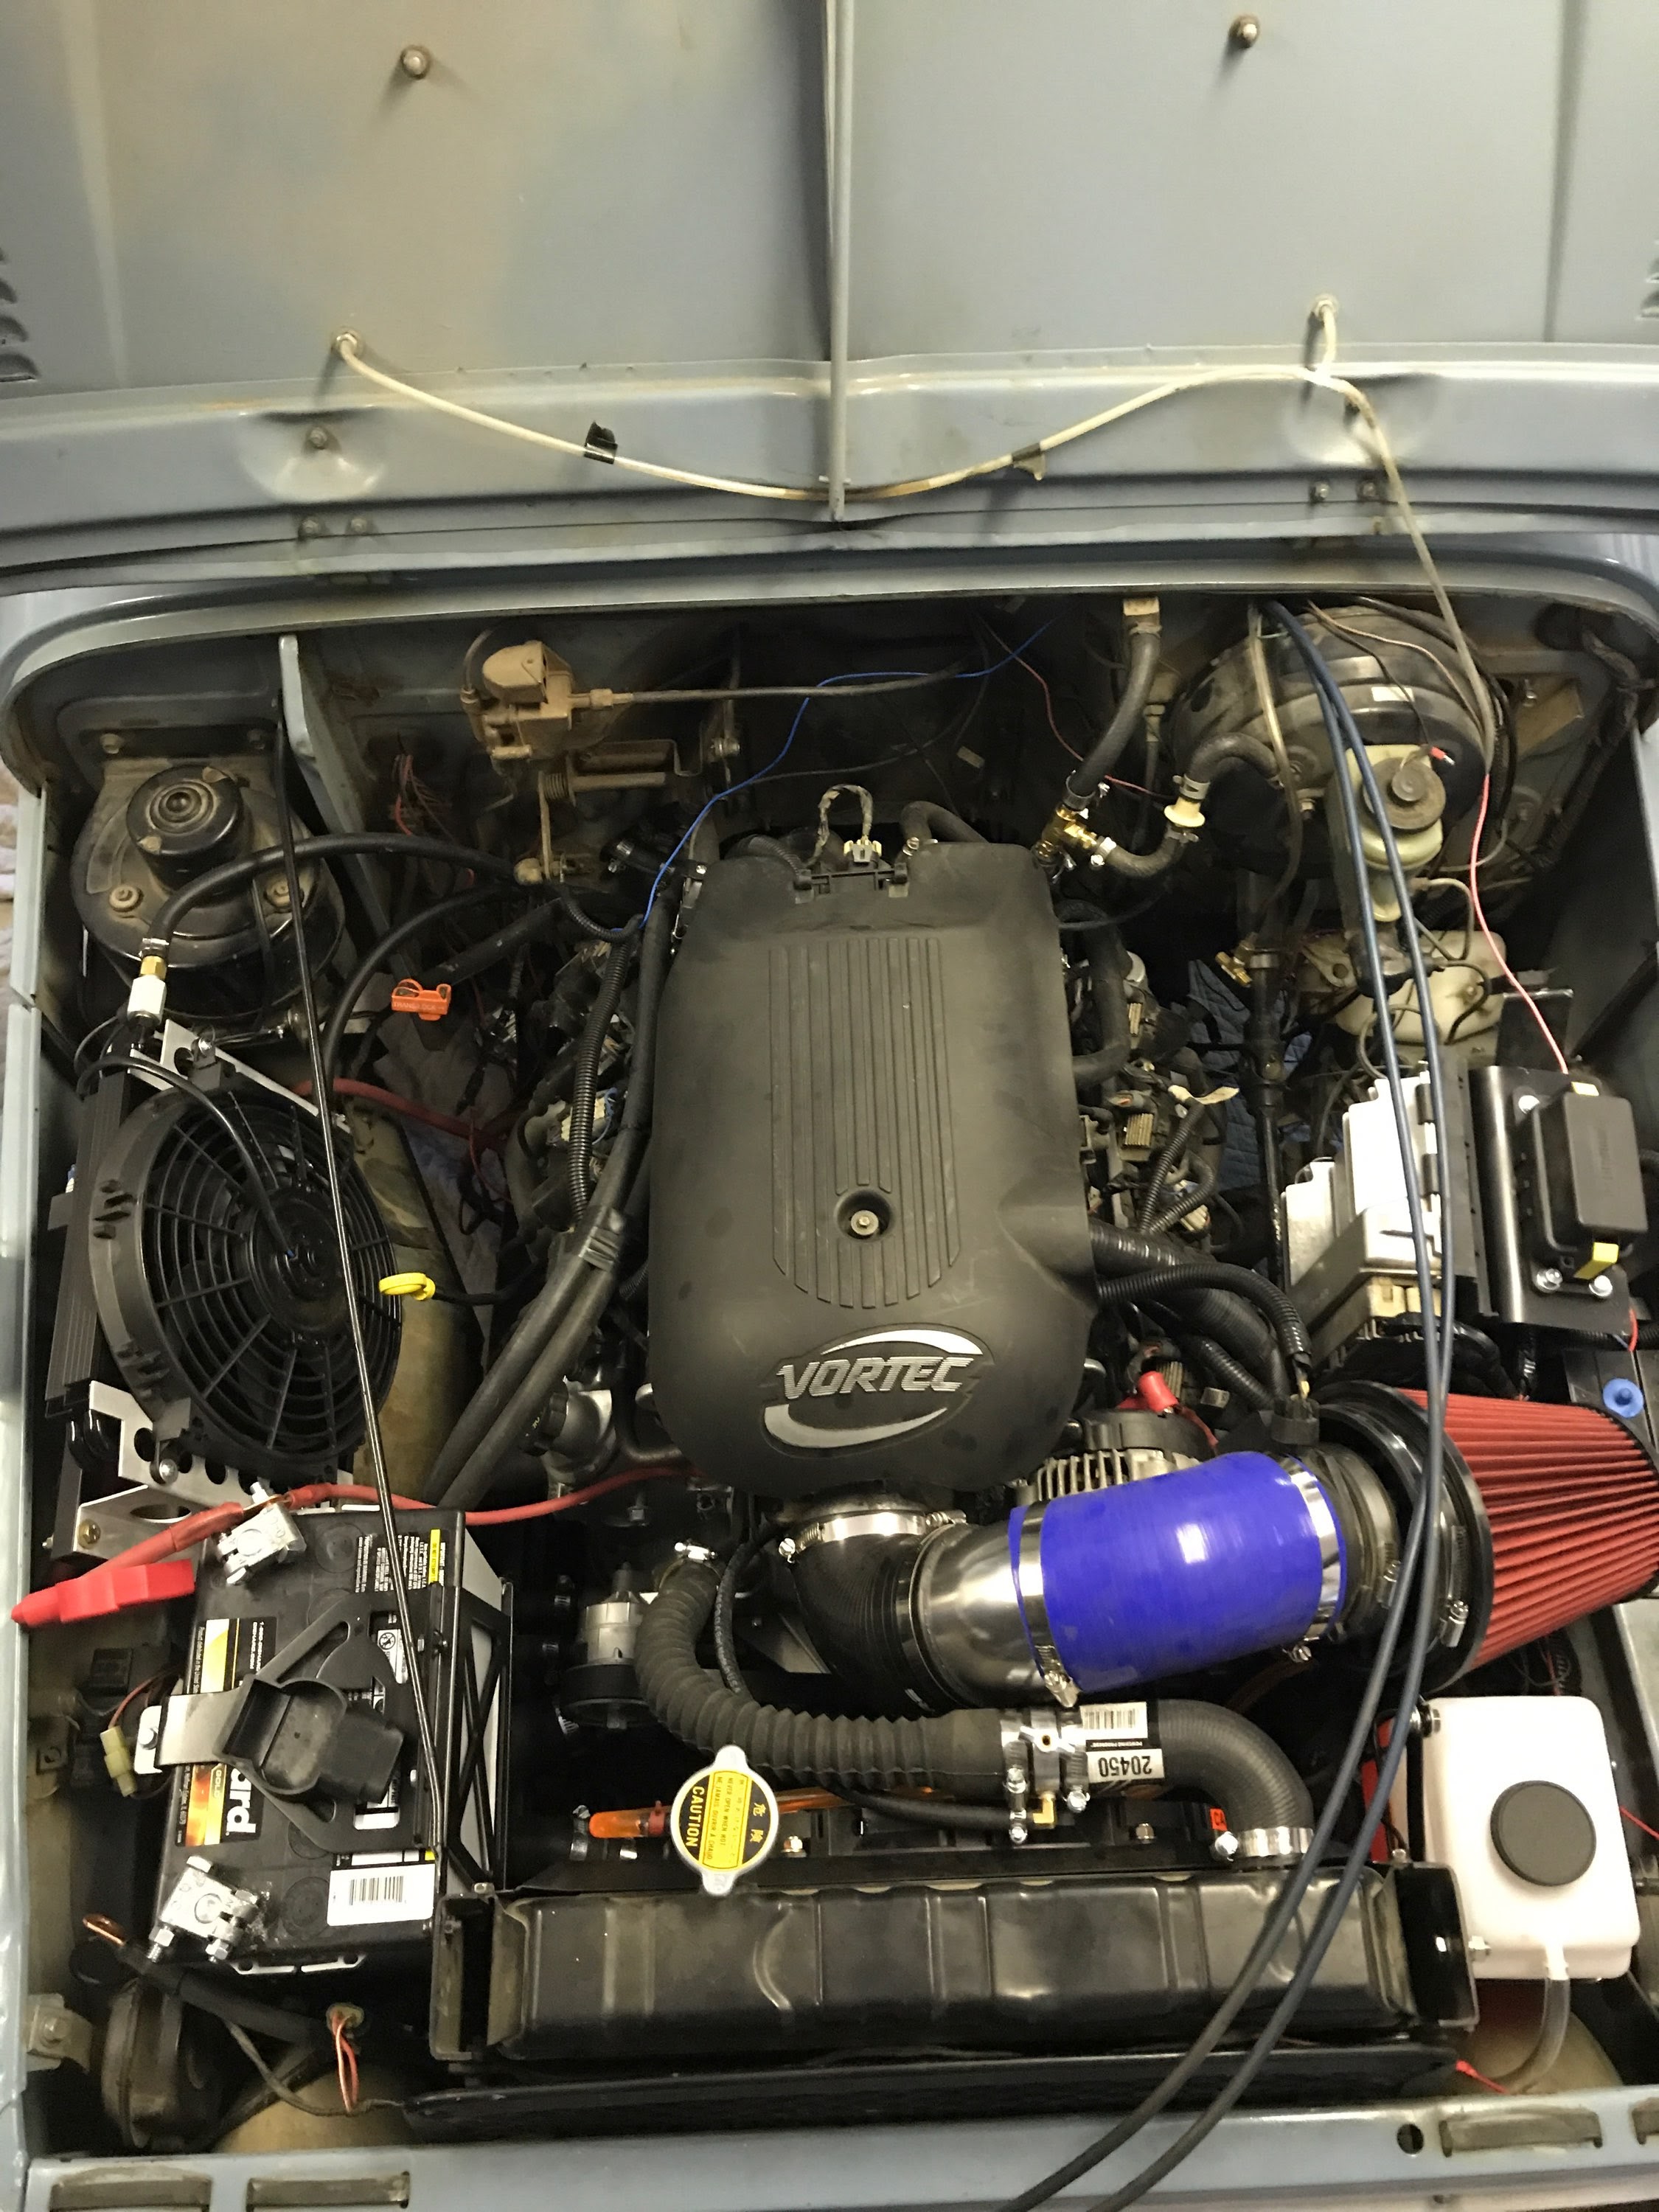
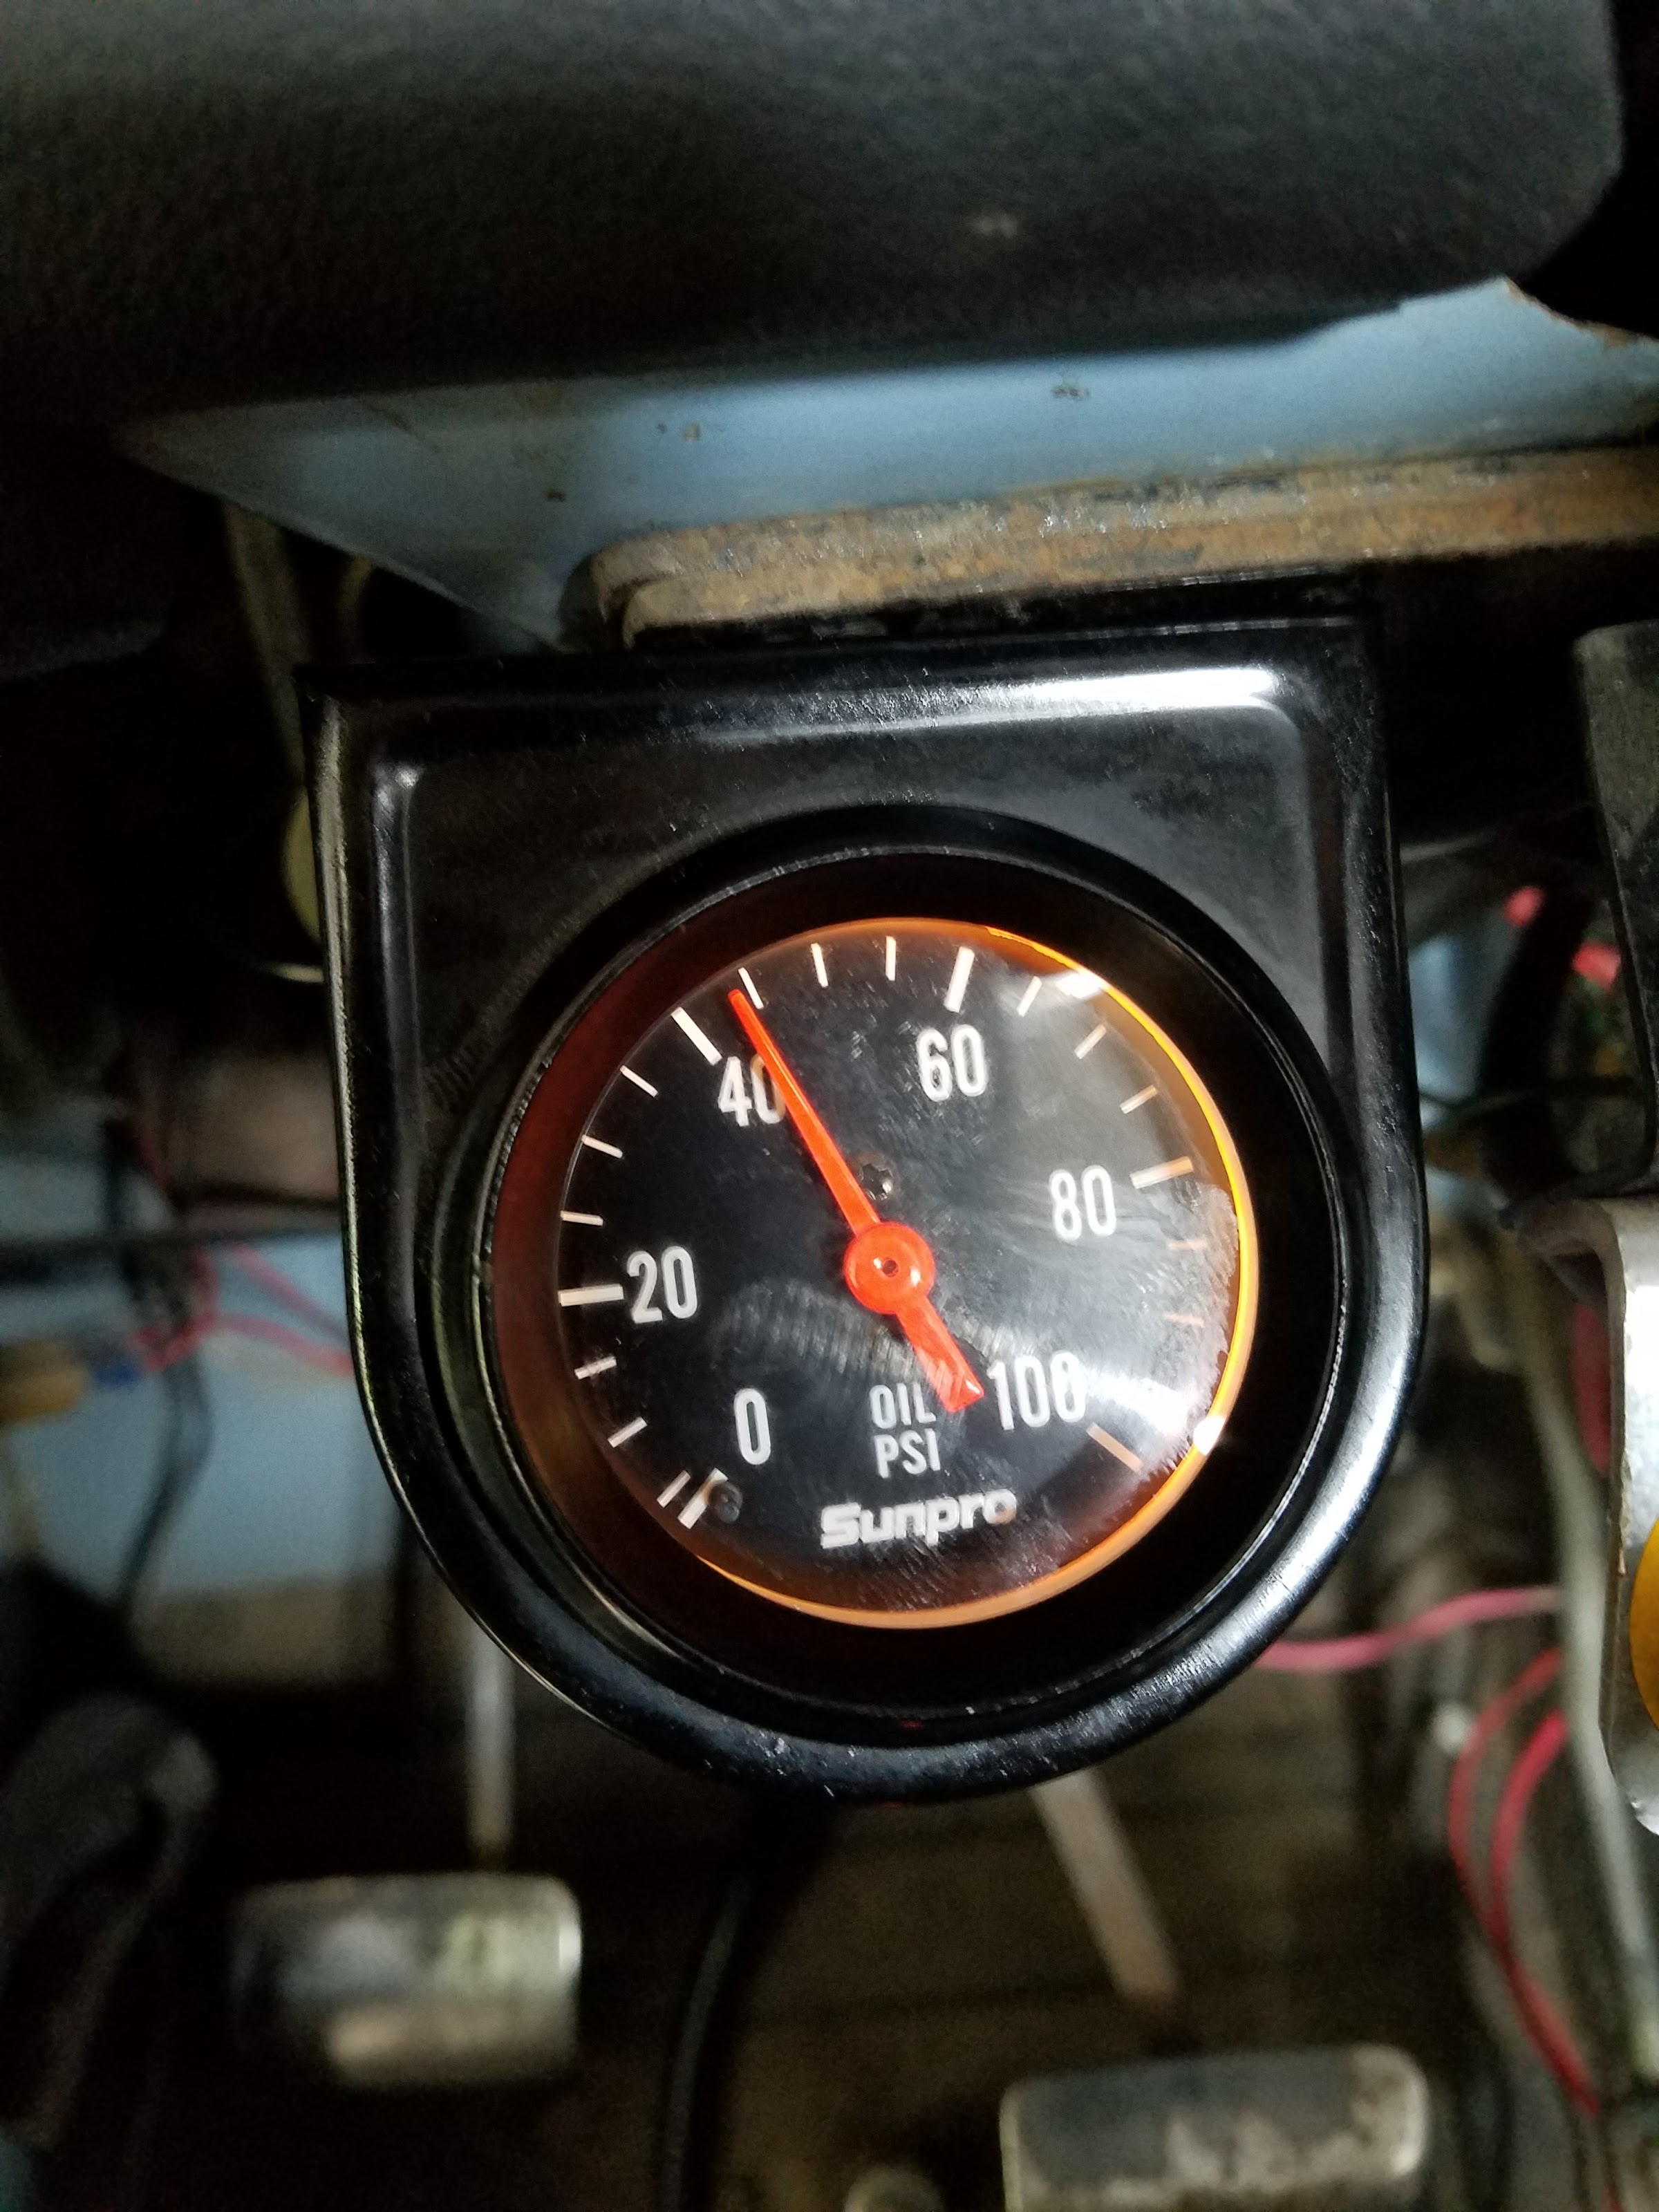
But this build starts here. Last fall, the lackluster performance of the stock F engine finally came to a head. I couldn't stand it anymore. 9-10 MPG and gutless was a combination I just couldn't stomach any longer. I started debating which motor I should swap in. I love diesels, and seriously considered a 1HDT or a Merc of some sort. But, after weighing lots of options, Mr Jits convinced me to go with a tried and true Chevy. I found this on Craigslist a short time later.

aVagTyqgPYBhxRli5ZEyaKk3Up6QtODJe_rcb4hXmJZEHonJ32FWOt05O7xQATVUYIr9pYTwOs7E5mct6WMophwrQxwYWD6Eb_Pi52kafxdve3U_Opzb06ssi_NP0BfjKK6eOqtEQA=w2400


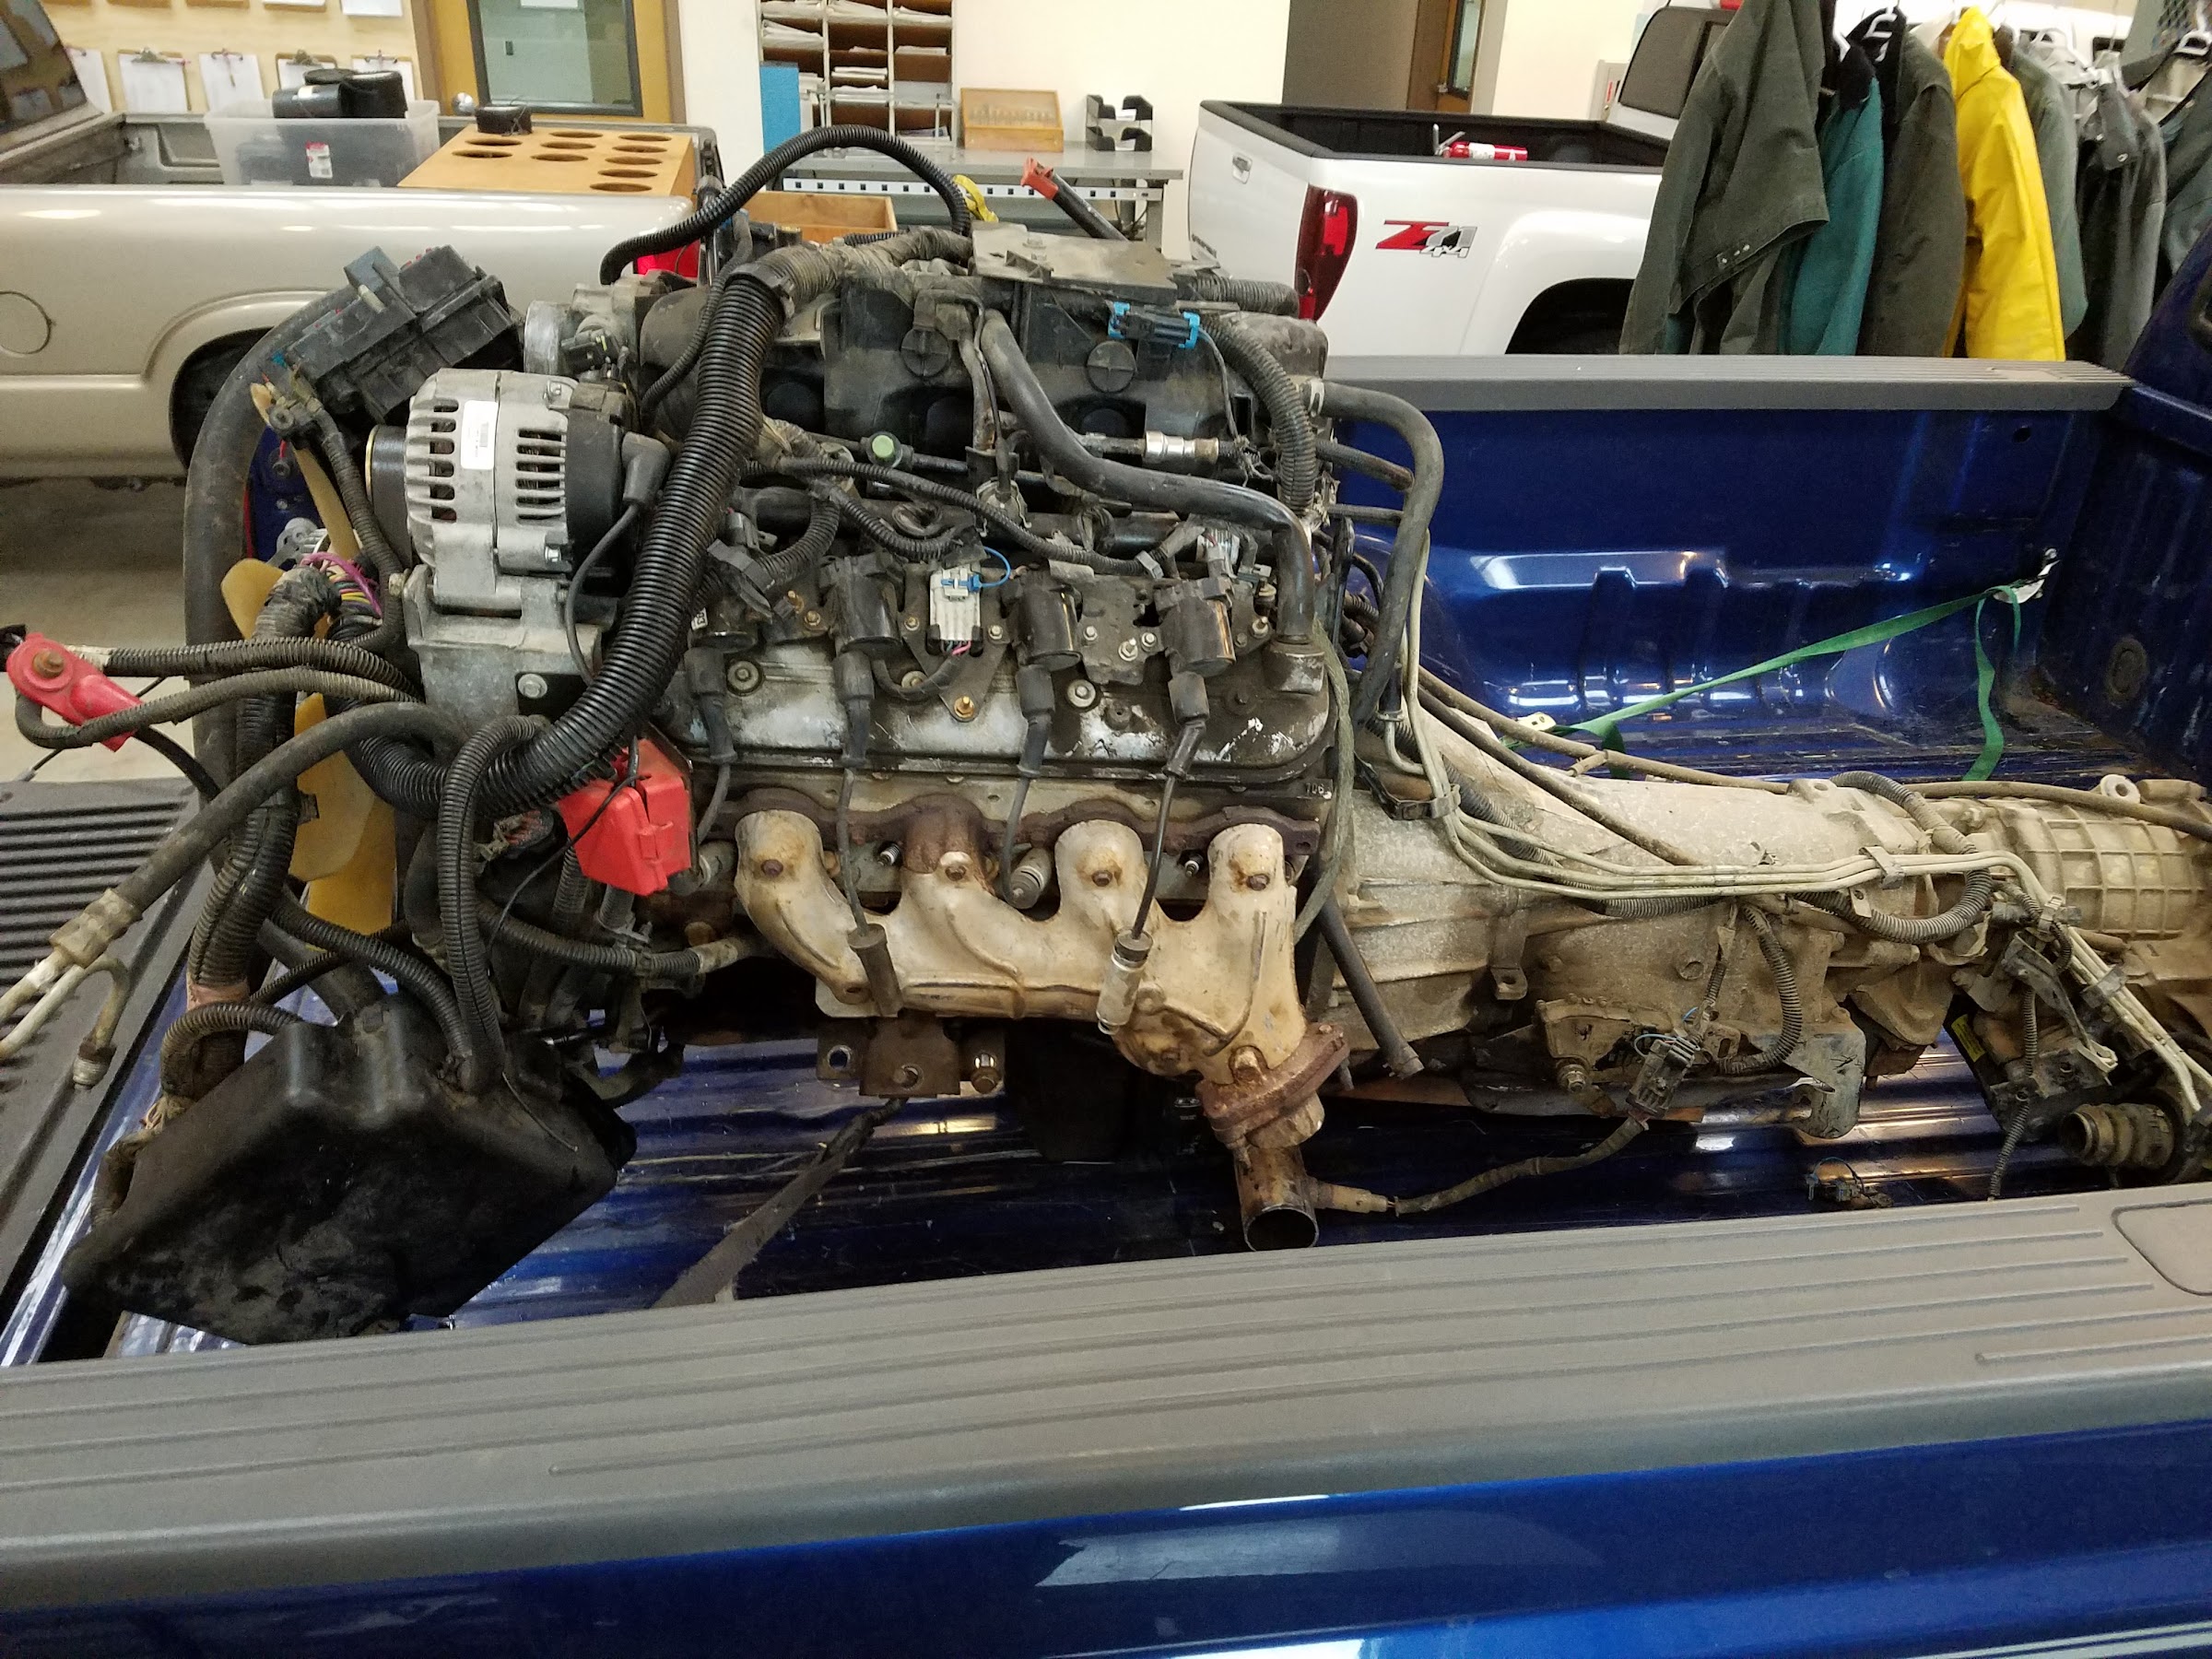
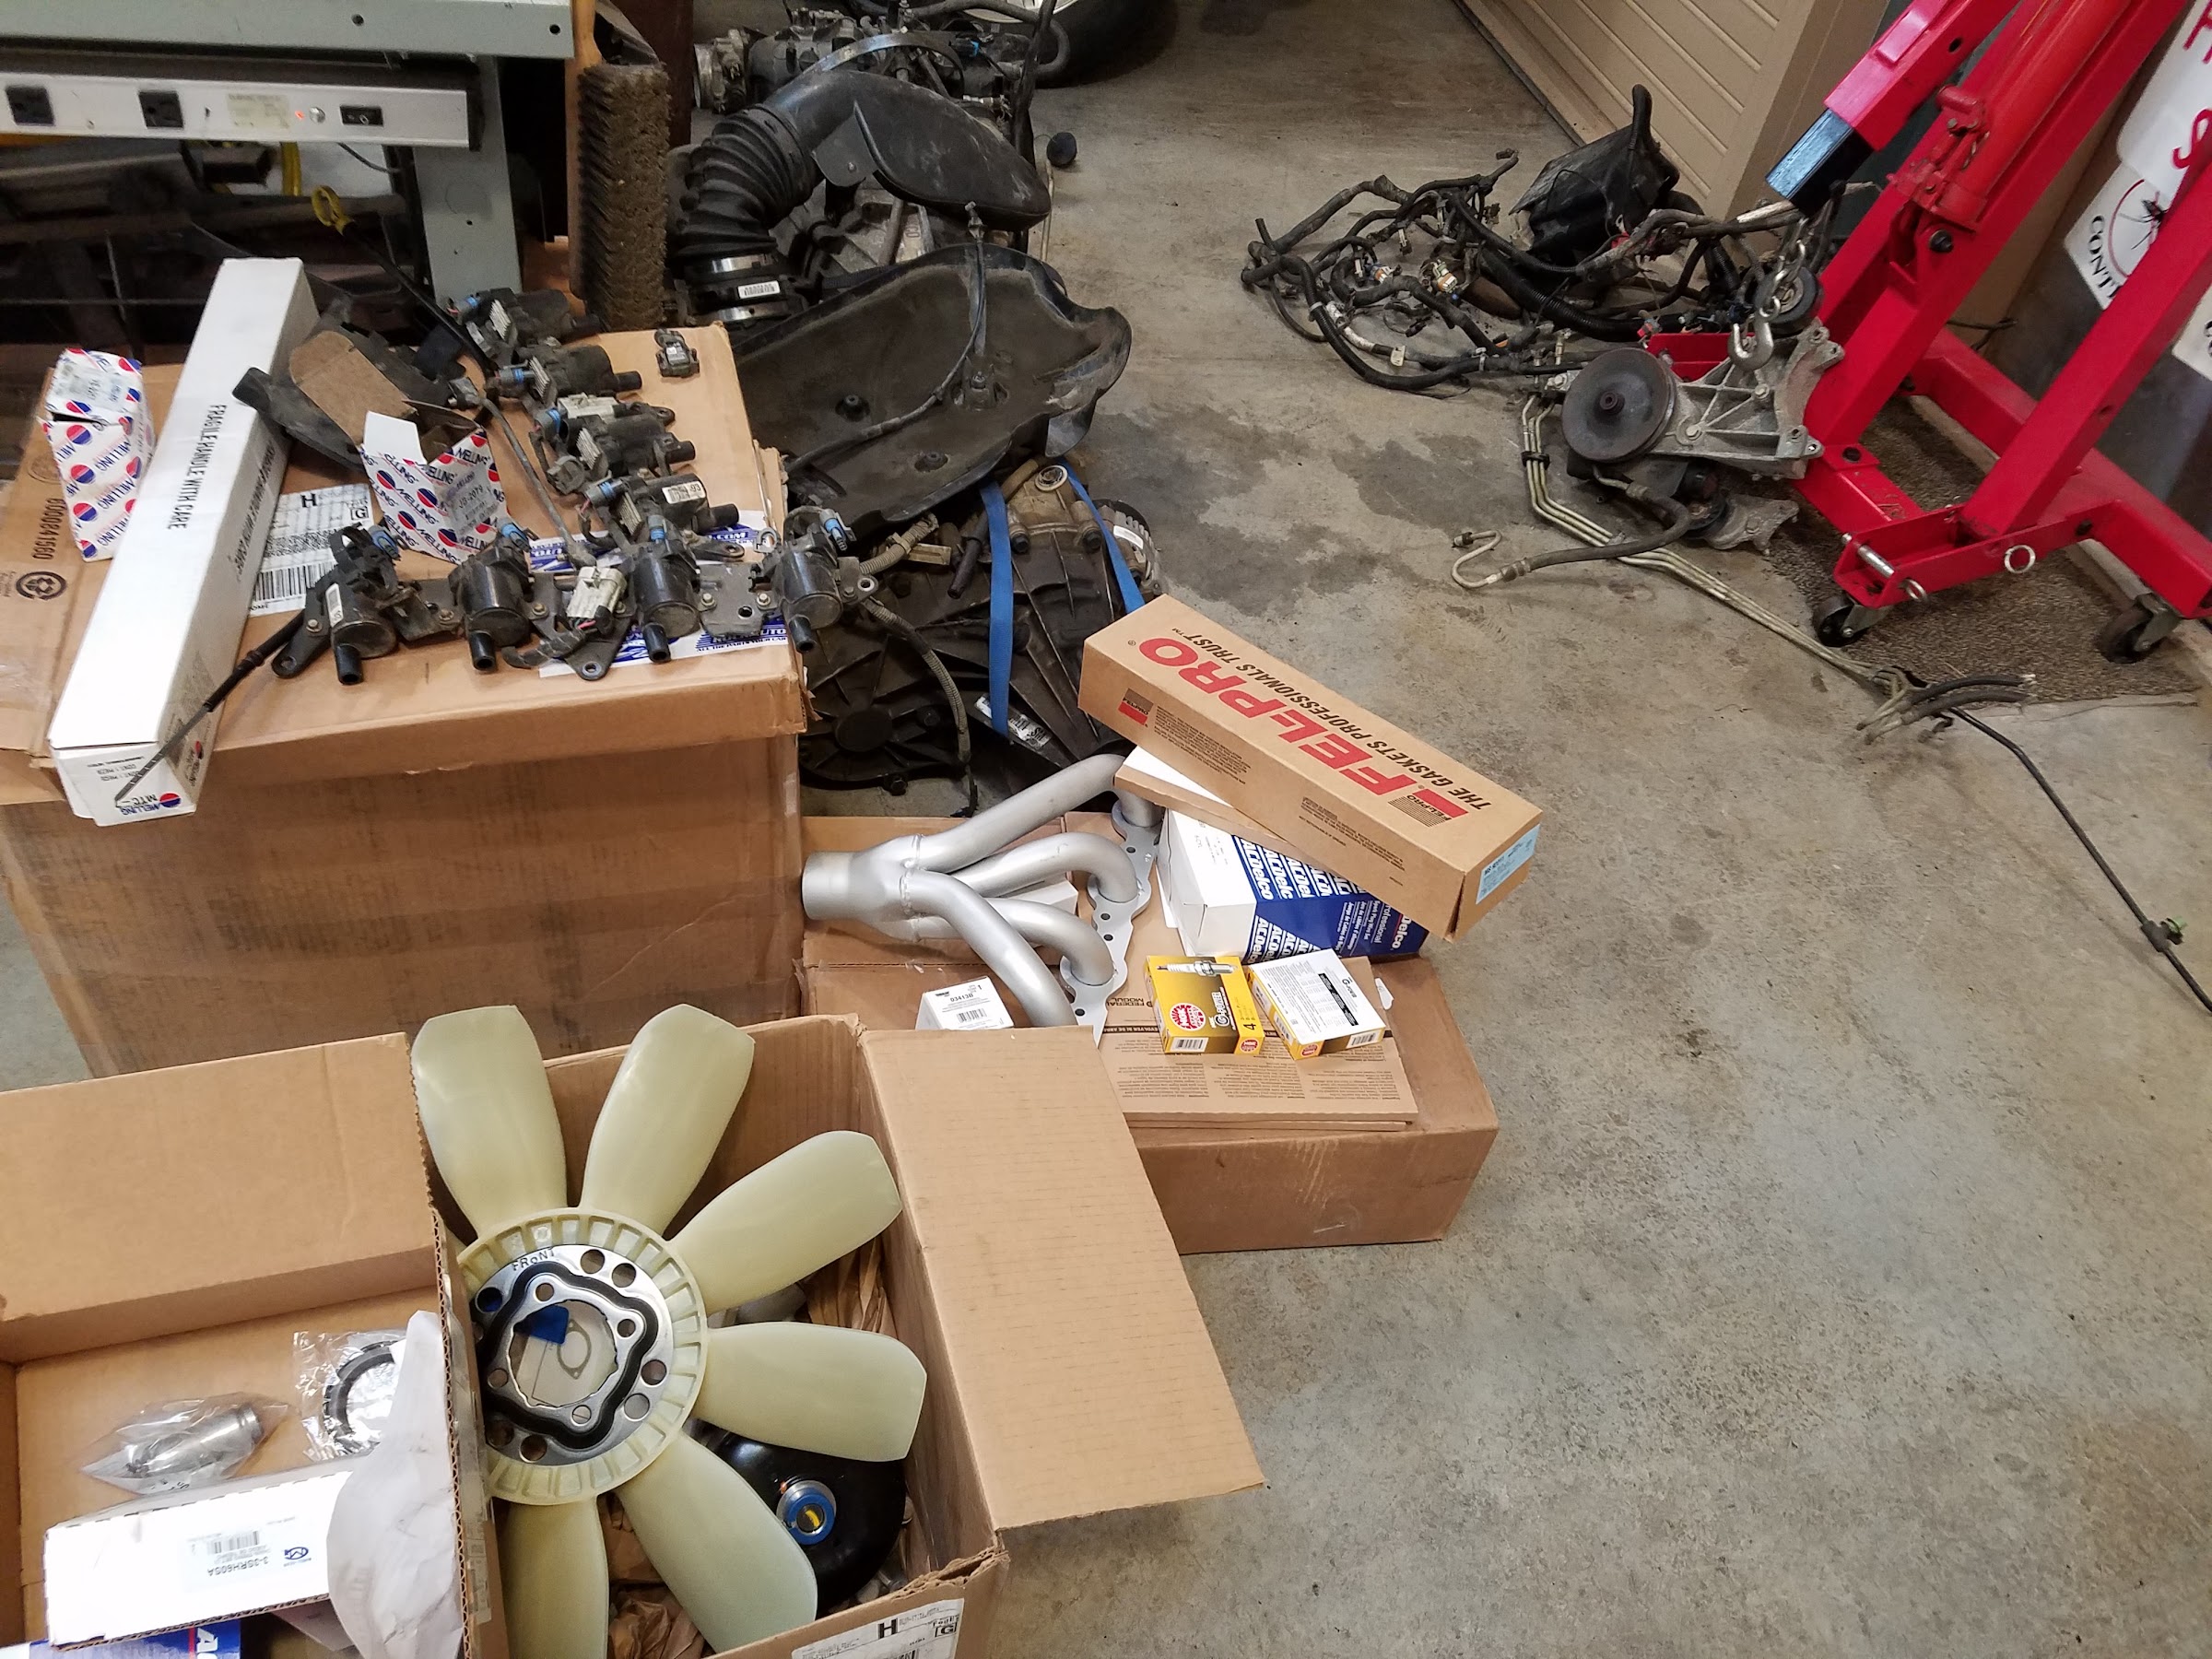
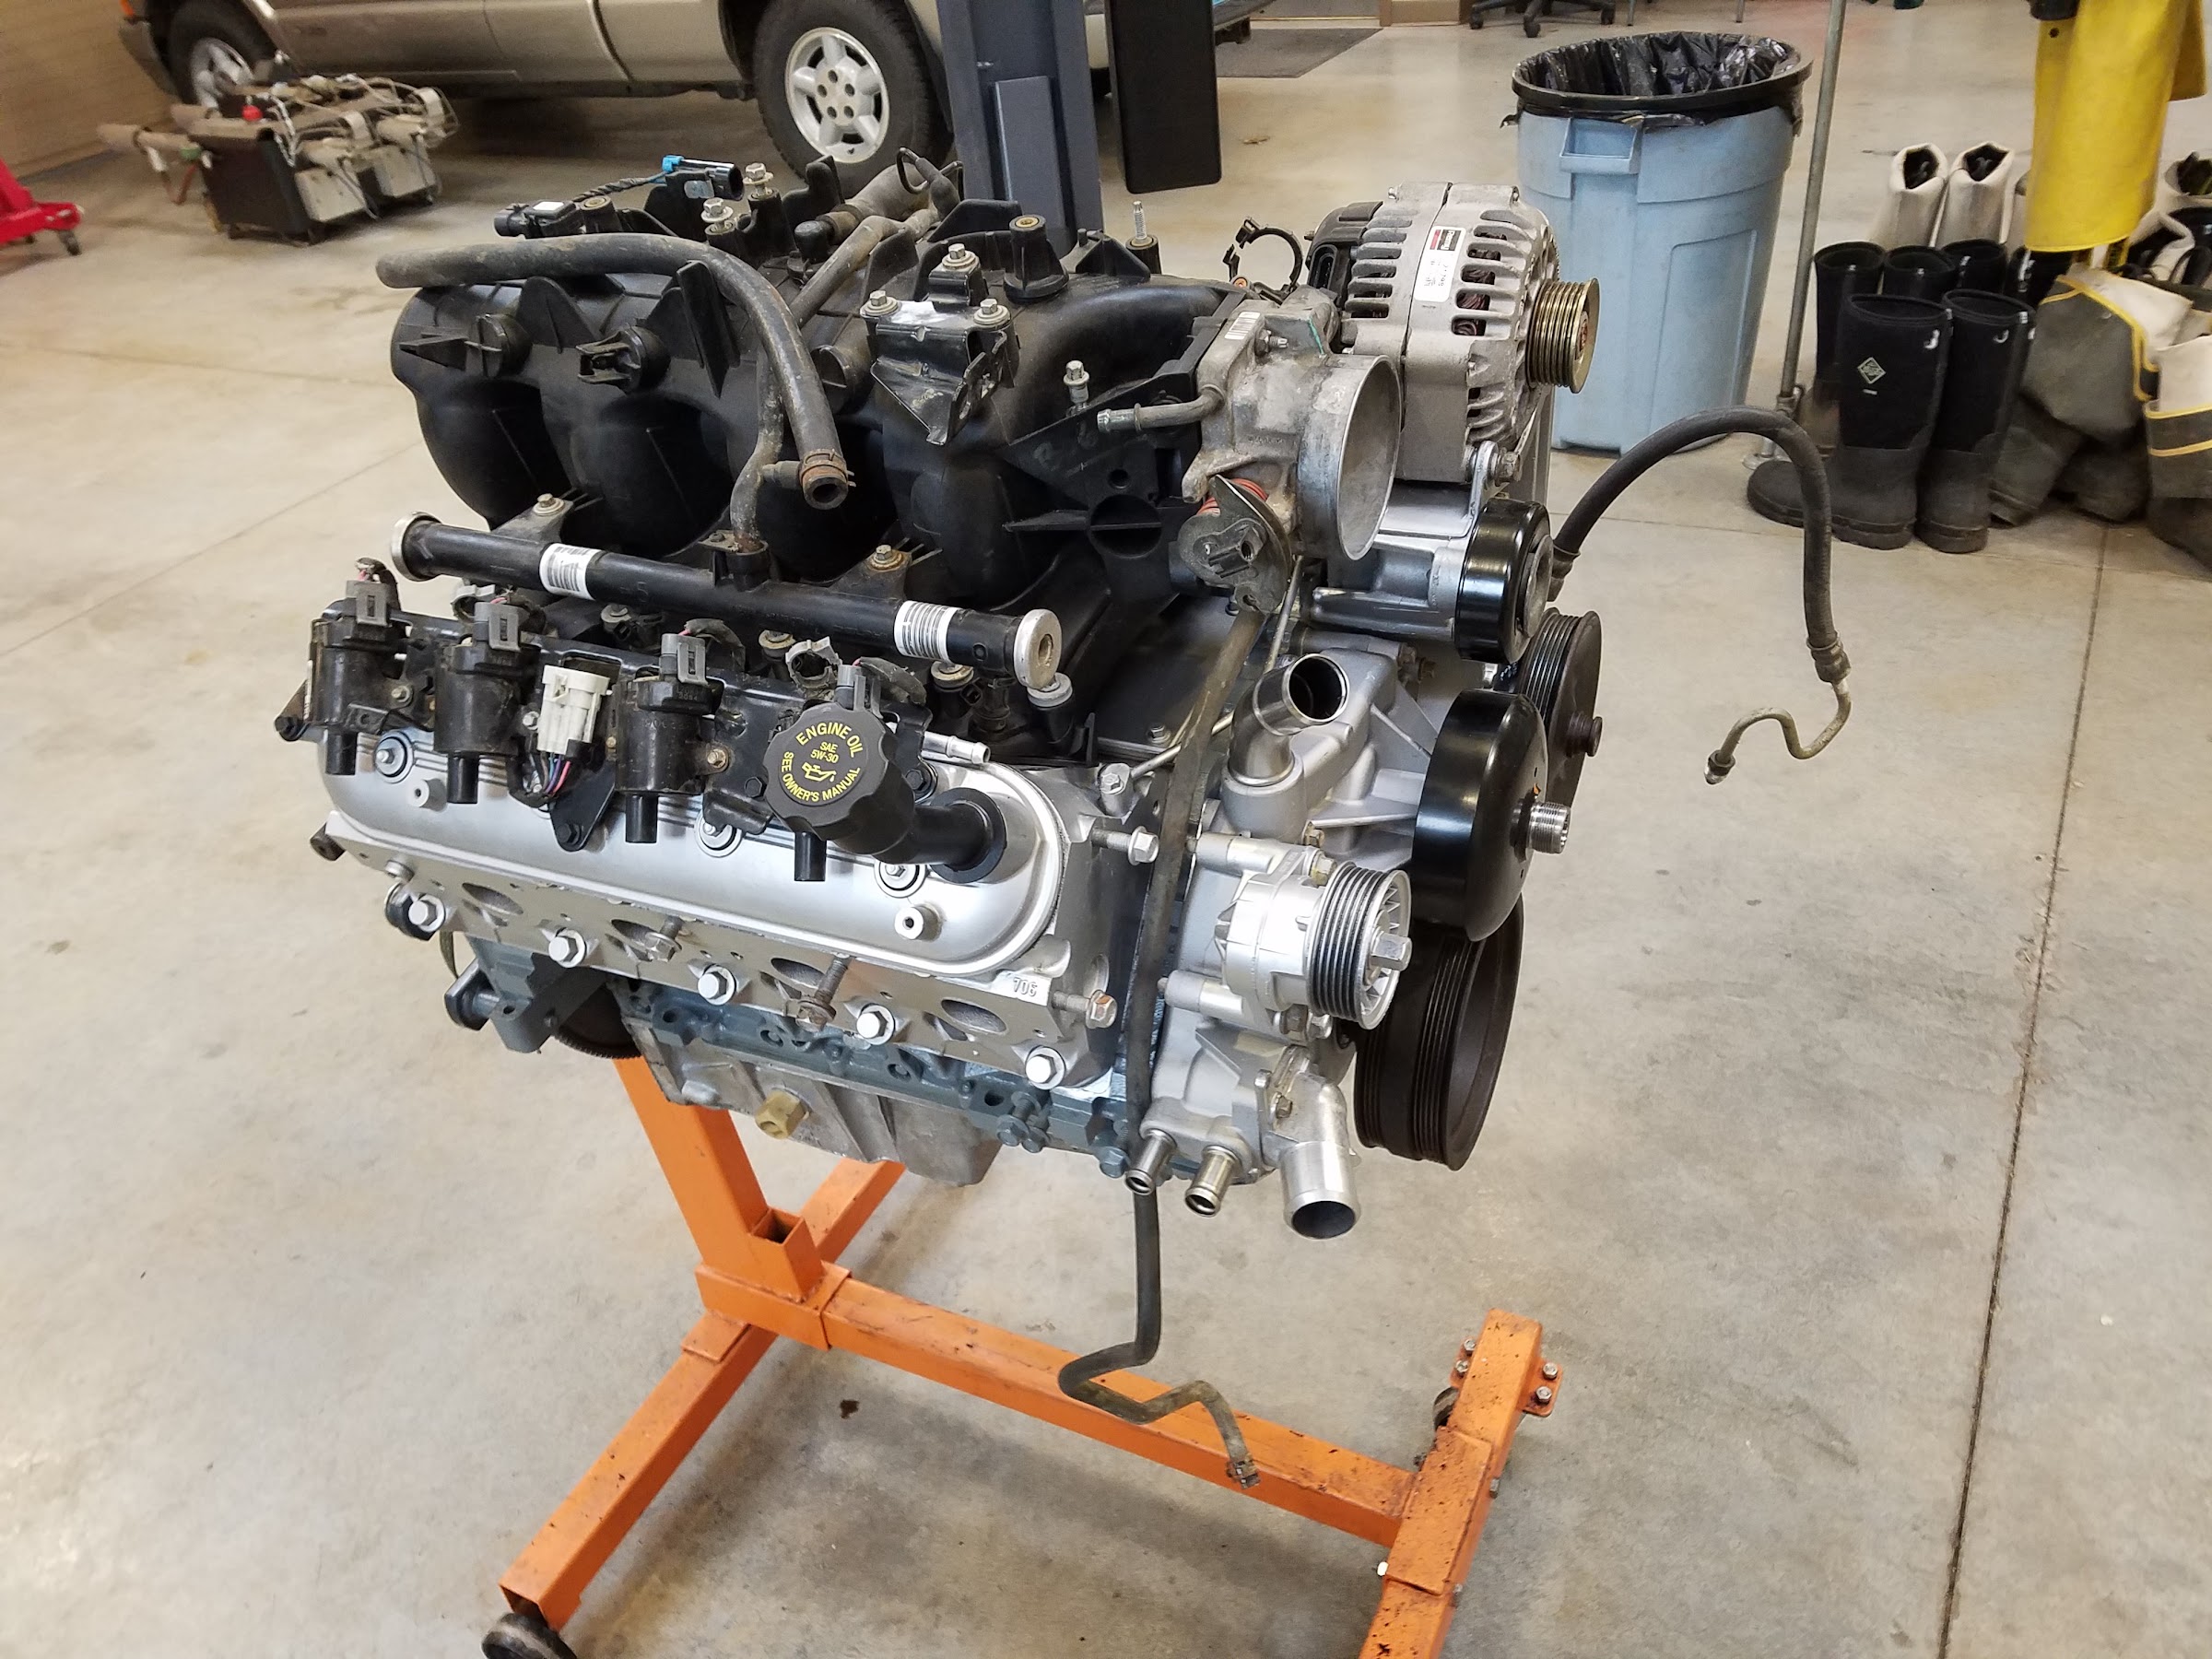
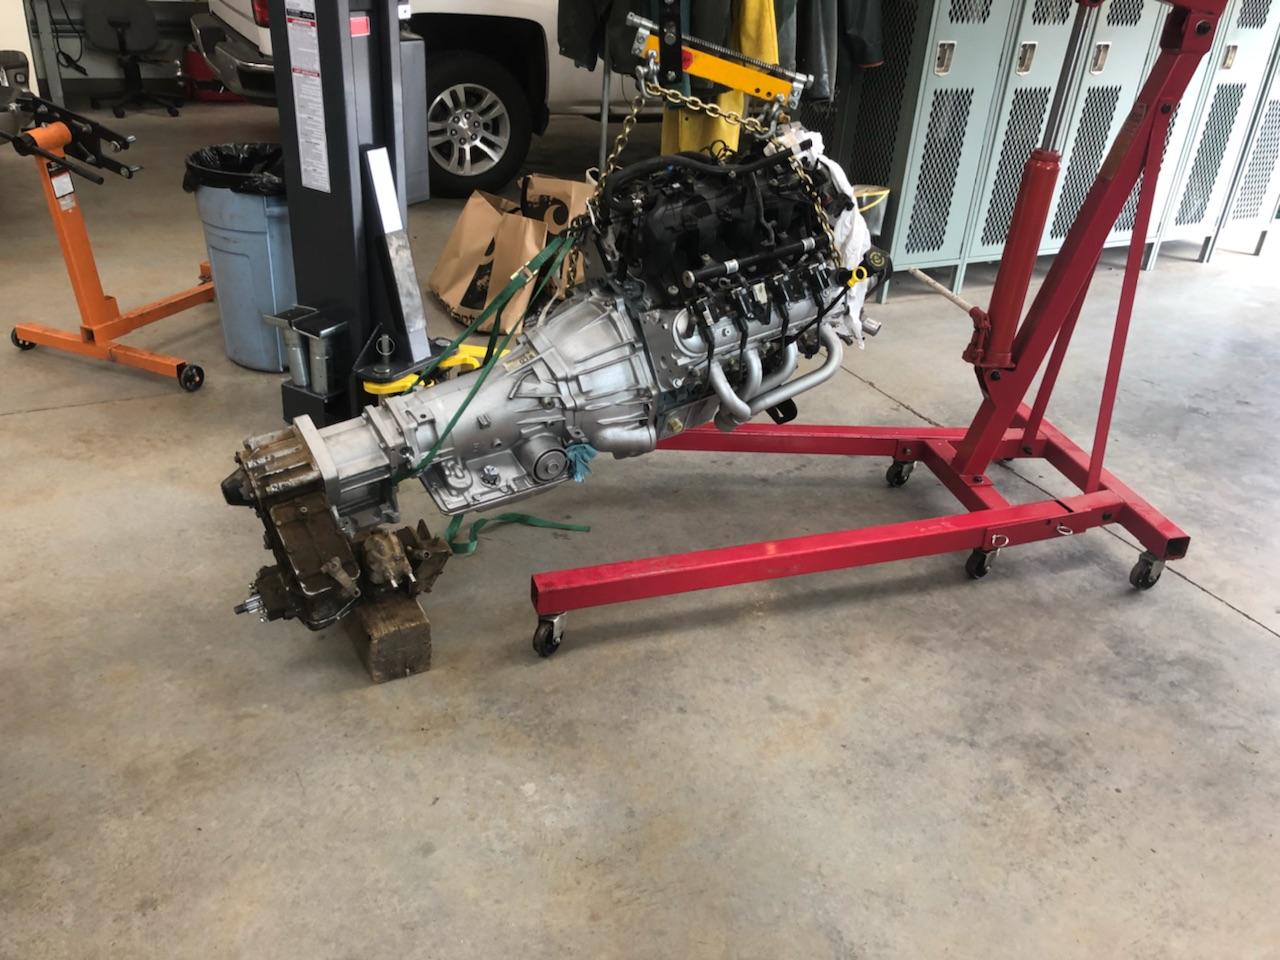
The story goes that this guys brother put the 2001 Suburban with 149k in the ditch and screwed up the frame. The guy was parting it out and sold everything in the picture for $800. The engine ran perfect, and no codes or any other glaring issues were found. I now had a base to start from.

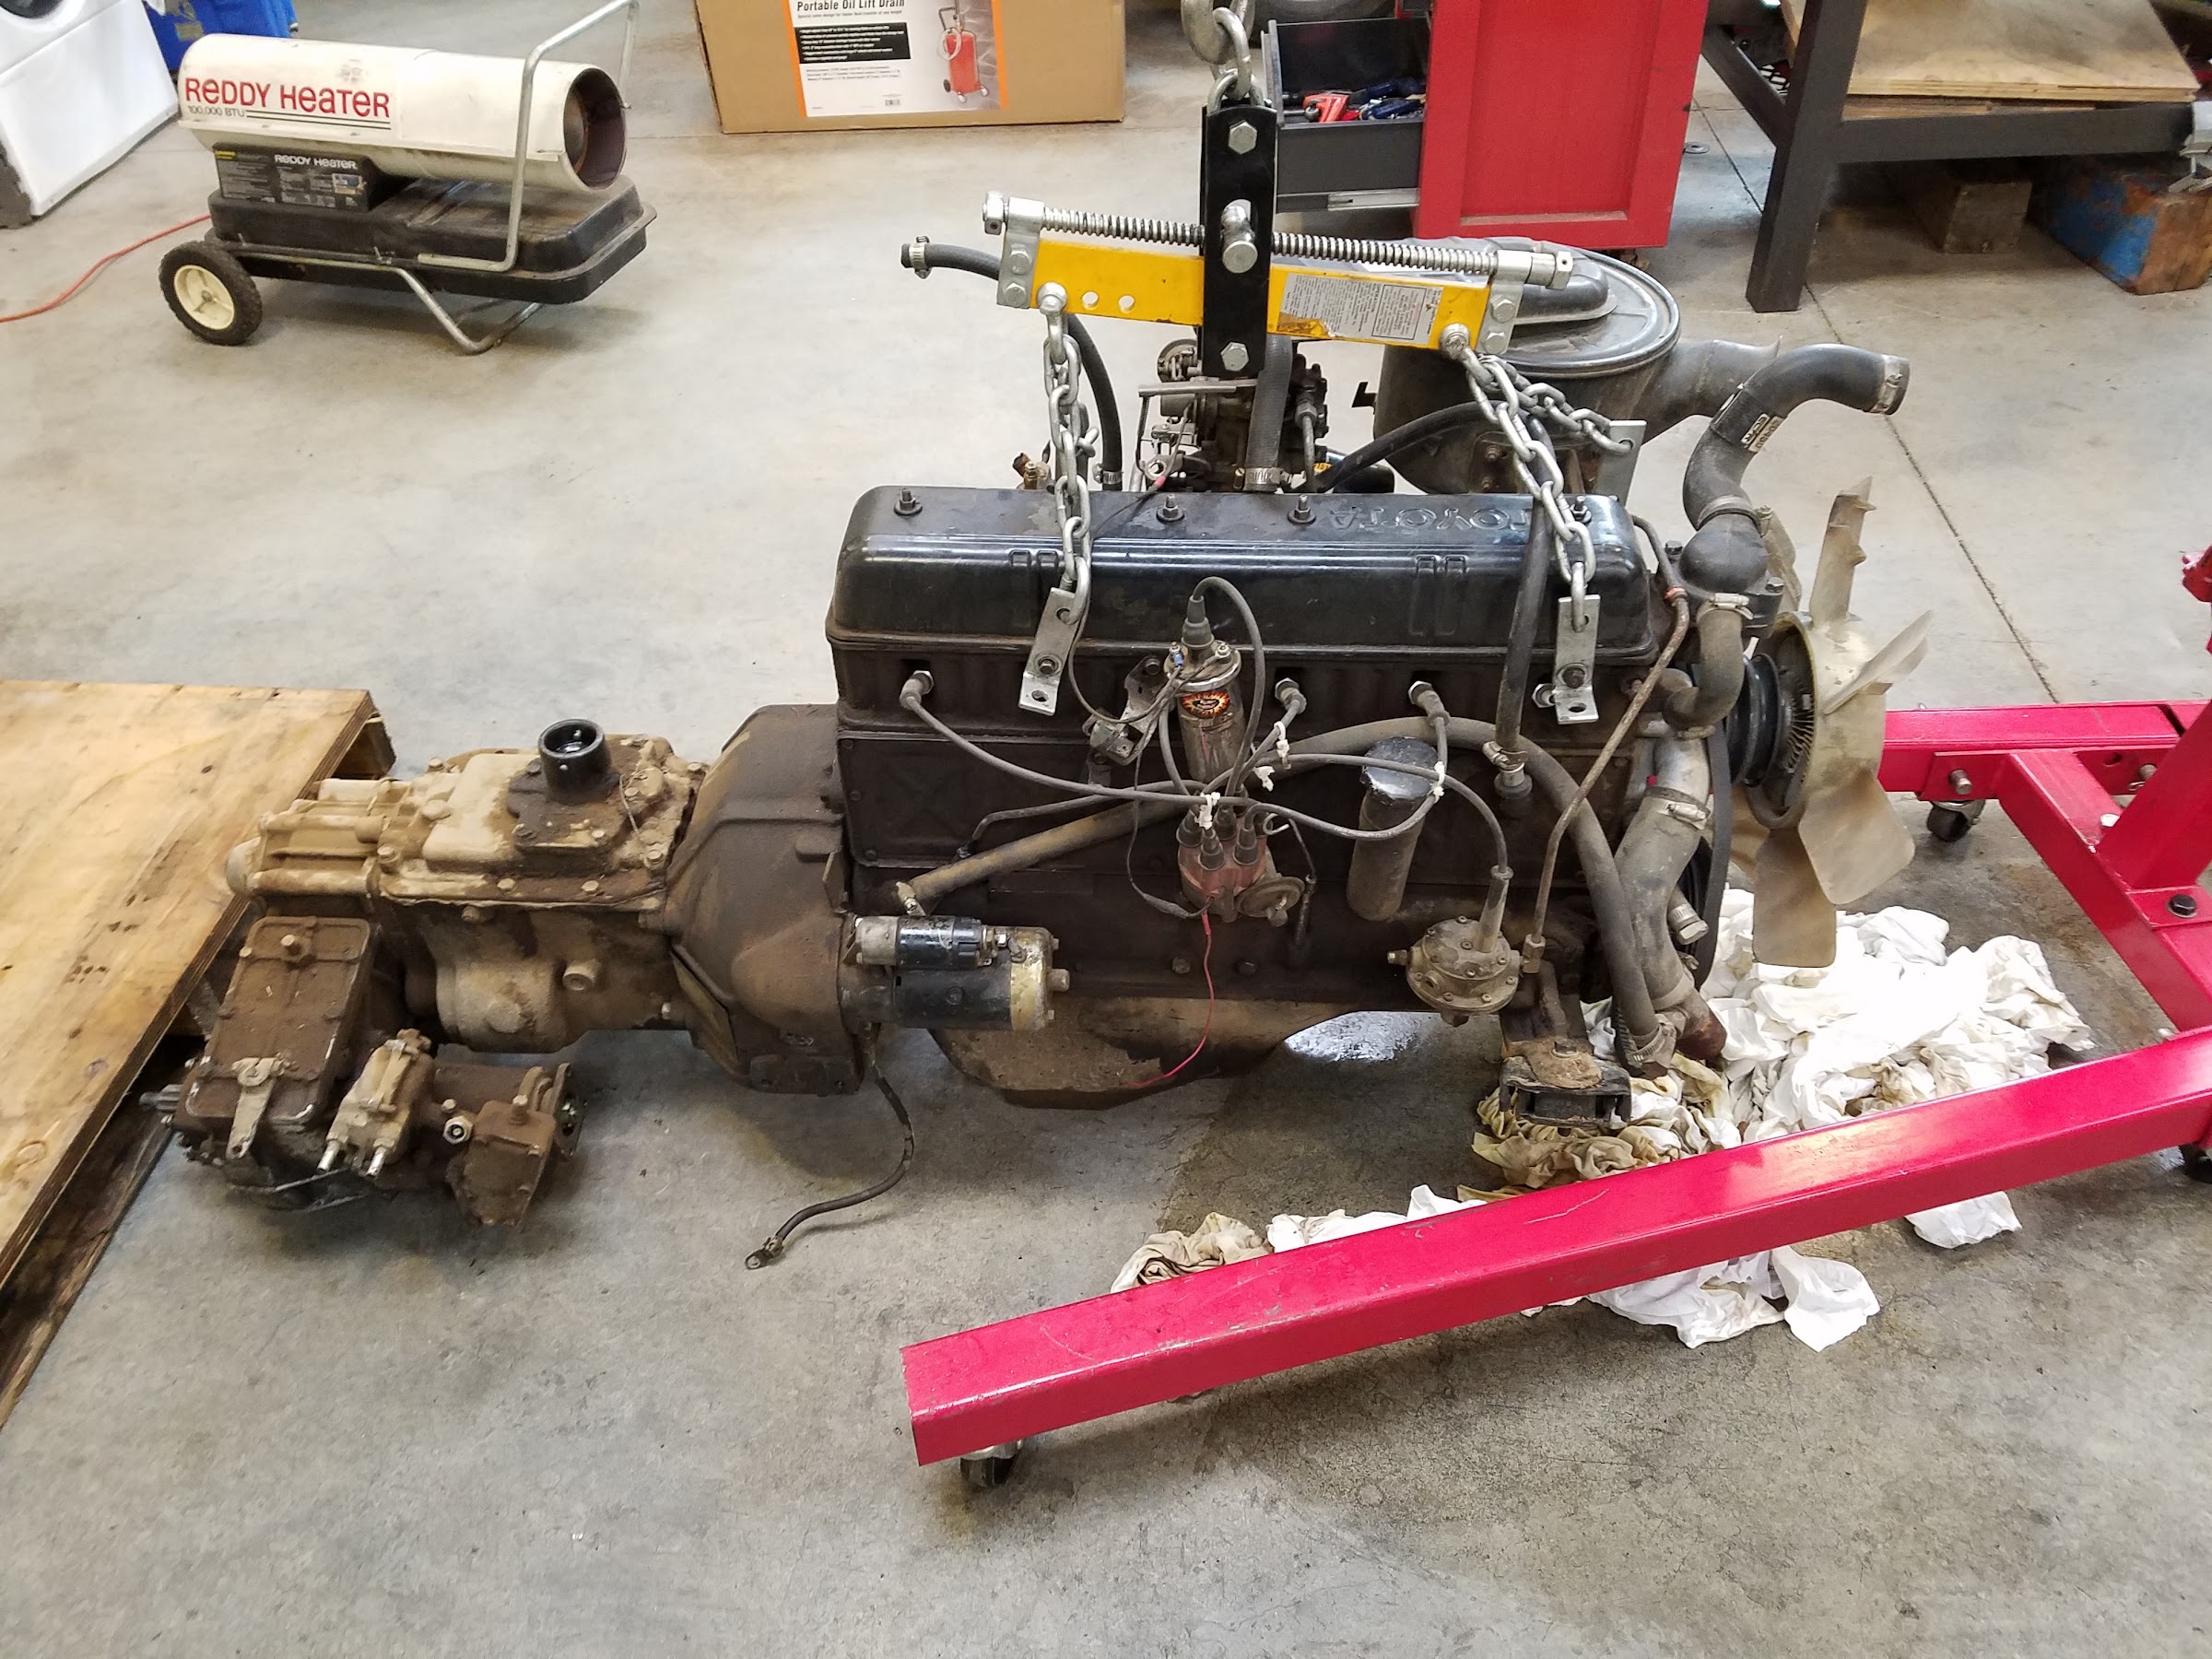
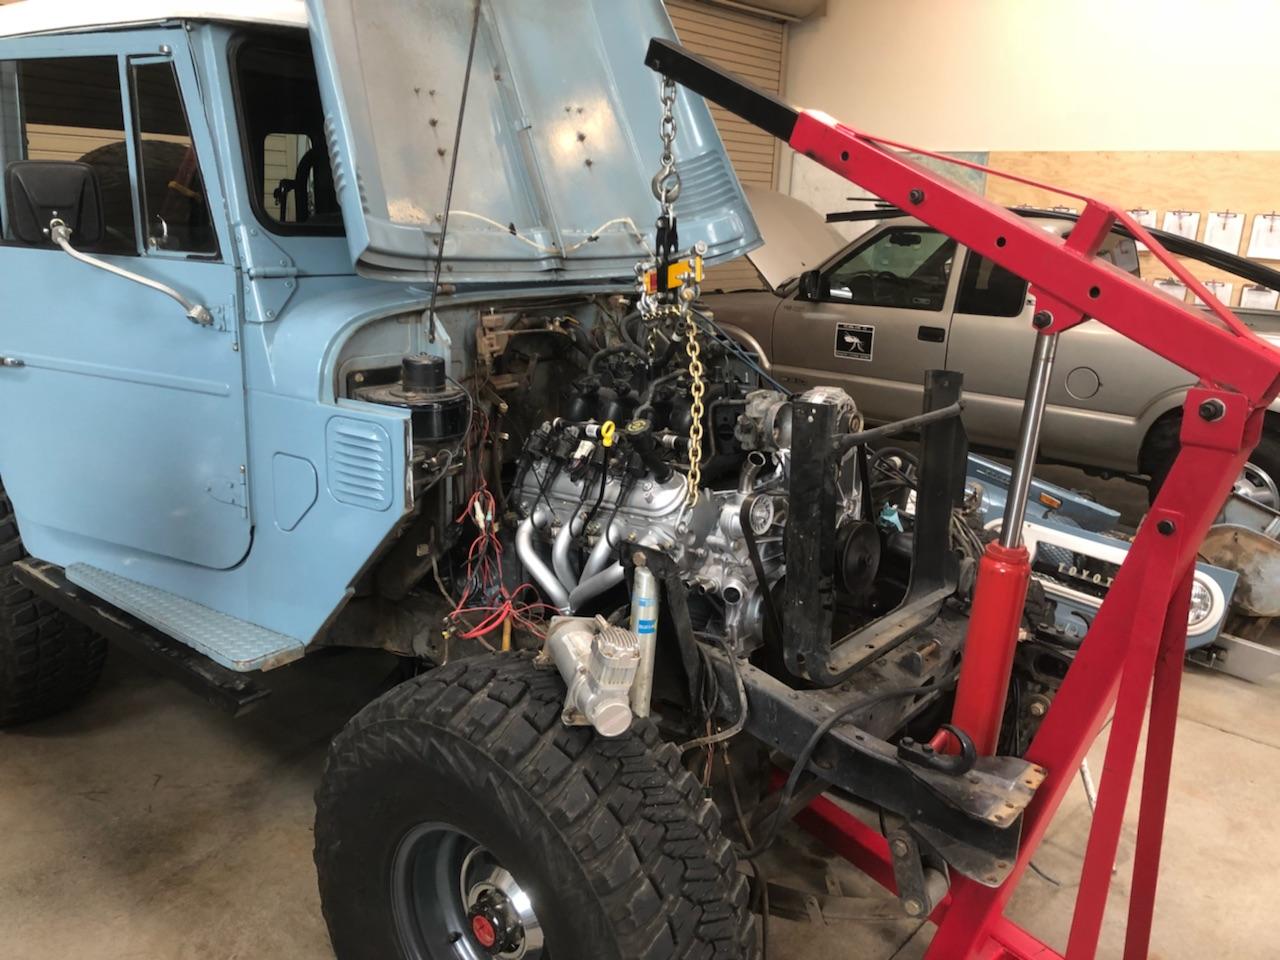
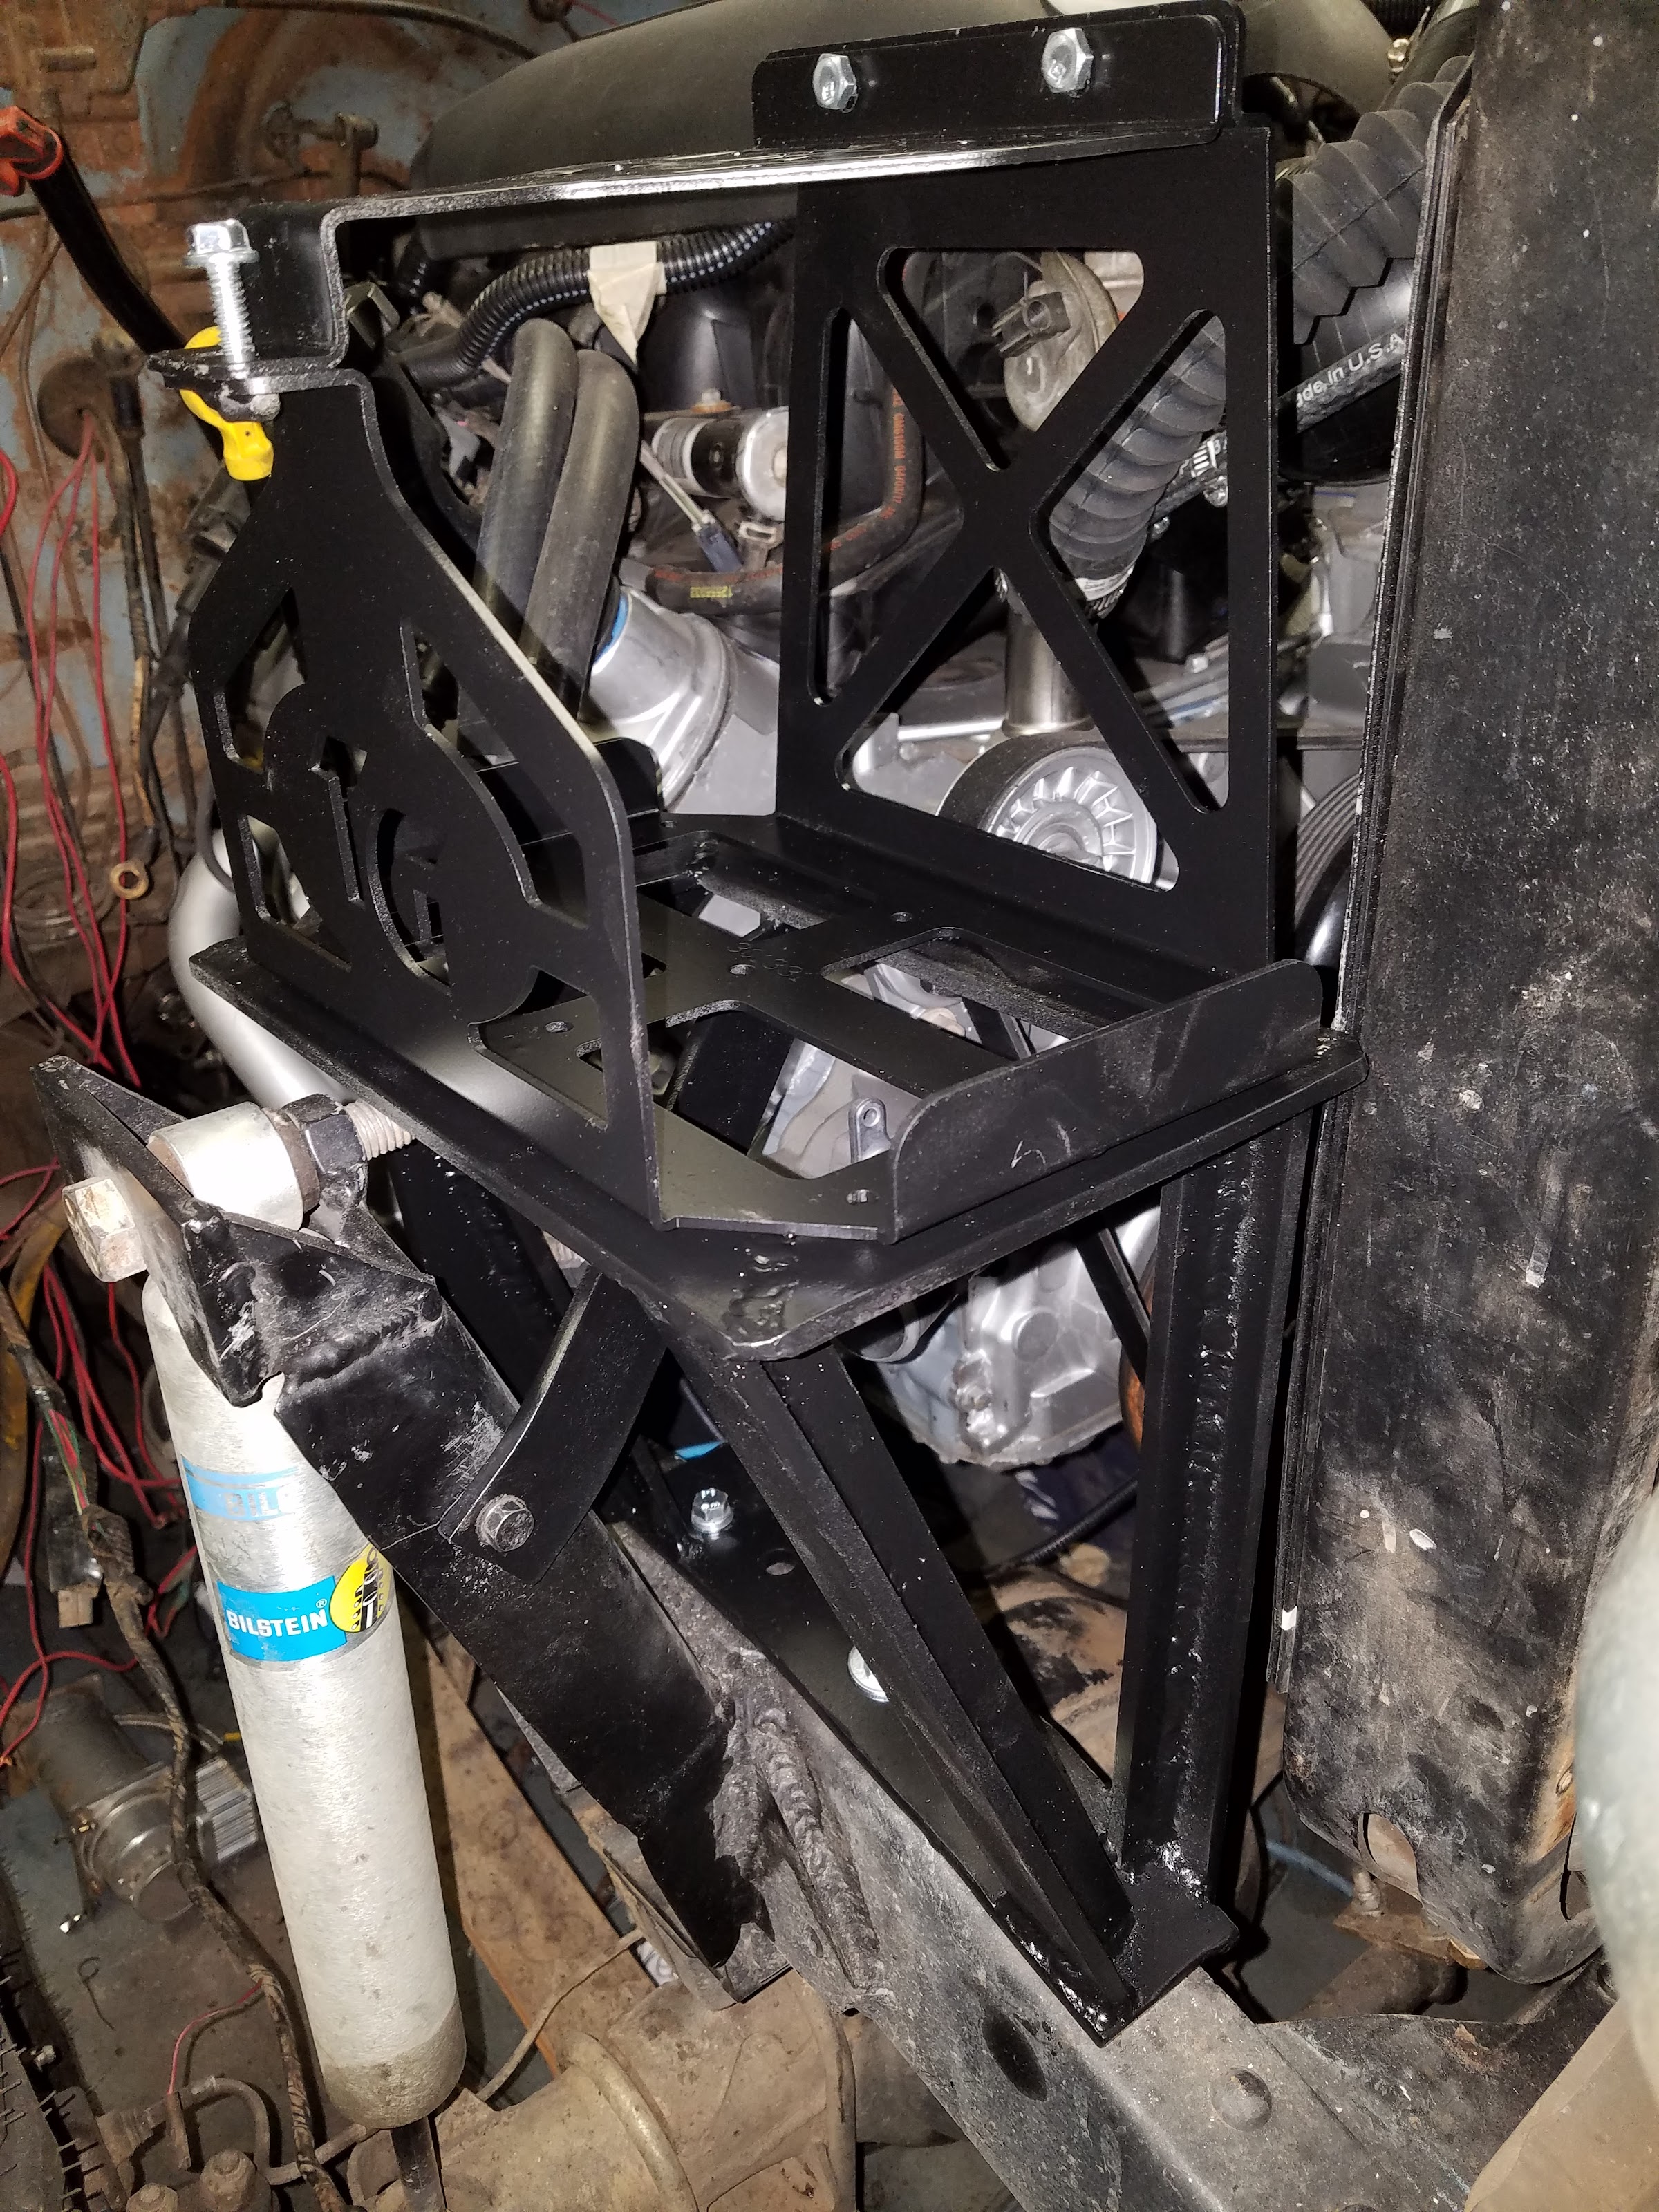
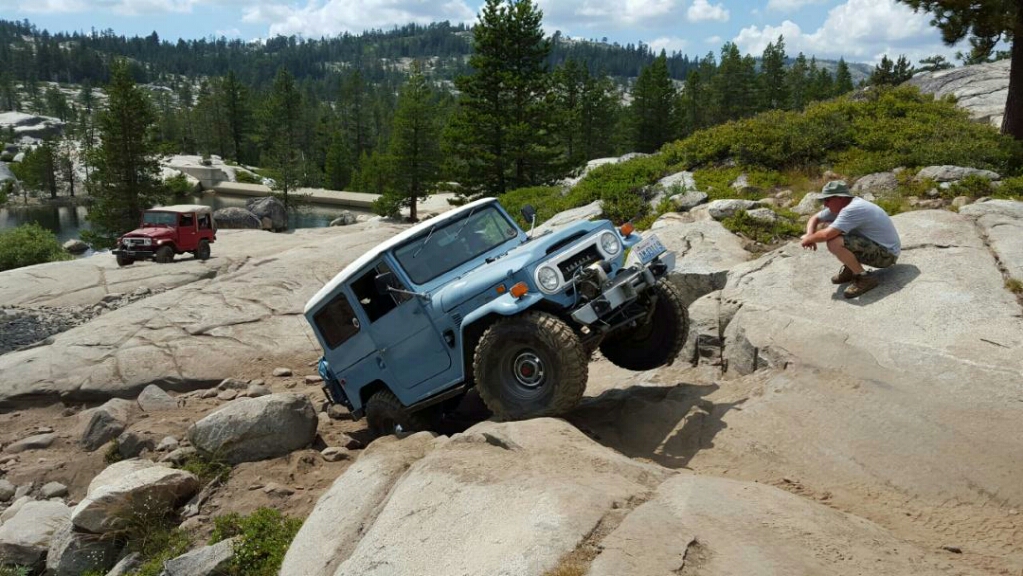
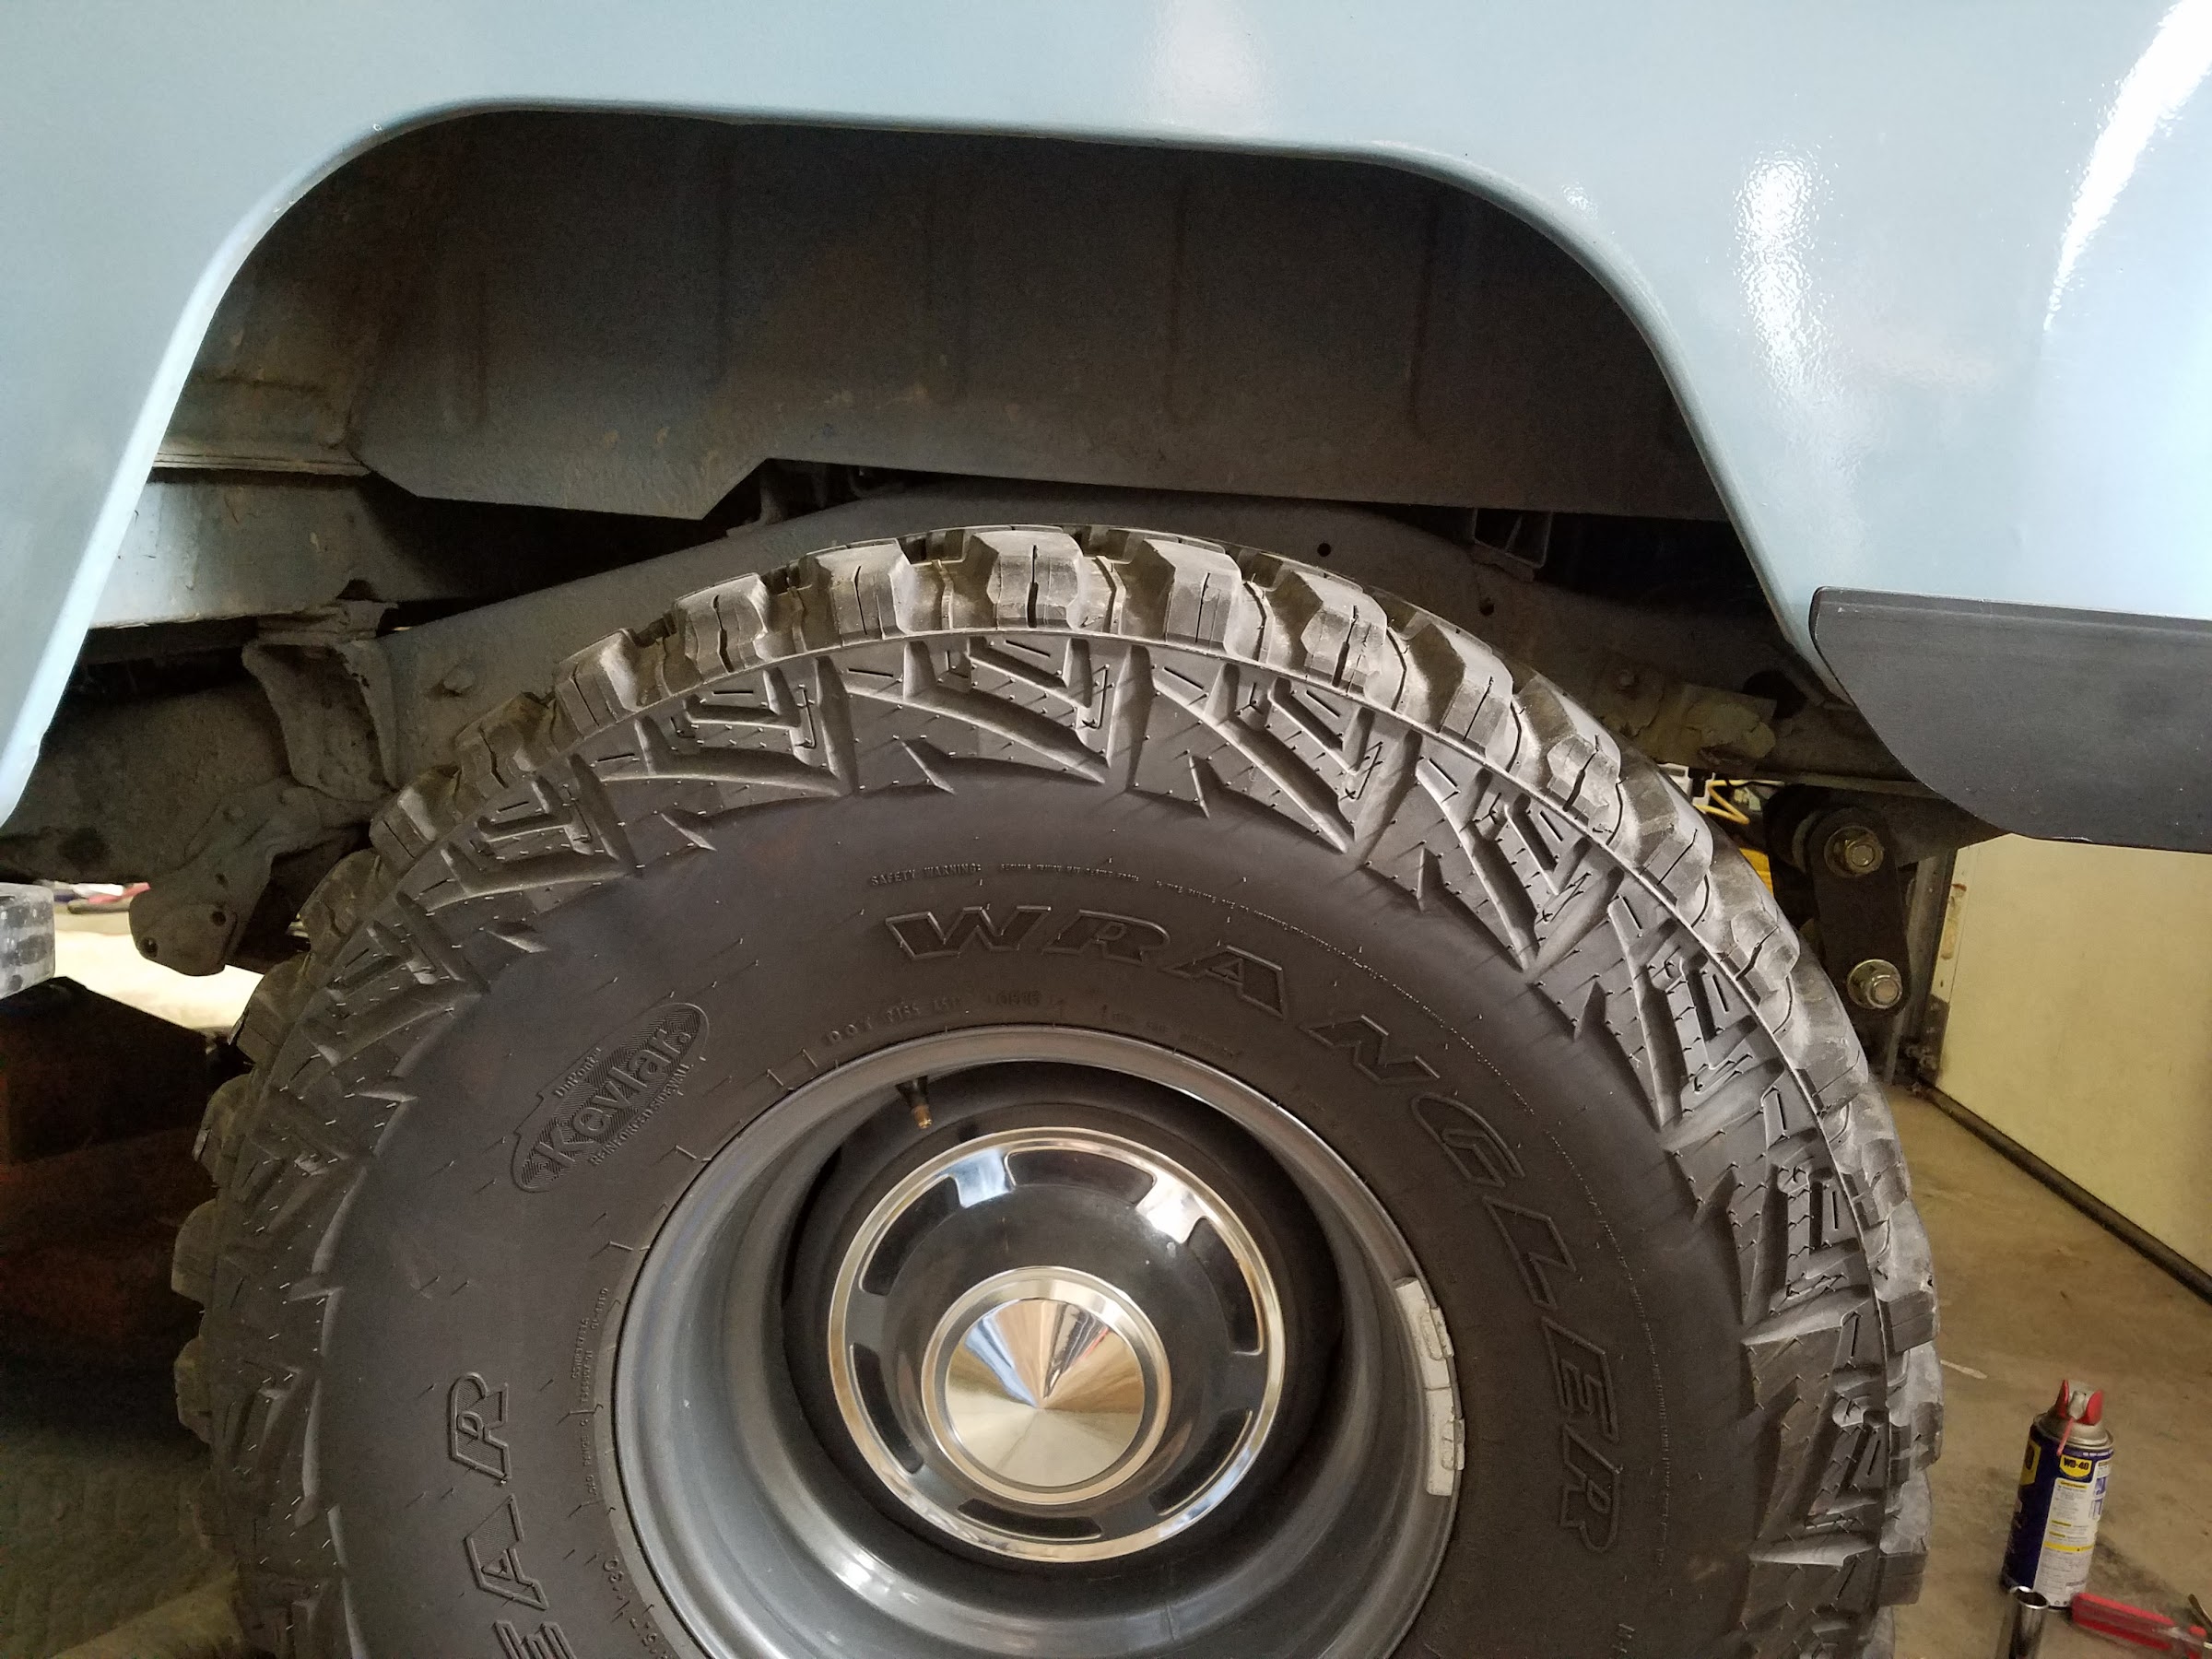
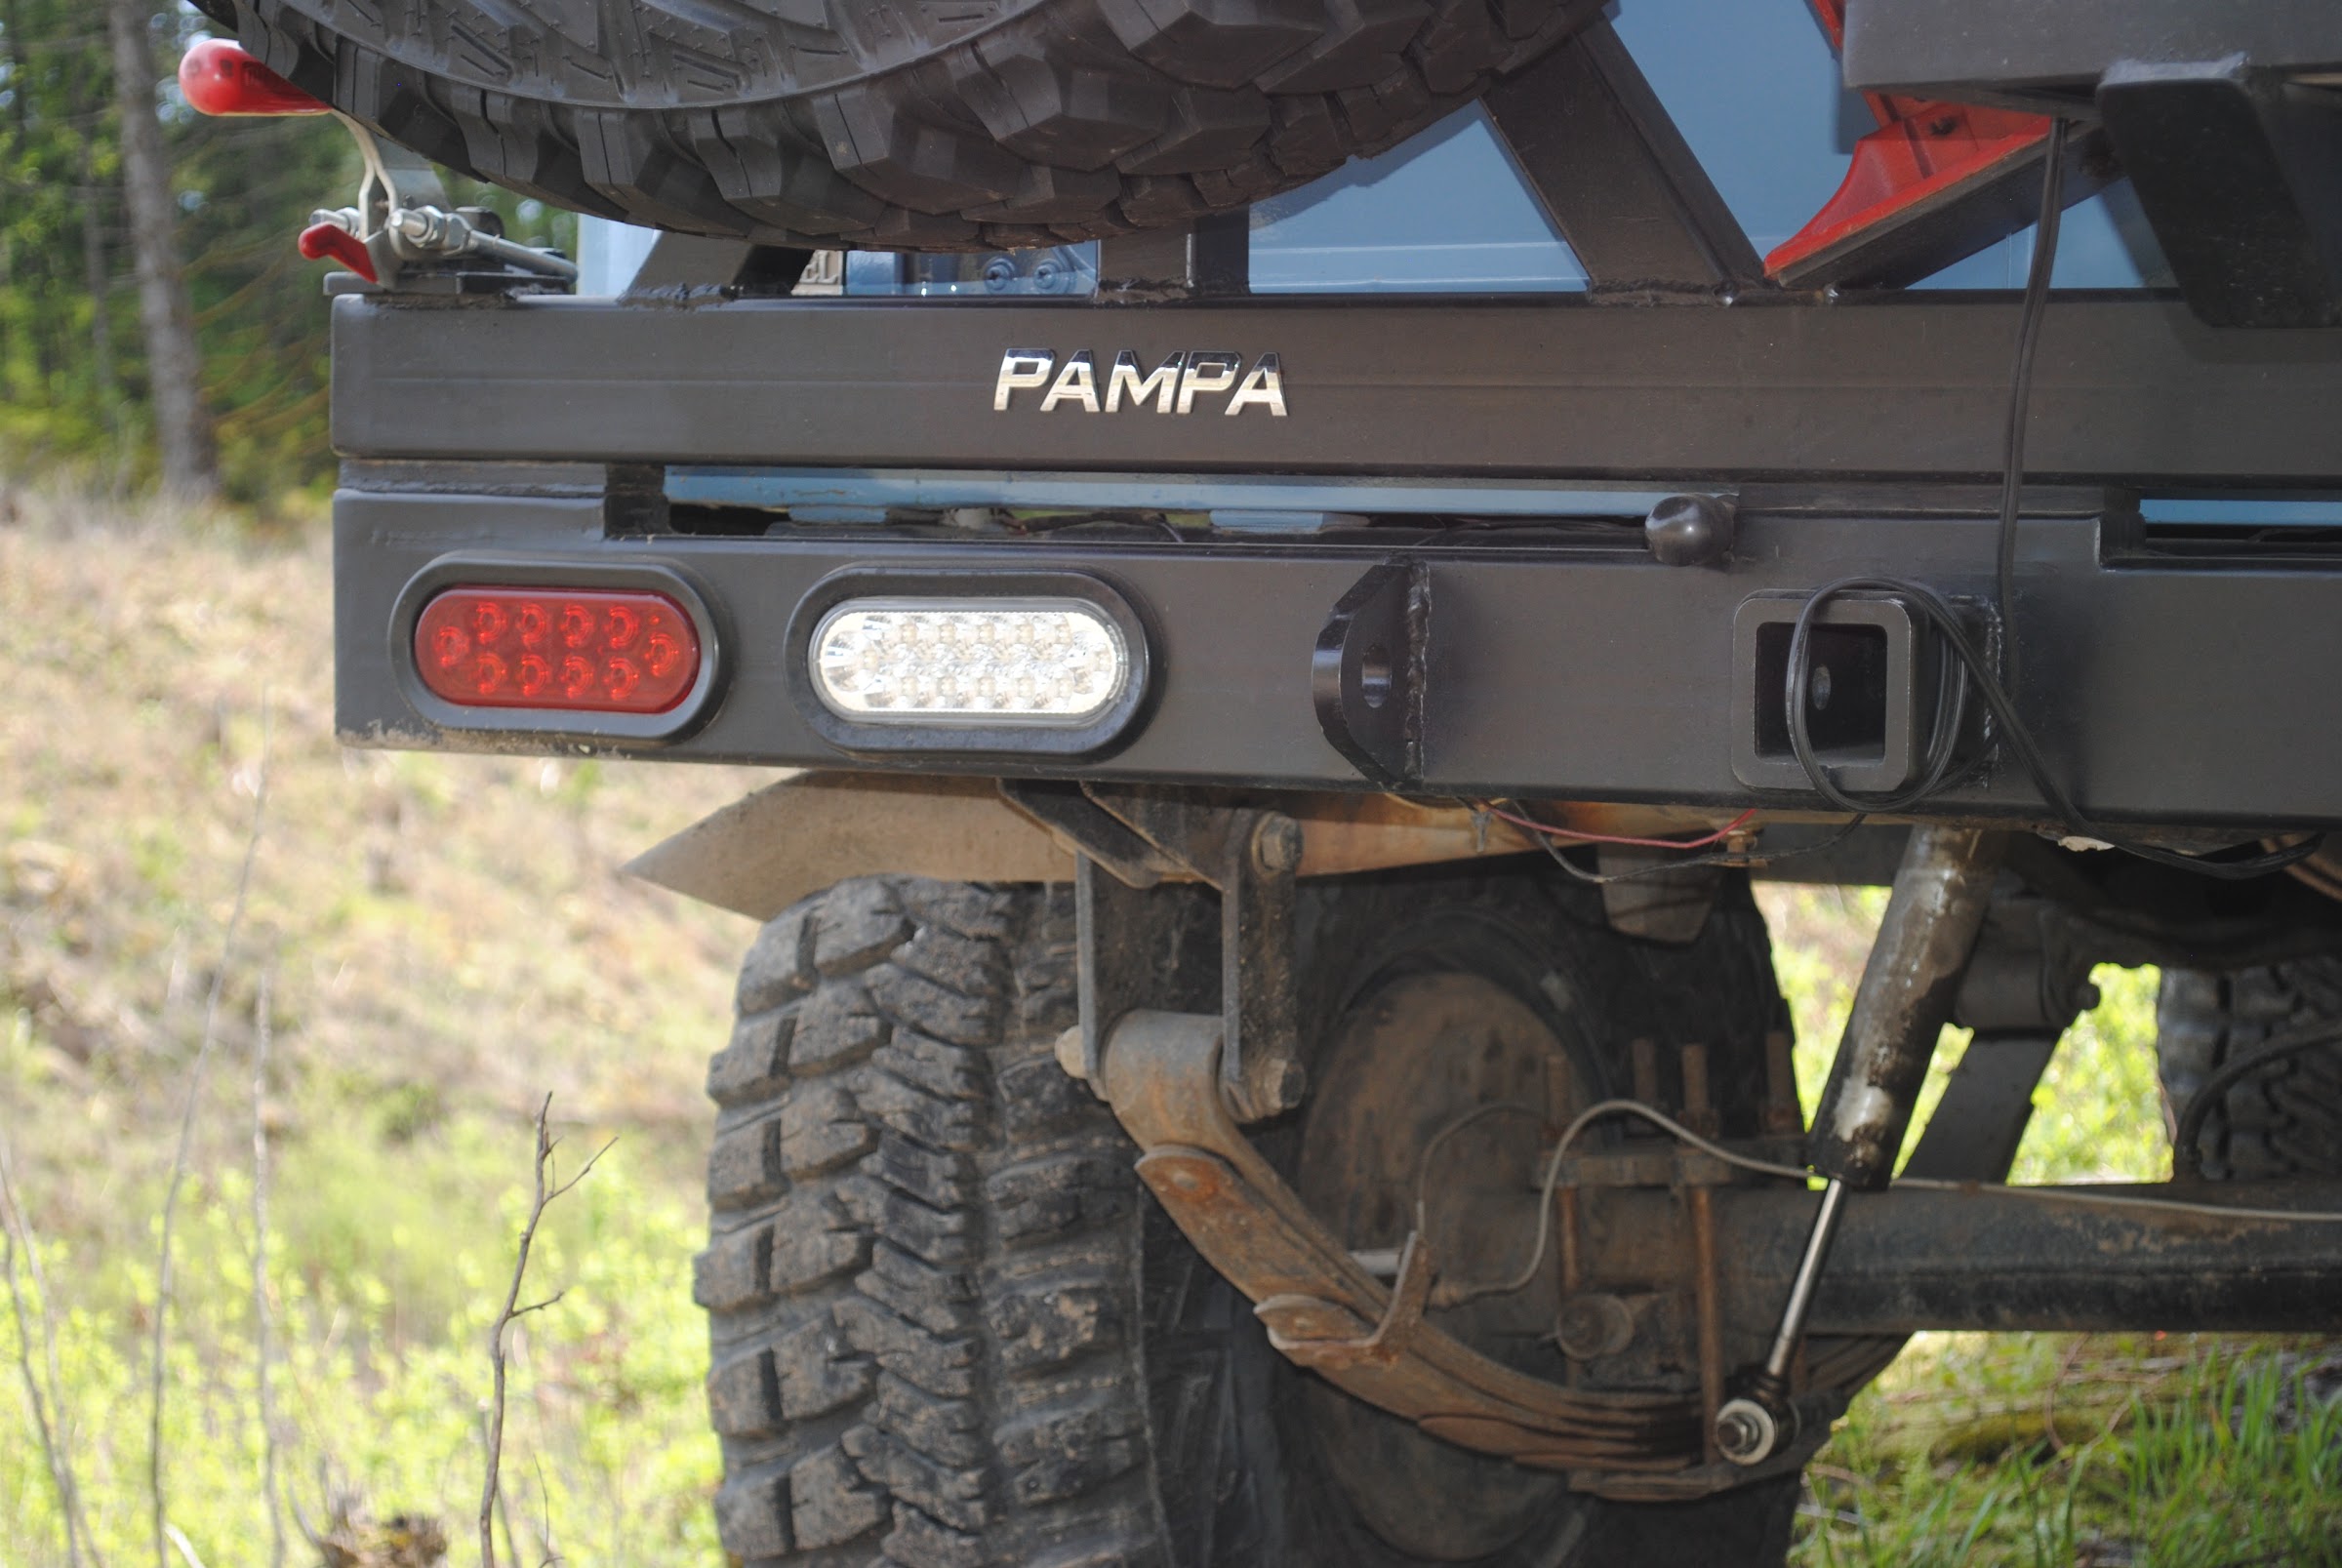
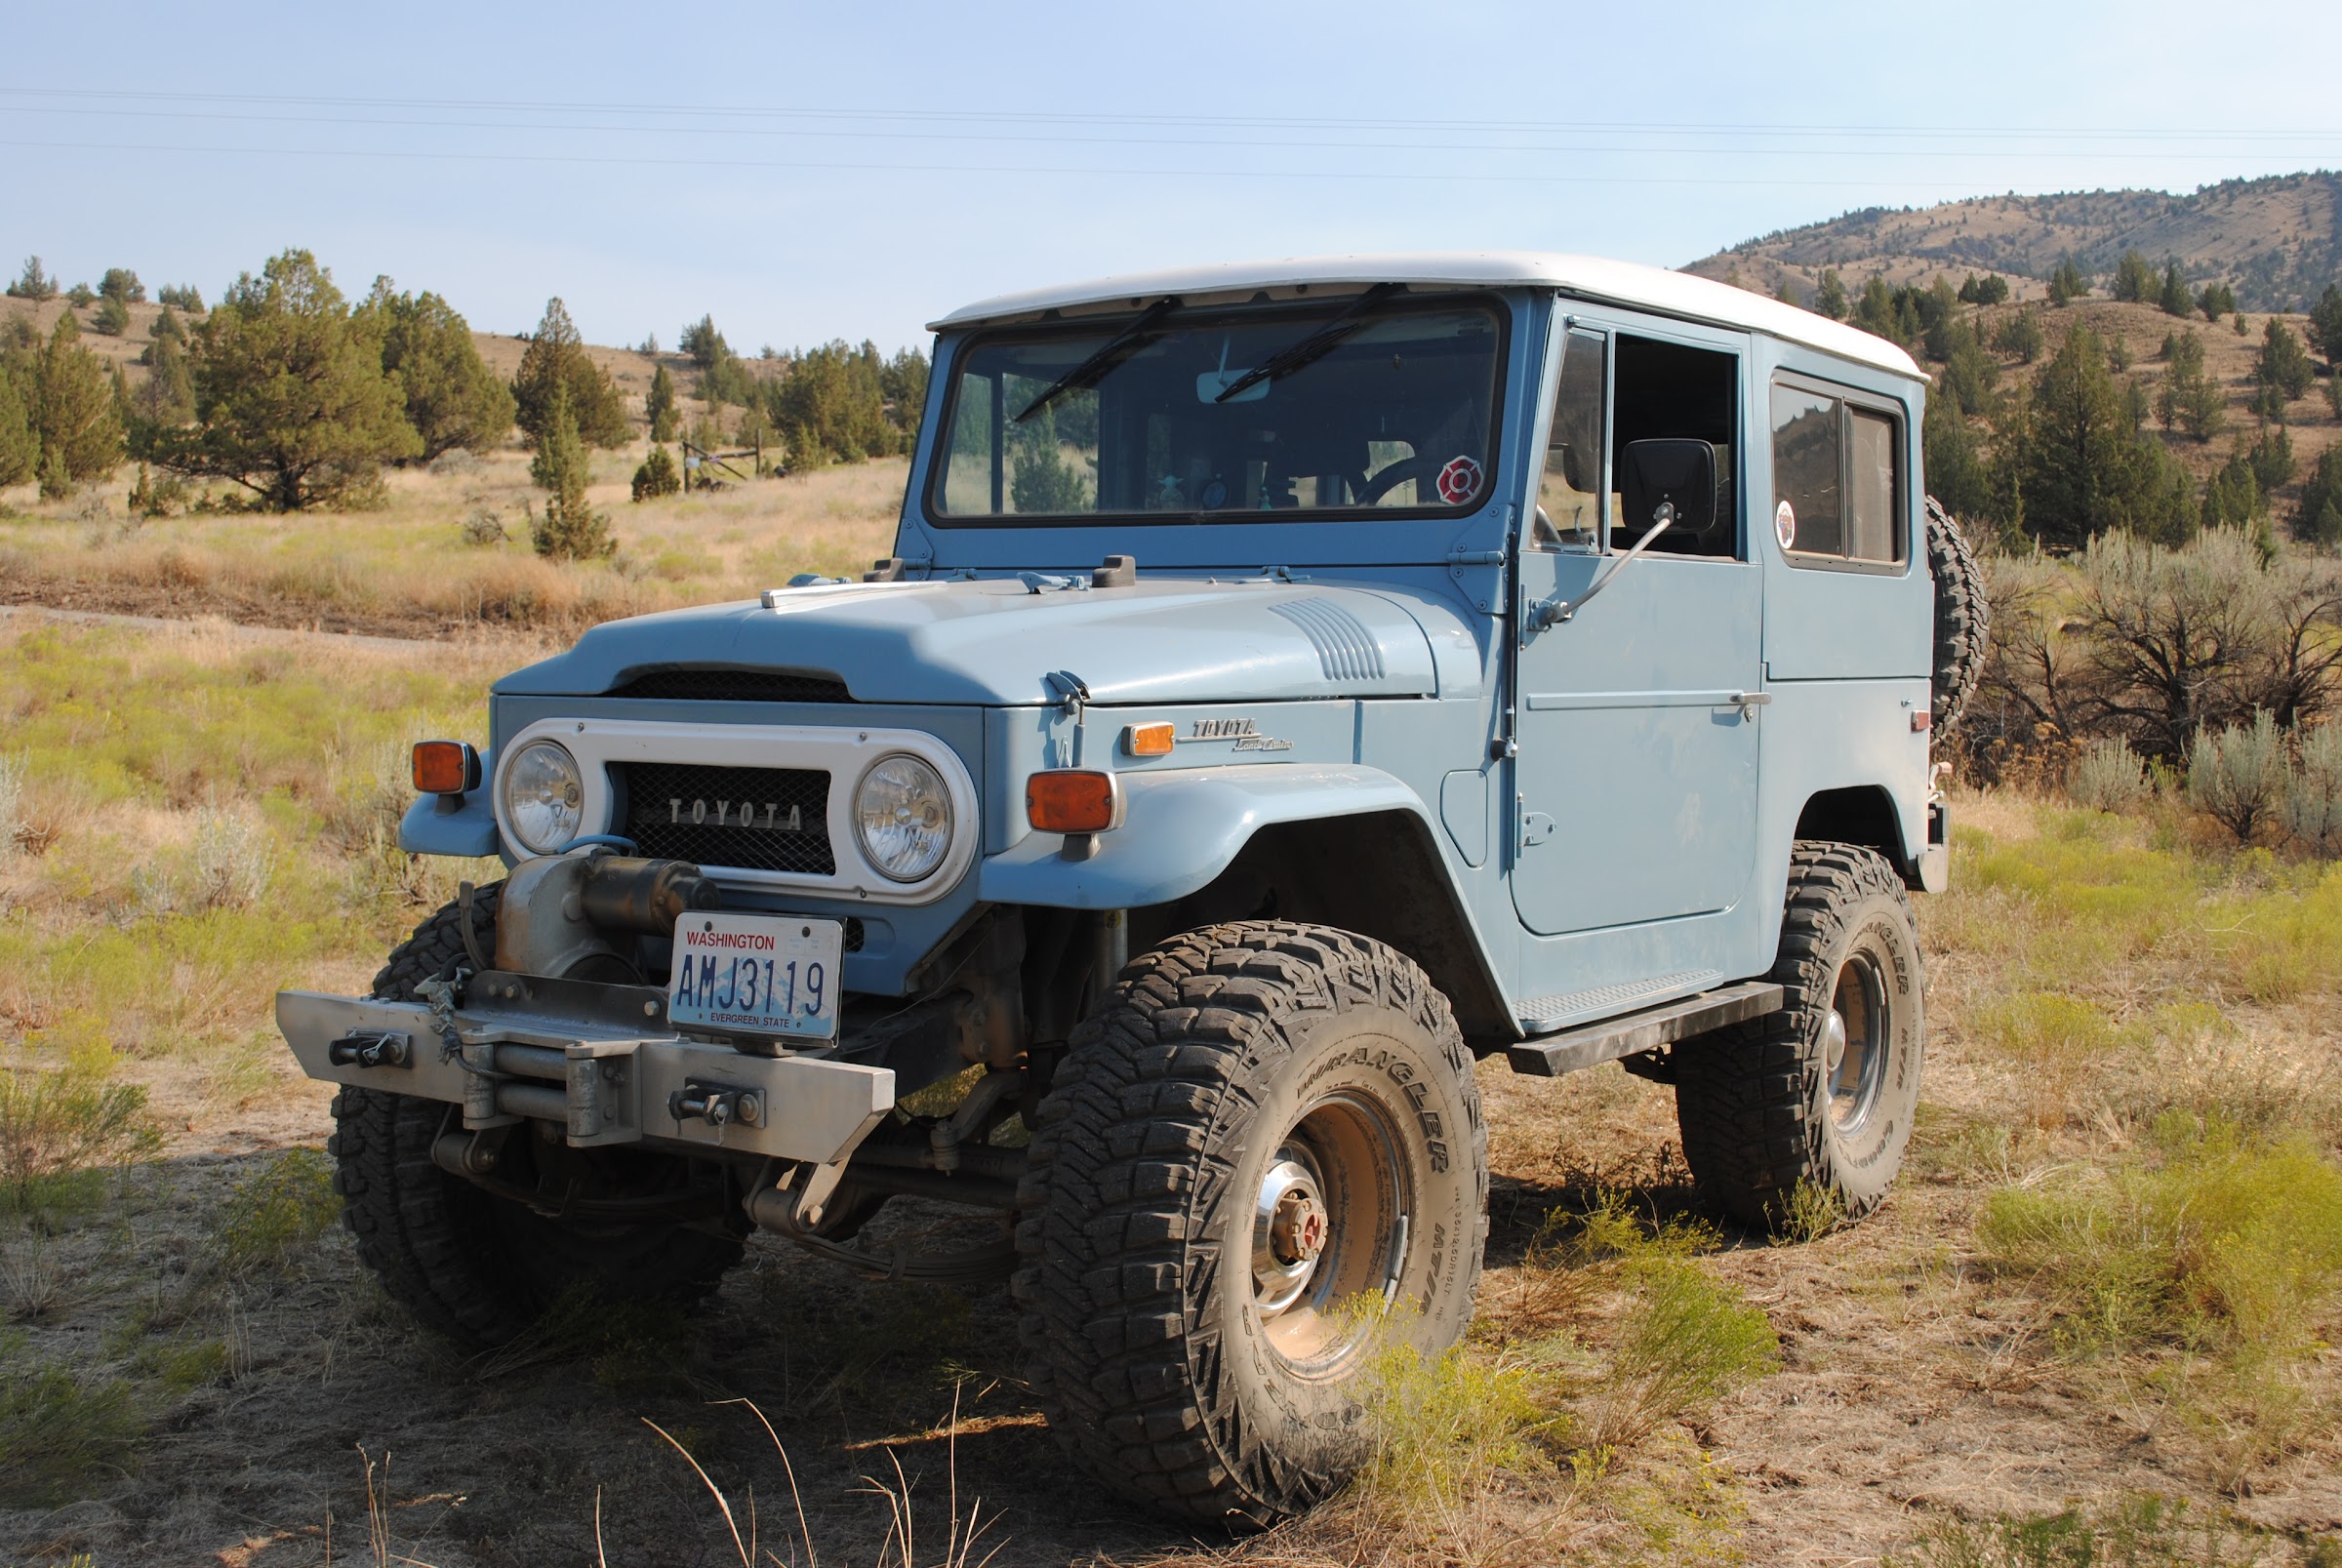
Oh, and here's a pic of what I'm putting that engine into.

TYcSP-W1omuyWznqOArUxmyiWJqmN8ZaKhQN81qYsXqY8kl_hdWguAyr7aQn5FxUctLQA3QcI0D0p1W6WJPVQi0i5wUpVOjlGfBASUBoFJs6iTjV8aNopz4_FJFsup4lT1zR7cg2Ww=w2400
 
First off, I tore down the engine and resealed it. I should mention, it is a 5.3 LM7. I added a RV/Towing cam while I was in there.

x-fiF4YsqOR0fvJM-qxhbFady1vvcyoPD39DuhoRWhb33oppZtF9J9yCTnK5ahAJbqZMrNA9AfSVs-zmLnhK6i8g6NS1ApxfKEoeLW1OGIV6qcL8iNebW2xfXiTDRfoHGDx_4yGCoQ=w2400


After ordering lots of parts from various manufacturers and suppliers, I put the engine back together.

NNjRQFyOwQL4wt-DWHqIEPAII7Z544sY0UhOQxS6z3IsMnxR3Xp5ocd4tPNhfyOw8Tw8fbK_pgJsi69p5x8dOa0nsLrzkxMlfzQbgmb2Ly12wGBteYF7Y1DZtbtV24y8qHXwziJHjA=w2400


30mfHXVQ1LQTInUCHbilBPpa4XtENgSwca89EE5T53v18FeTS6BeBa7a2VFYSvP8O-03JZDfpYSK2JxK6FErXHcCpdPDd8-k0Q-yhkHOiwAYZQyICXToHYOokKCYPwWY7_eEbN6Puw=w2400


I had heard that the LM7 oil pan was too deep to fit a 40, so I ordered a new Camaro oil pan and bolted that on as well.

Once the engine was done, I turned my attention to the transmission. Again, Mr Jits convinced me to rebuild the tranny myself. Why not. I'd never rebuilt an auto tranny before, so I watched youtube videos and bought the manual for a 4L60E.

MkaVWxrXJpN7_ISqSg2DDw8rs2EORlhqMNYI9RQm45NckMA9cMV2zjHchyhP6T6rLnwanjz_938_WaZ4PU4ZrjxBkCon250VNC6H4VbV12OaOT1-cAEpwt7dK5NaxGXDLTTPdImv3g=w2400


Yeah, there's a few parts inside the case. Unfortunately, I made it to this point, and my dad passed away suddenly. This is how the transmission sat for about 3 weeks while I dealt with family issues.

Luckily, I was able to get it all back together.

SEQTjsty4YMlZOZtsAKz63T_m2zuxwthnmS-eDDVcPrnd_F7rEnrn4_8TkBFiTtoX4ceQ63Zg3iE2EBTNYIcnYCAuXgp5Te0Xj_1ge-ofX-fwf5NfyECR8imJ-yqISGubZlHaYcgHg=w2400


The only major hiccup was finding a bearing under a paper towel when I was cleaning up. I had to tear back into the tranny and figure out where I missed it. It was a pain, but I'm glad I found it. And yes, in the picture above, the transfer case adapter is on sideways. I just had it like that so it would sit flat on the table. I fixed it before bolting on the t/c.

However, at this point, I had no idea if the transmission would work. You always hear horror stories about auto trannies and rebuilds, and this being my first one... well, you get the idea.
 
With the engine and tranny done, it was time to put them somewhere.

A7XZEF6YzDeieh8zHlb1bIxjSh6GJNja96VRN57-7mgyNX1pGhuAx73Yc3BcJJU3-3PwISaUj276_Mo92lFj0ZEailofDG42bdrTyfda7TKx2_UF2z3SCmd9UM2VQUk_-jGXB_Ee2A=w2400


Ugh, what a mess. Wiring is one of my least favorite things to do, but this mess will eventually get cleaned up.

adERQ8O4MffSiKScQsXsdXk7VJCt1nFbeCsgGNVutYEvXY-fcqmGrA48ljUfjnrQr7RJpNfXgwRN8-kb_LDz1s-PrZIHHp9sHZZIeUeE9HiyLh77po7oENj8RS56CECZ5iSUGwl35g=w2400


With the old out, it was time to go in with the new. Three friends showed up to give a hand - Brokenparts, Boots and Lorax gave up a beautiful Saturday in early March to help install my engine.

JMia8IrG0x5RYuB53jl9NjCoR7CiAM1opZ084HgOHb1LyMhnuUgpPrAvZQoVnJ4xifjm4R65d-I4dC5xYLbnBlQ9xX8W1lq0q663LzrOSmZ9RWdQ6Br4LrPn2b08EuPAjk91EbJzhg=w2400


We put this

Ym7yC9O80-QThEo-n7Q-dAl94YafvdTHZARVIN9Pw3joNVVcZ6BMkzDGp8Z1GkPBYOFF6YRZW9gQny_mfsmaFQCpnYufrfGpDkf4DxnBi0i5LVlpEzU-LDf5Ks7yvfr8800WCB8OxA=w2400


Into here

V9rAKPSH-wk-mggCAIm4oZS6M6pgMSwWVXVl5gs58EJpoh2nTAHeB6B6uFKGkYeLGuBtQEwCgamV4OtSfsYPEurNwGLxabafTITQUURXLmGOBdd12TrskIH3hEv3T8tGXLwUPfrYfQ=w2400


By the end of the day, the engine was where it needed to be, and the motor mounts were all welded up. Thanks guys!
 
Next up was dealing with all the little things that nickel and dime both your wallet and your time.

I built a transmission cross member/support brace. I don't like it and am going to replace it soon with a better design.

_JmldrJW_A7mgcaRSvLEfnqfSmksfyRm2PyD5jFch5GcBhjpQdcKjvlUS3PoVN7mNp57mHTM9HoVd03EzZ7AmEahHPi2Q3IW8eKqpBTPFknEGU16PCAvyQhlaMjtnMaFrELqPD8kxA=w2400


My radiator didn't line up at all with the fan.

dF9WEGLuRojf8ajS6QvkwGmrdRXQOitS6WS8cFOW1gjWlgxhI72FKYuUNxrEkoyb2L00ZAGs0TRx-gkPq6-Fj_a2wZNX820BMt1XYw93deiCfj8FBrUtQhXL-4Z73JBMr9RExT0TzA=w2400


Rather than screwing around with getting the radiator positioned correctly and building a shroud to fit the fan, I bought an electric fan.

laFYAT21woDsC6Afbt55ne5TW7YicSslSqOWdQhSfNAHRCWg-TNPYMW30EQsYCKfhhMn9mJEXIp81rrd3H4a_z-yhfkq3cDc418llK8EIjld20CLdVT02AixIFjv-3uwtgK2M6hEqA=w2400


It's a lot easier to build a shroud when everything is sitting on a table.

mxBGLKVwESglSbvrc8ArBHdbRV9lBKkvldVyH-QojTyoRYXIBFmPSowIW8iPwv1hSe63VZpAdNk5KRHLUiTsgLF0G3OA9ueeGrzTzB16xtwgz5JhgneF8U49viryb_6y_ZaQ3glI2g=w2400


It fit with room to spare - albeit not a lot of room.

ka4you39e2gt0BUmcUvcNdEyts2g19iUUvoVkeo9ix6HtzFUL7Bt2mMupCL3OzRdBd-A9nsmMveUmRy2_kTS8tC3tKA4rxv4y3oD4lSsybbcY6yYPVkHz30gr2tvxF7Jxaky9jLyiQ=w2400
 
I had my engine harness gone through and the PCM flashed by a local company - EasyEFI Solutions - Home. They were great to deal with and had a great turnaround time.

Plumbing was next on my list of tasks.

Coolant plumbing was a lot of trial and error, but fairly straight forward.

elRa17VhSori8jIMdZrkJpDivGptwetyiNYe3j0HJm7YkE295QOxtAVkcvxHTEY9ScWTXLSZr0I065oESx_irNJbRHEUGg7nIRB_K3g0_UDgq2Vyz2uOyXdI2RVLs9HHxEZypCATEg=w2400


The one thing I don't like is the flex hose. I really wanted to find a molded hose that would work there, but I finally gave up after multiple trips to the auto parts store and online searching. If someone has a hose that works, hit me up! I used the Jags that Run adapter to plumb in the steam fitting.

You can also see in the above picture that I installed an air intake. It was just a Spectre kit for a GMC truck that I managed to squeeze in there. Most people, it seems, put the intake on the passenger side. I wanted to put my battery there, so I went up and over the alternator. And yes, there's enough room to close the hood.

gHXZd7OQjLvWa5IaUFyjye8SX6ZTefjri-LlYnjsKO9F0en5cq1hRecJguaBsPSH0emJI4e5fZkjca44jZk9hsBHS0JLEqefXD9kRYdyi7hEej5SdzqdWg05pw89vysrBGTYarI0cA=w2400


Speaking of the battery, I built a removable frame for the battery box.

4qy-XS-boq9nUtcZ1nwBhVB6kEK-AyIMHmMlCjGfGs1mG9gAaGT4Uwb_hYc9a4lgxZPl-mDELoxICJsHtb0Y68cBqGPibrX7lberYa96oWDx5UWQ_8ZBSUjUNCWcNNStEipKVkGtxg=w2400


I also added a transmission cooler. There was no room to plumb it in front of the radiator. I ended up stealing Reddingcruiser's idea and put it under the hood. While not ideal, it will hopefully work. According to Reddingcruiser, he hasn't had any problems with the transmission overheating.

t7-eSWq_28UVXgQWwGxpbNf4jkPdyk3Hj5oDxcKVt6Eym7Qvgt-YGUkk6nsJbjcBAiKnSugc4H7MrtnU1uzGeaKJ4BQt4bnXVk__Ai6REJqr82ezEAVQUtQOr0mWmBz1v_eKZ_mcoA=w2400


The final touches under the hood were to build a bracket for the PCM and fuse block. You can see them on the driver's side fender.

-fXxP9DJdvzBU_ZrYhs5sdOrm183XkUsJ_q6S-esD2zBZXDuhwauCAefwkUVvyGG59oFmITZ_v93Xhv_sgZgbnAtdG3TvBlaTcTNf8qUMKY72IoHijF4xbqOuntRqebDJbxCBn1NpQ=w2400
 
I had finally made enough progress that I was close to firing the engine. First, I needed a few things. I had open headers, so I welded some O2 bungs to a couple of 90s.


2Vs2FCWRPa4NUqrfe1O4G5IdIFuyQHTKiVrhd6kuL8E0NRLxqz1BtcTBqyol_KQdWE5nlXxQzfyLTAEvEMPGnNWVAQKnPmWky--QP8vlf1_Xr9gJfqn82C8SpZVtFKUDin27MpgybA=w2400


I also needed some gauges. As much as I like modifying things, I still really like the vintage 40 look. So I added cheap Auto Meter gauges to the stock cluster.

1k3hKhlA5Gd8AEJNDVx04ZDO6vqbjLhv3M8haAxVTUkb48Guv_z6pAWJEFUJ1U98EWe6o3m08tOUP0y4sUYABzx1FRT5SAc1xlJpP5GCAuicW8RZCY1j5Lh2KtUGv3kXIStKPQ7z-Q=w2400


At this point, I was ready to fire it up for the first time. It was about 11:00 on a Friday night, and I made my son take a video. I'm sure the neighbors loved the open headers.


It started, but I had no oil pressure reading on the gauge. It didn't sound like it was starving for oil, and I assumed it was a gauge issue. But I didn't want to risk it and shut down.

The next day I plumbed in a mechanical gauge and it showed this when I started it up.

EDsVckV3c94wb29q1a_RkO6JFxk7BXLQnBNjmWFWhXOiIp7-_UiiA7XBio9Q4R2_3MsZZP_XWPWdnXGsirhWuaVzyBX5j666VK9OuTTNVtgVC9LmQjq-LSmXCoVsWs-FE4hKzPR8WA=w2400


That made me feel a lot better.
 
after owning 8 land cruisers, I'm certain they only come in blue or tan. I figure eventually I'll see one of the two blues I owned in Portland or 3 tans on here. Clearly it couldn't be yours, but first glance it had me curious.

Love what you're doing with it - I get preservationists but I'll never understand the trolls (and there have been a few here too) who think you're supposed to build the rig to their tastes.

how long is your rear driveshaft?
 
how long is your rear driveshaft?

Short. Which leads me to the next part of the story.

I had a 4" suspension lift. Once the engine, transmission, adapter, and transfer case were installed, my rear driveshaft would have measured 17 inches flange to flange. While that "may" have worked, it was too short for my comfort. On top of that, I have never liked my 4" lift springs. They were too stiff and didn't flex like I wanted.

Short story time. A few years ago, a group from the local club ran the Rubicon. I spent way too much time with a tire in the air. My articulation sucked.

nG2zivR3m8vQIsuy_MdxGUNTu_LU-UmNzuiS4wKr0K6pozxnpgYyxhRe8znpXn_aZwqHbHWk6QyrTMlNXbz4wz1vB2nBWSrQL2pwAPPkzs5osNt3Thf4fqHbPdnxtFAwQt5_Lapr5g=w2400


So, I decided to kill 2 birds with one stone. An SOA on flipped springs would help solve both problems.

XRZ6n3_yi1aBh838n3JPYZ7gNjdJggH1u0yowHHXL1fLzgpcqEXrMp-3OK8k3ypG4iepKzQqlCO5AkmvkJs0OUd5gDh4F6AQRmF5Ib30sWLNaFcoKnxN-f6bu40M77vEeRAG9snfkg=w2400


Flipping the rear springs got my driveshaft length to 21 inches! While not great, it's a lot better than 17. Yes, I could have pushed the spring and shackle hangers back even further. But, as I said before, I like keeping things looking somewhat stock. Case in point, when I went to 35" tires a few years ago, I added a couple of inches to the wheel well. I wanted to keep the stock appearance, but I wanted to fit 35s without rubbing. This is what it looked like.


hJcO54cNinrhkODD1Q6GWubPVTU_A8hdQKTWV2BeNz9YwvYTUjYxgIRak5kSVkJD_B3-H7VTfb4L0DPzWG1l0wS98FBcSTHc_ROJxI34qeM8ZfRAGvvUVFpI7uwAVr09eQL3gJOHTQ=w2400


Pushing the rear wheels back will probably require me to do this procedure again. The tire is no longer centered, and I don't want to tear up the sheet metal.


idAqwC7NrgVQAK9KdwwKIOAF46bxOLobHbpwFsQmIsWcz2zpQ6fd-9vGHeJVVfTn0yE3kjZMndvr9hP5pHm7XHVzsv6I107LLVw1T3vBNAzQqw-phz1WIhRmoBd3nBWSWLh4ZsXcaw=w2400


This brings me to my first question. When I flipped my rear springs, I didn't re-drill and flip the second leaf (military wrap). I understand what it is for. However, most modern springs, let alone aftermarket springs, don't have a military wrap at all. How important is this? Am I really playing with fire by not flipping the military wrap to the fixed end, or is it more "just a good idea"?
 
With the rear SOA done and a rear driveshaft made, I was getting close to a first drive. I installed a B&M shifter between the front seats.

Sbyzq7hInXDrNzTrQl4DXrolmauIRMeL6ZSEwLfd96xlVioQfkp5ScN8Abi4GWbIdVqHIv31TL_MJS_uedZCMOtFibOBlYpVfoqsLY-PkC33RvmdmmK2xVTgNtyhK6mQUnCbiFe3Vw=w2400


Time for my first test drive. Once again, I made my son film it. I didn't know he was filming, so feel free to skip ahead to the 1:15 mark.


In the video, you can see a couple of cherry bomb mufflers clamped to the exhaust. That was simply to "appease the neighbors" until I get an exhaust built.


I learned some things on this drive. First off, I had the check valve on the brake booster flipped around backwards. Autos are hard to stop without power assisted brakes. I did get that fixed right away. But, as it turns out, I didn't need to worry too much. My transmission wouldn't shift out of first gear. After some investigation, I figured out that I forgot to add the spacer on the 1-2 shift valve that came with my shift kit. That 3 week hiatus in the middle of the build came back to bite me. But, it turns out it was a free and fairly easy fix.

Co7PUzzD5-Np7vDiMnB5CXDLrjahc1LdYTH_96PkSk_d2Gaadg0-Xzcc4t8jxD7phAbip-eEmHheDEOho36Myx736rqYzrq5SlkL51-Ig_rK9A3ke_Vumnzo-kMm2K5Kz7ilIPEjbQ=w2400


After putting in the spacer, my transmission shifts beautifully. Crisp, firm shifts, but not harsh at all. At this point, I'm extremely happy with the results.

I should back up a bit. I did have to trim the transmission pan a bit to get the front driveshaft to fit. Even then, I was worried about clearance.

yORKL98MdZTD5qptJJChWUrcaIR08QsIr5YaLLKTtoZSJ3v7j2M2vmPaM75M3yWtg-9IPHROraalEUkB_d5qSzMzj1NBAgNlNkryMNTX1O2n9XySr9vm5nkoPrmCjKmMFP2sQrOomw=w2400


That goop is JB Weld. It does wonders sealing up the pinholes left from welding.

I bought a long travel slip shaft from Cruiser Outfitters, but the U joint wouldn't clear the pan. A little massaging with a ball peen hammer took care of that spot.

Gt0nIPKLh86ZI2EfVic1FgRa3_bbiRYYX6D8mHeEJ9-2_yn2cd0S0lxyI4phzRZCZP-qhWPewDtEhv1i7kbMEcc8HqHCXz3e0m6iuDmVFkoltpWbh3KF-ntQOAW03J5G-4LqYMNUiA=w2400
 
This brings me almost up to date. I still need to get pictures of this weekend's projects. The front SOA is done. The steering is done'ish (there's a story here, but I'll save it for when I have pictures). I went for a 10 mile drive yesterday, and I'm still smiling. This thing has power to spare. The guy that tuned the PCM estimated 340 hp. Even if he's exaggerating, I should still have respectable hp and torque numbers. It feels plenty powerful enough, especially when coming from the stock 135 hp engine (that was most likely down to 100ish after 47 years of use).

I still have lots to do to finish up. Here's a short list:

Finish up wiring
tranny cross member
skid plate
trac bar
exhaust system (I really do hate loud exhausts)
possibly body work the rear quarters
possibly new tie rods
Install a passenger side step so my wife can get in
And tons more little things that always crop up
 
I've broken enough springs to consider military wrap to be mandatory - does Benz Springs still do custom springs? last time it was $70 for a pair of FJ40 springs to my spec (granted it was a couple decades ago).... of course, now I'm running coils. I did the open the wheel well bit.... I went a whole 5 inches - 2 1/2 front, 2 1/2 back and life is good with 38.5s.
 
Short. Which leads me to the next part of the story.

I had a 4" suspension lift. Once the engine, transmission, adapter, and transfer case were installed, my rear driveshaft would have measured 17 inches flange to flange. While that "may" have worked, it was too short for my comfort. On top of that, I have never liked my 4" lift springs. They were too stiff and didn't flex like I wanted.

Short story time. A few years ago, a group from the local club ran the Rubicon. I spent way too much time with a tire in the air. My articulation sucked.

nG2zivR3m8vQIsuy_MdxGUNTu_LU-UmNzuiS4wKr0K6pozxnpgYyxhRe8znpXn_aZwqHbHWk6QyrTMlNXbz4wz1vB2nBWSrQL2pwAPPkzs5osNt3Thf4fqHbPdnxtFAwQt5_Lapr5g=w2400


So, I decided to kill 2 birds with one stone. An SOA on flipped springs would help solve both problems.

XRZ6n3_yi1aBh838n3JPYZ7gNjdJggH1u0yowHHXL1fLzgpcqEXrMp-3OK8k3ypG4iepKzQqlCO5AkmvkJs0OUd5gDh4F6AQRmF5Ib30sWLNaFcoKnxN-f6bu40M77vEeRAG9snfkg=w2400


Flipping the rear springs got my driveshaft length to 21 inches! While not great, it's a lot better than 17. Yes, I could have pushed the spring and shackle hangers back even further. But, as I said before, I like keeping things looking somewhat stock. Case in point, when I went to 35" tires a few years ago, I added a couple of inches to the wheel well. I wanted to keep the stock appearance, but I wanted to fit 35s without rubbing. This is what it looked like.


hJcO54cNinrhkODD1Q6GWubPVTU_A8hdQKTWV2BeNz9YwvYTUjYxgIRak5kSVkJD_B3-H7VTfb4L0DPzWG1l0wS98FBcSTHc_ROJxI34qeM8ZfRAGvvUVFpI7uwAVr09eQL3gJOHTQ=w2400


Pushing the rear wheels back will probably require me to do this procedure again. The tire is no longer centered, and I don't want to tear up the sheet metal.


idAqwC7NrgVQAK9KdwwKIOAF46bxOLobHbpwFsQmIsWcz2zpQ6fd-9vGHeJVVfTn0yE3kjZMndvr9hP5pHm7XHVzsv6I107LLVw1T3vBNAzQqw-phz1WIhRmoBd3nBWSWLh4ZsXcaw=w2400


This brings me to my first question. When I flipped my rear springs, I didn't re-drill and flip the second leaf (military wrap). I understand what it is for. However, most modern springs, let alone aftermarket springs, don't have a military wrap at all. How important is this? Am I really playing with fire by not flipping the military wrap to the fixed end, or is it more "just a good idea"?
You'll absolutely want to flip the milwrap to the fixed end. I bent two springs terribly (shocked they didn't break), and had they broken, I would have had some pretty bad times on the trail.
Have you planned an anti-wrap bar yet? Artec Industries Radius Arm / Anti-wrap / Traction Bar Bracket
(I prefer this over the ruffstuff bracket. I think I have the tube from the ruffstuff kit leftover. You're welcome to have it.)
Also, I don't know if you've seen my transmission crossmember, but I used the belly skid from IPOR as my base, and built in a transmission crossmember. I'll also be adding a mounting foot for the rear of the atlas that will be integrated into the skid. It gives a relatively flat belly, and offers protection for everything (I did have to extend the front of the skid to protect the pan of the 4l60e).
 
Last edited:
Glad you are continuing to document your build. I've been wanting to know where you are at. That's awesome that you're on to the test drives! Now we'll all have to keep up with you on the hills.
 
Simply the best color landcruiser out there, although I'm a little biased. Very cool build, I love the originality with the modern touches. I did the same swap in mine, the only thing that is the icing on the cake is the orion.
 
You mentioned rebuilding your 4l60e...if relying on hindsight, would you do it again or pay for someone to do it for you? I've got a new 4l65e that's a 2wd that I need to be a 4wd and have tossed the idea of selling and buying a 4wd or swapping the output shaft myself.

Super build btw!

edit: also - what specific headers and motor mounts did you go with?
 
Last edited:
I've broken enough springs to consider military wrap to be mandatory

You'll absolutely want to flip the milwrap to the fixed end. I bent two springs terribly (shocked they didn't break), and had they broken, I would have had some pretty bad times on the trail.

Well, you both talked me into it. It really won't be that hard to yank the springs out and flip the military wrap.

Have you planned an anti-wrap bar yet? Artec Industries Radius Arm / Anti-wrap / Traction Bar Bracket
(I prefer this over the ruffstuff bracket. I think I have the tube from the ruffstuff kit leftover. You're welcome to have it.)
Also, I don't know if you've seen my transmission crossmember, but I used the belly skid from IPOR as my base, and built in a transmission crossmember. I'll also be adding a mounting foot for the rear of the atlas that will be integrated into the skid. It gives a relatively flat belly, and offers protection for everything (I did have to extend the front of the skid to protect the pan of the 4l60e).

Thanks for the offer, but I do have a Ruff Stuff trac bar kit sitting in my garage. I have not yet installed it. I have not seen your belly skid system. I'd like to take a look and get some ideas.

Simply the best color landcruiser out there, although I'm a little biased. Very cool build, I love the originality with the modern touches. I did the same swap in mine, the only thing that is the icing on the cake is the orion.

Thanks! An Orion was in my original build plans. As I started hemorrhaging money midway through the build, that was one of the things that got nixed for the time being - the other being a Dakota dash. We'll see how the funds are holding up when I'm nearing the end of the build.

Ready for steering beef?

Yes! That was the story I referred to in my last post. I ended up working an OT shift today, so I wasn't able to get pictures like I was hoping. Essentially, I ordered some weld in bungs and made a "temporary" tie rod and drag link out of 1.25" .120 wall tubing. I would very much like something beefier that I know you can make.

You mentioned rebuilding your 4l60e...if relying on hindsight, would you do it again or pay for someone to do it for you? I've got a new 4l65e that's a 2wd that I need to be a 4wd and have tossed the idea of selling and buying a 4wd or swapping the output shaft myself.

Super build btw!

edit: also - what specific headers and motor mounts did you go with?

Thank you! Rebuilding the tranny really wasn't all that hard (certainly not easy, but it isn't rocket science either). Watching the youtube videos and having the manual on hand made it doable. If you can read and follow directions, you can rebuild a tranny. Yes, there are a lot of parts and a lot of steps. My biggest problem was dismantling the tranny and then waiting 3 weeks to put it back together. If I could have done it consecutively, I think it would have been a lot easier since things would have been fresh in my mind. On top of that, if this tranny holds together {knocking on wood}, it saved me about $1800 doing it myself. A local, reputable tranny shop quoted me $1800 for a basic rebuild, or $2800 for a rebuild with all the upgrades (making it a 4L65E). I sourced all the upgrades (5 pinion planetaries, clutches and steels, and a shift kit), rebuild kit and torque converter, with a few specialty tools for right at $1000.

Headers and motor mounts are from Advance Adapters. Since I bought a lot of parts before hand, I wanted to make sure that they would work together. AA's mounts and headers are nothing special, but they do work together just fine.
 
Another quick question. What's up with my starter? In both videos you can hear it struggle to start the engine. It's even worse when the engine is warm. When I tested out the engine before buying it, the starter turned over fine. No issues whatsoever.

I have a 2/0 positive cable to the battery, and a 2/0 from the starter case to the frame. So, I don't think it is an electricity supply problem. Is the starter going out? I've never had them go out like this before. I'm hesitant to plunk down a couple hundred bucks for a new starter if it isn't needed. The only thing that is different in the engine is a new cam and matching valve springs. I wouldn't think that would cause an issue with the starter, but... I don't know. Any ideas would be appreciated!
 

Users who are viewing this thread

Back
Top Bottom