
I didn't have any problem getting mine from Cruiser Parts but shipping took a little while because they have to wait for it to come in from Toyota, or at least that's what they told me. Sounds like you got some stuff the keep you entertained in the interim.Good stuff, @lcolon -
effing ToyotaPartsDeal.com just sent me a notification that my order for the insulator plate was voided because the part is NLA and/or back ordered with no timeframe for delivery.
Shoulda went with Cruiserparts.net to begin with as it was a $6 diference in price. Just placed the order with them. Hope I don't get the same news from them in a couple of days.
Navigation
Install the app
How to install the app on iOS
Follow along with the video below to see how to install our site as a web app on your home screen.
Note: This feature may not be available in some browsers.
More options
Style variation
You are using an out of date browser. It may not display this or other websites correctly.
You should upgrade or use an alternative browser.
You should upgrade or use an alternative browser.
Not Needed (hopefully): Over-priced Machine Shop with experience resurfacing 2F intake/exhaust manifolds
- Thread starter Rusto
- Start date
This site may earn a commission from merchant affiliate
links, including eBay, Amazon, Skimlinks, and others.
- Thread starter
- #82
I hope it doesn't take too long. I don't want to be down for more time than I have to, but I don't plan on doing this job twice, either.
- Thread starter
- #83
Some progress made this weekend, in between camping in the back yard with the kiddos, knocking out a big chunk of my honey-do list and generally, not getting as much time to work on the cruiser and I had wanted.
Apparently, my local dealer says he can get the insulator plate. Should come in tomorrow. Cruiserparts.net hadn't picked up the order yet, so I canceled that, and hope they are stand by their return policy. There is a 10% fee for canceled orders, but getting this timely for about the same price from local dealer will be a win. About 75% of thinks that the local dealer will inform me tomorrow that they were wrong and they couldn't source it, and we'll be stuck again.
I digress. jumped the other side of the engine and removed the push rod cover. Straightforward. Gasket came of the block easy, but stuck to push rod cover. This little tool is my gasket removing MVP, that's for sure. Can't recommend this razor blade holder / scraper more highly.
Got it all cleaned up and painted, ready to re-install tonight.
- Thread starter
- #84
The air rail injector nozzles, and the removal of the PO crap, had the potential to go south quickly. Thanks to three or four days of the nozzles soaking in PB Blaster, it went well.
Check out how badly rusted one of the stock nozzles is. I thought I was going to twist it off, but it broke free okay. The next two 'after-market' nozzles presented a different problem. There was absolutely nothing to get a wrench on. Crazily, the nozzle for the fourth cylinder was hand tight, so that came out easy. But of course the one for the number six cylinder, next the firewall, was tight. Queue the needle-nosed vice grips. Luckily, that worked and I was able get the all of the air rail nozzles out w/o any trouble.
Tonight - reinstall the passenger side, paint the exhaust manifold, clean and prep my "new" air rail and prep all the threads and bolts and such for assembly when the remaining parts arrive on Tuesday and Wednesday.
Last edited:
- Thread starter
- #85
Just scored a nice big, flat (4 ' x 2' by 1/2 inch thick) piece of aquarium glass from a neighbors bulk garbage down the street (it's spring cleanup here in Durango these days). That'll make for a good flat surface for my sanding/resurfacing of the manifolds.
Got a bird bath and feeder as well, but that's a story for another day...
Got a bird bath and feeder as well, but that's a story for another day...
- Thread starter
- #86
Right side of engine is now put together. Newly cleaned and painted push rod cover. Went ahead and taped off everything and painted the head as well, as mechanic that R&R'ed the head left it bare cast iron and it had started to rust already, of course. Took a lot of tape, but it looks good.
Plus, care package from @ToyotaMatt was delivered yesterday! my new exhaust studs and gasket are standing by for next phase and he was kind enough to include some random, much appreciated goodies as well. Thank you, sir! Order with confidence, y'all.
Last part is supposed to be here today. We'll see if my local dealer came through for me.
- Thread starter
- #87
Color me impressed. My local dealership found a part that I couldn't seem to track down online, got it here in a timely manner with no shipping of course, and it was reasonably priced. And now, I believe I finally have all the parts, tools, sealant, paint, etc.. to be able to get the job done... Right as my wife informs that I need re-prioritize and get the campers brake lights to work ASAP)... So close, yet so far away..

Good progress. Good luck with getting the manifolds bolted back up together again. Cross your fingers and do the cruiser dance that everything is straight.
- Thread starter
- #89
Thanks all.... Quick update. I was able to get the camper lights working pretty quickly. Both of the lights were bad, not all the wiring, connections, grounds, etc. that I checked first thinking that there was no way they could have both failed at the same time.... but $25.00 later and all is well. Of course, multiple other projects have bubbled up..
BUT, I was able to take @F226continental tip and put it into action. First, I connected the intake and exhaust manifold connected with the remflex gaskets sandwiching the newly acquired OEM insulator plate. First issue, though - with the new gaskets and plate, the stock length OEM bolts that go into the aluminum weren't long enough to get the threads started! Damn it. Luck would have it that I had two bolts that were 1/4 inch longer in my bucket of bolts that worked perfectly. Challenge overcome. Per the suggestion, I kept the bolts loose and attached to the head with no gaskets. It took some tightening and loosening and adjusting, but I was able to get it mounted and "flushed" it up to the head, nice and snug.
Then I tightened up the connecting bolts to Remflex specs (15 lbs). I consider the manifolds back together.
There is DEFINITELY some warpage that occurred. Looks like it's actually the exhaust manifold that is warped. I thought it would be the intake being that it's aluminum. Of course, it could be the warped intake manifold causing the exhaust to not seat properly... Anyway. Now it's time for me to take off the manifold, check for warping and resurfaces on sandpaper that's the been taped down to my thick, flat aquarium glass.
That'll be next.
- Thread starter
- #90
By the way, Cruiserparts.net DID cancel my order and return the money, in full. Quickly and with good communication throughout.
I'll order from them again, I'm sure, at some point.
And @ToyotaMatt provided real-time assistance that allayed some of my fears when installing his new tech manifold to downpipe gasket, studs and nuts. Thank you! Confidently order parts from them. I'm already building my next list of parts.
The support of this forum and the vendors that walk these walls is a legit reason why I love my Cruiser so much. Cheers, everybody!
- Thread starter
- #91
Update! - The manifold is as ready as it's going to get. I started out with gaps as large as .026 at the top edge of my exhaust manifold! That could have been a result of separating the manifolds or when I put them back together with two fresh gaskets and the insulator plate, but that's as close as I could get them by mounting them with no gasket loose, then tightening to spec.
I do like the table / aquarium glass and sandpaper glued down. Plus, i was able to put an office desk to work, seeing as how we're all WFH these days. It's one that adjusts up and down, so I was able to get it a proper height for pulling and pushing that manifold back and forth.
Anyway, the process was - pull the manifold back and forth for the length of a song, then rest, measure, drink some beer for one song, then back to it. Started wit 80 grit, finished with 220. Was able to get the bottom edges of the manifolds down to less than .008 (thinnest feeler I have), middle of exhaust ports to .010 (within spec) and to .015 at the top edge of 4 and 5 and .013 on 2 and 3. Not perfect, but I was worried about taking any more off. Considering the Remflex gasket says it's good out to .0625, I think we'll be good. I really wanted every port to be shiny and smooth, but I'll have to settle for this.
Notice in the pics how the bottom of the exhaust ports are smooth and shiny. That's where the leak was prevalent and I think that's been addressed.
I'd say overall, it was probably 30-40 minutes of actual sanding.
Used RTV Orange to keep the horns in place.
Table:
Looks good! I'm about to do this. Can you explain what you mean by "used RTV Orange to keep the horns in place"? That's the part I'm worried about, my horns swing pretty easily, and I don't know how to put the right amount of pressure on them to match the pressure of the weight of the manifold to make sure they all sand evenly. Maybe it doesn't matter if they are the same as the rest of the manifold because they do swing, and will tighten down to the head separately for the most part?
- Thread starter
- #93
@Borrego - I had one of the horns that stayed in place pretty well, but another one that was really loose. I applied the orange RTV to the loose horn prior to the test fit, and left the manifold on the head for 24 hours before I took it back off to resurface. I was careful to not push or pull on the horns directly during the resurfacing, but the orange RTV seemed to hold the loose horn in place really well. It was tip from another MUDder and I'm happy with the results. YMMV.
edit - I wasn't so much concerned with the horns sealing correctly upon install, more so the movement that would make it difficult to get the bolts started close to the firewall for the rear horn.
edit - I wasn't so much concerned with the horns sealing correctly upon install, more so the movement that would make it difficult to get the bolts started close to the firewall for the rear horn.
My local shop back when i had my 2f powered 60 did mine for 70 bucks.
NY prices too!!
NY prices too!!
- Thread starter
- #95
@mongoose2231 - I had a shop quote me $50, which I would have done, but it was an hour drive from here and his response didn't make me feel comfortable with his experience in re-surfacing the four-piece manifold. Then the Covid hit and I figured I might as well just do it myself.
U probably can do it fairly easily, like others mentioned. Make sure the .anifolds stay bolted to each other prior to resurfacing.
You might want to take a round file and gently clearance any of the holes that are now misaligned to save yourself some grief with installation. Just enough so you can test-fit a stud through. Happens when you put new gaskets btwn Int/Exh

- Thread starter
- #98
Good suggestion @Spike Strip - i was able to get the studs through during my test fit, but making it easier is a good idea.
- Thread starter
- #99
Progress, setbacks, more progress and a question....
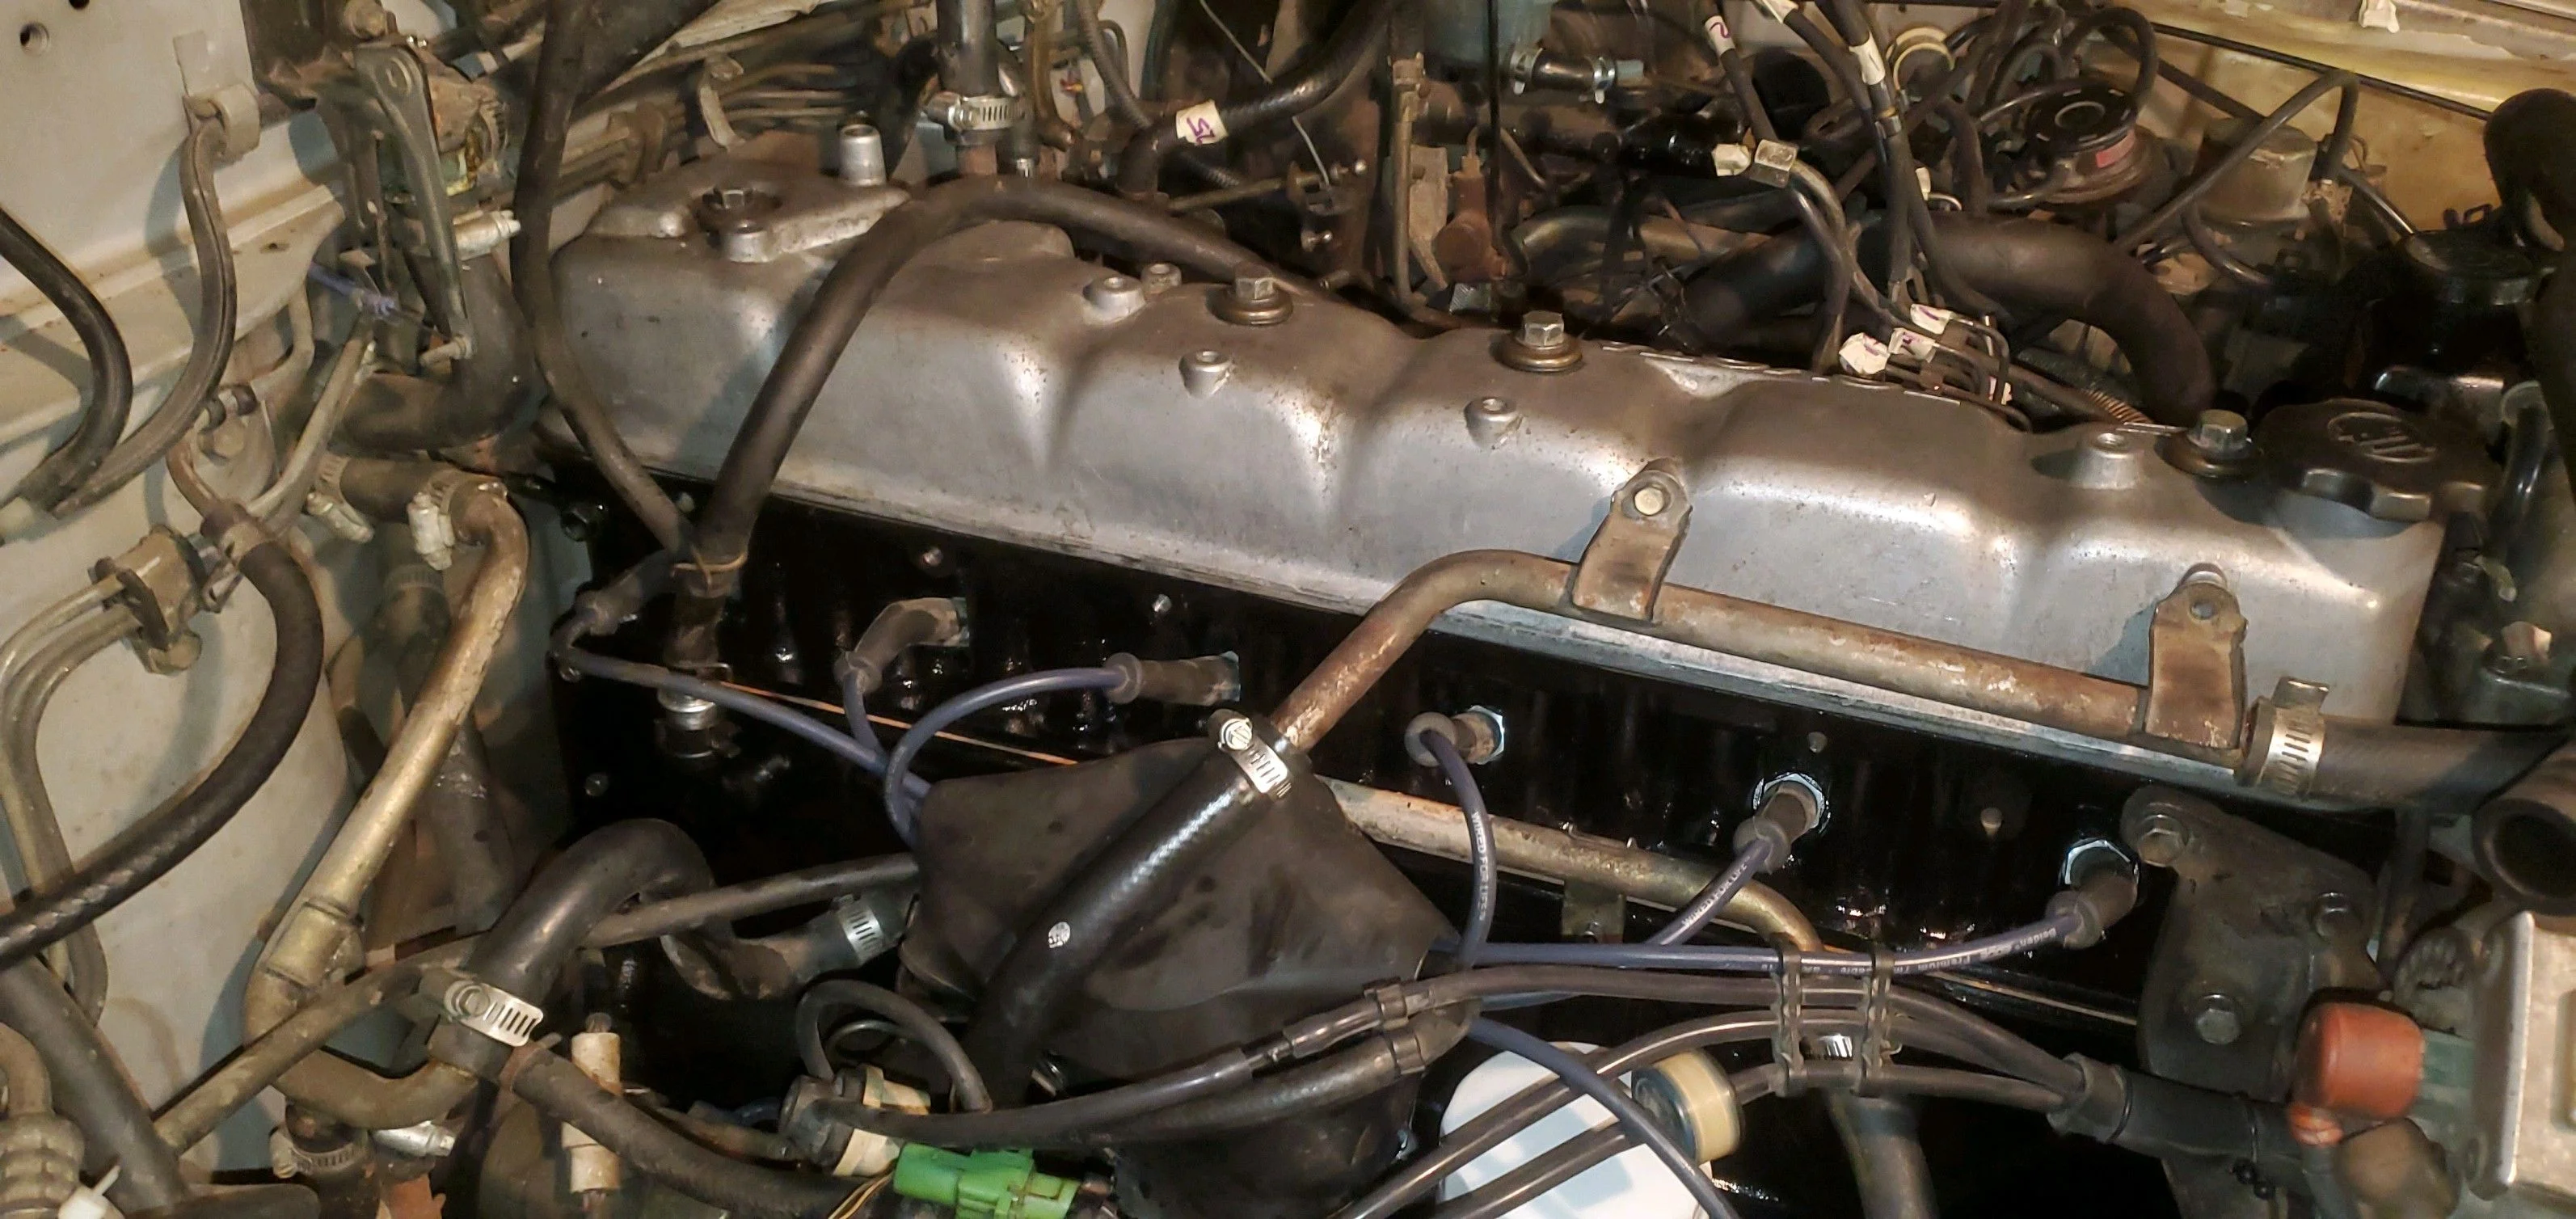
It's been a time of limited work due to many factors, but I have been able to get the manifolds back on the head. Whoop!
getting closer...
But then, when trying to get the EGR downpipe reconnected, the tube wasn't seated properly in the rear exhaust manifold horn and I bent the heck out of the flange. So.. off comes the EGR cooler (thank you PB Blaster) and I was able to heat up the flange, get it bent back and then applied some hi-temp JB Weld to the crack. I think it turned out pretty good, overall. And I didn't have to spring for the $OR stainless version.
Which leads to my question - are the OEM downpipes made out of stainless steel as well? When cleaning up the downpipe, it got all nice and shiny. But will it rust? Should I do a high-temp clear coat? Leave it alone and have it remain black? I like the idea of a shiny "new" EGR downpipe, but want to make sure I'm not polishing this all up, only to have it rust.
Yes, OE downpipe is SS.
I took my truck in a few years ago to have an O2 sensor bung put in and the muffler guy kept cursing about how hard the SS was to drill...
That pipe gets VERY hot. I don't think the JB weld will do it... You should find a replacement or have welded. Machine shop should fix it. Also make sure the stud holes in the flange have not 'mushroomed'. Use a ball peen and block of wood underneath to flatten if they have.