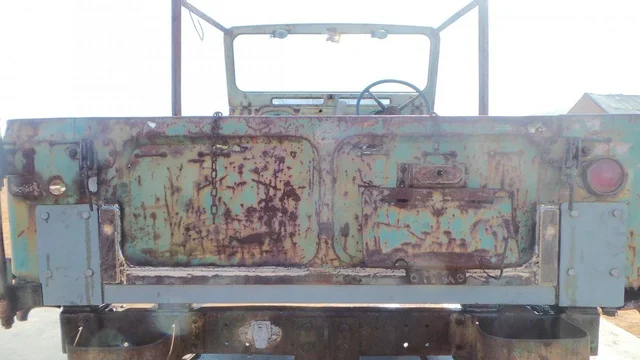
Look what I found.... 1961 FJ40 FST

This site may earn a commission from merchant affiliate
links, including eBay, Amazon, Skimlinks, and others.

the weather got very hot. a few thunderstorms threatened but the cruiser gods didnt strike us down with a lightning bolt so we continued. fabbed some plates to hold the rear quarters in 5mm plate. welded these to the 50 square

20150210_194009.webp


hard to see in above pic but there were a few wires and things holding this tub together. my brother is a carpenter b y trade and pretty meticulous. a lot of measure and remeasure went on. i held the dumb end of the tape. below is the new structural member getting a lick of rustproof paint atop the old structural member

20150210_201321.webp
 
thanks andy that would be great. i will take anything you cut out or parts you replace. can even pick up from your panel shop if you want; ive been meaning to get up there for a look for a time now. heck i might even have to drop you of a carton haha!
 
west. tell me something old mate. can you tell me why this rectangular plate here:

Screen Shot 2015-02-11 at 5.15.55 pm.webp


couldn't be installed in here:


Screen Shot 2015-02-11 at 5.16.07 pm.webp
 
Hi west aussie. This is a great thread and it's good to see all the recent progress. What do you know about that tow hitch? Does it have a particular name? I have the same thing on my troopy and I'm trying to figure out if there is a way to convert it to a normal 50mm tow ball hitch, without having to replace the whole thing.
 
84 troopy - sounds like you just need a towball with a long thread. we have a similar setup on few of our old work utes.

cult - because putting the plate there made west aussie happy!

20150210_202952.webp
 
ok i will get back to that plate a little further along.

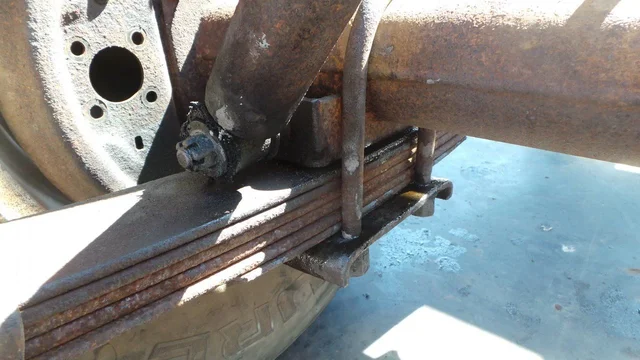
it was a couple days of teamwork; there was plenty going on. bumstein undid rear u bolts and lifted housing. the u bolt plates were belted flat on the anvil and rust layers between housing, spring and plate cleaned up. all replaced with a healthy dose of tar. one spring had a broken centre bolt and the leaves were shifting. sorted this. dunno if these springs are my final answer but they are doing the job within budget for now. having some structure made springwork easy; note the ratchet strap!

20150211_184452.webp 20150210_220047.webp

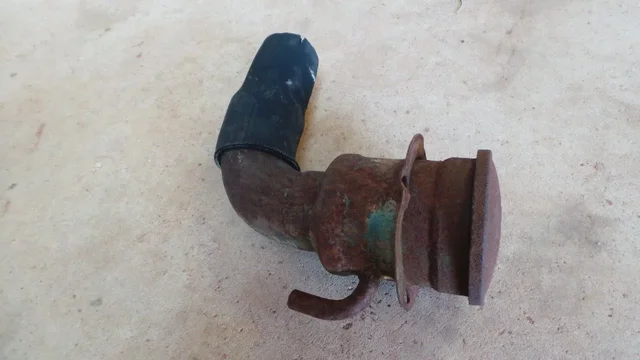
ground out some ugly po bolts and removed filler neck. needs a little straightening and a lot of gentle coaxing to get the cap off. check out the unbroken oem cap chain! (unclipped here)

20150211_184237.webp 20150211_184304.webp
 
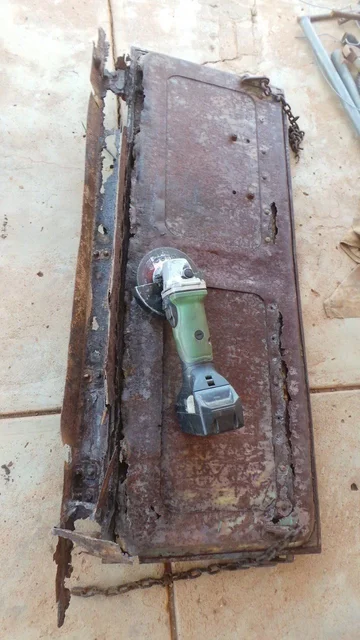
it was time to tackle the tailgate. this bad the structural integrity of about 24 horseshoes wrapped in alfoil as a flat package.

20150210_131816.webp 20150210_150259.webp

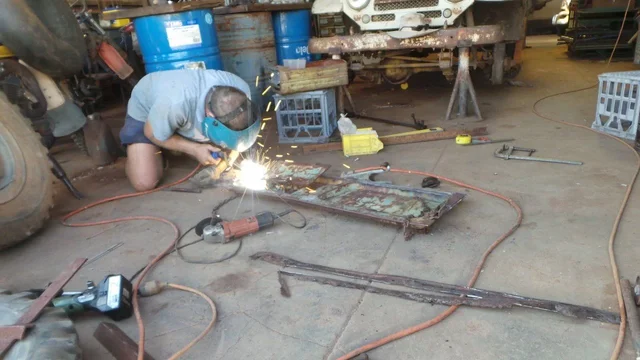
my brother got the hinges off and cut a slice off the bottom. replaced this with a piece of 40x40 angle. he's handy with a stckwelder; i could never have welded something so thin and rusty! next a piece of 4mm flat bar was welded up each side on back of tailgate. this overlapped the angle to give it some strength

20150211_184142.webp 20150211_184207.webp
 
test fit 20150211_192441.webp 20150211_192757.webp and fitted 20150211_213906.webp

ok cult, back to that 5mm plate. this gives all the strength at the rear because it overlaps the 40 square (not butted in) and is welded all 4 sides. as per plan we ran a little weld between this and the lower spare trye carrier hinge to brace this. we need to be able to carry a spare on rusty of course!

20150211_224209.webp
 
gave the fusebox and everything else electrical another dose of spray for the umpteenth time. its soon time to start wiring. and reaquaint rusty with a few bits stacked in the shed

20150211_184337.webp

and finally off the 'hoist'. HAPPY DAYS!!

20150211_222948.webp

20150211_222926.webp

20150211_215604.webp
 
it lives! well done! but i meant why not install the plates behind the body intend on the outside of it..?

what's next, get that F going?
 
knew what you meant cult, yea we coulda done that; but then our mighty resto work would be hidden! didnt really think of it. neither here nor there when you look at the project as a whole! that plate is 5mm thick so doing it like that would kick the tailgate hinges out a bit. also we sorta designed it to gently weld the bottom spare carrier hinge to the plate. this is a pretty easy undo if that carrier needs find a better home one day but happy enough with it for now. i might add that every metal on metal surface during this build is getting a good wire wheel clean and a coating of tar (for what its worth).

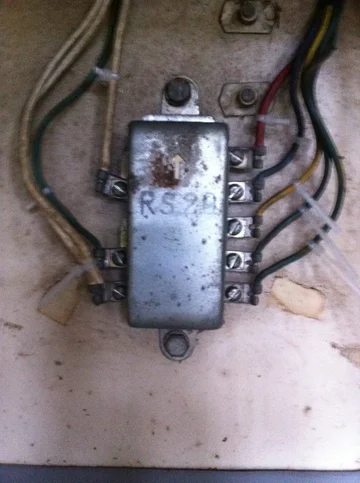
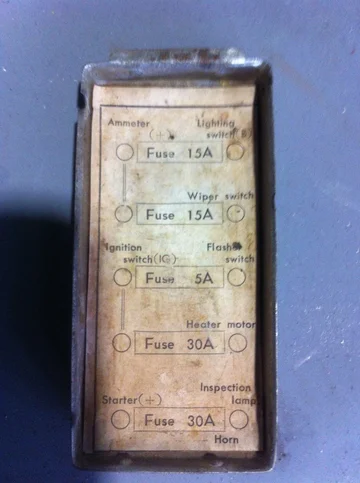
took a beer down to parts wreck no.1 (64fj45) tonight and pulled a few things; fusebox and accessory light plug among them. a bit of wiring is next; want to sort some under dash and bit of engine bay with room to get myself about before the motor and box go back in. anyways i got to geeking out over early fusebox variations and ran outa light. wondering if the later fusebox can be tweaked a bit and the mount holes elongated to fit through and under the old 25 style fusebox carrier.

wiring is not my strong point but its not the most complicated circuit; just hacked a lot. thinking maybe just a twist and tape patch job to see if i can get it up to speed then maybe try for something a bit more subtle and oem looking. need to do a bit of study.
 
Great posts WA!!! Been catching up on it this evening, some great pics and good write ups :-) giggled a few times and had to fill Channy in on the adventures!!

Great to see the fruits of all the work you've put in..

Keep it going until I get out there next, perhaps aim to take it for a drive on my next trip!!
 
i knew you knew what i meant ;) jeez you boys are going great guns here!
 
This ol steed is plenty rusty but it has a certain panache that can only develop from the kind of character building that put it in such a pitiful state!!

Even better, it now graces the pastures of the only bloke that would put in so much love and work to let this jalopy live again!!! It will get to rattle along many a dusty trail again :-)

Inspiring work Henry!!
 
kind words bumstein. yes she does have a certain allure in the flesh.

some treasure i pulled from parts wreck no.1

20150212_223340.webp

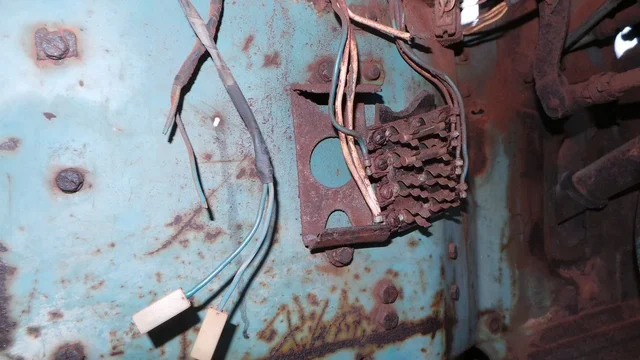
original fusebox on rusty

20150212_224458.webp

been having a quick look at fuseboxes. my fj25, rusty and proposed 64fj45 are all slightly different. (my 62fj45 fusebox is in deep storage and 63fj45 silverbullet doesnt have one).

anyone have a pic of an early fusebox to get me started here? will have a wander through some old threads. guess i want to see the configuration of the top fuse that has been bypassed; mainly if the feed side is supposed to be bridged to the fuse below it. i need to find an appropriate wiring diagram i guess. im a poor auto sparky!
 

Users who are viewing this thread

Back
Top Bottom