My grandfather was stationed on Guam with the Air Force for a few years. My Aunt was born there. Let’s get up and see how BA your truck is when you get home.Nice Bonestock, I’m actually working on the island of Guam right now. Hoping to get back soon.
Navigation
Install the app
How to install the app on iOS
Follow along with the video below to see how to install our site as a web app on your home screen.
Note: This feature may not be available in some browsers.
More options
Style variation
You are using an out of date browser. It may not display this or other websites correctly.
You should upgrade or use an alternative browser.
You should upgrade or use an alternative browser.
INSTALLING A SUPERCHARGER… AT 239k MILES… IN 2023.
- Thread starter TNFZJ
- Start date
This site may earn a commission from merchant affiliate
links, including eBay, Amazon, Skimlinks, and others.
More options
Who Replied?- Thread starter
- #62
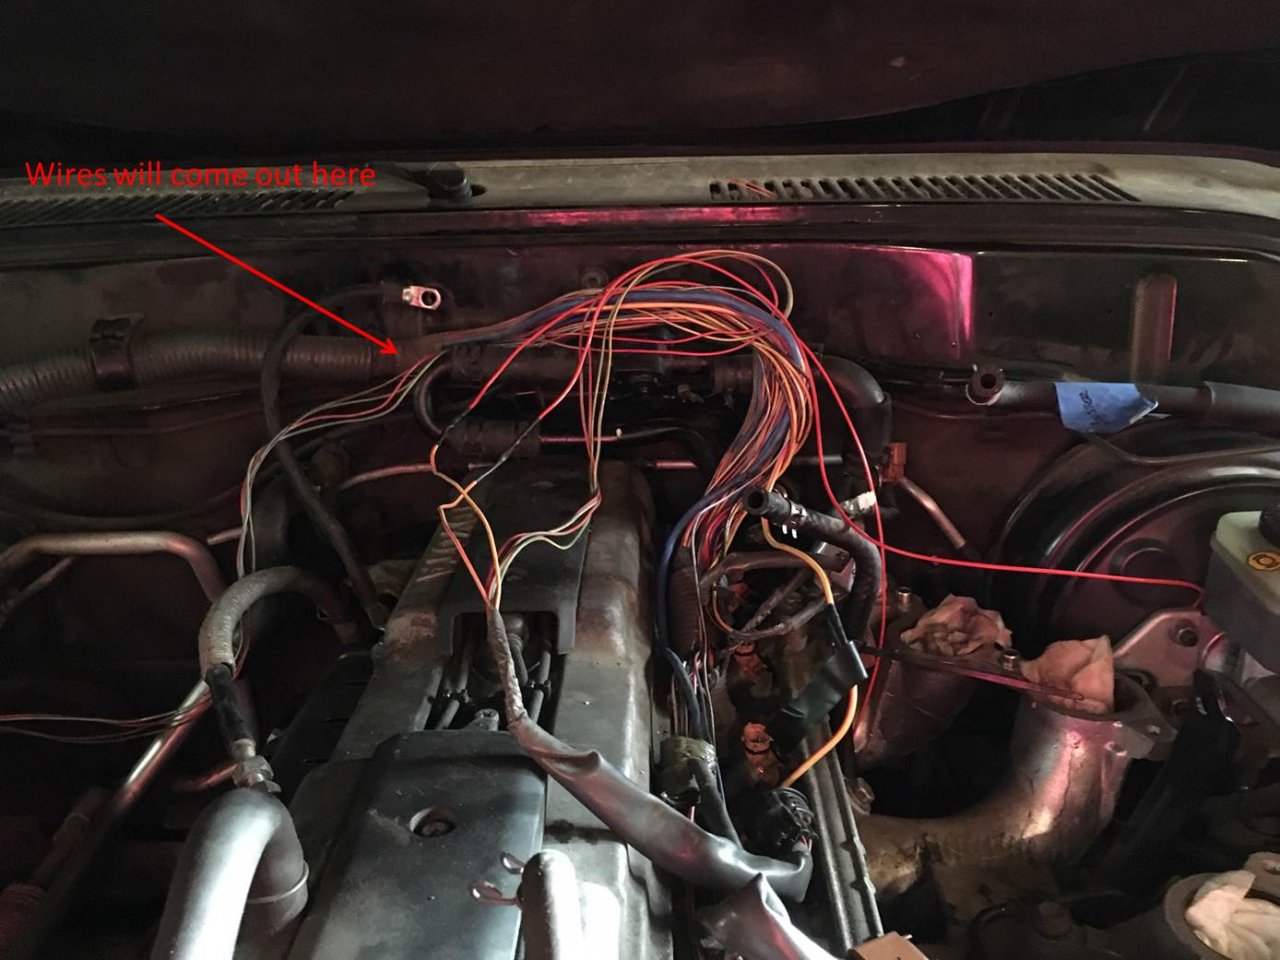
The supercharger instillation guide says to cut open the wiring harness to extend the connectors to the throttle body In its new location.
instead, my intentions are to create a jumper connection that will be plug and play.
Thanks to Richard Lillard on Facebook for this information and source material.


instead, my intentions are to create a jumper connection that will be plug and play.
Thanks to Richard Lillard on Facebook for this information and source material.
- Thread starter
- #63
Here is the tool needed for the terminals.


- Thread starter
- #64
- Thread starter
- #65
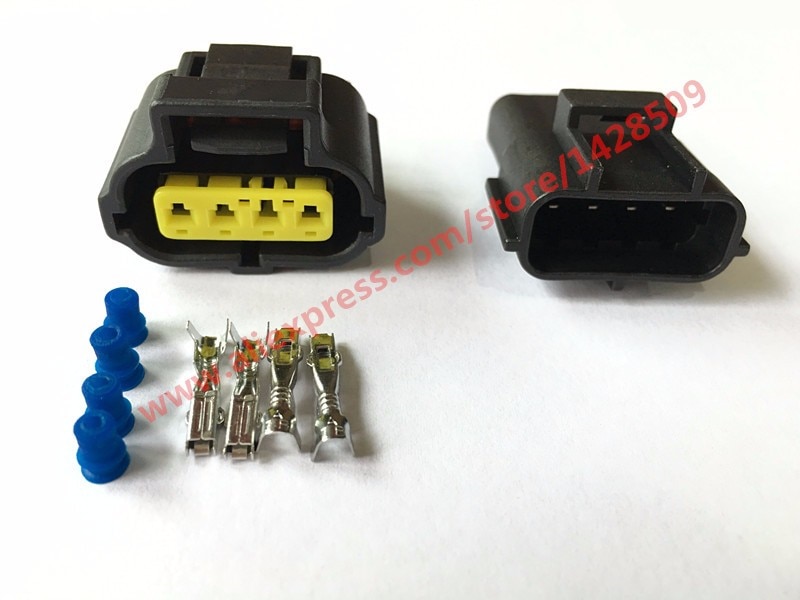
what are you extending? the TPS? best i can tell that is Toyota female sealed connector 90980−10711, which uses 1.8 pins, not 090/2.3 pins. Toyota repair wires are 82998-12620, which have the seals on the wires. Your pics show unsealed wires. but then you show crimpers making me think you are buying terminals, seals, and bare wire?The supercharger instillation guide says to cut open the wiring harness to extend the connectors to the throttle body In its new location.
instead, my intentions are to create a jumper connection that will be plug and play.
Thanks to Richard Lillard on Facebook for this information and source material.
just trying to help you avoid the wrong parts. i've spent too much time pouring through the Toyota wire harness repair manual. i don't know what facebook post you are referencing and you didn't post which connectors you are getting, so maybe you've got this all figured out!
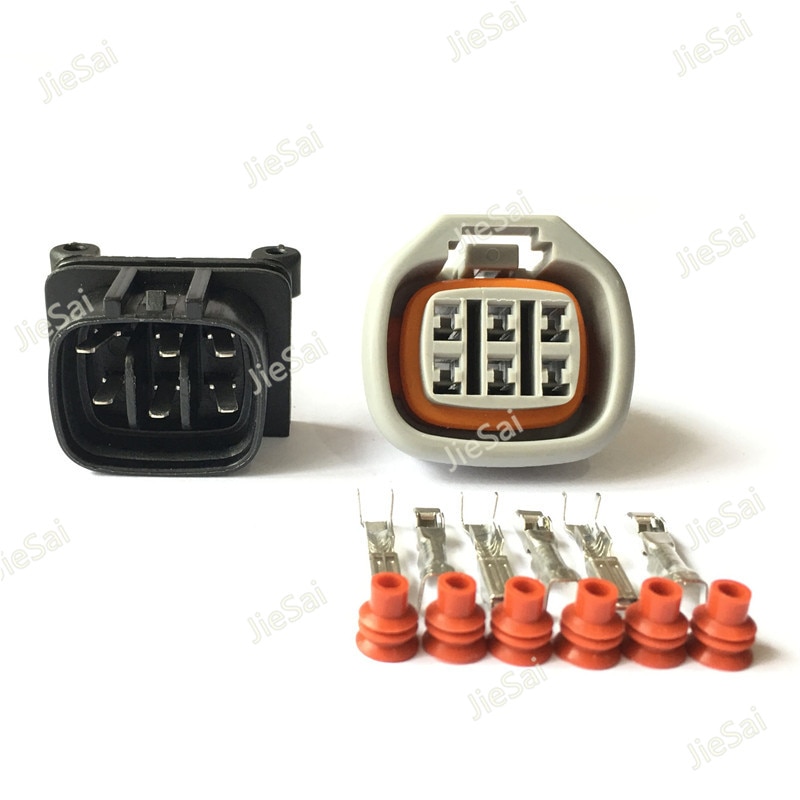
i think the IAC and TPS are the two? IAC does use 2.3II terminals with both male and female housings available. the TPS housing is only available from Toyota as Female, but you might be able to find a Yazaki (or maybe Sumitomo) housing that works. Same issue w/ the injector housings.
good luck!
good luck!
davidp14
SILVER Star
I've been following you on IG. Some very impressive work here!
Pierce
SILVER Star
I haven’t searched for a while for updates options but these worked for me
US $2.45 2% Off | AMP Tyco 4 Pin Throttle Sensor Plug 1JZ-GTE 2JZ-GTE 1UZ 3SGE TPS Wire Connector Female Male For Toyota 178399-2 184046-1
US $0.19 4% Off | Sumitomo 6 Pin 6189-0029 1JZ-GTE 2JZ-GTE IAC Accelerator Throttle Pedal Connector For Toyota Suzuki ECU ICM Ignitor
Here’s a short explanation as to how I made the male connections work. Been holding up fine for 20ish k miles now. The female was easy. I had to get creative with the male side.
They actually are. I’ve only done maybe 20k miles since install but it’s going pretty well. I had to change the way I attached the wire on the 4 pin connector (post #16) that hat the posts sticking out the back.
I initially soldered the wires to the post. The soldered joints broke after a few thousand miles.
what worked was crimping some more of the extra female metal connectors on the wire, attaching them to the posts and then soldering them on. Going for 15k miles or so.
These are what I ended up using.
US $2.25 10% Off | AMP Tyco 4 Pin Throttle Sensor Plug 1JZ-GTE 2JZ-GTE 1UZ 3SGE TPS Wire Connector Female Male For Toyota 178399-2 184046-1
2.27US $ 9% OFF|AMP Tyco 4 Pin Throttle Sensor Plug 1JZ GTE 2JZ GTE 1UZ 3SGE TPS Wire Connector Female Male For Toyota 178399 2 184046 1|plug wall|connector moldconnector jst - AliExpress
Smarter Shopping, Better Living! Aliexpress.coma.aliexpress.com
US $6.71 15% Off | Sumitomo 6 Pin 6189-0029 1JZ-GTE 2JZ-GTE IAC Accelerator Throttle Pedal Connector For Toyota Suzuki ECU ICM Ignitor
6.71US $ 15% OFF|Sumitomo 6 Pin 6189 0029 1JZ GTE 2JZ GTE IAC Accelerator Throttle Pedal Connector For Toyota Suzuki ECU ICM Ignitor|Connectors| - AliExpress
Smarter Shopping, Better Living! Aliexpress.coma.aliexpress.com
- Thread starter
- #71
Thank you for the kind words Dave. Stay tuned.I've been following you on IG. Some very impressive work here!
Might be over complicating this a bit. I just did mine a couple of months ago. I followed this thread from darkness to take the harness apart, splice two wires. All very clean, provides tons of length and is very easy to do.
 forum.ih8mud.com
Supercharger Wire Harness Extension
I'm in the (very long due to laziness, kids, etc...) process of installing a supercharger as I take care of various PM items. Right now I have the intake manifold off. I've replaced a lot of vacuum hoses, some EGR components that are hard to get to, fuel filter, and sent the injectors off to...
forum.ih8mud.com
- Thread starter
- #73
@freshspecbluegt
thank you. Good to know there are options.
thank you. Good to know there are options.
jfz80
Cruisin’
Correct in the IAC and TPS
6 wires total IIRC
Some folks have deloomed and rerouted the wires to avoid any cutting/splicing at all.
In 17yrs the only issue I’ve had with the blower were these splices. Twice. About 10 years apart. I used crimped butt connectors.
6 wires total IIRC
Some folks have deloomed and rerouted the wires to avoid any cutting/splicing at all.
In 17yrs the only issue I’ve had with the blower were these splices. Twice. About 10 years apart. I used crimped butt connectors.
Western union splice, touch of solder, adhesive lined shrink wrap = lifetime connection
- Thread starter
- #76
This will give you an idea of how I’ll connect the air intake to the main unit.
I have additional length on both ends that will allow me to fine tune the fit.
The elbow on your left is a reducer elbow. 3.5” to 3”.
The aluminum coupler is 3” by 6”.
All three pieces came from HPS Performance.

I have additional length on both ends that will allow me to fine tune the fit.
The elbow on your left is a reducer elbow. 3.5” to 3”.
The aluminum coupler is 3” by 6”.
All three pieces came from HPS Performance.
- Thread starter
- #77
Just in case, I have two style of the 3” inside diameter aluminum coupler. Both are 6” in length.
I’ve heard about fitment issues due to variances in outside diameter among couplers of different manufacturers.
Style 1 is from MRP Performance. It has a very nice machine finish and uses an undercut to secure the silicone hose. The prettier of the two.
Style 2 is from HPS Performance, the same company as all the hoses. It has a rougher “flat” finish. It feels lighter with thinner walls. It uses a rolled bead edge to secure the silicone hose.
- Thread starter
- #78
This is a 3” outside diameter mandrel bent aluminum 90° coupler from HPS Performance.
3” center line radius.
For the elbow connecting the plenum to the upper intake manifold I’m still deciding what to do.
Option 1: only use a silicone 90° elbow securing with 2 hose clamps.
Option 2: cut and bead roll the aluminum to size, add 2 silicone couplers on each end using 4 hose clamps. (The factory design)
Option 3: use the silicone 90° as option 1, but reinforce the inside with aluminum cut to size.
All HPS silicone couplers are 4 ply. I don’t have any evidence to support this, but I feel like it could handle positive air pressure passing from the plenum to the upper manifold.
To the comments about paint earlier in the thread. My powder coater failed miserably on the color match so I ended up going rattle can over the new powder coat. The rustoleum engine enamel in aluminum was a good match. In the pic below the supercharger is original paint and the plenum and runner were repainted.


Very nice work and excellent documentation! Someday I hope to have something boosted on my rig, this thrrad may come in handy. I'm just north of you in Sweetwater, maybe I'll see you in the wild sometime.
Similar threads
Users who are viewing this thread
Total: 1 (members: 0, guests: 1)