Once you have your Transfer Case all moved over to your new motor, and have done all of the LS motor prep you are planning to do, and you are sure you have done all of it... Seriously, do as much as you can to it while it is out of the truck. It will save you a lot of hassle.
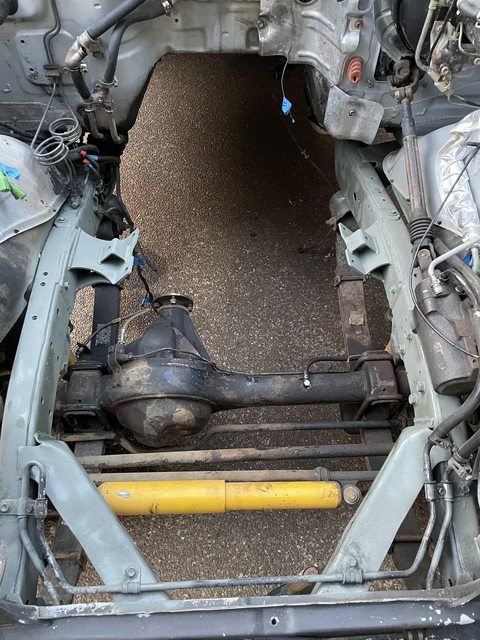
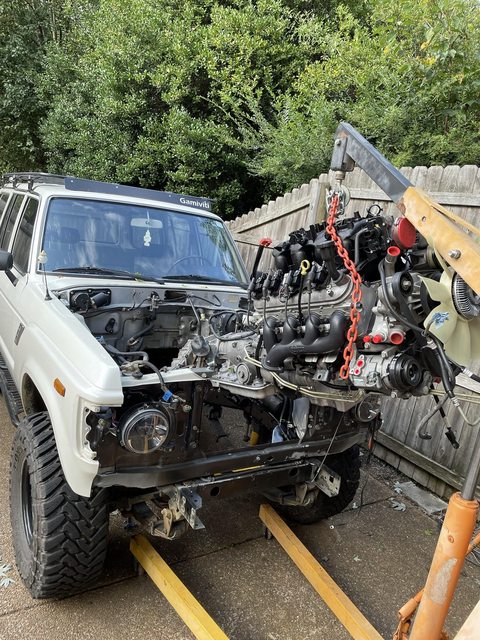
At this point you should have an engine bay that looks kind of like this:
From here, you can hit all of this with a pressure washer to get the dirt and debris out and start removing stuff you wont be needing anymore.
Decide if you are going to want to keep your Charcoal canister, and remove it. If you are going to keep it, place it aside to be reused, if you arent going to use it just chuck it. I used a one way breather valve attached to the stock vent line that runs along the frame rail and ran it up behind my wiper bottle in the engine bay and havent had any issues so far.
Remove your Hood hinges, remove your carb fan, remove all of your vacuum switching valves and smog stuff. Go ahead and remove your AC lines completely for now and set these aside. Youll reuse these. If you are reusing your Evaporator, plug off the two lines on the firewall with some tape. Remove your power Steering High pressure line. Put something in the empty ports on your box to block stuff from falling into it. There are a few hard lines for engine coolant that run above the trans tunnel that can be removed as well. Unbolt your diff breather hose holder from the frame rail, and remove all of your rubber fuel lines coming off of the hard lines on the frame in the passenger side and cap the hard lines. From here you can either clamp your Fuel feed line right as it exits the fuel tank, or drain your fuel tank. After blocking the flow of gas, remove the entire Fuel feed hard line. If you are looking at the lines on the frame rail in the engine bay, this line is the lower line. Also completely remove the choke cable and the pull switch from the truck, youll never need to use this ever again. The trick to making your engine bay look clean on this swap is removing as much old unused stuff as you can and hiding as much as you can.
(OPTIONAL) you can go even further and remove even more stuff to paint the inside of your engine bay. This is kind of the only time youll ever have to do this. I didnt do it, but if you are looking for a like restoration quality swap, this would be the time to do it. Some of the stuff inthere can be wrapped up in painters plastic or something else to protect it from being painted.
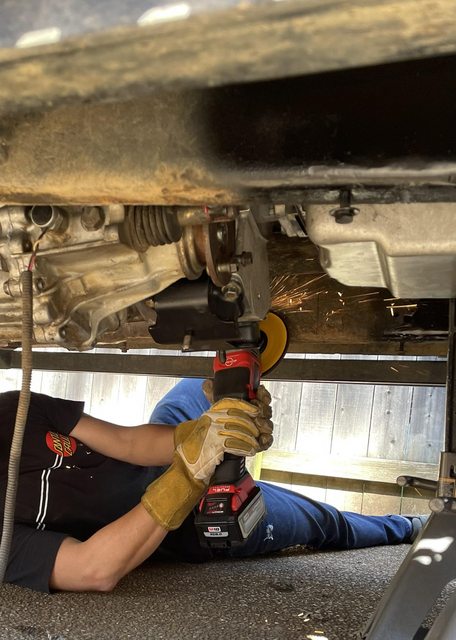
Once you have everything removed, you can start cutting off the mounts. There are 6 mounts in total you will have to cut off of the frame. the two old motor mounts above the axle, the inner trans mounts, and the outer trans mounts. 6 inch angle grinder or a plasma makes super quick work of this, but a normal 4.5 grinder works also. Definitely wear a respirator, gloves and quality eye protection in here because youll just be sitting in a giant cloud of dust. Grind off the mounts, flap the frame smooth on all 6 of them. The inner passenger side trans mount sucks and you have to be careful because you have a bunch of lines there in the way. You can unbolt the lines from the frame and move them out of the way to get better access to them.
Here is the engine bay with a bunch of stuff removed. This picture was taken before the ac lines and power steering lines were removed and before painting. Notice all of the flags of blue painters tape. These are all numbered so you can remember what things are.

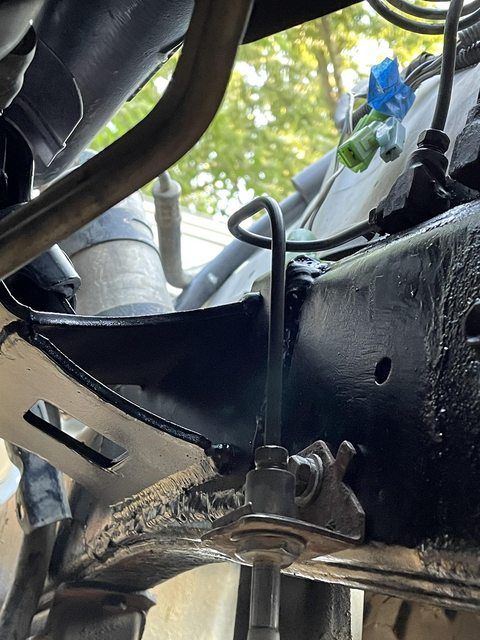
Lastly, there is a brake line T that you will notice directs the front axle brake line to the center of the truck. Remove the line from the bottom of the T and very carefully cut the T off of the bracket and move it so it points to the front of the truck, use a few good tacks to hold it in place. Or you could just buy another brake line T, theyre not very expensive. You will need to use a brake line bender or if you dont mind if it looks kind of lumpy, your hands, to bend the brake line into a position that is usable. Use the brake line bender though. The reason you are repositioning this T is because in stock form, it will interfere with your future exhaust. On my swap we just bent a new line and bolted it in for a nice clean look. With the Hooker manifolds this isnt absolutely needed but improves the routing quite a bit
Once you have everything out you have some options. If you use the
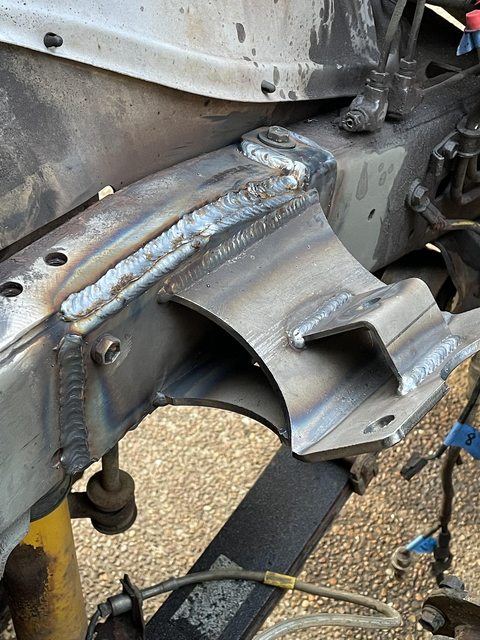
@Well Sorted Motor mounts, from here you will just bolt the motor mounts in and weld them to the frame. The mounts will offset your motor to the driver side and give you proper transfer case pinion angle, its really super simple, two bolts in each to factory bolt locations. There might be a slight gap on the top because the frame doesnt perfectly come to a right angle right there so instead of one giant fat weld you can run two beads. And maybe clean up the surface metal a bit better than i did
The other option is to run other types of motor mounts that arent keyed to your frame. They will need to be placed and tacked in with the motor and trans in the engine bay. You will basically offset the motor to the driver side about 1.5-2 inches and tilt it back little by little until you have proper pinion angle on the transfer case output. Lots of moving and checking, moving and checking. When you are satisfied with the positioning. Tack the mounts, pull the motor out and then burn them in. Definitely stay away from the Advance adapters motor mounts here, as they interfere with your exhaust.
Once your motor mounts are fully welded in, go ahead and spray some rust converter on your frame rails, prime, and paint the frame rails and motor mounts. I forgot to take a pic of my frame painted black, but here is it all primed with etching primer.
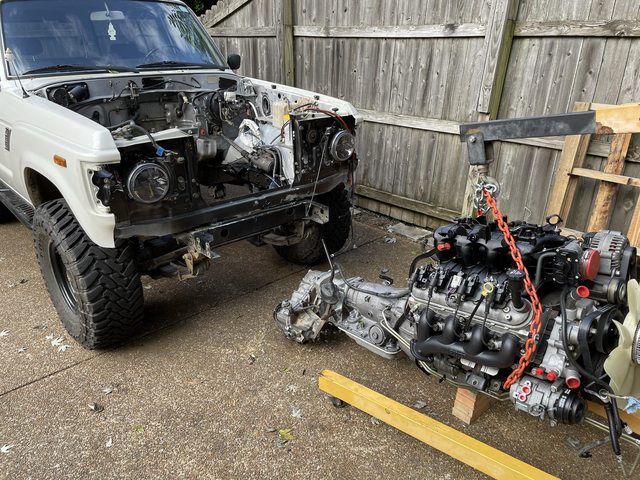
Once your frame is all painted up you can go ahead and install the motor/trans/tcase in one piece. Definitely get some buddies to help you with this. It is long and unwieldy. Its basically the opposite of the removal of the 2f. Carefully guide the motor and trans assembly into the engine bay and down the trans tunnel and be careful not to bash in your sheet metal. This is a trial and error approach and youll find that you will clip some things on the way in. Have someone working a floor jack under the transfer case once the T case is down in the trans tunnel and have them help guide the whole thing back in straight. I didnt remove the intake doing this, but keep in mind, its plastic and not very hard to remove. Once its above your motor mounts, slowly lower the motor down and bolt the motor mounts on the engine to the motor mounts on the frame. From here you will tighten the bolts on the motor mounts finger tight. Leave the Jack under the trans/tcase to support it and not put too much stress on the floor jack.


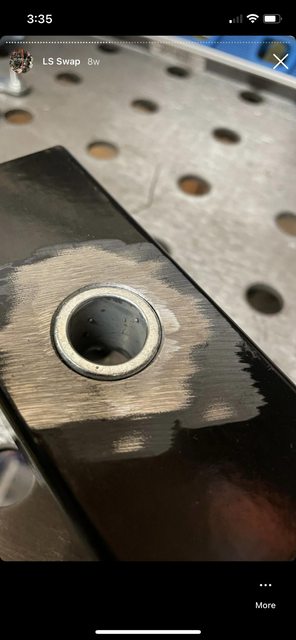
Now that the motor is in, and its bolted in on the motor mounts, youll need a to do your crossmember. This is a spot where you can either make your own crossmember to save some money out of square or rectangle tubing and flat stock, or just buy one. If you are using a 4l80e, the land cruiser shop makes an awesome crossmember kit. If you are using a 4l60e, and want to stay with the rubber mount, the Advance adapters crossmember is okay. I used it but you really need to make a quick modification to it to make it a little better. On the two bolt holes on the outside of the arms, you can go to ACE and buy some small steel spacers that fit the included bolts in the kit. They have some that are the exact length of the square tubing. Take a step bit and open the holes up to accept the spacer, and weld them in. Grind the welds smooth and youll have steel reinforced mounting points and your steel tubing wont bend when you tighten your bolts up.

Side note, the advance adapters 4l60e adapter doesnt have the proper bolt hole spacing on the adapter itself, you will have to modify your OEM trans mount and open up the holes some with a step bit to make the stock mount work. Its not hard but kind of unbelievable that they sell the kits like that.
After you have selected the crossmember you are planning on using, or made your own. Install your transmission mount to the transmission or adapter. Then bolt your crossmember to the trans mount. This will give you roughly where you will need to grind the paint off of your frame to weld on the crossmember mounts. Buy cheap grinding wheels for getting this frame coating off, the frame coating, dirt, grease and whatever else is under there will clog up your grinding wheels super fast and ruin them.
with the frame cleaned up you can tack your crossmember mounts to the frame and do a light dry fit. If everything lines up correctly, your pinion angle looks okay, and your drivetrain looks straight, go ahead and finish welding the mounts in and paint them. Once dry fully mount all of the bolts for the trans mount and crossmember. Fully tighten these bolts down. Then go up and fully tighten down your motor mount bolts. Remove your jack and your motor is officially in the truck on its own weight!