Head Gasket job (total noob) (2 Viewers)

This site may earn a commission from merchant affiliate
links, including eBay, Amazon, Skimlinks, and others.

I once had a code PO402 that a new VSV for EGR cured. Some have also cured a PO401 with a VSV for EGR. Very easy to do with the manifolds separated from the head; The EGR gasket came with my gasket kit. as will the rubber "O" ring for the distributor shaft. I would not do anything to clean the distributor other than using dry compressed air. If you look at the driven gear on the distributor .. you will see a little protrusion on one of the teeth and a groove on the bottom of the distributor housing near the gear - these will need to be aligned when you reinstall the distributor. You will also have to ensure that while those marks are aligned that the center of the distributor flange is also aligned with the center of the bolt hole that is used to lock the distributor ... and that the camshaft gears are aligned iaw the FSM ... IF you don't have the FSM ... get one (or photocopies of the relevant pages) BEFORE you undo the camshaft bearing caps as otherwise you may do damage to the camshafts .. they must be turned so that the lobes are pressing on the correct valves and the cap bolts are unscrewed in a specific order and sequence to release the camshafts evenly. Similarly the head bolts are to be loosened in a specific sequence.

The only mark you really need on the distributor is one that shows the position of the distributor flange relative to the lock bolt washer .. this will enable you to get the distributor re-installed well enough so that your timing should be "close" to where it was (it will need to be reset to 3deg advance eventually -- using a wire to short out the DLC1 terminals TE1 and E1 etc )
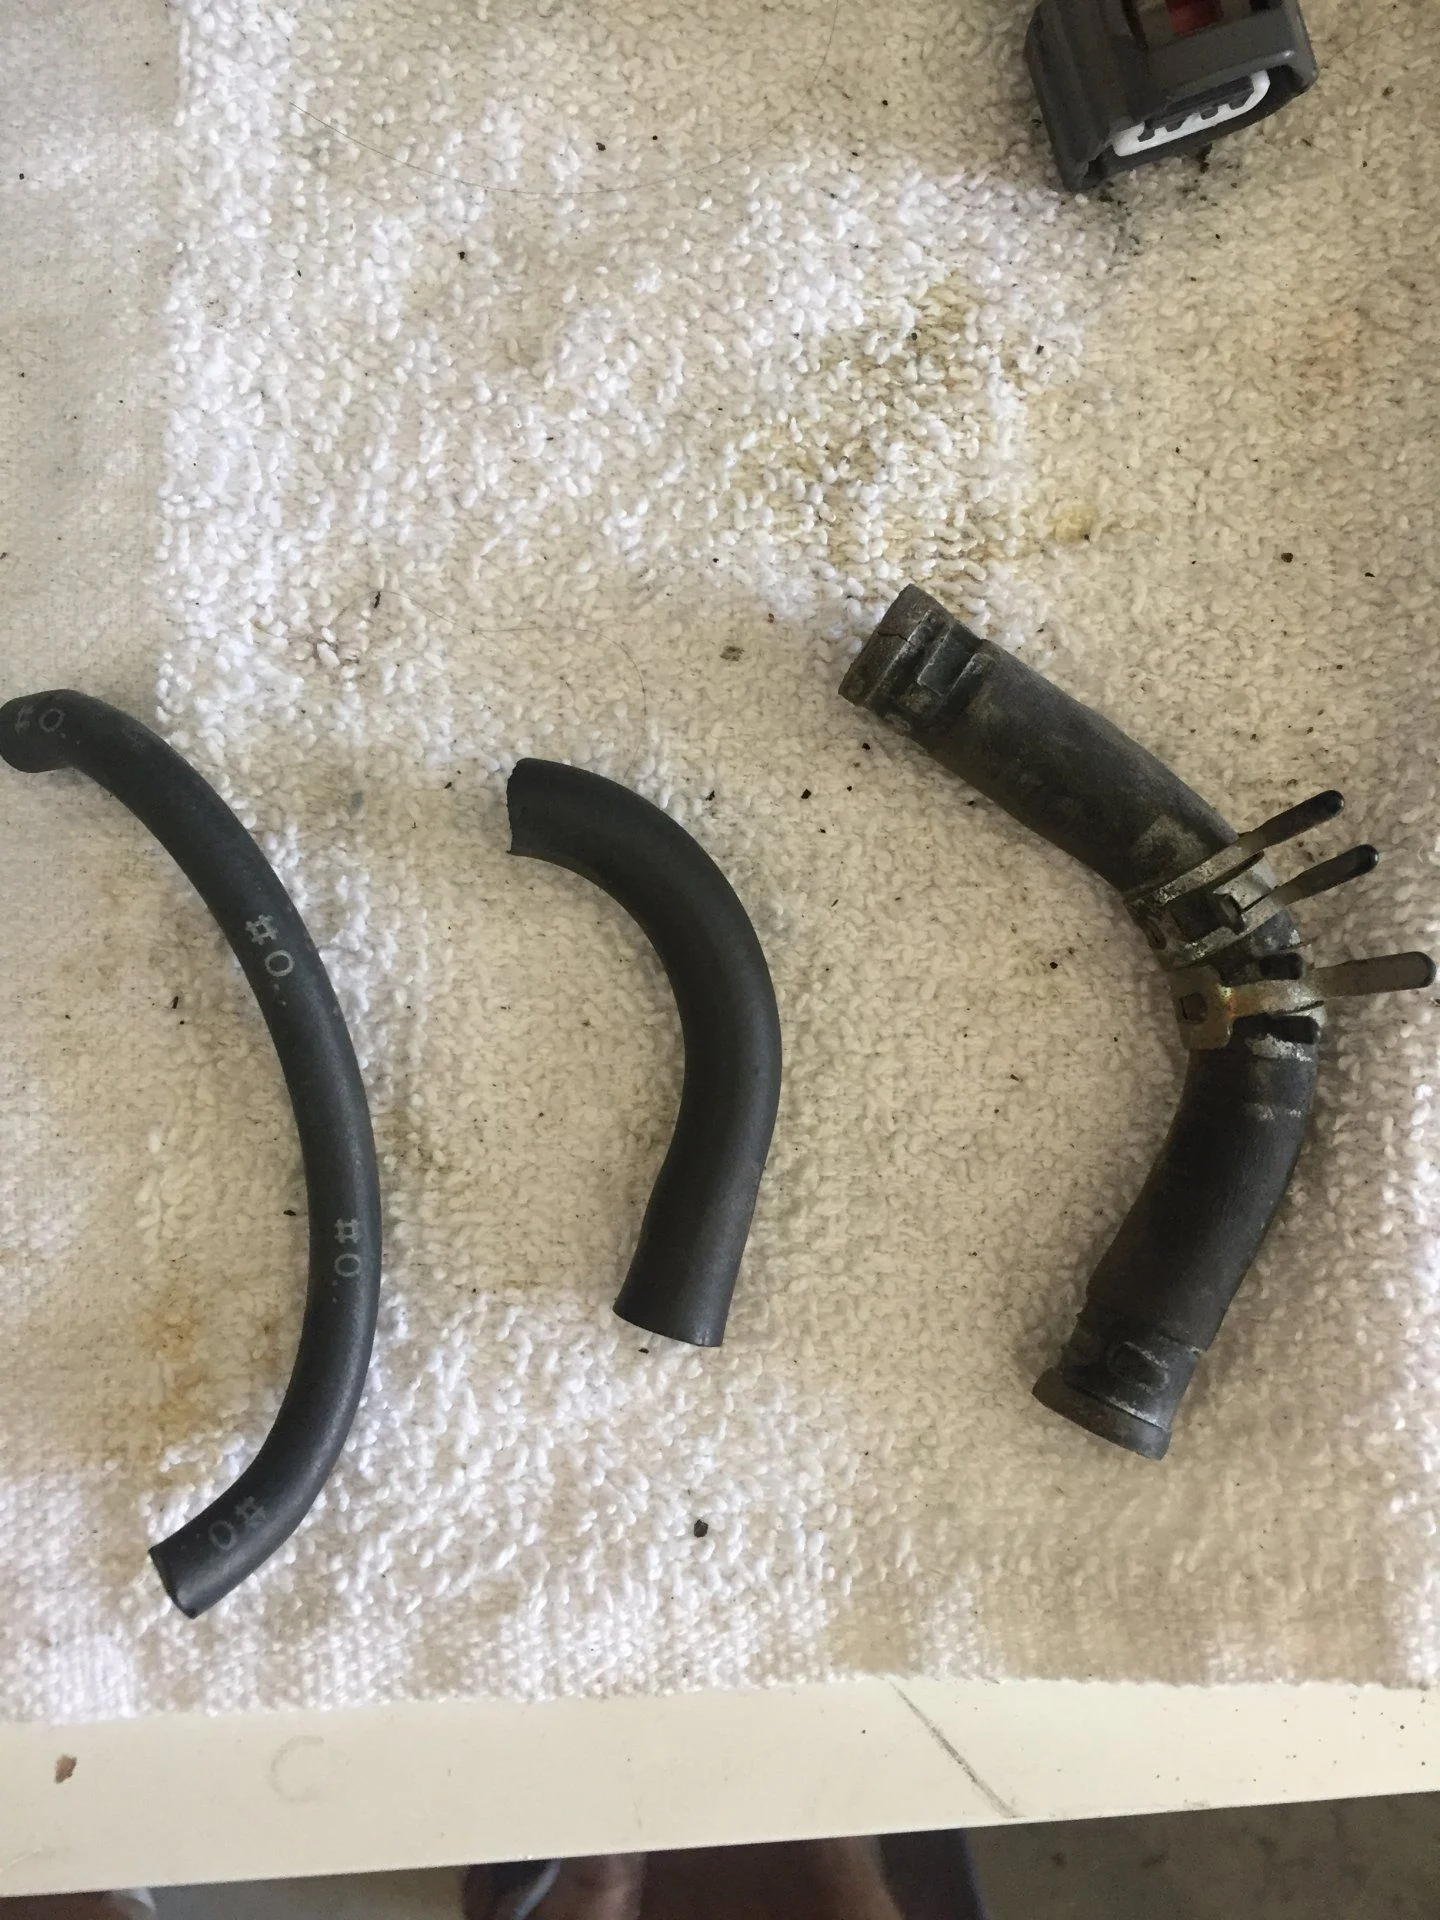
Thanks for the reply, I will go ahead and order the VSV for EGR tomorrow from Cruiser Dan. I have downloaded the FSM from toyota tech pages so I will follow it step by step. I will search for other threads related to P0401 and what others did .
 
Just saw your prior note that you do have the FSM - BTW I found some of the explanations a little difficult to follow - until I reread it it numerous times

ignore my following: Do you have the FSM? If not I would recommend you go no further until you read about the proper procedure to install the service bolt on the exhaust cam gears, position (and location) of the timing marks on the cam gears prior to removal, removal of the chain tensioner, how to mark the timing gear and chain etc etc. - it will reduce potential; for damage and make reassembly a whole lot smoother.
Well my English level is not great I have to say so that might be the reason why the explanations are difficult to follow ..
 
Well my English level is not great I have to say so that might be the reason why the explanations are difficult to follow ..


NO NO NO ... not YOUR explanations ... I found the explanations in the FSM difficult to follow and had to read the FSM several times before it made sense ...

I can easily follow what you are saying -- thanks !!
 
You can test your VSV's per the FSM or simply replace them if that makes you feel better. You only have two, my 1994 model has 4 VSV's. I replaced my modulator as precautionary. It only cost around $40. If you feel the need to clean the distributor perhaps some electrical contact cleaner would work well. And you will probably need carburetor cleaner for the egr valve. Plug one port and draw a vacuum on the other to be sure the egr valve opens. I was able to do this with my mouth on a clean length of vacuum hose. This is also a good time to test all the sensors that are screwed into the drivers side of the head per the manual by heating a pot of water to the prescribed temp and using a multimeter to measure continuity and resistance against the graphs in the FSM.
 
Do yourself a favor, remove the hood. It will make your work on the rig soo much easier and I found it really was the only way to get to the rear heater hoses. Whatever you can do to make your job easier is worth it.
 
Your doing great work (plus your acquiring tons of skills)!

I highly highly highly recommend you do the Crank Pulley Seal and Oil Pump seal while you have the radiator and fan out.
It's very little cost (maybe $10) and can save you a lot of headache down the road.
Disregard if you already had these plans.
I would also wrap the Wire Harness with Heat Tape where it passes by the EGR, for no real reason really.
Getting your injectors cleaned (take 1 week turn around) thru InjectorRx
Not trying to pile it on, just trying to "Do it Right"

**Your a very Bold Newbie, but what are you going to do after this is complete?
Be President, Go into Space, Start a Fortune 500 Company, or tackle the Front Axle Rebuild?
 
his crank pulley seal and oil pump were already done.

Good advice on the cleaning of the injectors.
 
Your doing great work (plus your acquiring tons of skills)!

I highly highly highly recommend you do the Crank Pulley Seal and Oil Pump seal while you have the radiator and fan out.
It's very little cost (maybe $10) and can save you a lot of headache down the road.
Disregard if you already had these plans.
I would also wrap the Wire Harness with Heat Tape where it passes by the EGR, for no real reason really.
Getting your injectors cleaned (take 1 week turn around) thru InjectorRx
Not trying to pile it on, just trying to "Do it Right"

**Your a very Bold Newbie, but what are you going to do after this is complete?
Be President, Go into Space, Start a Fortune 500 Company, or tackle the Front Axle Rebuild?
LOL, after I do this and the car will be running I am planning to do following:
  1. front axle rebuild
  2. all brake disc, pads and lines to be changed (will buy from slee)
  3. need new shocks (suggested by Robbie)
  4. would like to replace some bushing of rear control arms

I will see how it goes, I still have a lot of time to complete the car , plan to have it ready by next spring.

Jorge
 
Question about the vacuum lines: There seems to be three sizes of vacuum lines under the manifold. I already ordered the smallest one which is the most used from CDAN. Not sure what are the sizes of the other two lines there , one is probably 5/16 ID vacuumhose (as taken from the P0401 Defeated - with pics) thread. And I am not sure about the third one. Anybody knows that ?

 
Those vacuum lines are 40 dollars which seems to be overkill , I already purchased a set of 5 90999-92003 which will cover all small vacuum lines. Btw, here is the list of what I purchased:

  1. 04112-66036 head gasket kit
  2. 15785-66010 oil cooler gasket
  3. 90099-14118 distributor o ring
  4. 90999-92003 set of five vacuum hoses
  5. 16400-66040 radiator
  6. 16100-69325 water pump
  7. 90916-03117 thermostat
  8. 16346-66020 thermostat gasket
  9. 23300-69045 fuel filter
 
Any suggestions how to remove the fuel rail , also bear in mind that I have a new fuel filter on the bench which will be needed to be replaced.

Jorge
 
Any suggestions how to remove the fuel rail , also bear in mind that I have a new fuel filter on the bench which will be needed to be replaced.

Jorge
Hello Jorge, I don't mean be repetitious but now is a good time to replace the rubber section to fuel pressure line. It's that section from the fuel filter over to the fender. I fact, I replaced every singe rubber hose that became exposed when I did my HG last spring.
 
Hello Jorge, I don't mean be repetitious but now is a good time to replace the rubber section to fuel pressure line. It's that section from the fuel filter over to the fender. I fact, I replaced every singe rubber hose that became exposed when I did my HG last spring.
Did you buy it OEM or just used some regular 1/4 '' gas line ? The fitting at the end seems not to be standard so probably I will have to call CDAN. I am little worried working with fuel lines , never did that and I am starting to be little bit worried.
 
I have loosen up the fuel inlet pipe bolt and taken one screw from the gas filter (closer to the driver wheel). Now it is little loose and I can take the gas rail off. There was just a little bit of gas but the garage smells like gas station. I will be taking the rail out now and have the injectors inspected.
 
I think best would be to replace the fuel filter when the lower intake manifold is out. What do you guys think ?
 
if you are leaving the engine wiring harness in place ... you wont be taking the lower intake out... (you wont be able to)

but you can easily remove the fuel filter with the access you will have when the head is out


(incidentally I believe that the head gasket kit "might" also contain the distributor "O" ring)
 
Took of the fuel rail and as suggested I made sure to take of the spacers first. It is little dirty around #6 , I suspect in the past there was probably valve cover leak..

I also found this under the car, probably it is EGR gasket.

Any suggestions where should I send the injectors ?

Jorge
 

Users who are viewing this thread

Back
Top Bottom