
- Thread starter
- #1,681
And then last night I fought with the rear bumper bolts for about 3hrs, finally was able to get the rear bumper off after throwing just about every trick I could, besides heat, at them. Chrome ones snap pretty easily since they were so rusted in place, others were so rusted that I had to take two breaker bars at them (top and bottom). Luckily at one point I acquired a 24" 3/4 ratcheting breaker which became a life saver with my normal 36" breaker. So rear bumper is now off and will not be going back on until I am done painting. Front will not be coming off, really dont feel like breaking myself that much and the front valence has been off and on multiple times in the last couple years so I know that will come off easily!
Aside from that I (drunkenly) ended purchasing one of those Joying Android head units. Got into a offer/counteroffer battle with the Joying seller on ebay and well I will have a 7" Android 8.0 PX5 single din head unit coming next month (says shipping from China and should be here by October 5th). This pretty much came because of the fact that yesterday my current JVC head unit decided to drop the bluetooth connection a total of 4 times in the 5 drives I did. The new unit has a better bluetooth chip but also has their ZLink chip built in which will allow me to connect the phone to the unit (which I have it plugged in whenever I am in the truck anyways to charge) and then run Apple Car Play!
Here is current unit, JVC KDX-80BT
 Untitled by Greg Fisicaro, on Flickr
And what it will look like with the 7" single din, approximately...
 Untitled by Greg Fisicaro, on Flickr
Aside from that I (drunkenly) ended purchasing one of those Joying Android head units. Got into a offer/counteroffer battle with the Joying seller on ebay and well I will have a 7" Android 8.0 PX5 single din head unit coming next month (says shipping from China and should be here by October 5th). This pretty much came because of the fact that yesterday my current JVC head unit decided to drop the bluetooth connection a total of 4 times in the 5 drives I did. The new unit has a better bluetooth chip but also has their ZLink chip built in which will allow me to connect the phone to the unit (which I have it plugged in whenever I am in the truck anyways to charge) and then run Apple Car Play!
Here is current unit, JVC KDX-80BT
Untitled by Greg Fisicaro, on FlickrAnd what it will look like with the 7" single din, approximately...
Untitled by Greg Fisicaro, on Flickr Untitled
 Untitled
 Untitled
 Untitled
 Untitled
 Untitled
 Untitled
 Untitled
 Untitled
")
 Untitled
 Untitled
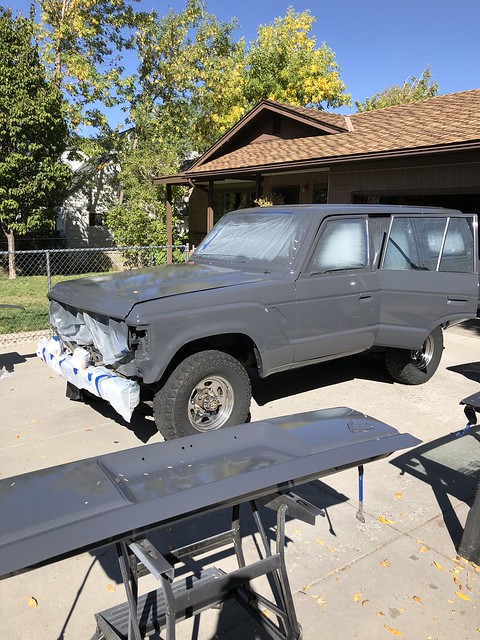 Untitled
 Untitled