RodrigzCrzr
SILVER Star
My bad!
Thank you though.
Thank you though.
Follow along with the video below to see how to install our site as a web app on your home screen.
Note: This feature may not be available in some browsers.
This site may earn a commission from merchant affiliate
links, including eBay, Amazon, Skimlinks, and others.
More progress this week on the FJ60. I received my rear OEM FJ62 anti-sway bar from Classic Cruisers and the extended drop links and bushings from Man A Fre this week.My bad!
Thank you though.
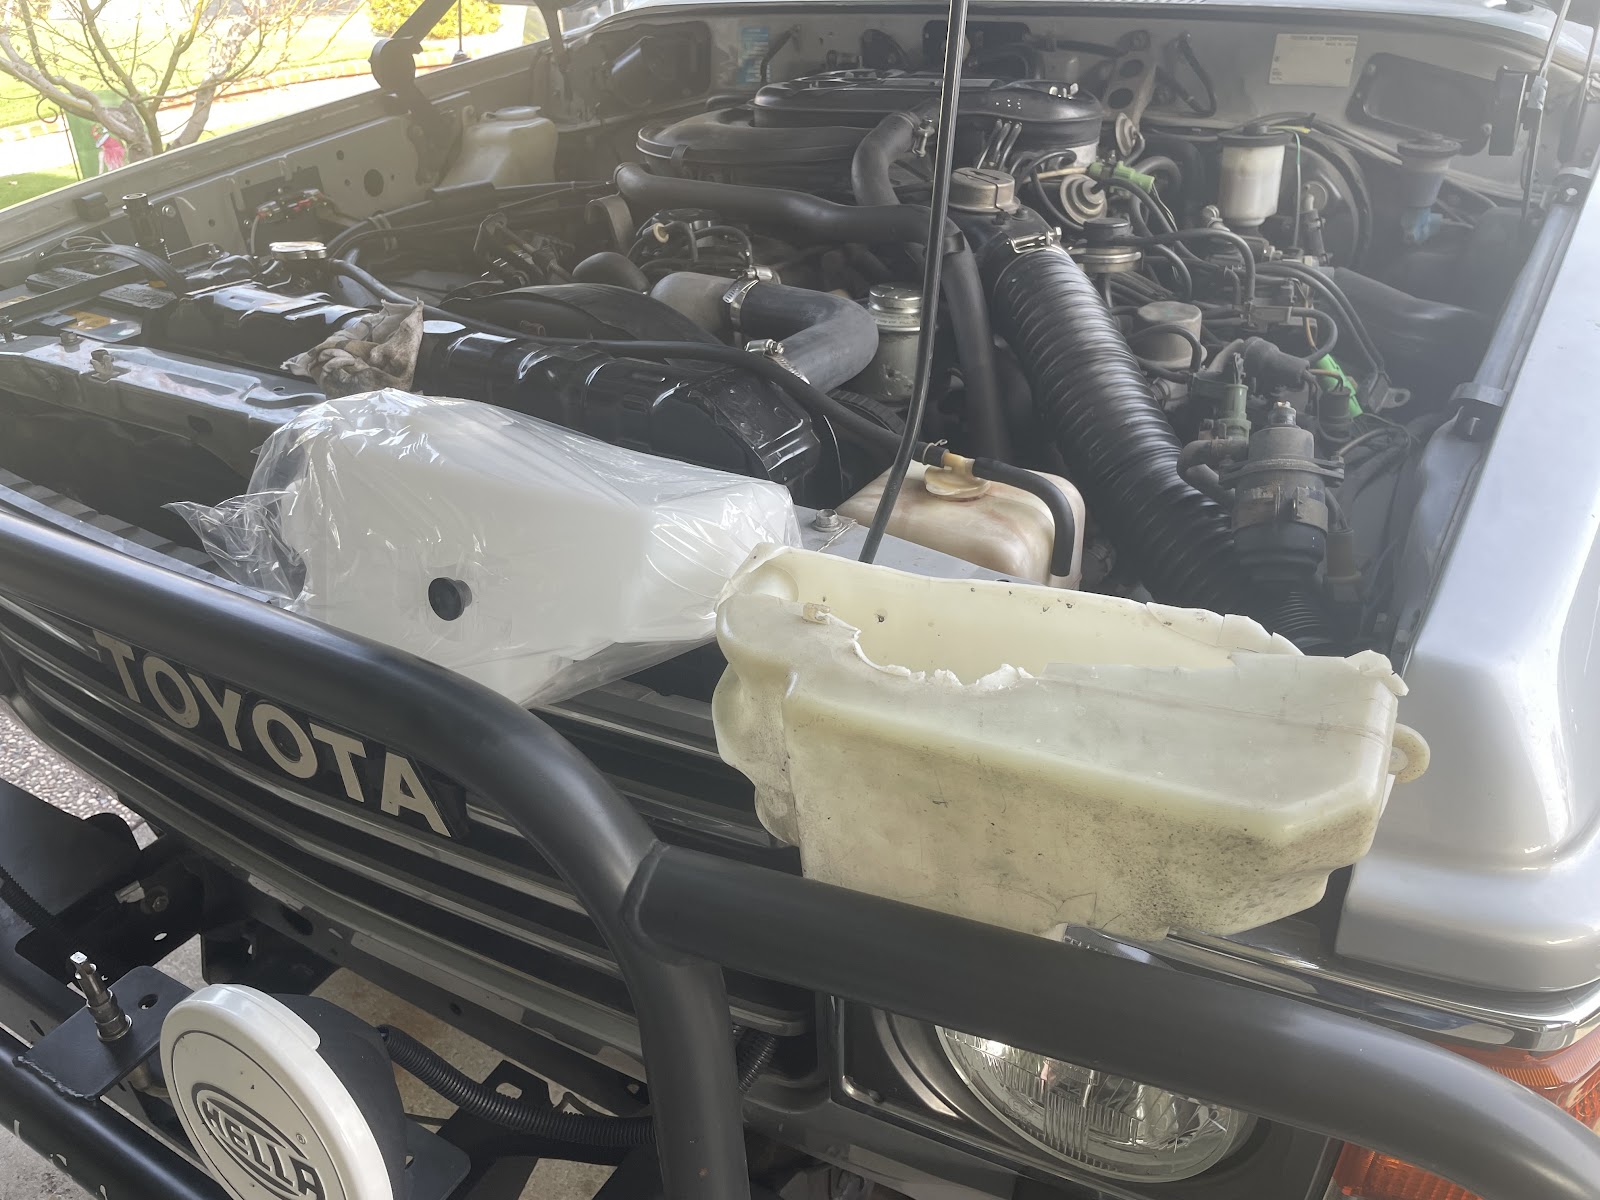
Great write-up. I learned a lot from it.Like many wagons of this vintage, my washer reservoir was cracked and leaking. I ordered an excellent reproduction from @TRFarmers , along with a new grommet for the pump. I hastily installed the new unit and filled the system with water. The system had a steady leak when sitting and could not build enough pressure for the squirrels to function. The valves appeared bad so I ordered new ones.
They arrived this week so I got to work.
These are all of the tools I used to do the job.
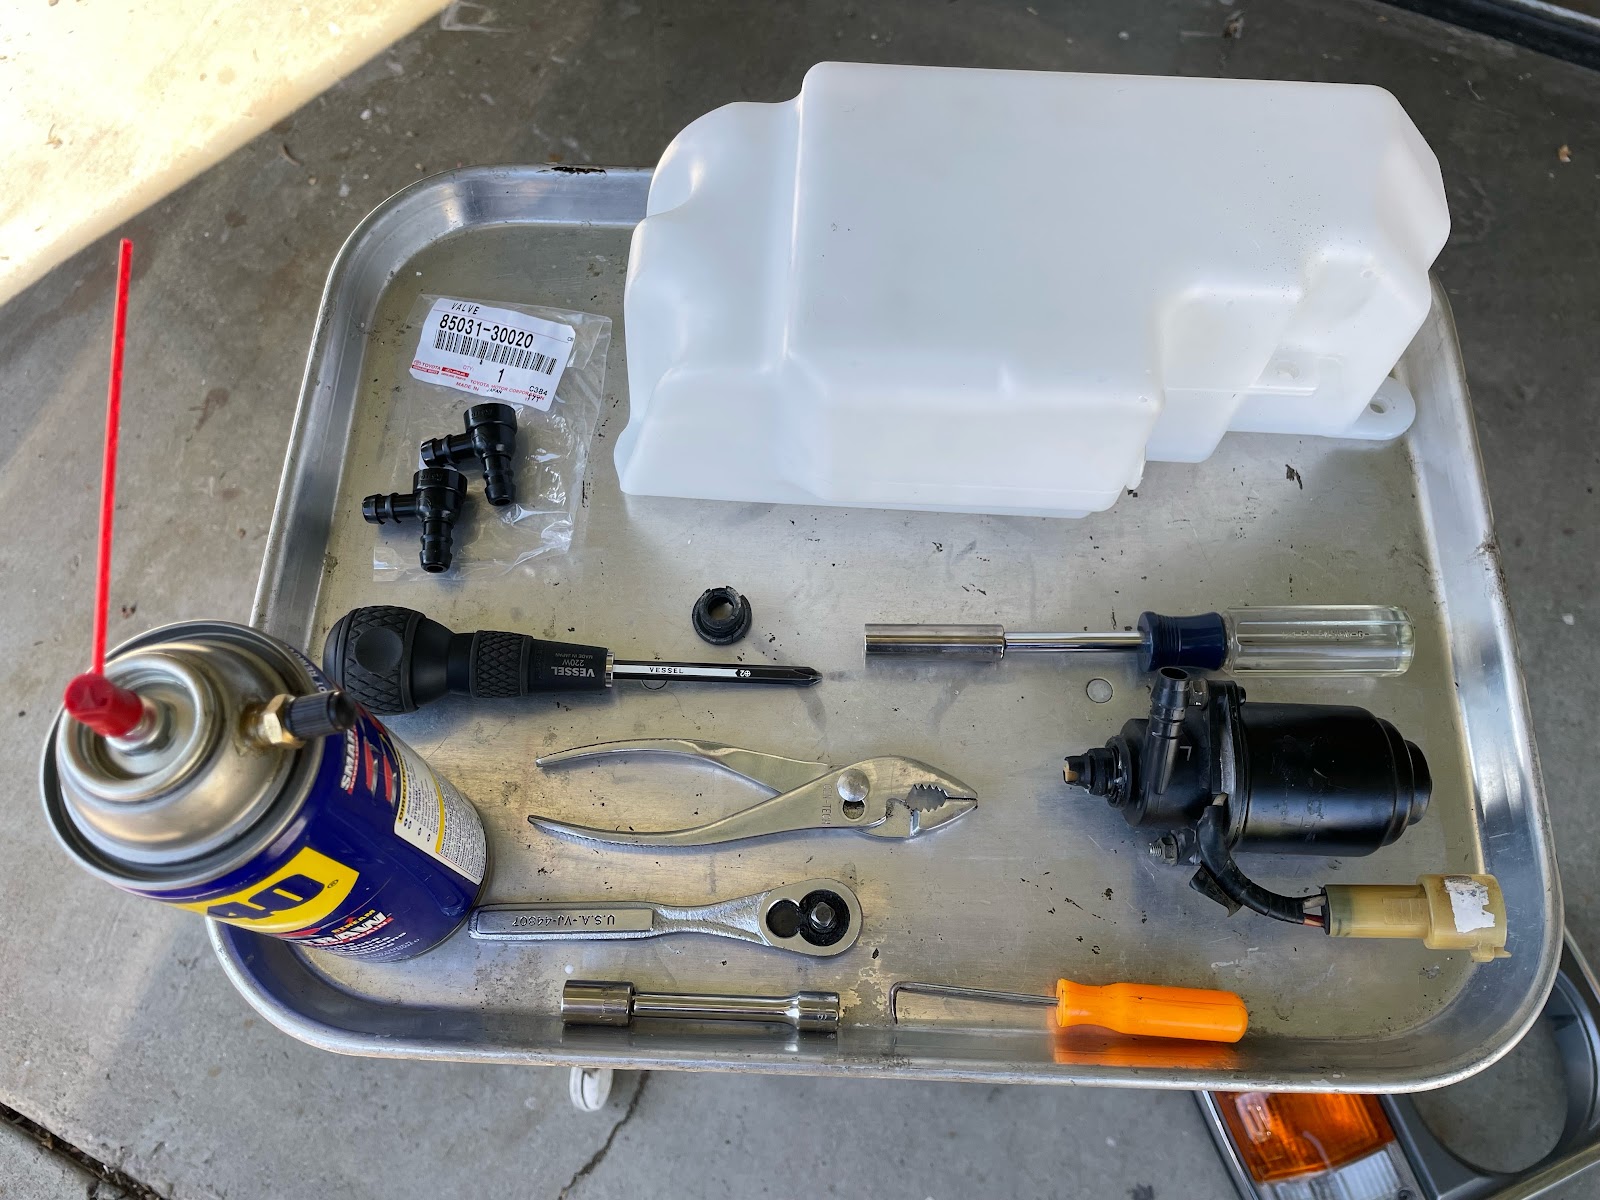
The WD-40 will help loosen the rusty bolts and stuck on hoses. The pick can help work the straw into the hose. A pair of 10mm sockets with extensions are ideal and a good #2 Phillips.
I started by removing the reservoir, held in place by three 10mm bolts. Once free, I removed the hose with my vice like grip.
Next comes the connector, just a simple push on the snap.
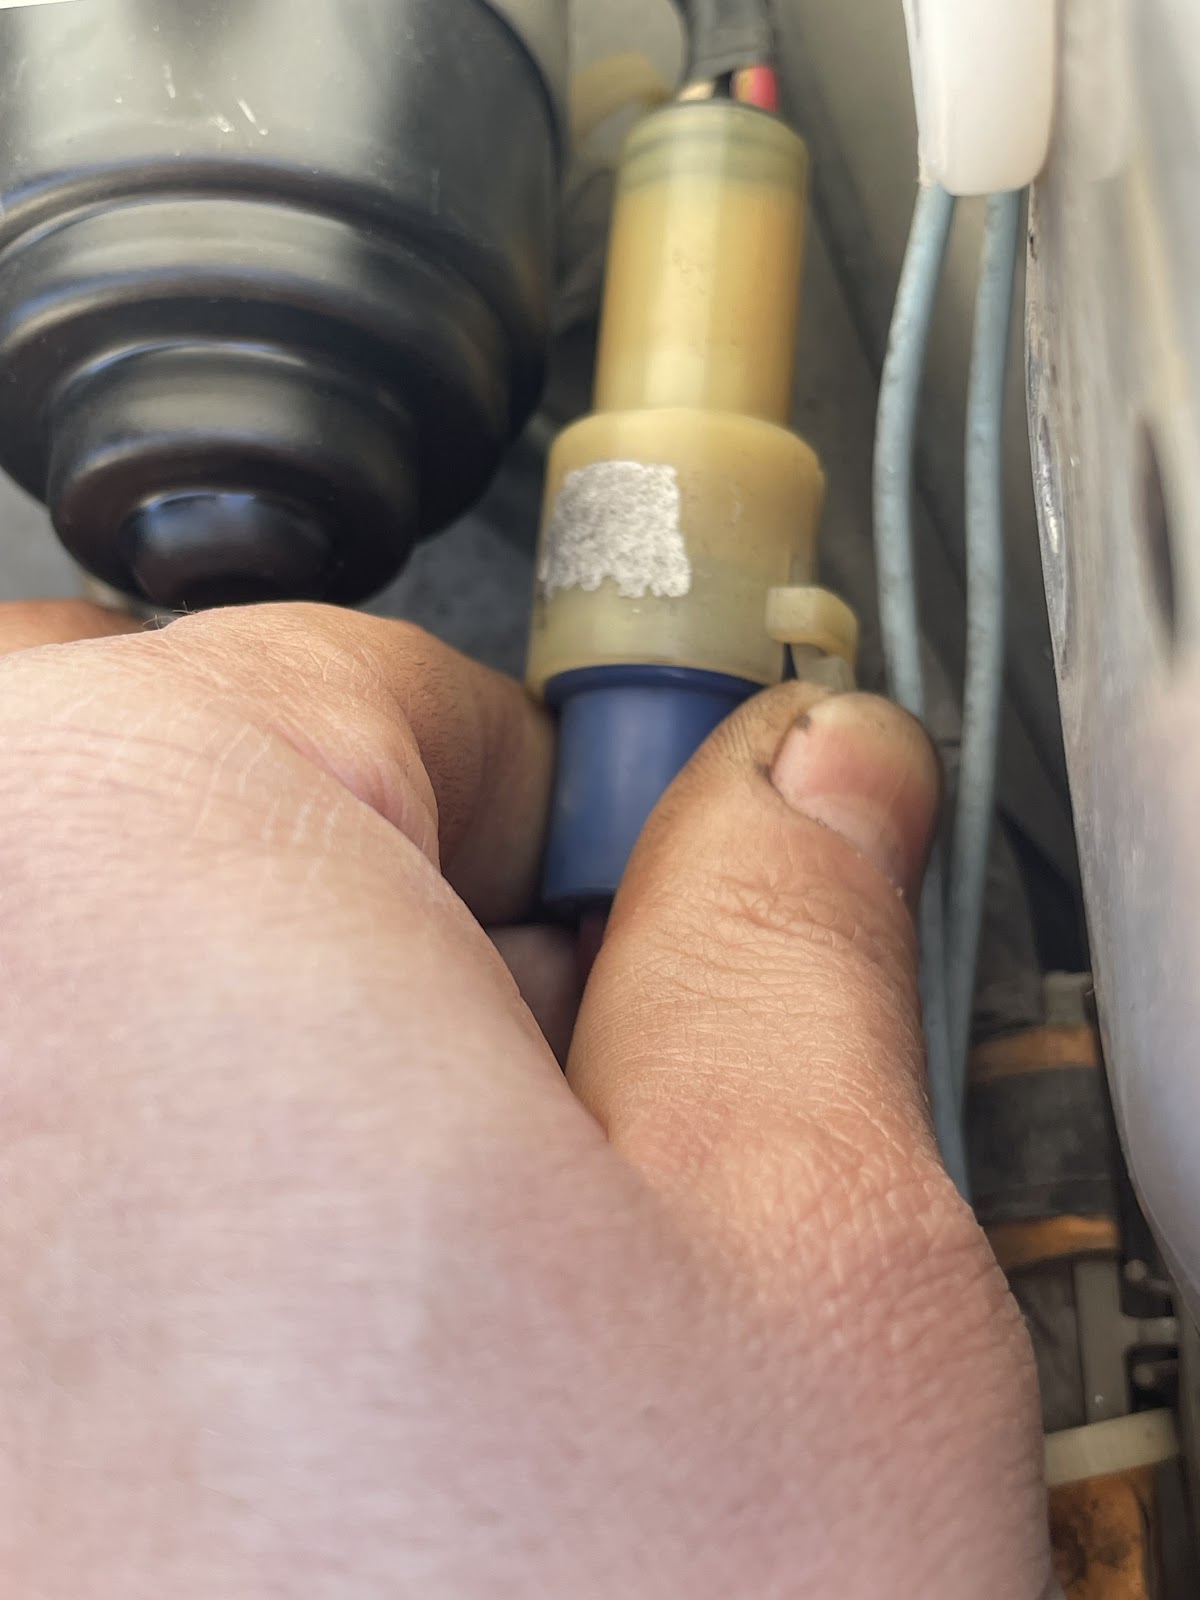
Now I swapped the pump from the old tank to the new one. The old grommet disintegrated when I pulled it out so I’m glad I ordered the new one with the tank.
Old and busted versus new hotness
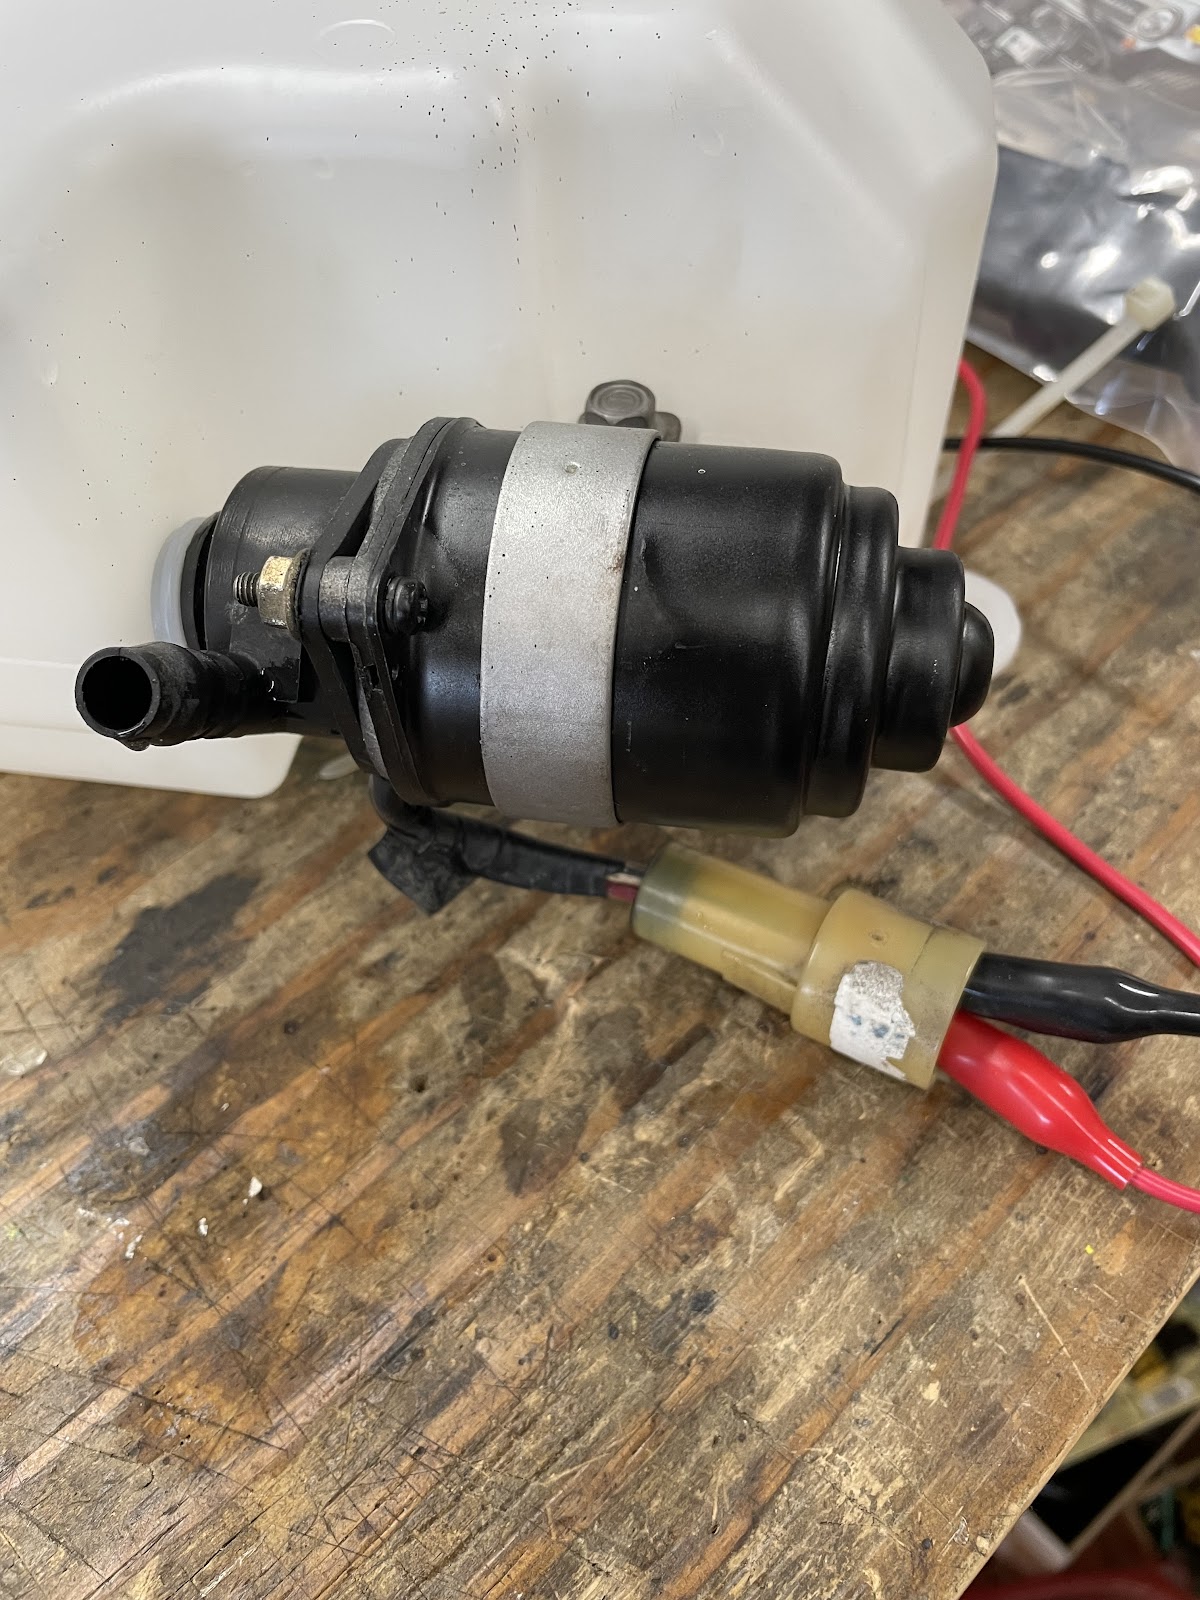
While the reservoir is out of the vehicle, test the pump. I added some water and connected the pump to a 12v bench power supply. The larger red cable is positive. Cycle it briefly, they are not designed to run for long.
I originally did not order the valves so when I reconnected the tank, water just leaked out. More than likely, if the valves are the originals, you’ll need new ones.
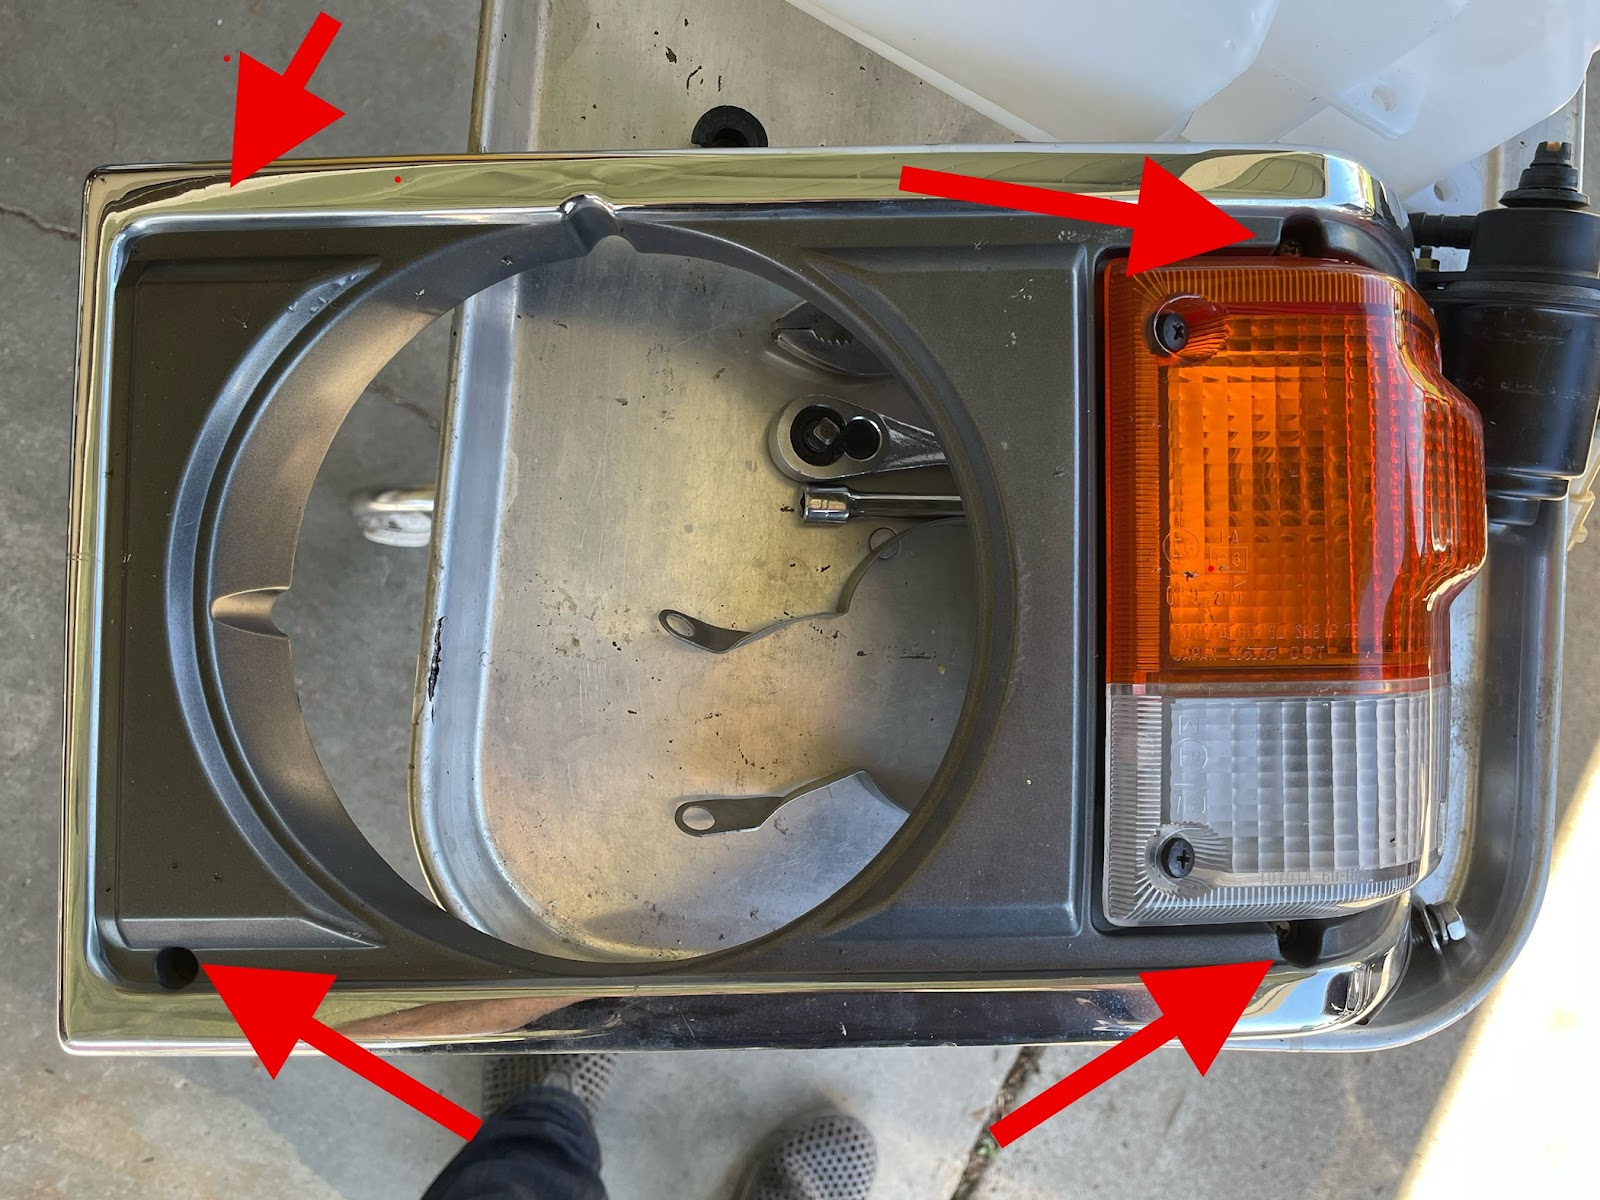
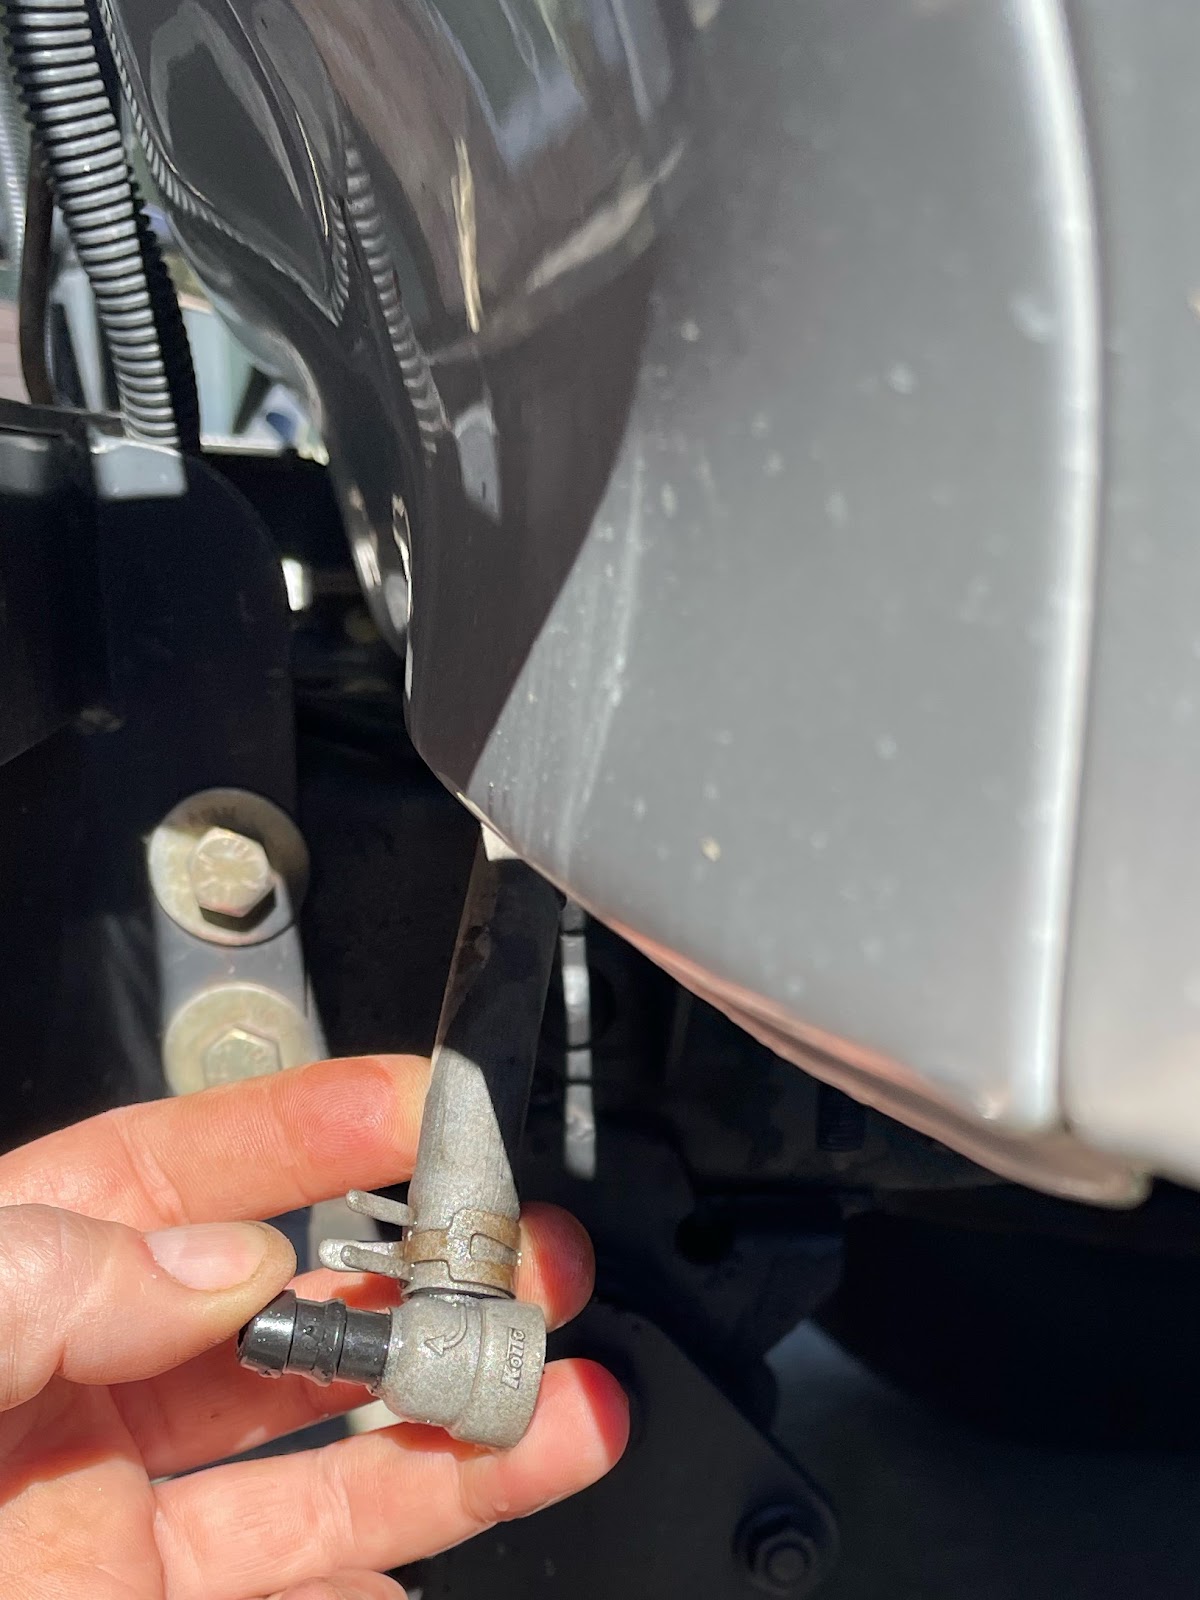
To access the valves, I removed the headlight bezels. It’s just four Philips screws, three on the corner faces and one on the top.
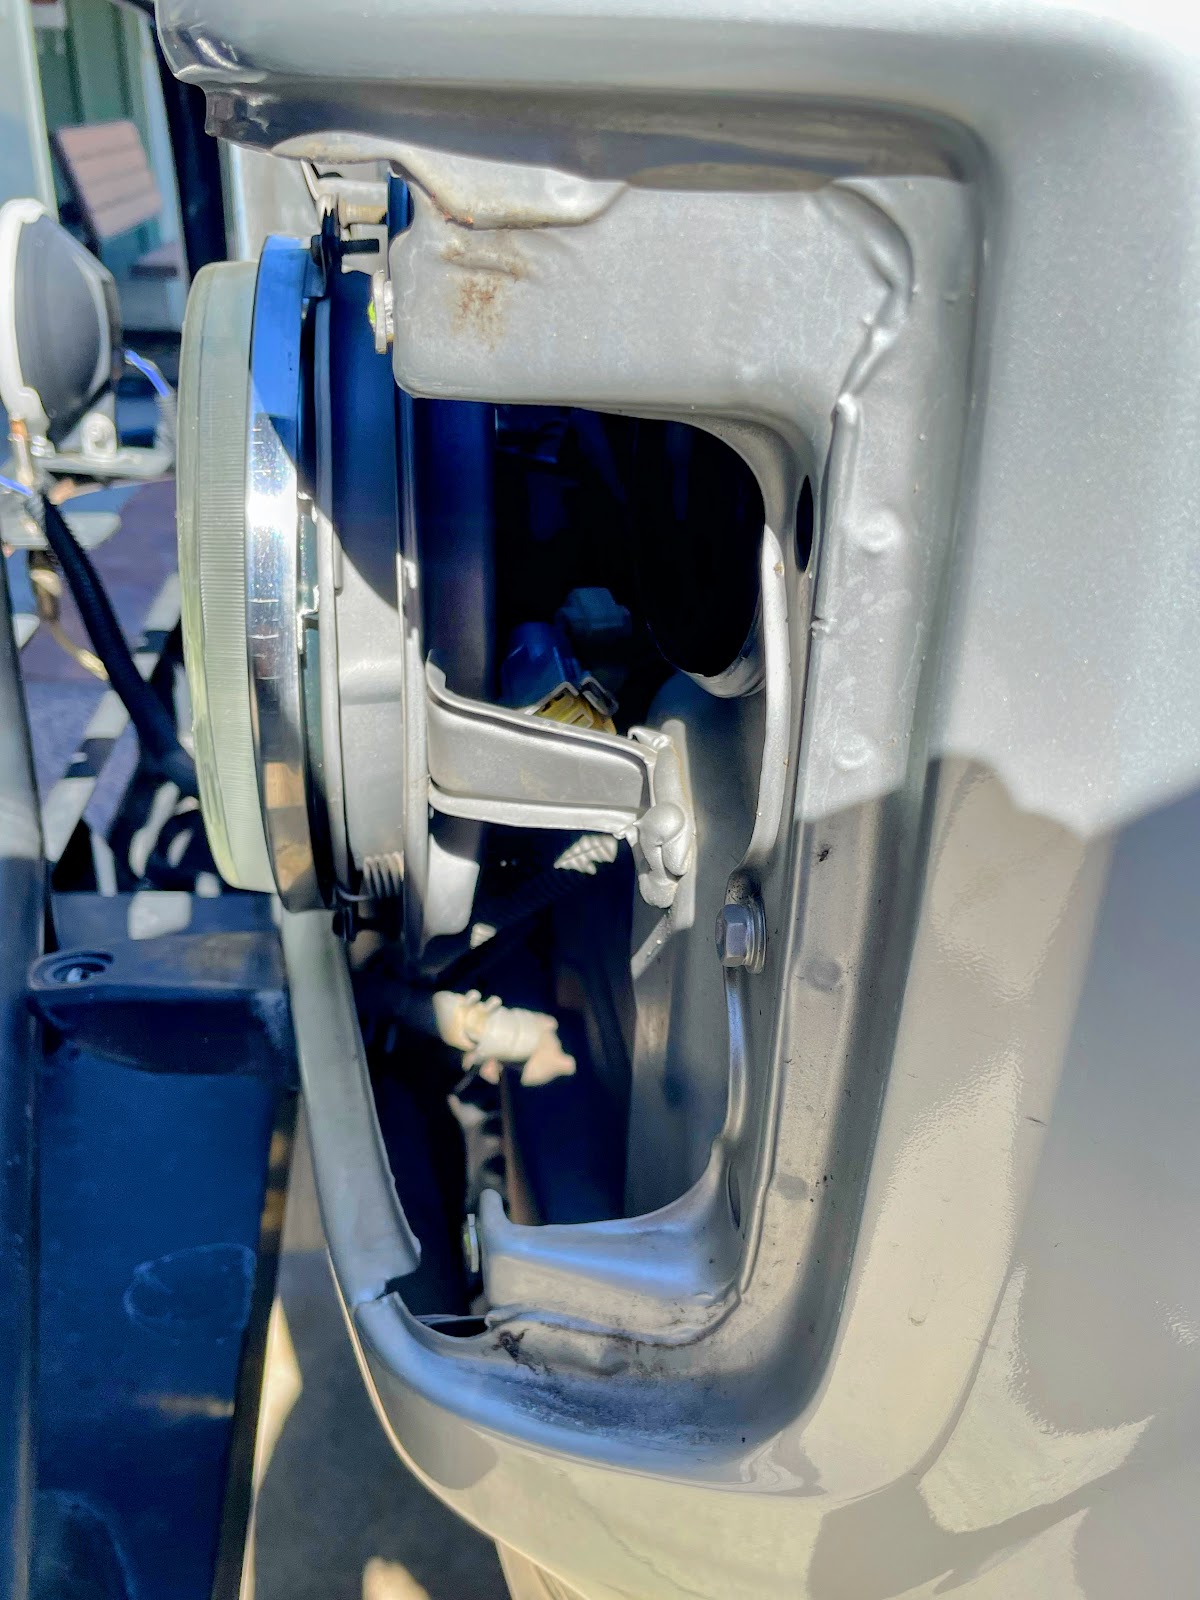
There’s a single electric connector, disconnecting it gave me better access to the valves.
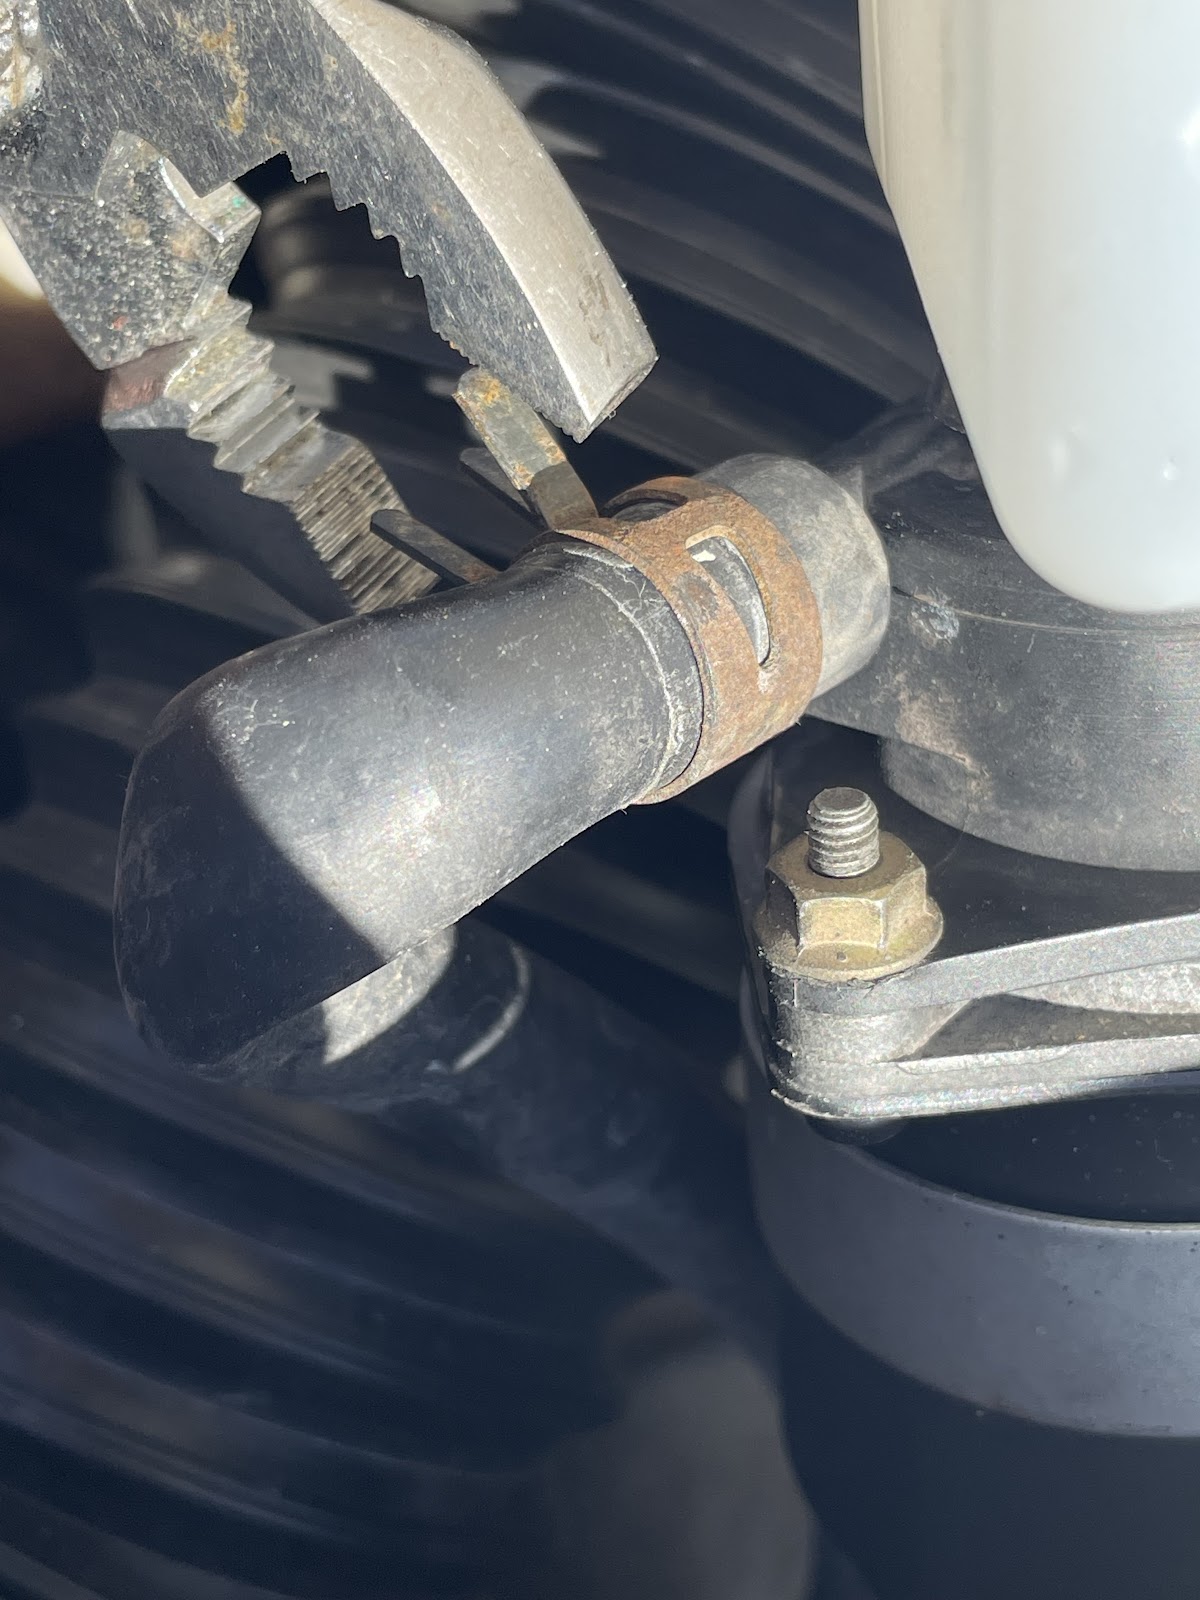
Removing the valves was the hardest part of the job. The hoses were stuck pretty good so some WD40 worked in with a screwdriver or pick helps to break them free. For the driver side, I ended up moving the clamps back toward the valve and pulling off the squirter from the front and working the hose free that way. The hose won’t fit through the hole in the sheet metal so it made it easier to work things free by pulling on the squirter housing.
Once I got one end free, I was able to drop the line through the gap and work on the other clamp from underneath.
With both valves removed I blew some air through the hoses to clean any debris left in the system.
Then it’s just a matter of putting everything back together.
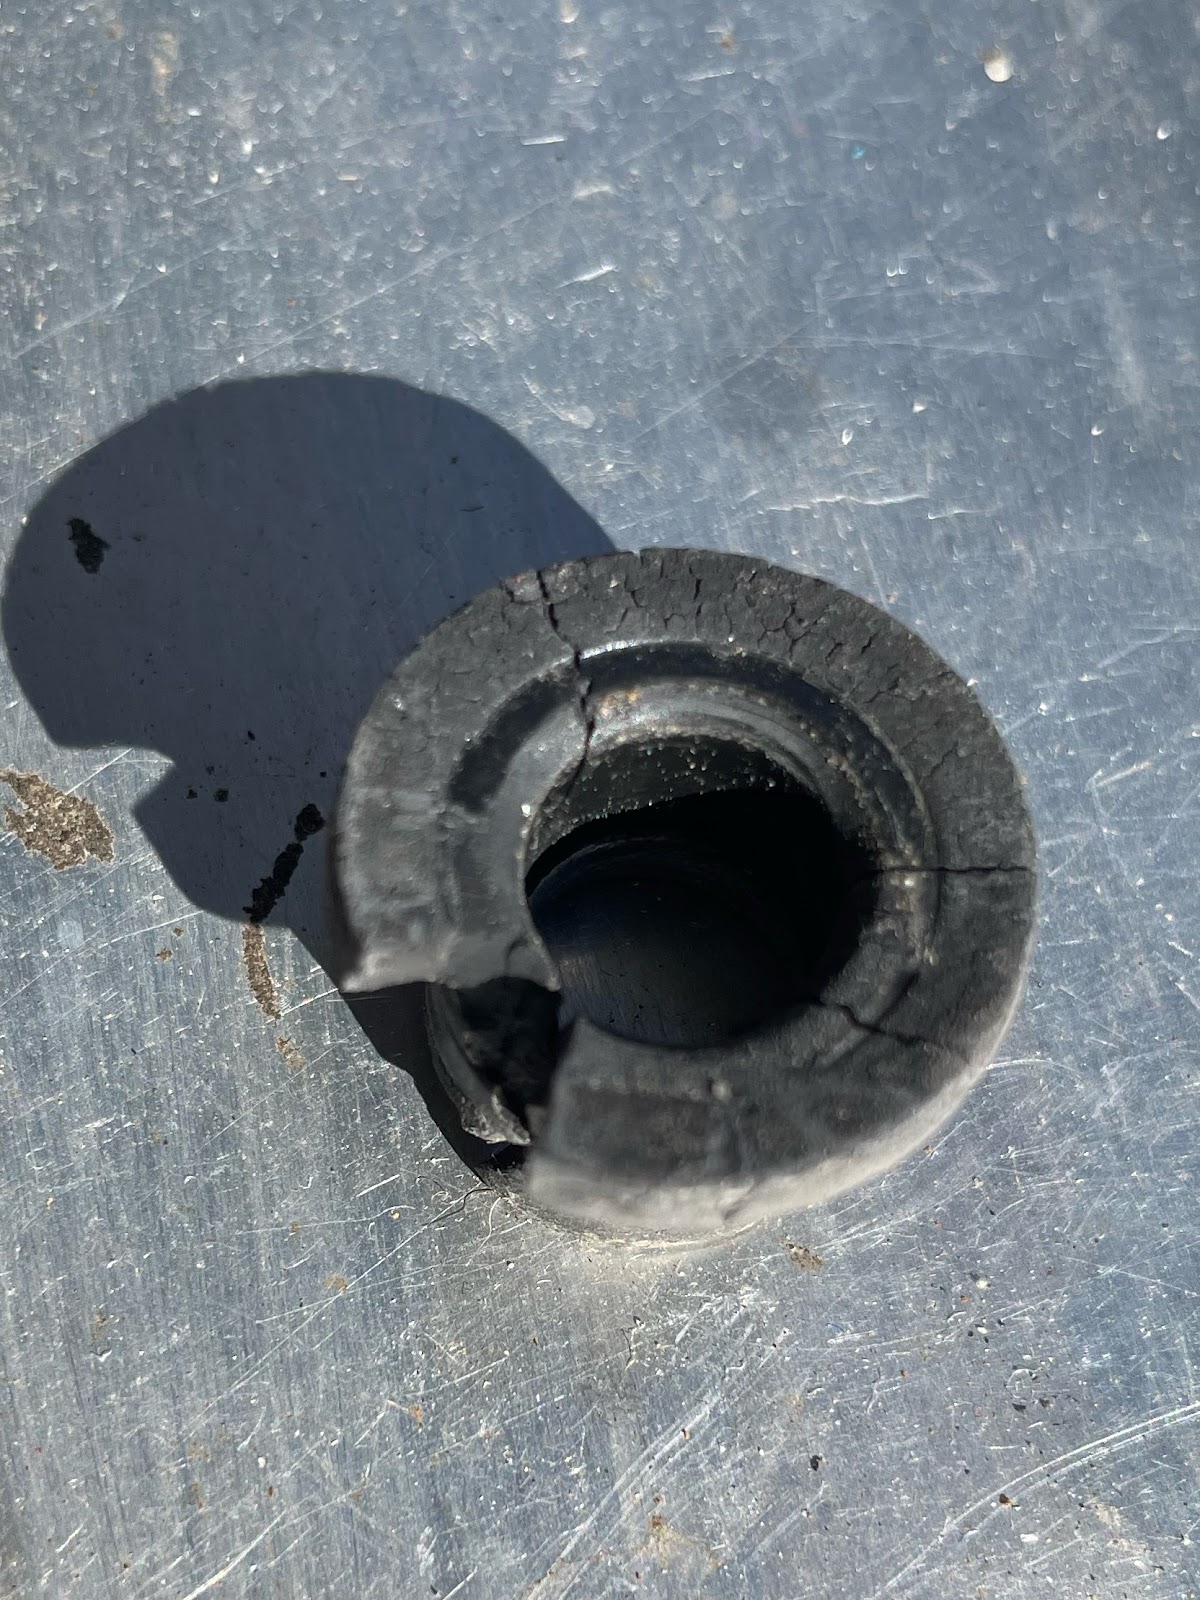
The valves are marked with an arrow in the direction of water flow. Don’t mess this up or you’ll have to wrestle the valve off again like I did.
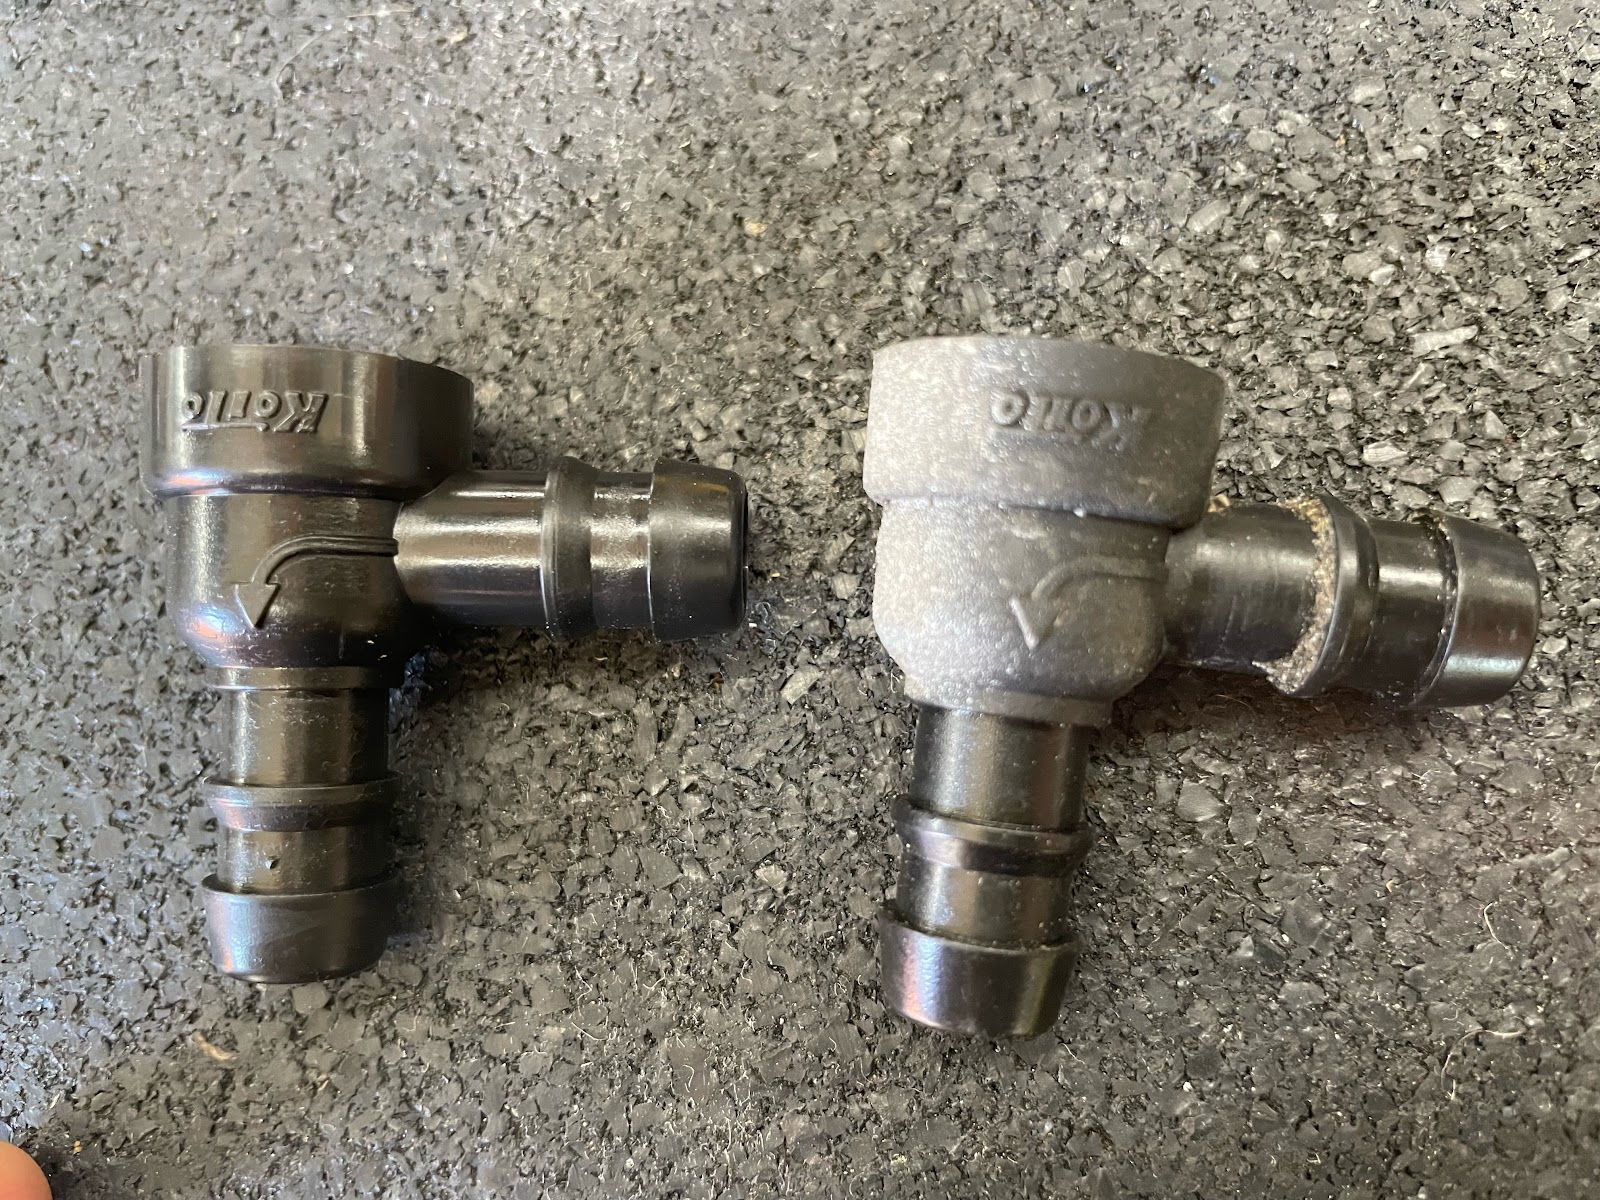
If you’re feeling lucky, you can test you old valve pretty easily once it’s outside the vehicle. If you blow into the fitting in the direction of the arrow, you should feel resistance. Unless you have super human lungs, no air will escape from the other end. If your valves are shot like mine, air will escape from the small hole at the elbow or through the other fitting. The system is designed to only allow water to flow to the washers under the pressure of the pump when activated. Otherwise, gravity would just drain the water while driving down the road.
Plan on replacing the valves ahead of time and just order them.
Once reconnected you should be able to fill the tank and test. Do this before replacing the headlight bezels.
FYI: the headlamp washers work off the same button as the windshield washers but only when the headlights are on. I didn’t know this and went on an unnecessary troubleshooting session.
If the washers don’t activate you may have a short or ground or even a bad relay.
The relay is located behind the driver side kick panel below the fuse panel.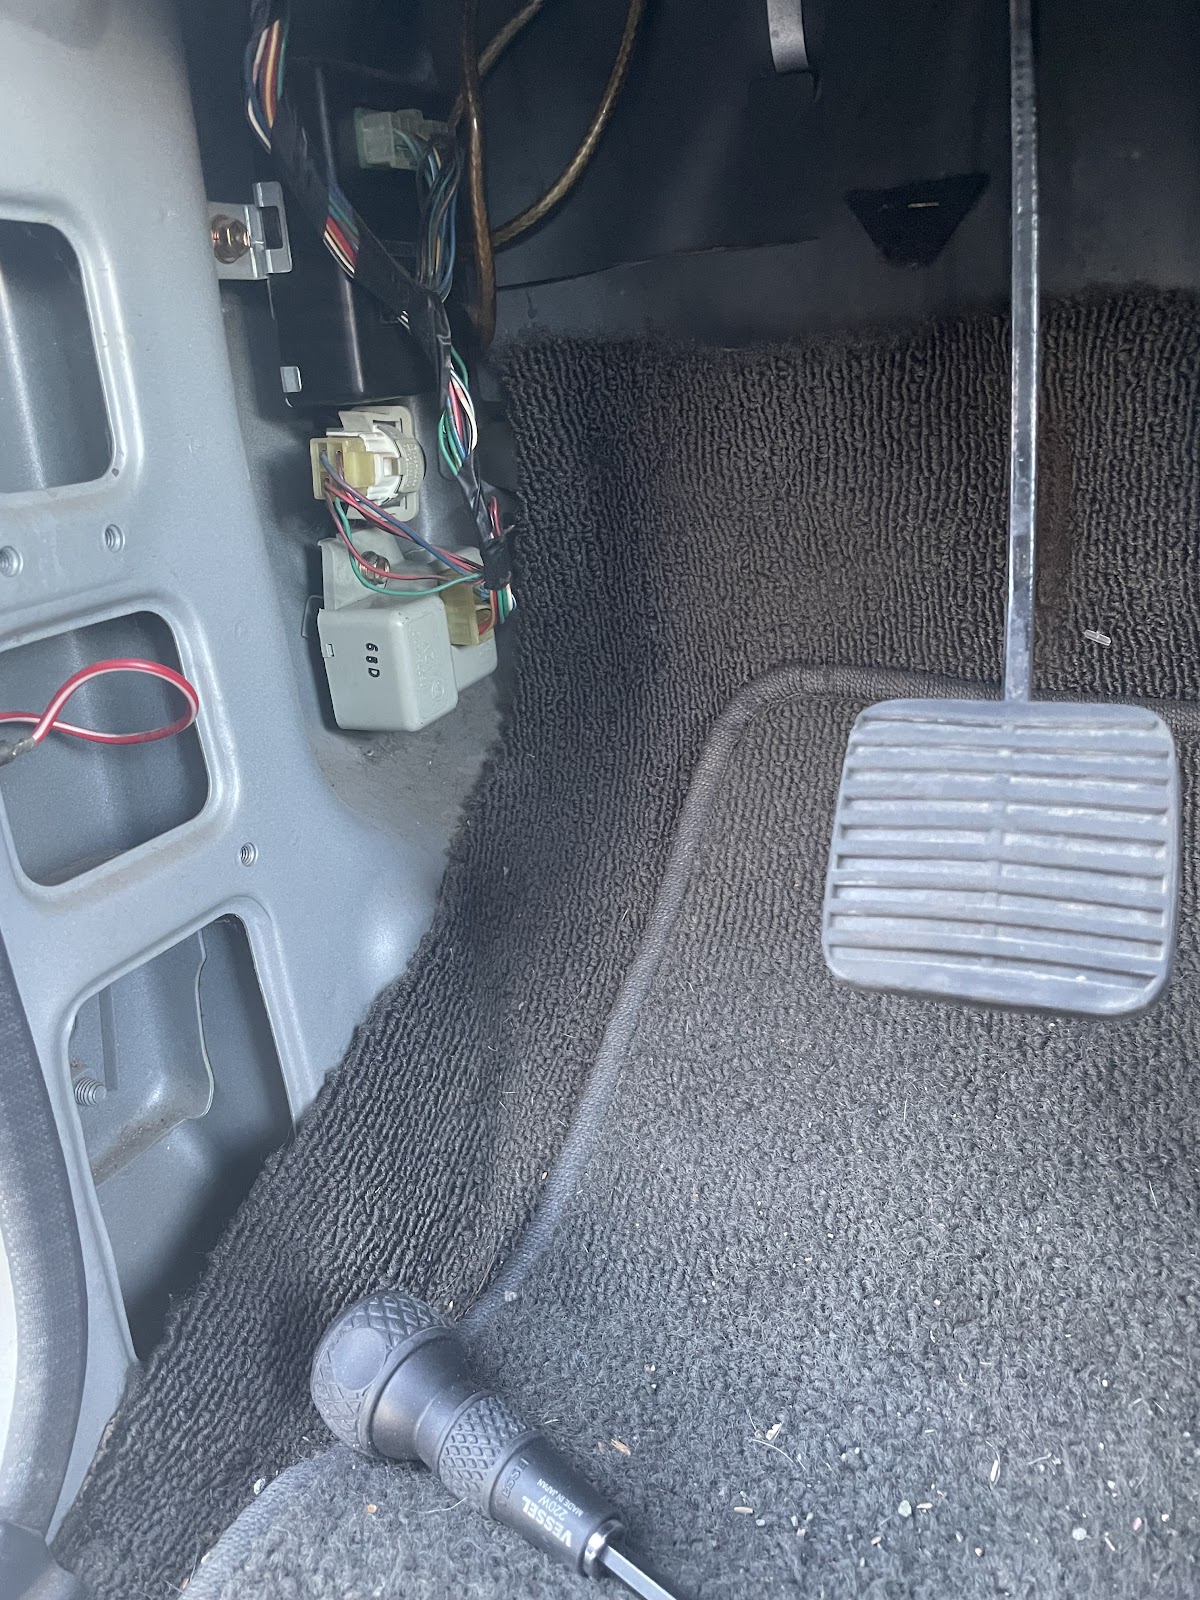
It’s the grey relay on the very bottom.
I had to cycle the pump a few times to work the air out of the system. The driver’s side didn’t work right away until I blew some air through the line to get things working.
I hope this inspires you to try the job yourself. It’s was very satisfying and took only a few hours working methodically and cleaning stuff up as I worked.
View attachment 2928654View attachment 2928649View attachment 2928647View attachment 2928652View attachment 2928655View attachment 2928651View attachment 2928656View attachment 2928650View attachment 2928648View attachment 2928657View attachment 2928653
I'm looking for rear 3-point belts and I'm interested in where you got yours. I'd also be interested in the keepers/guides at that point if you want to make more. Heck, you should just start selling them.3d printed these strap guides (keepers?)to keep the belts out of the way when folding the seat up or down. Since my 60 never had rear shoulder belts, I found the straps interfered when folding the seat and there was a tendency to want to get stuck in the mechanism when putting the seat back up.
Double sided tape keeps them in place. Simple solution. View attachment 2940667
View attachment 2940668
I'm looking for rear 3-point belts and I'm interested in where you got yours. I'd also be interested in the keepers/guides at that point if you want to make more. Heck, you should just start selling them.
1985-1987 Toyota Land Cruiser FJ60, Rear Driver, Passenger, & Center Seat Belt Kit with Push Button Buckles SKU: 50378-V01 Quantity: 1 Webbing Color: 69 - Charcoal SKU: 69 | |
| Late 1984-1987 Toyota Land Cruiser FJ60, Driver & Passenger Seat Belt Kit SKU: 50351-V01 Quantity: 1 Webbing Color: 69 - Charcoal SKU: 69 | |
")
An FJ62 with round headlightsBe careful there - with a rear anti-sway bar, rear cargo anchors, and rear seatbelts, you're getting awfully close to having an FJ62. Next, you'll put in an automatic transmission
Great work, stories, and photos!
 I’m not willing to give up my five speed.
Do you have pics of install...have same but nit sure where frame mounts go.More progress this week on the FJ60. I received my rear OEM FJ62 anti-sway bar from Classic Cruisers and the extended drop links and bushings from Man A Fre this week.
Rusty Gold
View attachment 2930044
I sandblasted and powder coated the parts, the bolts got nickel plated. Not factory spec but I have the setup.
View attachment 2930059
View attachment 2930060
View attachment 2930061
The front links are burly compared to the OEM pieces.
View attachment 2930065
The old links were bent and the bushings were shot.
I did have to take the wagon to the shop to move the exhaust pipe a little because the rear driver side link rubbed. Not too bad.
Overall, this was an easy and very worthwhile upgrade. The truck is much more composed on windy roads and is better behaved during freeway lane changes.
View attachment 2930058
Do you have pics of install...have same but nit sure where frame mounts go.
Here is a pic of the rear lower anti swaybar mounts. They will be a single bolt hole with a slot above it for the clip that goes around the bushing.Did the mounts for the rear sway bar start in 85? I'd love to add one but I suspect my 84 might be out of luck.
Did you get your visors from CruiserOutfitters? Thanks again for the sway bar pics too. Super helpful on my install. -CarlSo after my back recovered from my drive, I got to work on the seats. After weighing my options, I decided I wanted to keep my stocks and covers for now and just get new cushions, so I swallowed and placed my order with $SOR for a pair of seat bottoms.
View attachment 2917092View attachment 2917093View attachment 2917094
View attachment 2917095
The finished seat was very firm and felt about 4” taller. I had to readjust my mirrors a lot. It eventually settled and became more comfortable. I made my first vinyl repair with the Permatex kit. Getting the color right was hard and it seems I got worse at it with each separate coat I had to apply. It will do for now and is helping to keep the tear from getting worse.
View attachment 2917096
I also got around to installing the incline meter. I had to find a new home for the CB that was crammed into the modified slot under the radio. I printed up some slides to install the radio in the ashtray slot for now.
View attachment 2917097
I thought I could live with the bloated visors since they seem impossible to find in good shape but that’s to the folks from Mud I found out the 70 series visors are still available and a good fit. The strange sand color really does blend with my grey interior.
View attachment 2917098
The wagon came with a miss matched spare so I got a new K02 and a stock chrome wheel and mounted it in the stock location.
I also removed the Kaymar tire carrier.
View attachment 2917099
View attachment 2917100
No, Partsouq. Even with shipping they were the best deal at the time.Did you get your visors from CruiserOutfitters? Thanks again for the sway bar pics too. Super helpful on my install. -Carl