Ernboto’s FJ60 (1 Viewer)

This site may earn a commission from merchant affiliate
links, including eBay, Amazon, Skimlinks, and others.

Ernboto

My garage is my happy place
SILVER Star
Joined
Mar 18, 2021
Threads
9
Messages
158
Location
California
I picked up this beauty last Summer in pretty good shape.
AF3B48A8-90C2-447B-AFCB-D57E5ACCB0AD.jpeg


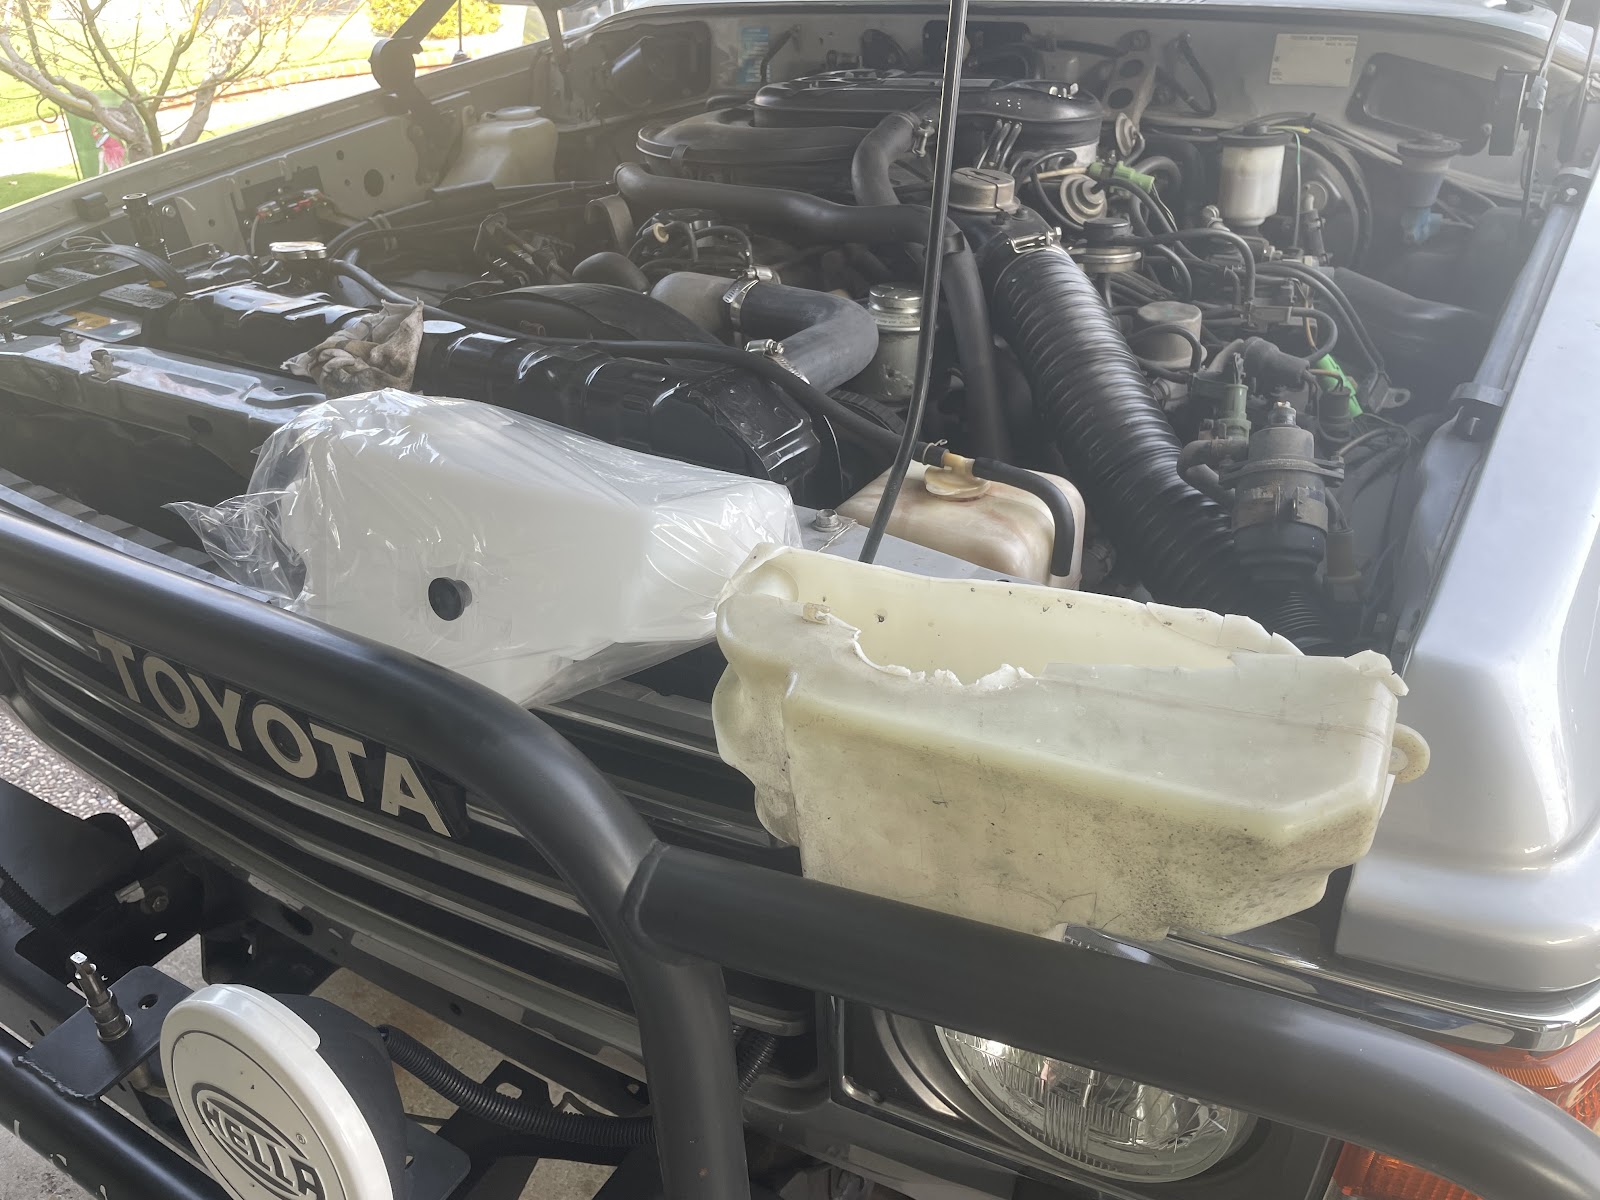
Here’s the the truck right after driving it 450 miles home from where I bought it.

I noted a few things on my drive home.
• This thing is fun
• Get used to thumbs up on the road
• These seats are broke down! I can feel the springs 😫
• I don’t think the heater works
• I definitely have an exhaust leak
• Need a new lock cylinder on the driver’s door and ignition
• Horn doesn’t work
• The speedometer is way off! No way I was doing 85 on the freeway.
• Need new rear hatch struts
• I think I made a good choice buying a Land Cruiser.
 
So after my back recovered from my drive, I got to work on the seats. After weighing my options, I decided I wanted to keep my stocks and covers for now and just get new cushions, so I swallowed and placed my order with $SOR for a pair of seat bottoms.

778B18F7-23F5-4DCB-AB38-8F0025B0FE1E.jpeg
7C78A451-2F53-444D-9D60-55E307F2F890.jpeg
95C6886F-A898-42DD-AE58-156DFDAB5527.jpeg


59EFE2E1-9CA9-46FA-8938-6CEEAA9842D8.jpeg

The finished seat was very firm and felt about 4” taller. I had to readjust my mirrors a lot. It eventually settled and became more comfortable. I made my first vinyl repair with the Permatex kit. Getting the color right was hard and it seems I got worse at it with each separate coat I had to apply. It will do for now and is helping to keep the tear from getting worse.

2E4DE180-6AC2-4000-BB4F-CDFB11E3B041.jpeg


I also got around to installing the incline meter. I had to find a new home for the CB that was crammed into the modified slot under the radio. I printed up some slides to install the radio in the ashtray slot for now.

B5FD6531-5C19-446A-9715-FE4FE280A189.jpeg


I thought I could live with the bloated visors since they seem impossible to find in good shape but that’s to the folks from Mud I found out the 70 series visors are still available and a good fit. The strange sand color really does blend with my grey interior.

33393D42-49FF-41E8-82BF-336299E15121.jpeg


The wagon came with a miss matched spare so I got a new K02 and a stock chrome wheel and mounted it in the stock location.
I also removed the Kaymar tire carrier.

A664CF05-5D3D-4BF1-AAD5-60DB8F97509F.jpeg


D82B1D0B-3B18-424C-ACF0-7D95678C67BC.jpeg
 
I pulled out the rear window washer reservoir and found that it actually held water. So that got cleaned up to remove the crusty remnants of washer fluid. The pump worked on the workbench so back it went. I connection everything only to find a few leaks in the lines to the nozzle. It was easy enough to snake a new line using a coupler to connect to the new line. The break was on the passenger side where it pops out of the body and into the lift gate.

There are a few clips just above the driver’s side taillight that you will have to bend out to free the hose. While removing the vent to get better access this wizened piece of jerky fell out.

C6BCD982-AEE0-4EAD-8115-81B8120D533D.jpeg


Looking through some parts diagrams I figured out it was most likely the vent flap that fell out.
AA2624D5-2D14-4434-A9E2-4D0A80A42EF9.jpeg


I found some rubber sheets that seemed like good material to make new flaps. It was easy to staple them in place and button them up.

6423BD90-A397-4E56-9792-F7D2A3F7088D.jpeg
BA80D789-71D9-49EF-8584-B7942FBD3B9D.jpeg


The vent covers got a little sanding and a coat of paint to spruce them up. The gaskets could use replacing, if I can find them. 3d printing them could be a solution.
 
Awesome that you dig into it right away!
good looking rig.
 
Awesome that you dig into it right away!
good looking rig.
I find that I have to work on stuff while it’s still fresh on my mind and I’m still motivated, otherwise i’ll get too used to it and learn to live with it. Also, I wanted to get stuff done while I still had another truck I can drive to pickup parts. I want it ready for camping soon.
 
I find that I have to work on stuff while it’s still fresh on my mind and I’m still motivated, otherwise i’ll get too used to it and learn to live with it. Also, I wanted to get stuff done while I still had another truck I can drive to pickup parts. I want it ready for camping soon.
Yeah, it’s a good way to go about it.
Otherwise things can get worse if you keep putting it off.
Well your on the right track for getting her ready for camping.
Where in CA you located?
 
SF Bay Area

Full disclosure, the timeline is a bit condensed while I play catch-up with the posted
 
Way to get at it! What's going on with the intake manifold? Find the exhaust leak?
There was a crack directly under the carb. Apparently these go when the insulator fails. I was fortunate to find a good used one and had it swapped.
 
There was a crack directly under the carb. Apparently these go when the insulator fails. I was fortunate to find a good used one and had it swapped.
I know exactly what you're talking about. I recently had a leak at the heat riser joint. Took it apart and my insulator plate was cracked and my gaskets were toast. Fortunately my intake is good. I put a block off plate in there ...from cruiser outfitters and flipped the valve to the hot position ...permanently.

Make sure you surface the mating flanges on the intake/exhaust to head after you put your manifolds together and before you mount to the head. They need to be FLAT. And, make sure the bolt holes are lined up so the bolts will go thru and they are flush so the bolt heads will lie flat in them. May want to spot face this area so you don't crack a manifold bolting it back up.

Here's a good read for you from the FAQs/sticky threads: Can we make a exhaust/intake manifold sticky? - https://forum.ih8mud.com/threads/can-we-make-a-exhaust-intake-manifold-sticky.225487/
 
What's going on with the heater? Fan not working? hot to cold slide stuck?
The heaters had several issues. First of all the, one of the previous owners was fond of Bar’s and applied it liberally to fix a leak. From the sludge I found I’d say they used a least a few bottles. I’ve drained and refilled several times and it now pretty clean. The radiator has been replaced under previous ownership but there were many poor repairs made along the way.

After reading up on some common problems. I decided to inspect the thermostat. I tested it and found a lower temp unit was installed. I also found that the o-ring that should sit on top of the thermostat was missing so I replaced them with OEM. That did help raise the temps to normal range but I noted severe pirting of the upper housing. There was a lot of gasket sealer used on the bolts and the bolts were heavily corroded. I also have thought it was curious that they had 1/2” heads. So upon further inspection is saw someone had drilled and tapped the threads for 5/16-18. While drilling they pierced through the casting.
03A5E738-B46B-48C2-B635-CC9074924559.jpeg


I tried to braze the holes, drill, tap and install helicoil repair threads. They held but i got some weeping of coolant up the threads.
I was finally able to source a good used lower so I had to drain it once again to install the new housings. The O-ring was toast from the pitted housing so I’m glad I went back in.

I hadn’t planned on tackling the heater issue at this time but I figured now was as good a time as any since the system was drained.

I disconnected the rear heater lines and tried to blow compressed air through them but the were completely blocked. I could visualize a thick cake of Bar’s leak sludge. I disconnected the rear heater core and attacked the lines at both ends with fish tape, coat hanger wire, and fiberglass rod but it wouldn’t budge. I finally removed the lines altogether and it hit them with a pressure washer, more air and finally more wire chucked up to a drill.
I figured either I’d dislodge the clog or make a hole in the line but at this point I was going win one way or the other even if it means adding rubber hose to splice it.
63B2976F-B14D-4E4B-9B2E-D0A5F0F10452.jpeg

There persistence paid off and I was rewarded with chunks of harder minerals with pockets of sludge and coppery slime. I hooked everything back up and was rewarded with heat from the dash heater but the rear was still cold. Whaa whaaaa 😫
 
I licked my wounds for awhile and convinced myself that I could live without the rear heater but it got to me that I had put all of that work in with no payoff so I looked at the lines and figured I had missed something or my rear heater’s cores were all clogged. I decided to break it down and start with the easiest stuff first.

I figured I should work my way up from the lowest points since sludge was such a problem.

So, once again, time to dump some coolant.

Pro-tip: it’s much easier to drain the cooling system from the lower heater lines that from radiator petcock, at least on my truck. The stupid petcock is aimed directly over a frame brace and just splashes everywhere but in my bucket.

Anyway, the next lowest place to look are the hard lines that feed the rear heaters. I was dreading a fight like I had with the lowers but there was no turning back now.

F301F531-C736-4C26-9EF9-24FBF780AB08.jpeg


I popped the “y” pipe free and sure enough the 35 mm long tube was completely filled with more coppery sludge and mineral chunks.
It just goes to show that you should never assume the problem you find is the only one to be found.
I poked around at it with screwdrivers pointy tools until I was finally met with a rush of clean coolant.

The other lines seemed clear so back together it went. A test drive proved I had found all of the clogs, because the rear heater was pushing out major heat. It took a few cycles to work the air out of the system. After that both heaters were working great.

There aren’t a lot of luxury items features in the 60’s so you have to make sure the ones it has actually work, right?
 
Gotta wonder how much of that Bar's leak crap is clogged in the heater core. And that absolutely sucks that someone would drill and tap SAE on a land cruiser.

FYI CityRacer as this: OEM Thermostat Housing Kit for '81 to '87 Land Cruiser FJ40 FJ60 with Oil Cooler - https://www.cityracerllc.com/collections/land-cruiser-60-series/products/oem-thermostat-housing-kit-for-land-cruiser-fj60-fj62
That is a nice kit, reasonably priced. Unfortunately, I had already ordered the upper housing and thermostat from the dealer before I new the lower had been butchered. It wasn’t until I got into it that I made the discovery. Live and learn. City Racer has been a good source for parts and they are local. Bonus!
 
The driver side window regulator was really crunchy so I ordered a replacement from Rock Auto. It was an aftermarket unit and it loonies okay until I compared it to the original. The comparison on build quality. Since I had everything apart and I’m impatient I pressed on.

I don’t think I can add too much insight on the subject but I will point out a couple of things I’ve done that make the job easier.

5C3B2C86-2882-4C0A-BBCB-FA21911D8AB2.jpeg


Get one of the door handle tools to remove the clip. Much easier and kinder to your door panel and handle.

9B70B4C9-4546-4E81-B2B1-2BBAEAC7DCF9.jpeg

Get some nylon interior tools to help pry the fasteners more gently. No matter how gentle, you are bound to damage some so get spares ahead of any work.
image.jpg


Removal of the regulator can be done without taking the window out. Secure it out of the way with duct tape or using a suction cup tool to keep it out of your way.
I had this handle in my bathroom and borrowed it for the job.

While your in there, spray the tracks with something like Blaster penetrating spray to break up the caked grease.

While in the door I replaced the worn lock cylinder. I found a NOS unit and had it keyed to match by a local locksmith.

I found the key code on the original passenger side door lock, had the dealer cut me a new one and took that and the cyclinder to an amazing local locksmith. Smooth like butter now.

3A2B262F-6D7A-49D8-9E31-D1E290B12B9F.jpeg
 
Last edited:
Like many wagons of this vintage, my washer reservoir was cracked and leaking. I ordered an excellent reproduction from @TRFarmers , along with a new grommet for the pump. I hastily installed the new unit and filled the system with water. The system had a steady leak when sitting and could not build enough pressure for the squirrels to function. The valves appeared bad so I ordered new ones.

They arrived this week so I got to work.

These are all of the tools I used to do the job.
jRJojFACasEIh5QAyRkjyUO5fLO6ph8nnk0BkhtFsIAGxVUwXF2R6ZLArtFu8QMJ0T0toy6VJQxYpBUldOCUc_MU4KkYwwi3eij-2mRRK0Y_CLdx4_TSCp5RHfjISdh9ft8QBlwh

The WD-40 will help loosen the rusty bolts and stuck on hoses. The pick can help work the straw into the hose. A pair of 10mm sockets with extensions are ideal and a good #2 Phillips.

I started by removing the reservoir, held in place by three 10mm bolts. Once free, I removed the hose with my vice like grip.

0l90bJaN8duKQRihmphU1POLMOk_POccghqE7vmvUY4vW2oM6rl78zsJcQAojh1L76_Y_cQnJ0zOatVh17jmecTQSEEMqTKeUEiFZcZO2B8dFeupSFuMS_c7yUHUIhVLHKEop7uQ

Next comes the connector, just a simple push on the snap.
WzjIt7eqpXzyFA4A2yb3SI7HQ8IKT17nK9GPmwgr0K_Su53lGa9FPE8tW_DWSedjk-W2KN3IDI4492Q0p97Xh-XYs0YZbfo3V-qDkkdOZBfcikXYBiqbi85GOGWbD-Tvz03urWzO

Now I swapped the pump from the old tank to the new one. The old grommet disintegrated when I pulled it out so I’m glad I ordered the new one with the tank.

fdLY0XclfaCpKCqL1UbjyK9A9mRNG3j7eLX8q68jgCNkQ3v3hLvnTwG_GHQfPwnS8FeQPACA_5biIjM2-HJuL9l3eQeyU2xBXIDfj2H9czhUp3NX3WQVVYtgM6wgrzouREofQK1j


Old and busted versus new hotness
W_YpN2Uu7f2Ii7EDuavLRL8LlHs8A778Dp0RBkUr730roL5VWXewa_ARJ5NCM4z5jTFkWpmLnunYdkxCdX78bAaEHkuPAXk_2yyltudRHaXSMWlwSgohYC_DUgIO6AH1XM9AOu-E


While the reservoir is out of the vehicle, test the pump. I added some water and connected the pump to a 12v bench power supply. The larger red cable is positive. Cycle it briefly, they are not designed to run for long.
p4WKBBy6T1Ol3FK2jbC6PmVsXChZmbO83RWmsGUsP7r3q6zl5bdsPQUY_FxpjB8CLBiyd2PcmKWWg__x3YZpzZUxiVWgIL8cMdmjTUb2Ypwdp2gCHpheyncunGCvw_FGEg-_5RCh


I originally did not order the valves so when I reconnected the tank, water just leaked out. More than likely, if the valves are the originals, you’ll need new ones.

To access the valves, I removed the headlight bezels. It’s just four Philips screws, three on the corner faces and one on the top.

RMVHj9JsE4YE1Zj6DosgXAUhj0AhSFGcElzOq48ZxANe4v4OMWF9hCOxQEy-FUTk-nb35gLow37dRobuCCbUdcf5bEaGx004axyuk22iVRrgtmT64JB2eT9_NJyjtbWVvEpWtbK3


There’s a single electric connector, disconnecting it gave me better access to the valves.

cfVMYrkx8QVcqRCYLgbHnfY6kfBBIzI7KATluUEnAFzo0a9XwTT7DrF9q05Gnn48TL0BGOTTcoRB7Td9mYZqFH_6szezizxgUOsfe8DI2hqaO3tOsq9tcotlsM5NSAM7mSBfGH16


Removing the valves was the hardest part of the job. The hoses were stuck pretty good so some WD40 worked in with a screwdriver or pick helps to break them free. For the driver side, I ended up moving the clamps back toward the valve and pulling off the squirter from the front and working the hose free that way. The hose won’t fit through the hole in the sheet metal so it made it easier to work things free by pulling on the squirter housing.

Once I got one end free, I was able to drop the line through the gap and work on the other clamp from underneath.

65zJtEMGpjkl7IXD66Msh1AwFpkvm8OToLDkW-oJI8NSlIZJFMIDGoM3XBbrGgHulKtnHAiEv59_p7Bg9yHgkbzXxrVyLlCwX111lJ3zpXdMlA3fq4TgkT2MAthshwaEibxhaiKB


With both valves removed I blew some air through the hoses to clean any debris left in the system.

Then it’s just a matter of putting everything back together.

The valves are marked with an arrow in the direction of water flow. Don’t mess this up or you’ll have to wrestle the valve off again like I did.

8_ohAp0LitOF7apgJItgr4UmVg1_raaIsDoMDiZmL1zeJDkihidgRfozrFAE8eOErztsBLTc8Pxfx-_tEejMwlel0UepKK28I1g4y5iEhSU6XDWm6nYbzRPU4JsREYq7X9U6rUie


If you’re feeling lucky, you can test you old valve pretty easily once it’s outside the vehicle. If you blow into the fitting in the direction of the arrow, you should feel resistance. Unless you have super human lungs, no air will escape from the other end. If your valves are shot like mine, air will escape from the small hole at the elbow or through the other fitting. The system is designed to only allow water to flow to the washers under the pressure of the pump when activated. Otherwise, gravity would just drain the water while driving down the road.

Plan on replacing the valves ahead of time and just order them.

Once reconnected you should be able to fill the tank and test. Do this before replacing the headlight bezels.

FYI: the headlamp washers work off the same button as the windshield washers but only when the headlights are on. I didn’t know this and went on an unnecessary troubleshooting session.

If the washers don’t activate you may have a short or ground or even a bad relay.

The relay is located behind the driver side kick panel below the fuse panel.
Ze01dCDLPveGIDVDEh3MaIu0jmhfn2pZRqVsHkWuhd_2QnSQGtkkKgeDU_wussP5ggCah7rzO_F_axb4msorr2DwaEv7oAkm8V9XHQOiBknQHzsHO1nqD4QXN_WFHFm77979od3v

It’s the grey relay on the very bottom.

I had to cycle the pump a few times to work the air out of the system. The driver’s side didn’t work right away until I blew some air through the line to get things working.

I hope this inspires you to try the job yourself. It’s was very satisfying and took only a few hours working methodically and cleaning stuff up as I worked.


Edited: 5/3/22 removed duplicate photos

1645119461715.jpeg


1645119462651.jpeg


1645119461580.jpeg


1645119462513.jpeg


1645119462185.jpeg


1645119461862.jpeg


1645119462986.jpeg


1645119461402.png


1645119462043.png


1645119462374.png


1645119462846.png
 
Last edited:

Users who are viewing this thread

Back
Top Bottom