BJ42 going in half - project (1 Viewer)

This site may earn a commission from merchant affiliate
links, including eBay, Amazon, Skimlinks, and others.

Joined
Jan 17, 2007
Threads
40
Messages
1,334
Location
Finland
I’ve always wanted BJ40 or BJ42, even before I had a driving license 25 year ago. But I’ve never had a right time to buy it, until last December when a friend of mine told that his friend is selling his 1981 Land Cruiser BJ42 (Euro-specs, I live in Finland).

It was quite rusty, but very close to the original, never welded and only 176tkm driven. It was been 12 years off the road, sitting in a barn and last 3 years outside. After couple weeks of thinking I had to buy it, the price was right too.
picture.php


Last winter it just rested and dried in my workplace.

I only took the spare wheel carrier and towing hitch off to make it shorter/easier to store. Btw. the hitch is rated for 3000 kg (6614 lbs) as Toyota is recommend.
HJzf9B-mG.jpg

SyxfG5BZQM.jpg


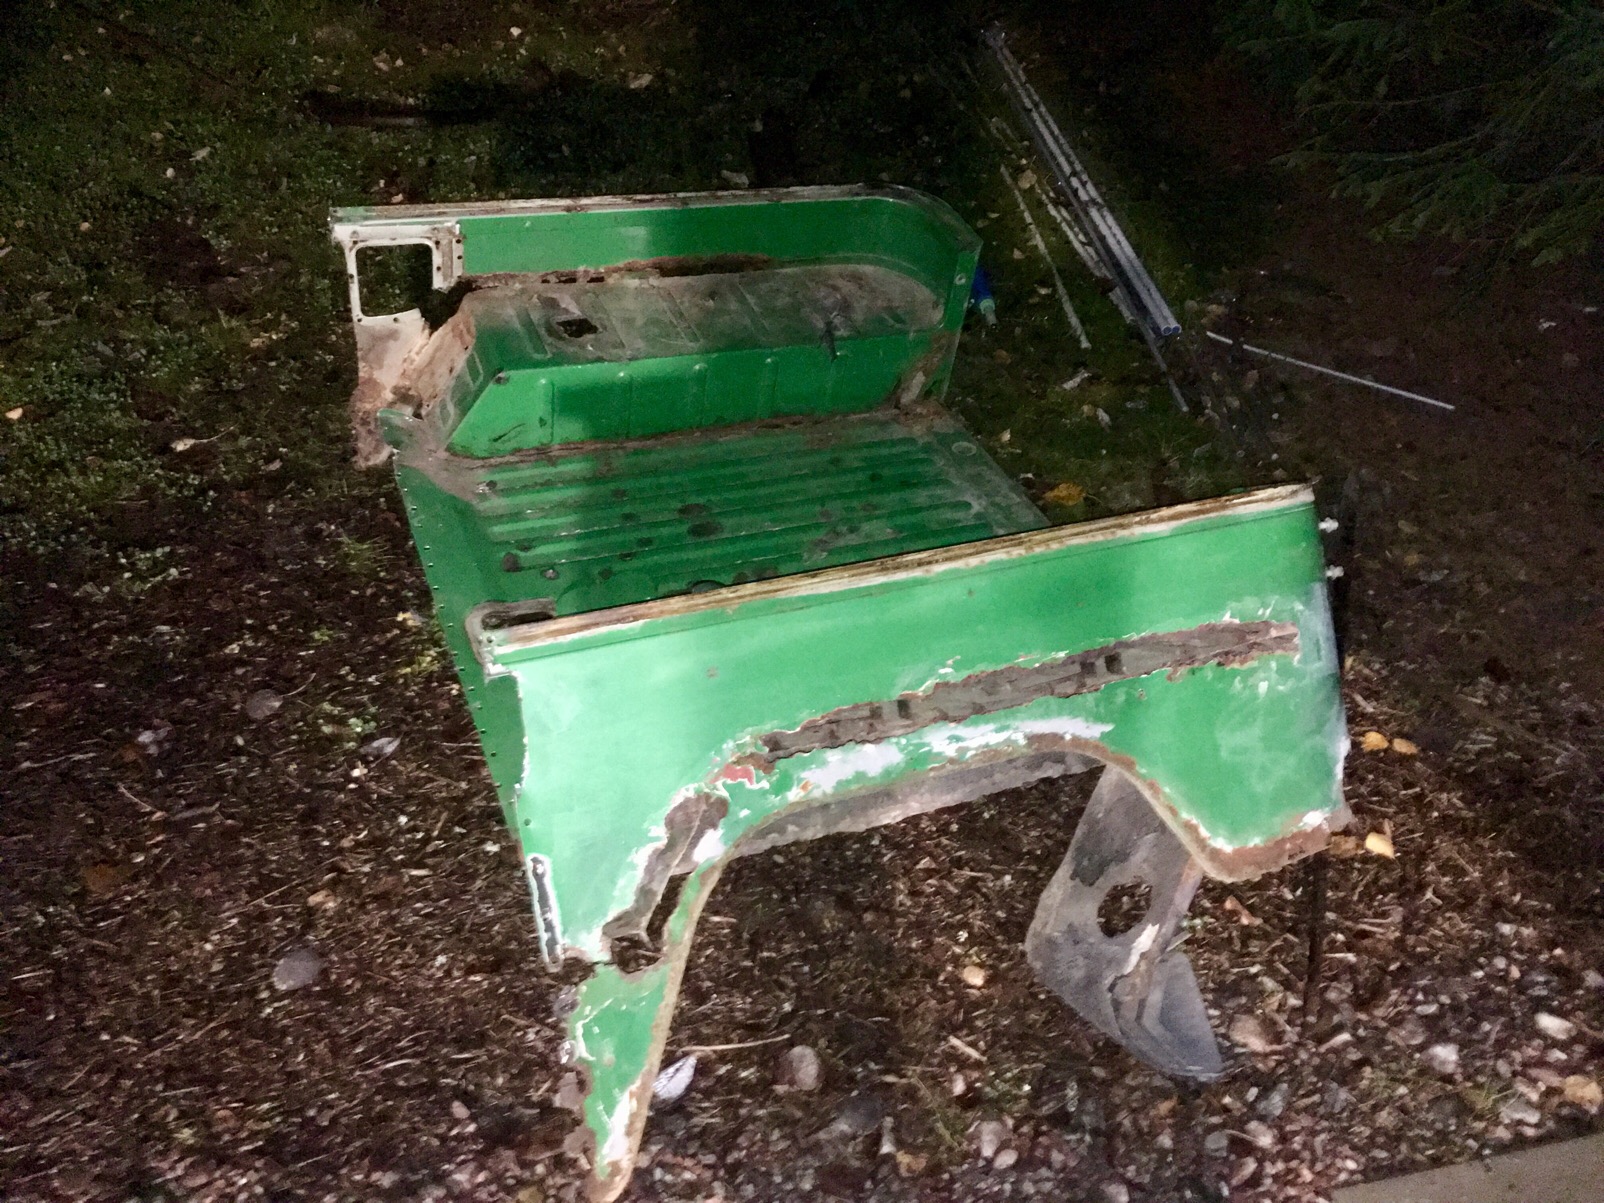
Well, checked the rust situation more specifically too:
rJ-FNi9_G.jpg

picture.php

picture.php

picture.php

picture.php

picture.php

picture.php

picture.php

picture.php

picture.php


...and desided to order 1/2 tub from Teseven, France. The front half of the tub is surpricingly good, no holes in the floor. There is some undercoating/rust prevention stuff sprayed maybe when it’s been new, it’s saved it, but the rear part is exposed more to sand&salt water spray.

The frame is quite good too excluding again the most rear parts. I already ordered the repair parts from Awl_TEQ (very high quality, I can highly recommend).

Also a lot of other parts is already bought:
• 4” Rough Country springs and shocks (I think I’ll get it work and flex)
• greasable shackles and urethane bushes
• 8.5x15” steel wheels
• 35x12.50R15 Trepadors
• fiberglass fenders
• fiberglass flares
• HJ61 steering box and all other steering parts
• round bezel and bib for it
• early model round signal lights
• older model steering wheel
• batteries (2x100Ah)
• lower part of the front door as for a repair part
• parking brake cable
• + some smaller things

So here it is, the last day as a whole:
picture.php

Runs great:
I had to build a ”garage” for it first:
picture.php

Syx6vNi0f.jpg


And then dismantling. The windscreen frame is perfect. Thank God.
picture.php


The roof, doors, front bib and fenders are removed:
picture.php


So, what I am planning to do? You can guess regarding to the part list. Otherwise, just clean and original look. The color will be 621 = Rustic Green.
classic-sport-rustic.png

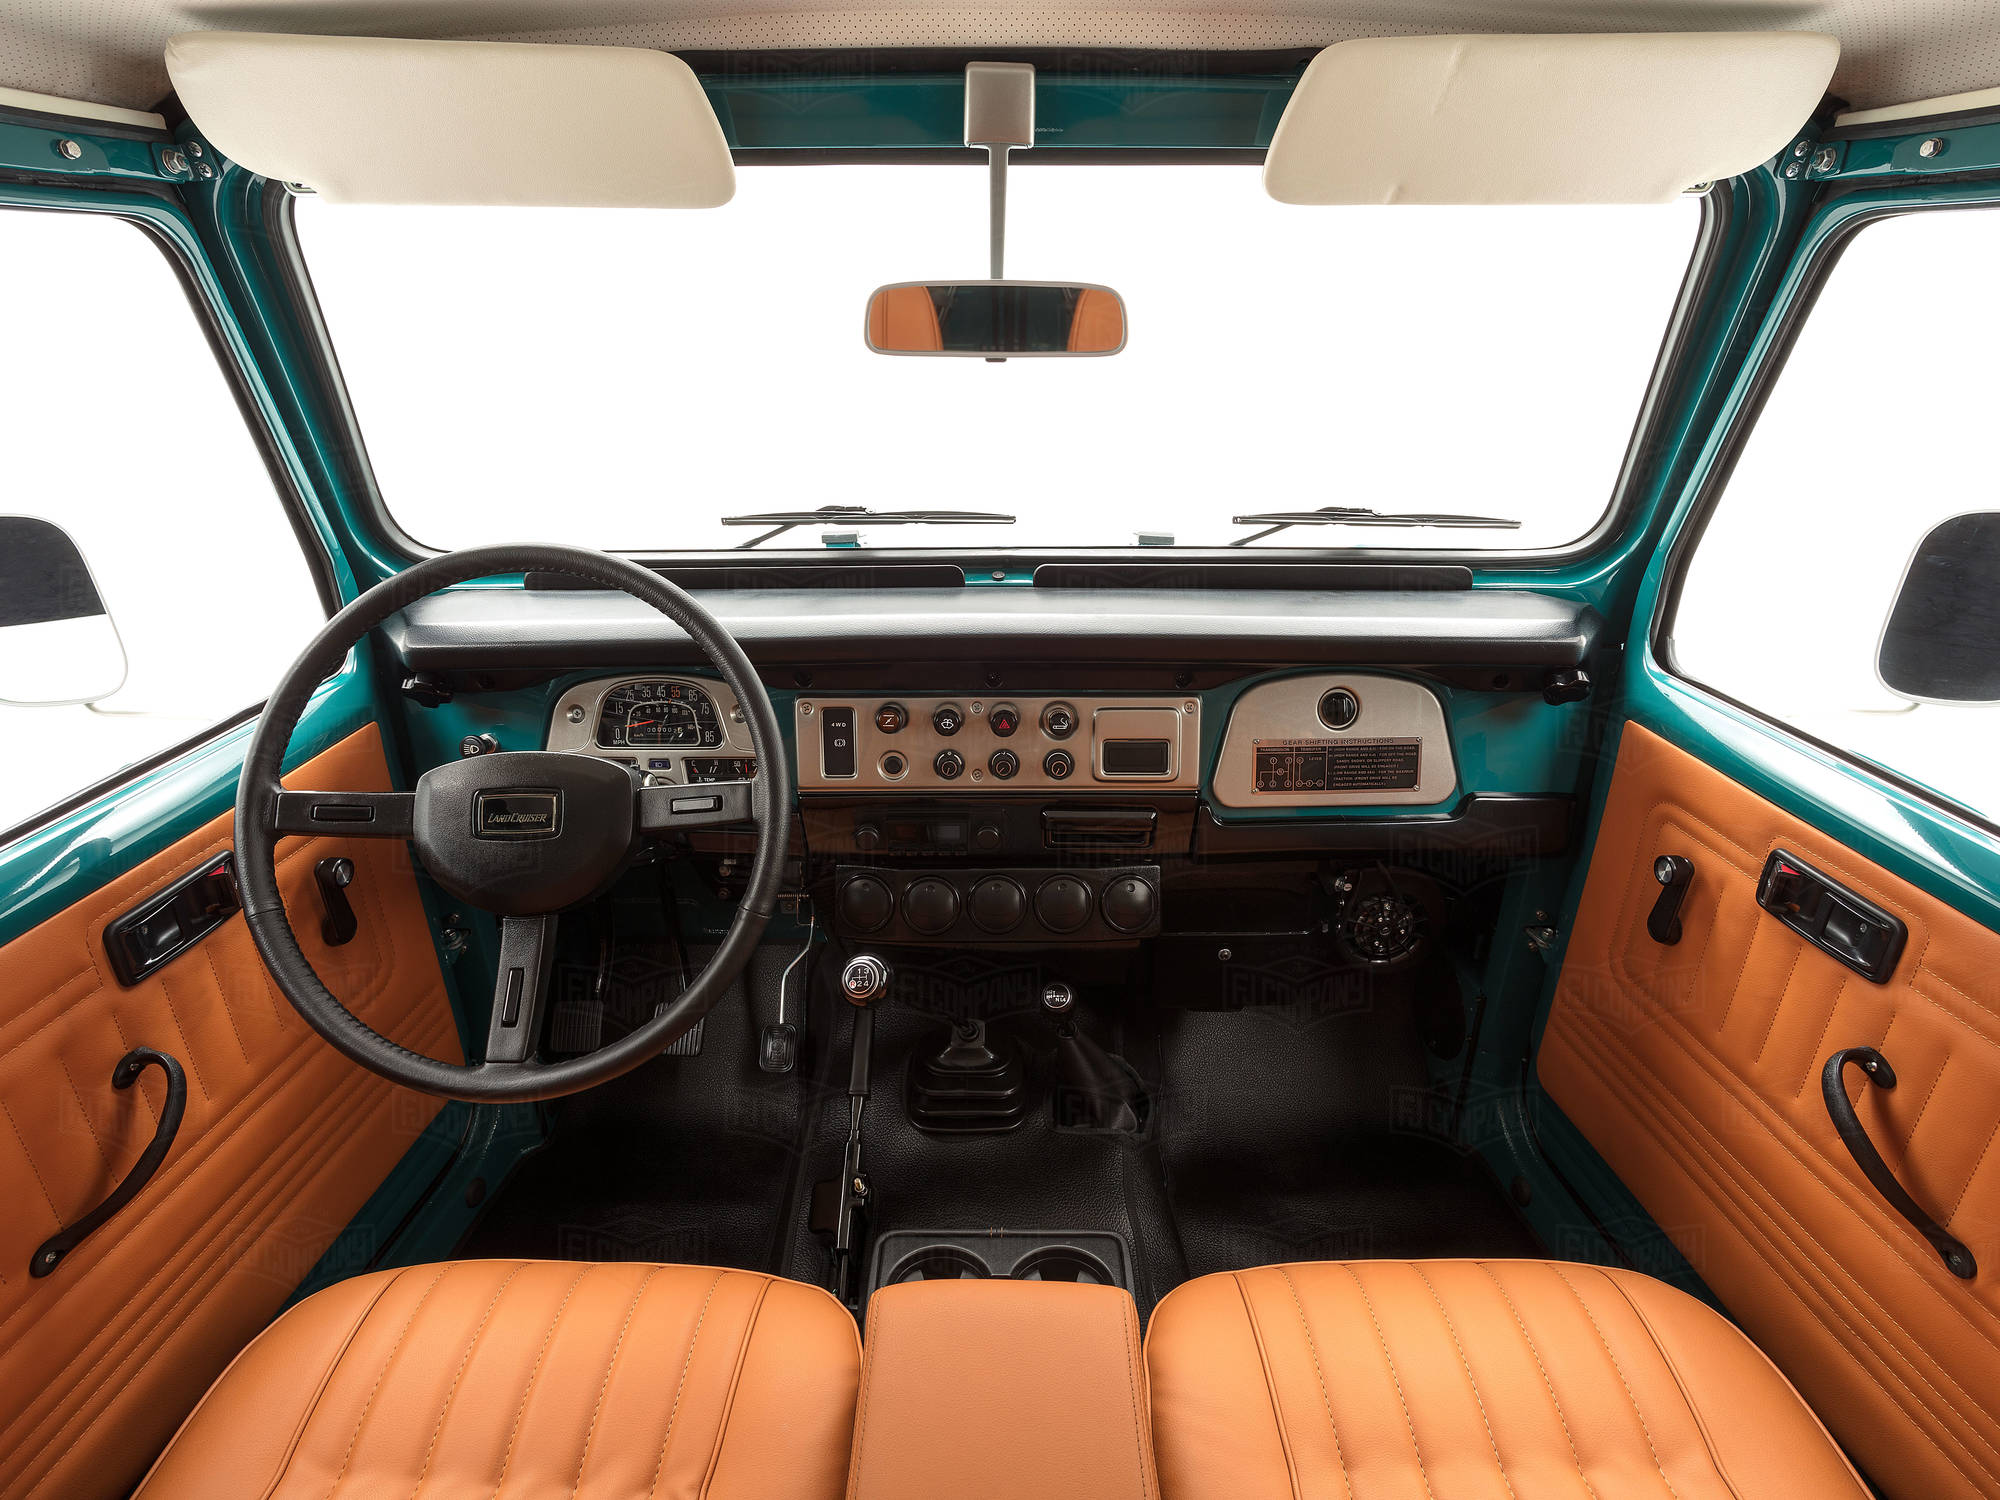
And I would like to get the same color interior as FJ Company is done:
image_59b14ea1b759d_The-FJ-Company-1983-FJ43-Land-Cruiser---Rustic-Green-361844---Studio_027.jpg


7E2CE600-F9F6-477D-8E3D-C82011114033.jpeg
 
Last edited:
Not much happened yet, but HJ61 power steering box is installed.

Holes for the mounting bolts drilled:
picture.php


A frame hole had to weld:
picture.php


Holes for the ferrules:
picture.php


And welded:
picture.php


I wanted to get the steering box to the same spot where it is in HJ61 and luckily just passed the radiator frame:
HkDI_urYQ.jpg


Original steering shaft is cut and milled to fit to the HJ61 slide part:
ATTACH]
picture.php


HJ61 steering column support with it’s bearing is cut and welded to the original flange:
ATTACH]
picture.php


And connected:
picture.php


Steering rod is from BJ75, steering stabilizer is Monroe’s:
ATTACH]
picture.php


New shock mount is almost done, now it’s just at the right spot, 6 cm behind, the same 6 cm which is the result when I turn the lower mount backwards:
Sy7WJwrYX.jpg


The battery tray is still under progress, I had to cut it quite much.
 
Last edited:
Some updating. The homemade shock mount is now ready and mounted.
picture.php


Now it sits exactly 60 mm further back, but otherwise just same distance (up/out) than the original.
picture.php


I cut and turn the lower mounting point 180°.
picture.php


picture.php


picture.php


picture.php


picture.php


Then cutting the 2H pulley to fit to 3B crank.
picture.php


picture.php


picture.php


picture.php


And it’s ready.
picture.php


picture.php


I don’t have all kind of micrometers, so the straightness is checked at easy way.
picture.php


picture.php


The belt tensioner bracket had to modify too:
picture.php


picture.php


Homemade bracket for the power steering pump.
picture.php


And here it is.
picture.php
 
Last edited:
And back to the tub. It’s now cut in half.
BkgI2nqsoQ.jpg


Rust/rest in peace, bye. I don’t miss you.
BkU3h9jo7.jpg


The front part is also taken off and carried to my other smaller garage room.
picture.php


picture.php


picture.php


Not much room to do, but maybe just enough.
picture.php


I bolted peaces of plywood to the windshield hinges points the prevent the tub touching ground.
picture.php


Quite good, but there is some need to repair.
SJxyRpqk4.jpg


picture.php


picture.php


picture.php


picture.php


And the same spot from the other side.
picture.php


Right rocker panel’s support is got some hit.
picture.php


Something is bubbling, I have to cut out this.
picture.php


Looks ok.
picture.php
 
So, let’s start drilling the spot welds. You need to get it just right, otherwise you need a hammer and a chisel.
picture.php


The rusty parts are cut off.
picture.php


picture.php


Well, a little more.
picture.php

...because it was not so smooth between the running board and the rocker panel.
picture.php

... and because of this:
picture.php


Right floor is welded.
picture.php

picture.php


The new rear tub front edge look like this.
picture.php


So I cut and welded the front tub edge to match the new tub.
picture.php


picture.php


picture.php


picture.php


picture.php


I think I’ll do the mounting by 6 mm screws, so I could split the tub easily in the future if needed.
 
Last edited:
nice work first of all. the fact you built a nice covered garage with concrete pavers that look level is outstanding~!
one question, its an 81 yes? didn't 81 come standard with factory power steering? why did you need to drill and weld new power steering in, is the HJ61 a better system that requires holes in
 
nice work first of all. the fact you built a nice covered garage with concrete pavers that look level is outstanding~!
Thanks, it’s been surprisingly good, even at winter. 5kW blowing heater + 2.5kW infrared heater give enough heat to comfortable working.
265C9932-EF55-4527-8352-4B85C7DA6ECE.jpeg


A08E7636-C819-4EA3-B2AD-15DA27A95318.jpeg

tlc81 said:
one question, its an 81 yes? didn't 81 come standard with factory power steering? why did you need to drill and weld new power steering in, is the HJ61 a better system that requires holes in
Yes, 7/81.

No, I have understood that power steering is not been even an option in any European versions of the BJ42.

Drilling and welding is for strengthening the frame for the steering box. HJ61 steering box is the same than later FJ60 and FJ62. The best option I know.
 
Last edited:
Rust repairing continues...
welder.gif

Right side rocker panel is done. Made of 1.5 mm thick electro galvanized steel. First about half of the edge is changed:
picture.php


picture.php


picture.php


picture.php


I got punched holes through the driver’s side floor by screw driver:
picture.php


Lid is open:
picture.php


Well, as you can see, there is almost in every seam some rust between. :( Hard to set a line where to stop, this looks quite good and hard, especially after sandblasting, but I’m sure the seam is brown inside.
picture.php

I have to trust in epoxy primer and rust prevention stuff that they will do their job.

It took some time to get the 1.5 mm patch to it’s form, but there it is:
picture.php


And welded:
picture.php


I changed the driver’s side rocker panel too:
picture.php

picture.php

The vertical joint had to bend, there is chassis glue between:
picture.php


And the last thing, B-pillars. I cut the edge off for getting flat surface against the Teseven 1/2 tub.
picture.php


picture.php


So, now it’s finally ready for sandblasting.
 
Last edited:
Work looks good but did you consider sand blasting first so that you could see what you have to work with and what needs replacing? You can always do it after the blasting but I like to blast first to see what I have to work with.
I have beaten it by hammer and chisel from all over, so I’m positive there’s no holes anymore. Easier to paint immediately after the blasting when everything is already done.
 
Quite the nice project ! Just a note if you are welding stainless to steel you will need a compatible filler rod.L309
No stainless here. Only electro galvanized.

Frame bottom part is fixed, looks about ok...
1572730572392.jpeg

...but inside was not:
1572730639251.jpeg


New slice made:
1572730663005.jpeg


And welded:
1572730704064.jpeg


And grinded:
1572730735726.jpeg
 
Last edited:
No stainless here. Only electro galvanized.

Note for ALL readers.. fumes from welding galvanized steel are HIGHLY TOXIC!!! Use appropriate protection to ensure you are safe.
 
Engine (3B) cleaned, seals changed and painted:
1572728370146.jpeg


Checked the internals too, looks good:
1572728534121.jpeg


1572728592224.jpeg


Oil pan painted too:
1572728418948.jpeg


1572728436038.jpeg
 

Users who are viewing this thread

Back
Top Bottom