40/45 Mutt

This site may earn a commission from merchant affiliate
links, including eBay, Amazon, Skimlinks, and others.

To finish up the steering I decided to lift the steering box slightly with a 1/4" plate. This brings it up and slightly towards the firewall

assembly11.webp
assembly12.webp

I also had to bolt the column to the wall in a lower spot. I cut the bottom of the opening and made new bolt holes. Instead of the stock 3 bolts (to on the upper corners and one in the middle on the bottom), I now have 4 (2 on the sides, 2 on the bottom corners)

assembly13.webp
assembly11.webp
assembly12.webp
assembly13.webp
 
Finally it is starting to look like a truck again.

I got everything done on the firewall except the heater valve on the engine side. Also put on the windshield and everything that bolts to that.

The next step will be to finish up all of the wiring in the engine compartment, charge the battery, change all of the fluids, bleed the brakes and clutch and fire it up. I will have to change a rear axle seal as well since it started leaking since I started ripping the truck apart
assembly14.webp
assembly15.webp
assembly16.webp
 
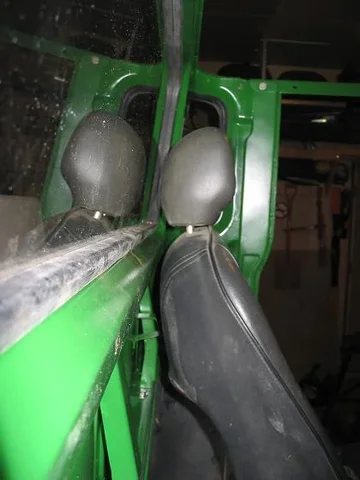
It's looking good. I'm not sure later 40 seats will work in there. When my friend was building his he had early 40 seats in it without much legroom. The original seats in my 79 I think have even more of an angle to the backs. I would suggest trying to find some of the 84-88 toy regular cab buckets. The SR5 versions are pretty comfy, and the seatbacks are designed to fit up against a vertical back wall. I actually used old honda CRX seats in an 82 pickup I had once that were very thin in the backs, and were quite comfortable once I got the brackets fabricated correctly.
 
Cool thanks! At 6'1" and 200lb, I always found the 40 a little short on leg room. I actually had my seats mounted 3" back which was just right with the factory seats. With the 45 cab, and the '77 40 seats, I would have to mount them 2" further forward than stock. That's 5" further forward then I had them before!!!

However, I don't normally run the top on, in which case I could mount them about 1" further forward from where I had my 40 seats. That's not too bad. The back wall of the 45 then fits nicely in the scooped out area on the back of the seat.

For how often I run the top, I might be able to handle it!

Thanks again
 
After finally hooking up and bleeding the brakes and clutch (not without a couple leaks in the brake system), and running the vents for the diffs and transfer, I managed to find some time to start fitting together the front body parts.

How come every time you take a cruiser apart it takes forever to line all of the panels up properly again??!!! (Don't answer that - It's rhetorical)

I should finish up the front end (body) tomorrow if everything goes okay.
assembly17.webp
assembly18.webp
 
Tightened up the fenders, aprons, and bib. Attached the hood. Everything is now lined up better than before!

Just needs the latches and signal lights.
assembly19.webp
 
Actually, post 1 has the pic of my original truck. I had the fenders on the original first.

I didn't build them however. They are aqualu fenders. I just requested from Todd that he build them from checkerplate instead of smooth alluminum.

This time.... I decided to paint them.
 
D'Animal?! You're the one that built that orange ext. cab right?

That thing is frickin' awesome! If I was really looking to build this truck up I would have done something very similar (although, likely not as nice lookin). But I just wanted to fix this one up before I start on my real project next year. Another stretched 40 (+16" in wheelbase and another +13" behind the rear wheels) is in my future. I have a toy drivetrain but will likely switch to something else. Also have a stretched alluminum tub.

B
 
Just about there.

Other than getting the hardtop/doors completed (which I won't be putting on anyway) and the deck/box (I'll temp. put a deck together), all that is left are the seat brackets and the exhaust.
assembly20.webp

This entire time I have been concerned about the rear tire clearance with the cab but will work this some more once the rear deck is on. With about 500lb on the back and the truck flexed as much as I could get it, there is just about 3/4" clearance (as shown). There currently are no bump stops and I haven't checked yet the stroke on the shocks (where is the top and bottom of the travel).
issues1.webp
assembly20.webp
issues1.webp
 
Nice!

Cool looking project! I am also looking forward to seeing the bed installed! If you don't mind Baf-fj44, What welder (welders?) have you been using? I'm looking at buying one soon, and am wanting to get some builders inputs, likes, and dislikes. Keep up the good work!:cheers:
 
If you don't mind Baf-fj44, What welder (welders?) have you been using? I'm looking at buying one soon, and am wanting to get some builders inputs, likes, and dislikes. Keep up the good work!:cheers:

I've got a Lincoln weld-pak 155 (Mig with argon/CO mix). Works great. Easily does 3/16", which is what all of my work was. It will do 1/4" as well, you just have to build the welds up a bit.
 
Finally got some more work done. I can't believe how slow I'm doing this build. It's PAINFUL!!

Anyway, I cut the posts off of the bottom of the hardtop (due to the alluminum tub), and trimmed the bottoms of the vertical supports along the back to allow the top to be positioned as far forward as possible.

Here are the pics with the back wall installed with the supports going to the windshield. Also threw the door shells on to see how they fit. Holy! They fit better than they did before. (well... the driver side does anyway)

Next will be paint for all of these pieces. Fiberglass top is on it's way from gozzard.

(I can't believe how short the wheelbase looks with the truck cab on!!!)
assembly21.webp
assembly22.webp
 
Thanks!

Thanks for the info on the welder. I have actually picked one up since I left the post. I bought the Hobart Handler 210 after looking at a bunch of machines. It seemed the most capable for what all I would need without breaking the bank.

Your Rig is looking good! You've made a lot of progress imo...
Have you seen this website? Home Page Cruiser Concepts I have seen this guys rig in person both while it was a 40 and now, and He too has done an awesome job. Just thought that you might want to check it out. If for no other reason than the brotherhood... The Guy (Mike) is a member here on mud and his username is: ZORNFF :cheers:
 
Been steadily making SLOW progress. But here are a few updated pictures.

Got the hardtop and doors painted and reassembled. Some of the window seals on the top are crappy but they'll do for now
assembly23.webp

I built some new seat brackets as the 45 ones are different from the 40's and I don't have the 45's. Mounted the seat as far back as possible but also so I could put the seat further back when the hardtop is off
assembly24.webp

Unbolted it all, painted the brackets then rebolted everything together. Here's what the bracket layout looks like
assembly25.webp
assembly23.webp
assembly24.webp
assembly25.webp
 
So I finished up mounting the seats and seat belts. I don't have the corner shoulder mounts but just used one of the upper bolt holes for now until I can make some up. The retractor mounts to the top of the door frame pillar.

Also got my fiberglass top from Gozzard and painted the unfinished inside
parts3.webp
parts4.webp

Here is a pic of the truck currently. The top is just sitting in place without the bolts.
assembly26.webp
parts3.webp
parts4.webp
assembly26.webp
 

Users who are viewing this thread

Back
Top Bottom