3FE refresh - doing a reboot on my '92 (1 Viewer)

This site may earn a commission from merchant affiliate
links, including eBay, Amazon, Skimlinks, and others.

Hi Jason, great job on the refresh. I've been doing the same thing, but have stretched it out over a few months. My :princess: isn't as allowing as your :princess: when it comes to husband/daddy duty.

Anyway, I saw where you said that your PS hose was damaged by a belt. I would encourage you to replace the high and low pressure lines NOW. The way that they have to wrap over the front frame cross-member and under the radiator, make them impossible to get out unless you remove the radiator. As many before me have had to do, I removed the radiator to get to my PS hoses that were leaking. It is a PITA, so do it while you've got it out if you can.

Good luck!!

My next job will be the push-rod gasket and a PS pump rebuild...never ending, but fun! :cheers:

Thanks on the kudos! Definitely fun. You're right though, seems like there's always something else. I see what you're saying about the PS lines - I didn't even consider that. I'm pretty tapped- out as far as 'free' time goes. I blasted through the first four days pretty quick. Wasn't expecting how long it took to clean everything. Plus, I'm trying to be as methodical as I can so as to avoid a lot of @!$? ups. So, for the past couple of weeks now I've been lucky to get a few hours on Saturday. Back to husband, dad & working stiff ville.

Jason
 
So yeah, my epic long weekend came and went. At this point, we've been a one car household for a couple of weeks. Luckily, my daily is a motorcycle, so commute duty is covered. Unfortunately, all four offspring have activities that I haven't been able to help with (no kids on the bikes). :princess: is getting super agitated.


Jason
 
That crap on the thermostat and housing is most likely the result of a PO using some sort of RTV product as opposed to the Toyota gasket. I had that on mine one time when I used to have other knuckleheads work on my truck.

You are certainly doing a fantastic job and yes, the dissy needs to come out if you're going after the side cover gasket. It's a PITA, but you're well past that point now.

And I will echo the PS line statement made earlier. Toyota sells the PS lines as 1 piece, from the pump to the box, including the "paperclip" cooler mounted on the front cross member. It's a 20 minute job to do it with the way she sits now and impossible to do once you put everything back. The high pressure lines tend to weep after 20 or so years anyway, and the front mounted cooler may also be suspect. I had replaced mine when my radiator let go a few years ago. I also took the time to use some POR15 on the cooler with a top coat of Rustolium.

A quick note about the fan. Please make sure you carefully check the base of each blade for hairline stress cracks. It doesn't happen often, but there have been a couple of cases where the fan lets go at speed. That creates quite a mess in the engine bay.
 
The battery cables were pretty ragged when I first got the truck. Tried to get some OEM from CDan but he informed me they were NLA. Held off on buying custom ones because of price but finally decided to bite the bullet and called Urban Land Cruisers to put in an order for their cables. AWESOME. Extremely beefy and well-built. Install was ok, but the cables were super stiff. It helped a little to warm them up to room temperature first. As it turned out, I didn't even have a ground cable going from starter to frame any longer!

Along with installing the batt cables, I spent time stripping all of the crusty electrical tape off of the random wire harness ends/connections and re-wrapped everything with fresh electrical plastic tubing and tape (including battery cables).


This pic doesn't do the cables justice. Had only wrapped a couple at this point.
image.jpg

image.jpg
 
That crap on the thermostat and housing is most likely the result of a PO using some sort of RTV product as opposed to the Toyota gasket. I had that on mine one time when I used to have other knuckleheads work on my truck.

You are certainly doing a fantastic job and yes, the dissy needs to come out if you're going after the side cover gasket. It's a PITA, but you're well past that point now.

And I will echo the PS line statement made earlier. Toyota sells the PS lines as 1 piece, from the pump to the box, including the "paperclip" cooler mounted on the front cross member. It's a 20 minute job to do it with the way she sits now and impossible to do once you put everything back. The high pressure lines tend to weep after 20 or so years anyway, and the front mounted cooler may also be suspect. I had replaced mine when my radiator let go a few years ago. I also took the time to use some POR15 on the cooler with a top coat of Rustolium.

A quick note about the fan. Please make sure you carefully check the base of each blade for hairline stress cracks. It doesn't happen often, but there have been a couple of cases where the fan lets go at speed. That creates quite a mess in the engine bay.

Thanks Jon. Will definitely inspect the fan. Sort of a bummer to hear about the PS lines. I really don't want to get this pig back together only to have a line burst in three weeks. OTOH, I'm really feeling the heat to get everything buttoned up and back on the road. Will have to chew on this for a bit. And a great tip on the POR15!

Jason
 
So I called my local dealer as well as American Toyota down in ABQ. No power steering line assemblies in stock. Wasn't too surprised. Said it would take a week or so to get them in. MUD price on that bad boy is over $400 large!! That's going to have to wait a bit...


Moving on to valve cover.

Removal of the cover gave me some trouble. Kept wanting to hang up at the very back on the rocker assembly bolt. Was difficult to maneuver up and over. The PCV valve was so caked with crap on the inside that it was all I could do just to blow a tiny bit of air through. It also took for freakin ever to yank that little donkey from the cover. I wasn't about to let a $4 part defeat me though. :hillbilly:

131.jpg


130.jpg


Finally got it off. Wasn't in too bad of shape, but was a little beat up.

147.jpg


LOTS of wire wheel action.

152.jpg


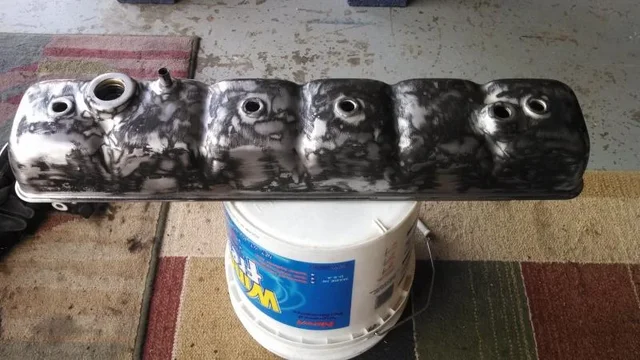
End result. Took a full day between everything else to apply a bazillion coats of primer and high heat engine paint. New PCV valve, new oil-fill cap and all new grommets. The red valve cover nuts are supposed to be good for about 3HP. :p WOOT!!
158.jpg

Jason

131.jpg


130.jpg


147.jpg


152.jpg


158.jpg
 
Last edited:
Tear down continues.

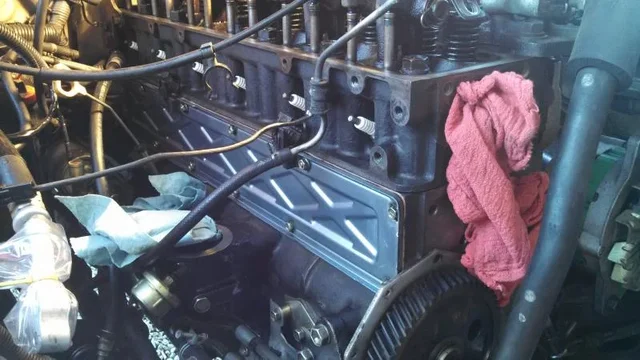
Getting the pushrod cover off was a real treat. I don't know how some of you guys manage to get that gasket replaced without removing almost everything on that side of the engine bay first. What a drag that was. Cleaning the old cork gasket off was even more fun. Again, green Scotch Brite pads are my new best friend. And a painter's razor blade scraper...


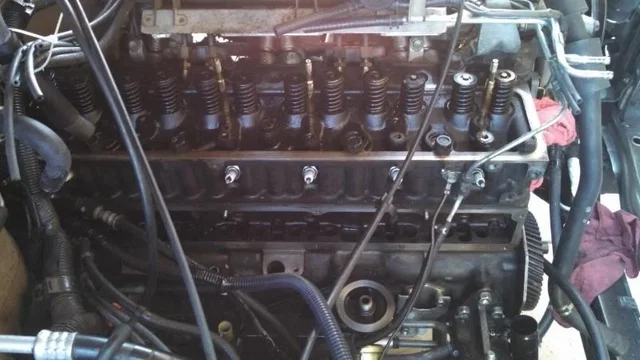
Spent a lot of time with kerosene-soaked rags cleaning EVERYTHING. I think it turned out ok.
155.jpg


This is as far as I went in tear down mode. I didn't want to pass the point of no return.... although I'm often (usually) tempted to. :grinpimp:

132.jpg


Old plugs didn't look too bad, actually.

139.jpg


Jason

155.jpg


132.jpg


139.jpg
 
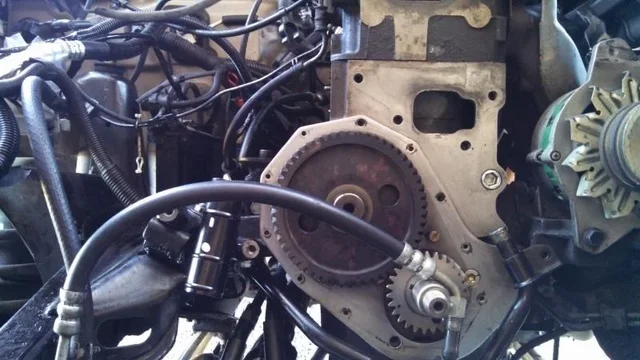
Got the front end tidied up.

Before:

40.jpg


After:

138.jpg


Got the pushrod cover cleaned/prepped/painted and gasket on. I used some Permatex high-tack (super sticky purple crap that's really hard to get out of your new coat once it dries) sealant to fix the cork gasket to the cover prior to install. I let it dry for a couple of hours and then it was pretty easy to get the cover back on (relatively). I found that the easiest way to get at the far back bolts was to use a little 1/4" thumb/wheel ratchet. Torqued them from the inside out to the edges (lightly). Seems good to go!

145.jpg

Jason

40.jpg


138.jpg


145.jpg
 
You could eat dinner off that 3fe!
 
Are you going to do the galley plug while you have it pulled down to that point?

Nice work btw!

No, not on this go-round. I thought about it but didn't want to have to pull the head (I've read it's a lot easier to do with it pulled). Mainly because I was already down for so long at this point, just wanted to get her buttoned back up. I also wasn't sure if my tapping/threading skills were up to it - never tackled that before. The good news is that the galley plug looked ok still (by the naked eye). Plus, when/if I do decide to take that on, at least I'll know what I'm doing pulling everything off.

Jason
 
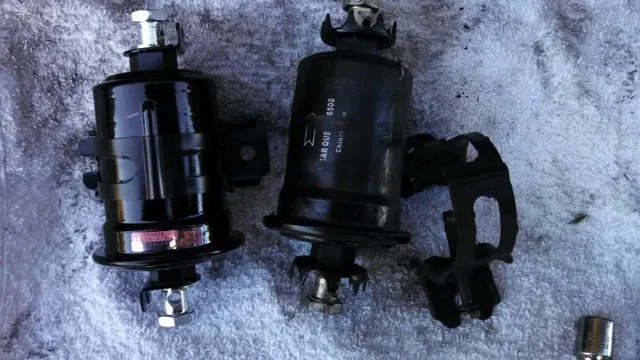
Decided at last minute to do the fuel filter. Not too bad a job when all the junk is removed & you can hit it from above. Hardest part was getting the banjo bolts loose - you can't put too much torque on them because you risk tearing the fuel line. A little soak with PB for a few minutes & all was good.


Old filter was Chinese. Who knows how long it was in there.

219.jpg


Ahh, OEM goodness!

216.jpg

Jason

219.jpg


216.jpg
 
Looking good buddy. Great job. Can't wait to see it buttoned back up!
 
Thanks!
 
So now that all the cleaning of parts is out of the way, it's on to replacing hoses and vacuum lines. Bought every single hose that I could think of. Even screwed up and bought some twice. :doh: Ordered lots of the bulk vacuum line, too. Replaced one at a time

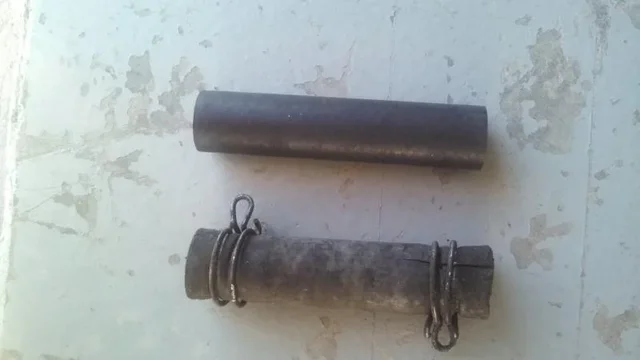
Ran into this little situation when I was replacing the heater hoses up against the firewall. Not sure how long the pipe was like that. Amazingly, I was still getting heat front and back.

159.jpg


Fixed it up the best I could. Hose went on fine.

161.jpg


Ahh, it's the little things that are going to help me sleep better. :p

185.jpg


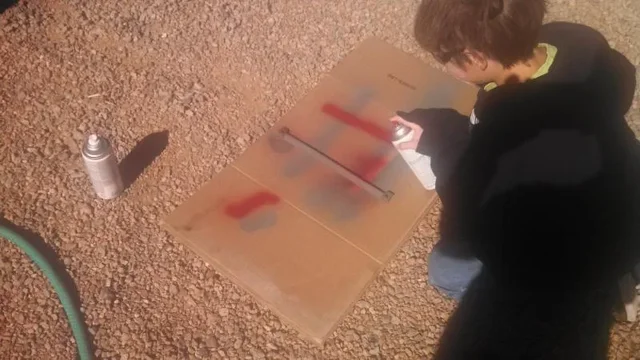
Meanwhile, had the youngest out painting small parts. You know, red, for more POWA! ;)

52.jpg


Jason

159.jpg


161.jpg


185.jpg


52.jpg
 
Last edited:
While doing the heater hoses I was also planning to swap out my heater control valve. Picked one up a couple of months ago from Cdan. Turns out, I guess my VIN just missed the cutoff for this particular valve, so my '92 takes the older '91 valve. At least that's how I understood it when talking to Beno about it while ordering some other parts. So... now I've got a brand new OEM heater valve collecting dust. Mine is still serviceable, so I'm just going to nurse it along.

Jason
 
:princess: getting pretty edgy with me at this point. This project has run WAY over time and budget. Speaking of budget, had to do something that I always hate doing - had to open the gun safe. :frown: Grabbed a nice little S&W J-frame that hasn't gotten used in a couple years and took it to my local toy store to put on the block. Cha-CHING!! Back in business $$$$


Button-up mode commencing!

After I got the rocker arm assembly back on, I tackled the valve cover. Used the hi-tack sealant to glue the gasket on and then smeared just the smallest bead of Permatex #2 along the edge. Let it dry for a bit and then wrestled it over the rocker arm/valve 'bolt' at the back. Was tough to get positioned without knocking the gasket out of its groove. Finally got it!

142.jpg


Called Beno to order this coolant line/hose assembly. Took a few days to get in from Japan (I think). Apparently, you can't buy just the hoses, have to get the whole thing. Be prepared, Mr. Toyota will require a left nut for this unit... which was okay with me as I wasn't using mine anyway (see comment at top).

181.jpg


Frontal view of the nut-robber hose assembly. I guess the pipes are brazed, which is one reason it costs so much.

182.jpg


Dizzy back on. Went on pretty easily.

202.jpg


Jason

142.jpg


181.jpg


182.jpg


202.jpg
 
Soooo, subscribed to this perfect thread. Funny, almost feel like 80-series-tech could use a sticky about how to hoard/hide parts and gain support from the Missus.
 

Users who are viewing this thread

Back
Top Bottom