Navigation
Install the app
How to install the app on iOS
Follow along with the video below to see how to install our site as a web app on your home screen.
Note: This feature may not be available in some browsers.
More options
Style variation
You are using an out of date browser. It may not display this or other websites correctly.
You should upgrade or use an alternative browser.
You should upgrade or use an alternative browser.
1978 LPB Teardown and Rebuild
- Thread starter Awl_TEQ
- Start date
This site may earn a commission from merchant affiliate
links, including eBay, Amazon, Skimlinks, and others.
More options
Who Replied?Awl_TEQ
Supporting Vendor
- Thread starter
- #383
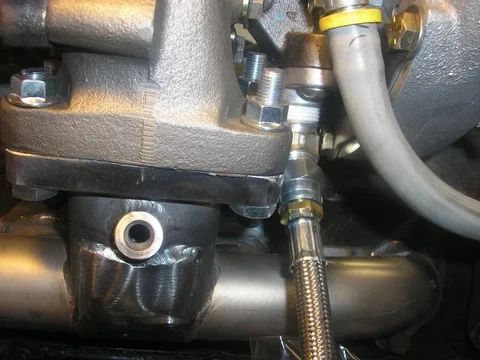
Welded
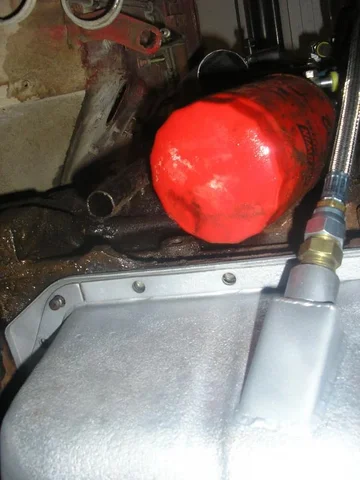

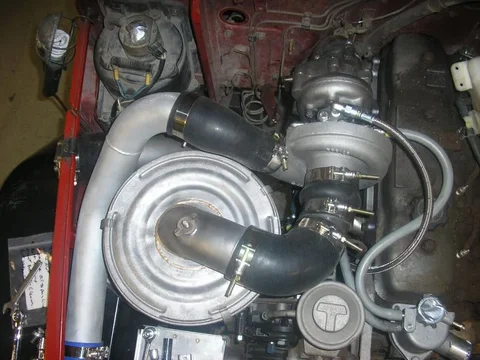
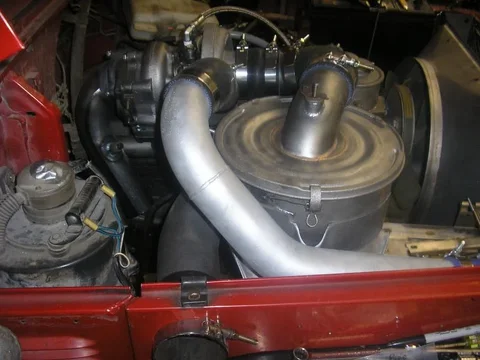
Turbo oil and water done. I have purchased the tubing required to finish the charged air line from the intercooler to the intake manifold. I'll do that next. I am also saving funds for a Marlin Toybox - I'm at 25% now and climbing. Also sourcing disc brake parts. I'm going all Toyota with IFS 4 piston calipers, vented LC rotors front and rear - I know, overkill on the rear - I like the Idea of the same parts front and back.
Oh yeah, I need to mount the waste gate actuator...

merbesfield
SILVER Star
Looking good. I too have not been here in a long time. Too many projects, too few hours in the day. Cheers.
Have a question Kevin,
do you need a separate oil cooler for your conversions or a larger oil pan capacity or both ?
Cheers
Peter *
*..... always nosy
do you need a separate oil cooler for your conversions or a larger oil pan capacity or both ?
Cheers
Peter *
*..... always nosy
just read this whole thread.
one word to sum it up:
EPIC.
subscribed.
one word to sum it up:
EPIC.
subscribed.
DanS HJ-45
SILVER Star
Kevin:
Your oil return idea is AWESOME. Very clean looking.
I like the York mount too.
Dan
Your oil return idea is AWESOME. Very clean looking.
I like the York mount too.
Dan
What a pity ....The 3B has an oil cooler built in and I wasn't planning on any external oil cooler. I don't recall any one else doing an oil cooler during my mud research.
found such a cool cooler

maybe you can build your own
it´s a Military Land Rover oil cooler http://www.lrseries.com/shop/produc...R-ASSEMBLY.html?page=2&search=assembly&page=2
http://www.lrseries.com/shop/produc...R-ASSEMBLY.html?page=2&search=assembly&page=2
would fit a cool Cruiser too I think
Cheers
Peter
Nice.
The water cooling lines to the turbo !!
On mine I'm going to have one on the suction side of the water pump , and the feed from cooler spot, That i have not looked into very deep as of yet. Yours looks like there both connected to the rad thermostat or below that.
It needs to have a flow.
And not to just be a pain , but the turbo drain line , for me looks to be a bit on the small size.
If were using imperial measurements , the turbo i stole from 2009 is fed with oil line that has a orifice to feed the shaft of 1/16 hole size after the banjo bolt feed. the return line is 5/8 ID pipe to the crankcase back. This is a water cooled / oil lubed turbo also .
One common problem is the turbo return can restrict the return flow causing the intake side to weep / leak oil into the intake impeller side . the return line gets smaller due to oil getting "coked" after it gets heated past the turbo.
Just something to keep in mind.
VT
Awl_TEQ
Supporting Vendor
- Thread starter
- #393
VT, thanks for the input!
Check out this old thread on the subject of these water lines ----link see post #11
Basically there is no flow until after you turn the engine off. Both lines go to the same place in the T-stat housing. The housing I have is from a 13BT. The center body of the turbo is at a slight angle (not level) so that as the heat soaks into the water it rises and exits to the T-stat thereby drawing water in through the other line. Moving the lines to provide flow while the engine is running would cool the turbo only when running which is not the purpose of these lines - they exist to cool the turbo after you shut'er down. The efficiency of this system is debatable but it is the stock setup from Mr. Toyoda on the 13bt (sister to the 3B). It is designed to act as a sort of "turbo timer" to cool the turbo slowly and help reduse oil coking.
My oil return line is 1/2" - the feed is 3/8" but the supply fitting is only 1/8" on the block. The return line is not under pressure, it is a gravity drain back to the pan. The shaft and seal ARE the restriction and set the oil flow. Most on this site feed the turbo with a 1/4" line but in my (our?) cold climate I figured a bigger feed line will get oil to the turbo sooner on cold startup (yes, even though it is fed through a 1/8" fitting).
These line sizes seem to be the norm on very many builds here on this site and I am comfortable with this set up.
Potash actually. I was a little hesitant to post pics for fear of being ridiculed as a sucker but ...
Edit: Absolutely awesome work !

Last edited:
Awl_TEQ
Supporting Vendor
- Thread starter
- #395
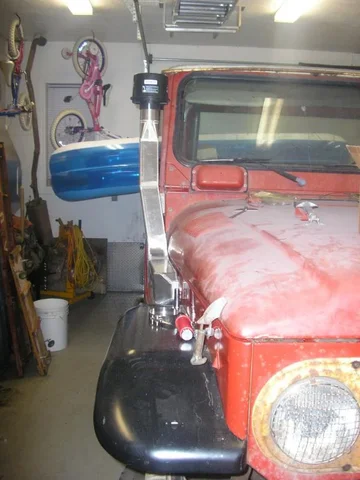
Time to make a snorkel
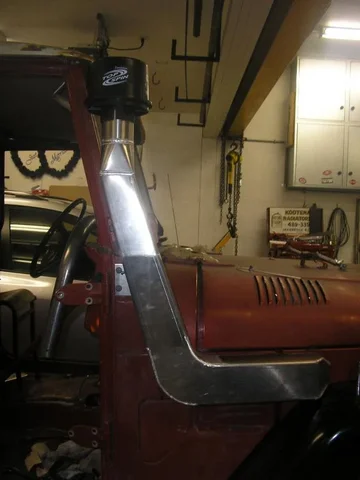
I scratched my head, did some searching and measuring. I like the look of the Safari snorkels but they have a couple of drawbacks. You can't fold the windscreen down and they are overpriced. Being a sheet metal guy I won't be making it out of plastic either. Aluminum is great to work with. I find it is more forgiving.
This is a mock up to see if I was on the right track. My air filter housing is a 3.5" inlet and so is the outlet of the snorkel. I notched the snorkel to go over the louvers and then angled up at 75 degrees (same as the windshield). It tapers from 4.25"x3" down to 3"x3" as it reaches the top. Most ram scoops and pre-cleaners are 3" so I will transition from square to round in order to mount one. I also offset the riser 1.25" away from the cowl to allow the windscreen to fold without interference.
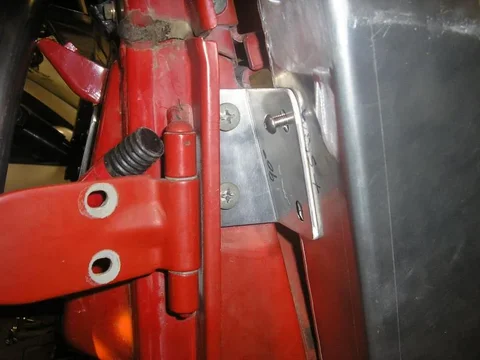
The Safari snorkel does not offset out like this. It also attaches to the top portion of the windscreen hinge with a support bracket. My support bracket will attach to the lower windscreen hinge. The Safari also sits further forward making a larger A-pillar blind spot.


Awl_TEQ
Supporting Vendor
- Thread starter
- #396
Here is the windscreen folding down

And folded down
I wanted to improve my bends a little so I tossed the first one and made two more. Shown here is the back portion that ends up against the truck. There are two here - the top one is a 3" outlet and underneath is my 3.5" one. Yes, this is a prototype of a snorkel that I'll be selling The mounting holes will have pressed in blind nuts. A paper pattern will guide the installer to drill holes through the wing of the cowl and bolt from the inside out into these captured nuts. The cross sectional area of any given point in the snorkel is greater than the outlet so there is minimal constriction of the air flow.


And folded down

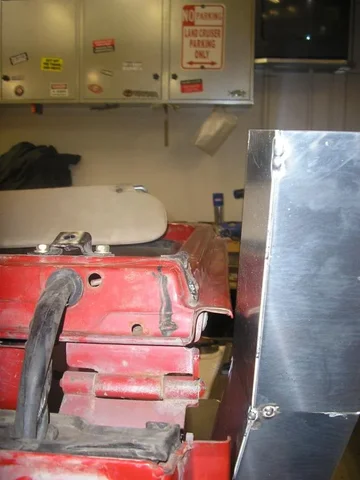
I wanted to improve my bends a little so I tossed the first one and made two more. Shown here is the back portion that ends up against the truck. There are two here - the top one is a 3" outlet and underneath is my 3.5" one. Yes, this is a prototype of a snorkel that I'll be selling
 The mounting holes will have pressed in blind nuts. A paper pattern will guide the installer to drill holes through the wing of the cowl and bolt from the inside out into these captured nuts. The cross sectional area of any given point in the snorkel is greater than the outlet so there is minimal constriction of the air flow.
Awl_TEQ
Supporting Vendor
- Thread starter
- #399
These are both in their raw welded state. They will be smoothed and powder coated black wrinkle the same as my winch solenoid covers. The smaller one here is the standard size I will be producing and selling. It is much closer to the Safari in size - 3" inlet and outlet. I will be starting a new thread in the "merchandise storefront" section in the classifieds once this one is powder coated and all purdy like.
Oh, and I will be making left and right mounts. Makes no difference to me, just bent backwards.
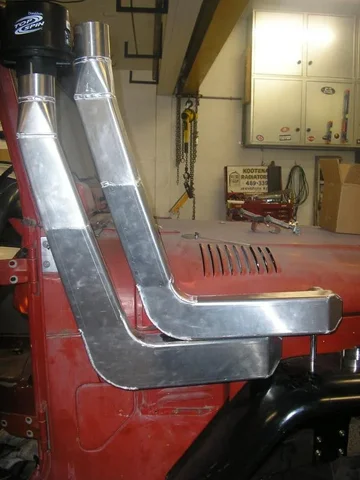

Oh, and I will be making left and right mounts. Makes no difference to me, just bent backwards.

Hey Kevin,
Great watching you do your thing (love that red truck - hate to see it get painted at some point)!
Saw another sill (79+ newer model) you did for someone in another thread - fantastic work. Did you work out a "single-piece" version of the older sill?
Anyway- really inspiring stuff.
Gus
Great watching you do your thing (love that red truck - hate to see it get painted at some point)!
Saw another sill (79+ newer model) you did for someone in another thread - fantastic work. Did you work out a "single-piece" version of the older sill?
Anyway- really inspiring stuff.
Gus
Similar threads
Users who are viewing this thread
Total: 1 (members: 0, guests: 1)


