1976 FJ40 BUILDUP - Chief $*itty Pants (1 Viewer)

This site may earn a commission from merchant affiliate
links, including eBay, Amazon, Skimlinks, and others.

I have been picking away at my fj installing all the little crap inside the tub and went to set the heater in to verify my clearance only to find out that I really really topped all my dip crap moments on my engine placement!! It is to far forward period. There is absolutely no way to bend my shifter well enough to clear the heater! I also think I placed the rear crossmember mounts too high! Completely what I get for trying to wing it..... It isnt that big of a deal I can fix it but man o man what a screw up! If nothing else I thought everyone might get a good laugh at my stupidity and desire to do things over and over and over....... I need to go watch that Handy Manny show with my son I think they talk about measuring twice and cutting once!!

I could really use a picture of someones tried and trued 350 w/ advanced adapter to the factory four speed advanced adapters rear crossmember L bracket placement on the frame....

I could also use a measurement of a perfectly fine sbc measurement between the back of the valve cover and firewall on the passenger side such as right here on this borrowed picture.

engine setting.jpg
engine setting.jpg
 
Last edited:
You could put a H55 behind it instead, the shifter comes up a bit back from where the 4 speed shifter comes up. You would need the split case too though.

I've got about 2 to 2." from the valve cover to the firewall. They are tall covers though.
IM000420.jpg
 
Last edited:
Mine are tall also...... I am wondering if my placement would be fine if I lowered the back of the crossmember mount. I thought I would cut a fat hog and use the whole 2 to 3 degree downcline in my drivetrain however it is pretty obvious my frame wasnt setting level at the time. I just noticed my advanced adapters t-case crossmember is actually touching the bottom of my tub. Depending where it should be sitting I believe it needs to drop at minimum an inch and a half and if so that would really lay the tall valve covers back reducing my clearance...... I know wishful thinking but after this screw up I can pretend right?...... :eek:)
 
By the way thanks as usual Bret!!

I grabbed some pics to better show....

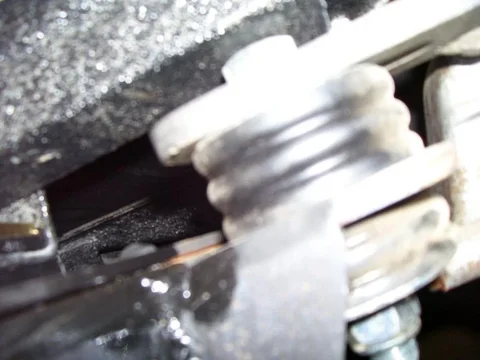
This pic you can see it touching my floor
106_0593.jpg

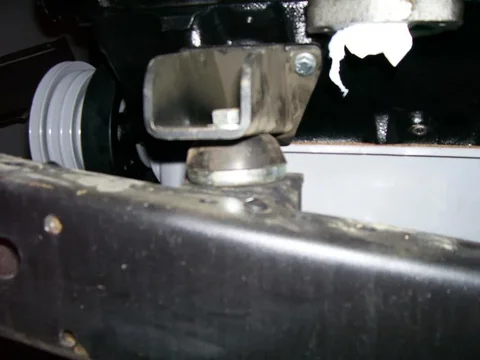
This pic you can (i never noticed before) see the head of the bolt actually touching my tub... Holy crap huh I placed the L bracket level with the top of the frame
106_0594.jpg

And here you can see my engine placement height which I placed level also exactly like it said to do which I could actually place it higher according to the instructions
106_0597.jpg
106_0593.jpg
106_0594.jpg
106_0597.jpg
 
Oh man I think I have as good as can be news!!! I got in a hurry and put the crossmember in upside down and never noticed!! This is going to lower my transmission a lot! It doesnt help my bolt touching my tub but it may give me a chance at the rest of my issues. I used the tub bolt holes and frame tub mounting holes and mocked up where I thought the engine should sit counting the radiator and all and I didnt think I could get that stinking far off but :meh: So for right now I look like :hillbilly: and by tomorrow I hope to be :clap:

I have to lift the back of the tub up anyways to fix my bumper screw up so that will allow me to get the bolts back out!

I still appreciate your help Bret!!
 
where does the tranny cover sit in relation to your drivetrain? I think my motor sits a little higher than yours. I made a small doghouse for the tranny tunnel to fit the tranny in because it was lifted up a bit as well. I was trying to keep the drivetrain higher up. the rear of mine is as high as I could get it and still get the e-brake drum by the frame crossmember.

You may find that as you drop the transfer a touch the valve cover may drop a little as well as move back. Depending on how high the motor sits it may clear the firewall. Be careful of your distributor clearance (especially a big cap HEI). If the motor sits a little low you may find a clearance issue between the crossover pipe and the diff flange or driveshaft yoke.

A lot of variables to look at. Can't just move one thing, they are all related.
 
As for my tunnel I dont know I dont have the dang thing here to check....

As for my crossmember being upside down for the guys going :rolleyes: you were right it only bolts one way so.... I removed the bushings that are about 1.5-2" thick and lowered my t-case that much for now and there is no two ifs about it my motor is to far forward. However I have a plan IF my clearance to the radiator is enough... Bret is your radiator moved forward an inch? Do you have short or long water pump? I don't have a dang fan handy to set on there to varify clearance but I think I would be good.
Does anyone have a fan handy that they could tell me what the measurement on a sbc stock fan from the face to the very back where it mates to the waterpump or pulley
 
I am running a short water pump, I did move my radiator forward a little, but there is quite a bit of room. I have an electric fan that is almost 6" deep and I am running a small mechanical fan as well. Having the motor forward can help with cooling, but the oil pan/crossover can start getting close to the pumpkin.

The mech fans I test fit were almost flat on the front and swept back with the blades. You could run a short pump and space the fan of choice off enough to clear your other accessories?? I don't think radiator clearance will be your biggest problem.
 
I scored a steering column for a decent price today out of a newer iroc.... Hoping it works I am a little nervous about the fact it had antitheft device at the key....... I ofcourse do not have the factory key so I will have to disable that if possible. I also got the project moving forward again with my set back of engine position. Once I move the radiator an inch forward I will have two inches between the mechanical clutch fan, with more at the fan blades to the radiator. I have lots of room around my firewall and distrubutor, and probably the most custom ya custom that's the word shifter on this site!! Ok honestly it is very very embarrasing but it works :rolleyes:
I have also ordered rear disc brake brackets and something else...... hmm guess I will remember when it shows up :D
106_0618.jpg

106_0619.jpg

Bret thanks for all the help on the other stuff!!! And I promise the shifter was in no way Bret's idea :D Unfortunately I get all the blame for that one
106_0618.jpg
106_0619.jpg
 
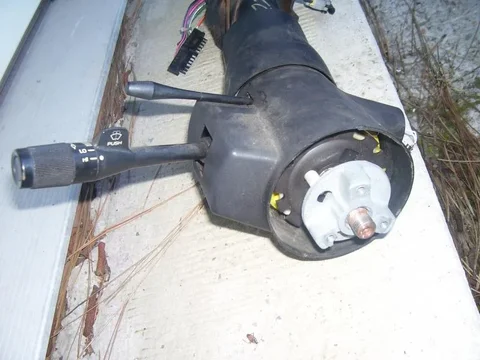
Well I wasted the night staring at the steering column with no worries of modifying the arrows but after test fitting I am going to have some issues with the electronics clearing the entire brake/clutch pedal assembly when I copy Rockcods theory and move the column back and up with new mounts. With this said I am planning to remove the electronics for now loosing the dimmer and turn signals and FOR ONCE rather coming with problems come with a solution. But first I need to get this thing on the road.... I thought about just putting the stock column in for now but the time I spent modifying the steering shaft to later redo it all I might as well put the gm column in minus the electronics. You can see the switches are ran by linkage so I could put them anywhere under the dash using some creativity.
column.jpg

I am so stinking lucky I was also staring at the crossmember mounts trying to figure out if I should cheat and trim the poly bushings or remove and reweld the mounts and it just so happens the mounts are two different sizes and I can just flip them and get what I needed. :cool: That is some lucky stuff right there.
column.jpg
 
Spent some decent time on the fj40 this weekend. I didnt complete my list but :meh: Truth is I would have but coyote hunting slowed me down :D Here are some pics of the weekends progress.

I trimmed, re-boxed, and Por15 ed my bumper where I had screwed up the clearance to the tub. I wouldnt recommend my current clearance for others due to possible contact on flex but I am not RTI ramping it anytime soon...
106_0620.jpg

Here is where I gave up and decided to just space the dang Scout box out 3/8" and call it good. I didnt have to but I would have to have moved my radiator over a bit which who cares I have to redrill anyway to move it forward but more so I was having issues getting the power steering pump to clear. This should help.
106_0623.jpg

I picked some of my parts that we sprayed during the week. Again I went ahead and color matched my seat brackets only because we had the sealer and clear already loaded in the gun from the paint job I was helping my painter buddy with.
106_0624.jpg
106_0620.jpg
106_0623.jpg
106_0624.jpg
 
Well I am going to have to show it some time so here is a pic of my current shifter scenario......:rolleyes: It all clears the heater box fine now but it is sure going to be interesting getting shifter boots. I obviosly plan to sheet in the old openings and make the main shifter opening smaller.
106_0626.jpg

As far as my crossmember problem I flipped the bushings on the advanced adapters crossmember and that lowered my transfercase perfectly. The only problem is I had to lift the back of the tub about a foot to give me enough clearance to wrap the tub with a welding blanket and fix the bumper...... Do you think I remembered to put the crossmember to mount bolts back in at that point OHH NO not me I like to do things two some times three times!! :grinpimp:

My axles will obviously get reblasted and por15 applied but I wanted to point out to everyone that the shiny fixes are the regular por15 where the rest is the chasis coat over POR15 wich is meant to be flat black not gloss ......... but I realize I left my frame out in the sun and rain for a year but I am really really not impressed with the way it took the abuse. I had to go around and re-por15 areas that had rust coming through. I thought I had taken the extra measures by top coating the entire frame because I was subjecting it all to sun for a while but........... This isnt fully fair because I have not contacted POR company to allow them to have a chance to provide input rather I am doing it the ????able way and just complaining! I will say since I had it blasted and there was no rust I really wish I would have never used it and just simply sprayed it with chasis paint which I have now seen my painter buddy use and it looks better than mine...... Just my opinion for anyone interested - POR15 is awesome on rusted surfaces....... The topcoat is very questionable...... and it isnt worth putting POR15 over the top of perfectly rust free blasted steal with the thought that it would prevent rust from even thinking about ever appearing..... Again just my opinion!
106_0626.jpg
 
Last edited:
Well I have been slacking yet picking away at the cruiser.... Thanks to Shane's heater kit, a blasting cabinet, self etching primer, and rustoleums hammerite in a can, I have a rebuilt shiny heater. I have also installed all the glass and window seals including the windshield where I had my painter friend install it and for those that are nervous it was truly simple....... You just have to take your time and ensure the seal seats as you go around in order to minimize the pressure and prevent breaking the glass.

106_0693.jpg

I whipped up a quick block off plate to cover the factory holes in my tranny tunnel cover prior to spraying it with the durabak to match the rest.

106_0699.jpg

And last but not least I have been playing with the alignment of the fenders, tub, aprons, hood, etc. It was fairly simple to pull it off with one line that is :mad: however it took a lot of time to get them all close. (close being the key word) In order to get my hood to sit flush with the front grille I had to sacrifice a bit of hood sticking out on both sides (about an 1/8") :meh: What the heck am I talking about I dont have any fenders.......

106_0698.jpg
I need to order the custom backspaced wheels but it is hard since I couldnt put them on even if i had them because it wouldnt make it out of the garage with the 37's it barely makes it in there with the 32's. Now that the weather is getting better it might be time to move it out into the new shop where I actually have room.:cheers:

EDIT - LOL What a mess!!! You dont realize what kind of a disaster you create untill you look back at your own picture........ I think I will get it out into the shop for sure tomorrow and maybe even clean the garage!!! The pics inside the garage look like crap anyway because you get so many reflections off of everything near by.
106_0699.jpg
106_0698.jpg
106_0693.jpg
 
Last edited:
I decided to get off my butt for the cruisers sake and throw down on the steering collumn. I started off with the easy way which you will see in the first picture but it just didnt leave the collumn where I thought it should be. It was too far forward and too low.
0523091111.jpg
The pictures that I took of the final scenario didnt save but a couple others did. I simply reused the factory firewall bracket that I removed from the factory collumn. (hogged the hole out of-course)
0523091351b.jpg
I had to screw with it for a long time tack it, put it back in to check, break the tacks, grind them off, and try it again over and over again until I was finally happy with the placement of the collumn in regards to the dash.
0523091351.jpg
The only draw backs I have right now is that I need to remove the headlight dimmer sensor off the side of the collumn to make room for my brake pedal. Everything else cleared perfectly. The dang steering shaft that I got from the IROC is the perfect length!!! However the steering box end is too dang small to fit on the scout box.....

The pic makes it look all out of wack but it looks great in person. One could cut the dash up to get a better fit but then you are going to run into other issues with clearance. Atleast that is my opinion based off of my experience. Not saying it could not be done because I am sure it has but it will require more work and possibly having to remove the electric switch off of the top of the collumn plus at least in my case it would have been a fairly harsh angle at the collumn vs. the steering shaft.
0523091111.jpg
0523091351b.jpg
0523091351.jpg
 
I talked my wife into pulling the cruiser with the 4 wheeler while i hand turned the tires. Talk about a circus!!! But..... I have more room to work now.
0523091432.jpg
0523091432.jpg
 
The only draw backs I have right now is that I need to remove the headlight dimmer sensor off the side of the collumn to make room for my brake pedal.


I had a similar situation when I used a GMC Jimmy column. What I did was to play like a blacksmith. I heated, hammered, heated and hammered until I got the needed clearance so I could keep the dimmer switch intact. The pedal shaft curves over to the side a bit more before going down. The pedal pad sets just a bit higher now but unless you know what to look for you don't see it.

Don
 
Thanks for the reply Handcannon. I had seen your post a while back where you did that!! I have been considering your exact thoughts. The other thought I have is trying to determine what type of metal it is and if I coudl cut and weld a horseshoe type piece of stout metal including gussets. I think it is just forged metal which would be ok right? The other option is to go with a foot dimmer like a 73-79 ford pickup.

On a side note I got the valves adjusted today and the rearend ready to pull back out to rotate the pinion up 16 degrees to perfectly match the e-brake drum. I am back and forth on pointing it at the t-case and purchasing a cv style driveline but with my train moved forward at minimum 4" I think I could easily run a non cv style or even possibly the front driveline in the rear.... I know cv style would be the best but so is the extra money!! :eek:)

Tomorrow I will be ordering the customed backspaced black 397 cragar smoothies in 17s along with a summit fuel pump, starter bolts, valve cover studs, a new oil primer (so I can prime the passeger side drivetrain vs. my homemade tool), distributer plugs ins, carb studs, msd plug wires, lokar throttle cable assuming I can mod into my factory pedal and have enough throw, and a distributor hold down since I lost mine.

Most of this is because I let this drag on and have misplaced a lot of small items!!

For those who care the deepest dish I could get in those wheels is 3" backspacing. This is for the 17x9's I didnt check on the 8's. The 3" should be fine taking into consideration they are 17's not 15's.
 
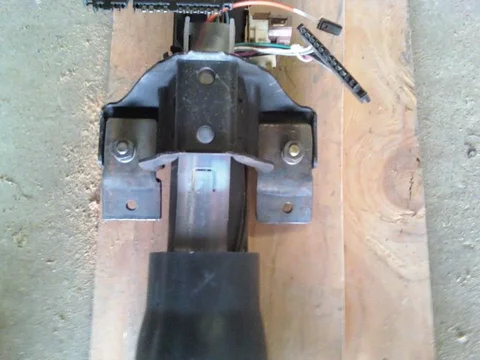
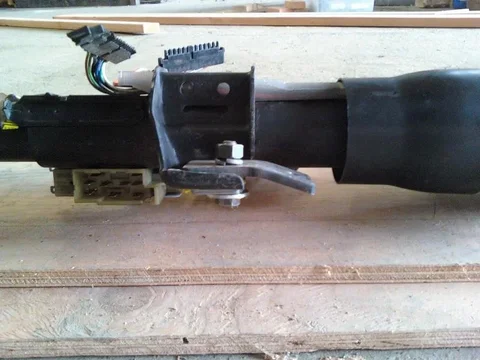
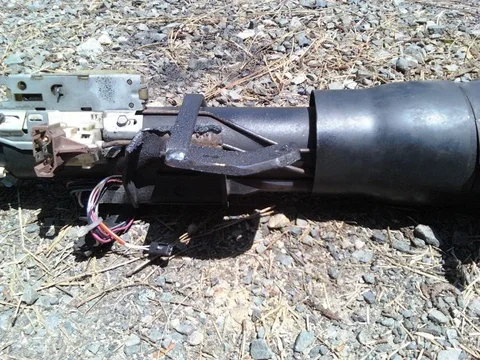
I was bummed because I thought I had lost my pics of the mods I had done to make the steering collumn fit. I found them and I thought I would go ahead and post. Not because I did a good job but more because I hadn't found a ton of info in regards to doing it and I hope this will help others. With that said I realize that every collumn is different when you take into consideration the model and year of the vehicle but this is how i went about it.

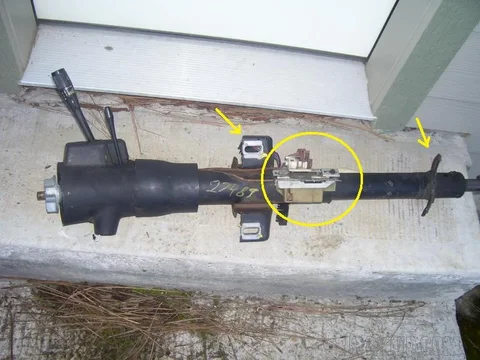
You can see the first picture I posted is where I tried to cheat and simply make a couple brackets spaced accordingly which would have allowed me to reuse the safety feature built into the mounts even though it wouldnt work that well because you weld it solid at the bottom of the collumn.

That method would have worked but the collumn was about an inch lower than I wanted it to set. I couldnt cheat and shim because the head of the bolt you see hit the factory FJ dash supports. It was made out of 2" by like 1/4 flat bar that was cut 3.5 inches long and I heated and bent a slight angle to better fit the factory dash mounting holes. This method allows for adjustment in and out due to the bolts but no up and down.

In the following pics I unbolted the home made brackets and simply trimmed the factory bracketry on the Iroc collumn to allow me to move the brackets down an inch. At that point I tacked them up to pre-fit. you have to be a lot more precise with this method to ensure your front dash holes are 5.25 inches apart prior to welding. Once I got it I burnt them down and torched off the excess upper factory collumn bracketry. I also bent a small piece of 1/2 by 3/16 flat bar and placed a few bends in it to reinforce from bracket to bracket.

My pics suck as usual but hopefully they will help someone someday. For the record this method did away with the safety feature that GM had placed in the collumn and I would be wearing the collumn as a necklace if I ever tried to whip its but in a wreck.... Just thought I should throw that out there so if you try it you are aware.

this pic is upside down
0523091112.jpg
The splatter is actually spray bedliner that I wasnt patient enough to wait until it cooled down all the way and it made the bedliner bead up like that?????

0523091320.jpg

0523091321.jpg
I had to narrow the passenger side bracket to better clear the e-brake brackets. Look on the bright side it is under the dash so it wont be seen!! LOL
0523091112.jpg
0523091320.jpg
0523091321.jpg
 
Last edited:

Users who are viewing this thread

Back
Top Bottom