1976 FJ40 BUILDUP - Chief $*itty Pants

This site may earn a commission from merchant affiliate
links, including eBay, Amazon, Skimlinks, and others.

Throttle linkage bracket sbc

Again I am trying to save a dollar where I can so I whipped up a simple throttle cable bracket to work with my generic lokar cable. It is nothing special but here is a pic incase anyone wants to mimic. It needs to be cleaned up and painted still.
106_0740.webp

106_0741.webp

Also my pedal mod needed to be extended about a 1/4" to half an inch to increase the arc when pushed. My pedal maxes out and my throttle is about 3/16" from wide open. Easy fix.
106_0740.webp
106_0741.webp
 
With the help of washers as temp shims I was able to shim the bracket out to what I believe to be perfect. It will allow for good alignment of the hoses to the box and the only disadvantage I see is the back of the pump is remotely close to the exhaust manifold but not so close it should be a probelm.
106_0747.webp
106_0747.webp
 
these damn things always find a way to get dirty... i don't get it.. but its looking good!

PS i might be calling you to ask about your sil replacement... i'm going to see exactly how salvageable mine is.

on a side note.. i was looking at my harness the other day and didn't know what these two connections were for. they look like the oil pressure sender connector but are definitely not seeings its on the wrong side. let me know if you have an idea what they are for...
106_0747.webp
 
You got my number and feel free to call whenever!! As for those wires I thought they were oil but they are not. I actually havent figured it out either Sorry
 
:doh: Thats right!! Brake Master. Thanks angurus

The throttle bracket was really simple and should be plenty sturdy with the weakest link being the washer but :meh: I dont know if all manifolds are the same but my spacing was 3.25" between the mounting holes, the washer (cable mounting spot) is straight above the second mounting bolt and is approx. 3.5" above the lower mounting plate. The angle of the bracket mounts to the manifold in kind of a 45 degree angle and the round stock is parallel with the mounting bracket. I believe it will clear the air filter fine since it is all lower than the Distributor.....
 
Well my friend dropped off the FJ60 axles on friday. It would suprise you how much they will squat the back of a tacoma! :rolleyes: I started on disassembly and have taken several minitruck fronts apart but for some reason the hubs do not want to come off! I cant get the little wedges to come loose. I am going to pick up some WD40 tomorrow and let it have it but if anyone knows a trick please share. I tried tapping with a piece of wood and large hammer, I tried tapping on the wedges with a screw driver and hammer as I usually do and no luck. I need to call tomorrow and see if they will trade me my never opened small knuckle highsteer arms for large knuckle arms.

106_0752.webp

106_0753.webp
106_0752.webp
106_0753.webp
 
Well finally I screwed up and it HELPED ME!! LOL Apparantly when I ordered the Marlin highsteer kit I didnt even realize that they dont make one for the small knuckle so I dont have to send them back and try and exchange. HOWEVER...... I do not think with my current setup it is humanly posible to run Marlins highsteer without connecting the pitman arm and tierod during every bump in the road. I may end up needing to go with Lukes method. Even then it seems like the tierod would be close to the third member.....

(The reason for this scenario is a combination of my scout box and low profile shackle reversal)
 
Well finally I screwed up and it HELPED ME!! LOL Apparantly when I ordered the Marlin highsteer kit I didnt even realize that they dont make one for the small knuckle so I dont have to send them back and try and exchange.

i thought you're using the fj60 outers?! those have the larger pattern knuckles on them. i'd highly recommend going that route since they are stronger than the small pattern stuff.

georg
 
Georg,
I was planning to use the 60 outers someday but thought it would take me a while to find them at a reasonable price so the highsteer kit was to hold me off for a few years and I would sell it later when I found larger knuckles. However I stumbled across them sooner than I thought I would so all is good! (Ya my idea sounds really stupid to me now too!! :D )

I started searching a lot harder about 4 or so months ago when that thread was going around and the gentleman just didnt want to listen to the fact that he should upgrade no matter how many times you mentioned it to him......
 
taking off the locking part or the housing? If the housing, have you taken off the c clip

Sorry I didnt see you trying to help! I was referring to the housing not the face of the locking part. I had convinced my self for some reason that I didnt need to take the face off and the C clip could be done after the housing was removed but I am guessing I am wrong!! It has been a while since I have done it!

I will take them fully apart the right way and not try and cut corners and see if that helps
 
Yep thats what i get for thinking I remember.... I should have done this little thing called READ THE TECH LINK SECTION!!!!

How to Remove a Birfield...

I will remove the face, remove the clip and give the bolts a love tap with the nuts on. I was just so sure that in the past I had found that I didn't need too. So it is true it is worse to think you know then not to know!
 
Back at it

Well hunting season is over now so I do not have any excuses why I am not finishing the 40. Oregon and Idaho were good to my trophy room and Colorado gave me the opportunity but I choked.. :mad:

I am currently ripping the 60 axles apart to upgrade the knuckles along with using jeffery_1965 's thread to try and figure out the wiring to the chevy tilt column. To make things more complicated I have a whole additional big plug on top of he norm. I think it is because of the delayed wipers. I am trying to replace the tumbler in the column and have done a ton of searching outside of this site in regards to how that is accomplished. I hate to ask it out loud but here goes anyway.... I know the right way now such as making a tool to press the security ring down, remove the clip, remove the wiper assembly, put key in run etc. but in my case I do not have a key so I am trying to drill it to release the tumblers etc. I am curious about just drilling the tumbler, threading it, and using a slide hammer to just basically rip it out. the tabs appear to be plastic and I would think it would work but? It works for the theives but then again they probably dont plan to put a new one back in :D

Any thoughts or success or failure stories about using a slide hammer? I wouldnt even be contimplating this if I had a key so I could put it in run to allow me to utilize the other steps


I have also been modifying the factory battery stand and box to work on my new scenario. I sectioned the battery tray down to allow a smaller battery. I knw most people probably shoot for bigger and more batteries but I dont think I need that for my application. I cant remember but on a factory set up what is right behind the passenger headlight??
 
Awesome build man, ive been sitting here reading it and it motivates me to go home and work on mine, keep up the good work, and keep the pics coming!!!
 
Awesome build man, ive been sitting here reading it and it motivates me to go home and work on mine, keep up the good work, and keep the pics coming!!!

Thanks a million! I will be honest I had a pile of money saved up prior to starting this project and the pile was gone about half way to this point :eek: Which is why things have slown down!

Back to it:
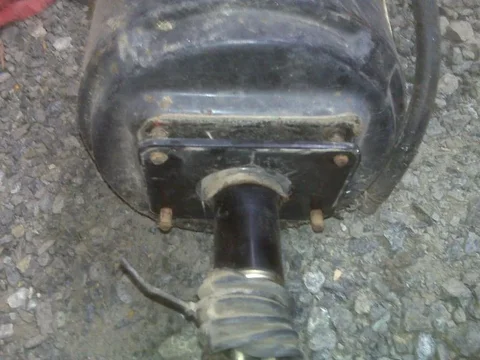
I picked up a 1987 yota master cylinder and booster at the wrecking yard this weekend. As mentioned a million times it was a bolt on swap. It appeared to be the exact year that they changed the brake booster up a bit though as compared to the 86 and older. They are basically the same size as the 86 and older but you can visually see some cosmetic differences. I have included a few pictures of the 87 and the factory 1976 which of course is huge compared to them all. The 76 fj booster is smaller in diameter a little though.

The first one is obviously of both of them (76 FJ40 - VS 87 MINITRUCK). You can see how much smaller the newer one is than the older one.
IMG00416.webp

The other pictures are to show a 1/4 inch or so spacer that came with the 87 booster. First of all it shows that the bolt pattern is identical as I place it on both the old and the new but it also spaced the new booster off enough to allow the clutch master to go on fairly easily. It also minimized the amount the push rod needed to be shortened.

IMG00417.webp
IMG00418.webp

More pictures to follow to help explain the shortening of the push rod
IMG00416.webp
IMG00416.webp
IMG00417.webp
IMG00418.webp
 
Last edited:
Here you can see the length of my factory push rod.
IMG00419.webp


In this picture you can see that the new pushrod is just a bit to long even adjusted down all the way. In my scenario the 87 set up worked just fine if I removed the locking nut which allowed me to screw the end of the push rod assembly on a bit further.
IMG00420.webp

The problem and the need for shortening comes into play on the length of the push rod that is left over. All I did was removed the end, screwed the nut back on an inch or so (to allow it to fix the threads when removed) and I cut about 1/2" of length off of the push rod becuase it hit on th pin....
IMG00421.webp
IMG00419.webp
IMG00420.webp
IMG00421.webp
 

Users who are viewing this thread

Back
Top Bottom