
The evaporator is straight forward on an 80, 45 minute job taking your time.
-
North American Clubhouses - East RegionCA.ON- SOTEC CA.ON- Upper Canada Land Cruisers CA.QC- Club TORQ CA.QC- Quebec Cruisers AL- DixieLand Cruisers AL- Hot South Cruisers FL- Florida Land Cruiser Association FL- Northwest Florida Toyota 4WD FL- Tampa Bay Land Cruiser Association GA- Pavement Pounders GA- Georgia Cruisers GA/FL/AL- Red Hills Land Cruiser Club GA- YOTA IL- Windy City Land Cruisers IN- Hoosier Cruisers IN- Indiana Land Cruisers KY- Kentucky Landcruiser MA/NH- Yankee Toys MI- Lake Michigan Land Cruisers MS- CottonLand Cruisers NC- Olde North State Cruisers NJ- Garden State Land Cruisers NY/CT/MA- FJNortheasters NY- Gotham City Land Cruisers OH- The Buckeye Birfield Syndicate PA- Keystone Cruisers PA- Steel City Land Cruiser Club SC: Land Cruisers: Charleston SC- Palmetto State Land Cruiser Association SC- Upstate Cruisers SC- Swamp Fox Land Cruisers SC- Low Country Land Cruisers TN- Appalachia Cruisers TN- Bluff City Cruisers TN- STLCA VA- Bay to Blue Ridge Cruisers VA- COVA CRUISERS VA/DC/MD- Capital Land Cruiser Club VA/NC- Mid-Atlantic TLCA VA- Star City Land Cruisers VT/NH/MA/ME Acadian Overlanders WI- Land Cruiser Legends WV- Mountaineer Cruisers
-
North American Clubhouses - Central RegionCA.AB- Oil Country Cruisers CA.AB- Rocky Mountain Land Cruiser Association CA.AB- Toyota Ghost Wheelers AR- Razorback Land Cruisers AR/MO- Ozark Mountain Cruisers CO- BookCliff Cruisers CO- Colorado Land Cruisers CO- Derailed Cruisers CO- Rising Sun 4WD Club CO/WY- Horsetooth 4 Wheelers Cruiser Club IA- Tall Corn Cruisers KS/MO- Tornado Alley Cruisers LA- Bayou State Land Cruisers LA- Louisiana Land Krewesers MO- Gateway Cruisers MT- 406 Cruisers MT- Big Sky Cruisers NE- Flat Land Cruisers NM- High Desert Cruisers OK- Green Country Cruisers SD- Dakota Territory Cruisers TX- Alamo City Land Cruisers TX- Bayou City Land Cruisers TX- Lone Star Land Cruisers TX- Lone Star Land Cruisers - Austin Chapter TX- The White Trash of the Elwood Chapter TX- Toyota Trail Riders
-
North American Clubhouses - West RegionCA.BC- Coastal Cruisers CA.BC- Okanagan-Similkameen Land Cruisers CA.BC- Peace Canyon Toyota Swamp Donkeys CA.BC- Calgary Chapter: Swamp Donkeys
CA.BC- Vancouver Island Cruisers AZ- Copper State Cruisers CA- Beach-n-Toys CA- Central Coast Land Cruisers CA- Central Valley Crawlers CA- Gold Country Cruisers CA- Inland Empire Cruisers CA- L.A. County Trailcrew CA- Mountain Transit Authority CA- Pacific Mountain Cruisers CA- San Diego Cruisers CA - Santa Cruz Land Cruisers CA- SoCal 80's CA- Southern California Land Cruisers CA- Toyotally Awesome Cruisers HI- Hawaiian Island Land Cruisers ID- Treasure Valley Land Cruisers NV- Battle Born Cruisers of Northern Nevada NV- Southern Nevada Land Cruisers OR/CA- Jefferson State Cruisers OR- Cascade Cruisers OR- Central Oregon Cruisers OR- Portland Metro Cruisers UT- Red Rock Cruiser Club UT- Wasatch Cruisers WA- Central Washington Cruisers WA- North Sound Cruisers WA- South Sound Cruisers WA- Spokane Land Cruisers
Navigation
Install the app
How to install the app on iOS
Follow along with the video below to see how to install our site as a web app on your home screen.
Note: This feature may not be available in some browsers.
More options
Style variation
You are using an out of date browser. It may not display this or other websites correctly.
You should upgrade or use an alternative browser.
You should upgrade or use an alternative browser.
What are you working on?
- Thread starter crawlin40
- Start date
This site may earn a commission from merchant affiliate
links, including eBay, Amazon, Skimlinks, and others.
I just replaced both front calipers on my 80. Advance Auto, got 4 years out of them, got replacements no questions asked.
Working on replumbing some of the shop air lately. Having fun cutting threads on pipe for the black pipe section and then sweating copper for those sections.
Cut the pipe, thread the pipe, goop up the pipe, install the pipe, next pipe…

Cut the pipe, thread the pipe, goop up the pipe, install the pipe, next pipe…
Wow other than a color photo, it's like a time warp to the 1950s.
If the technology works…
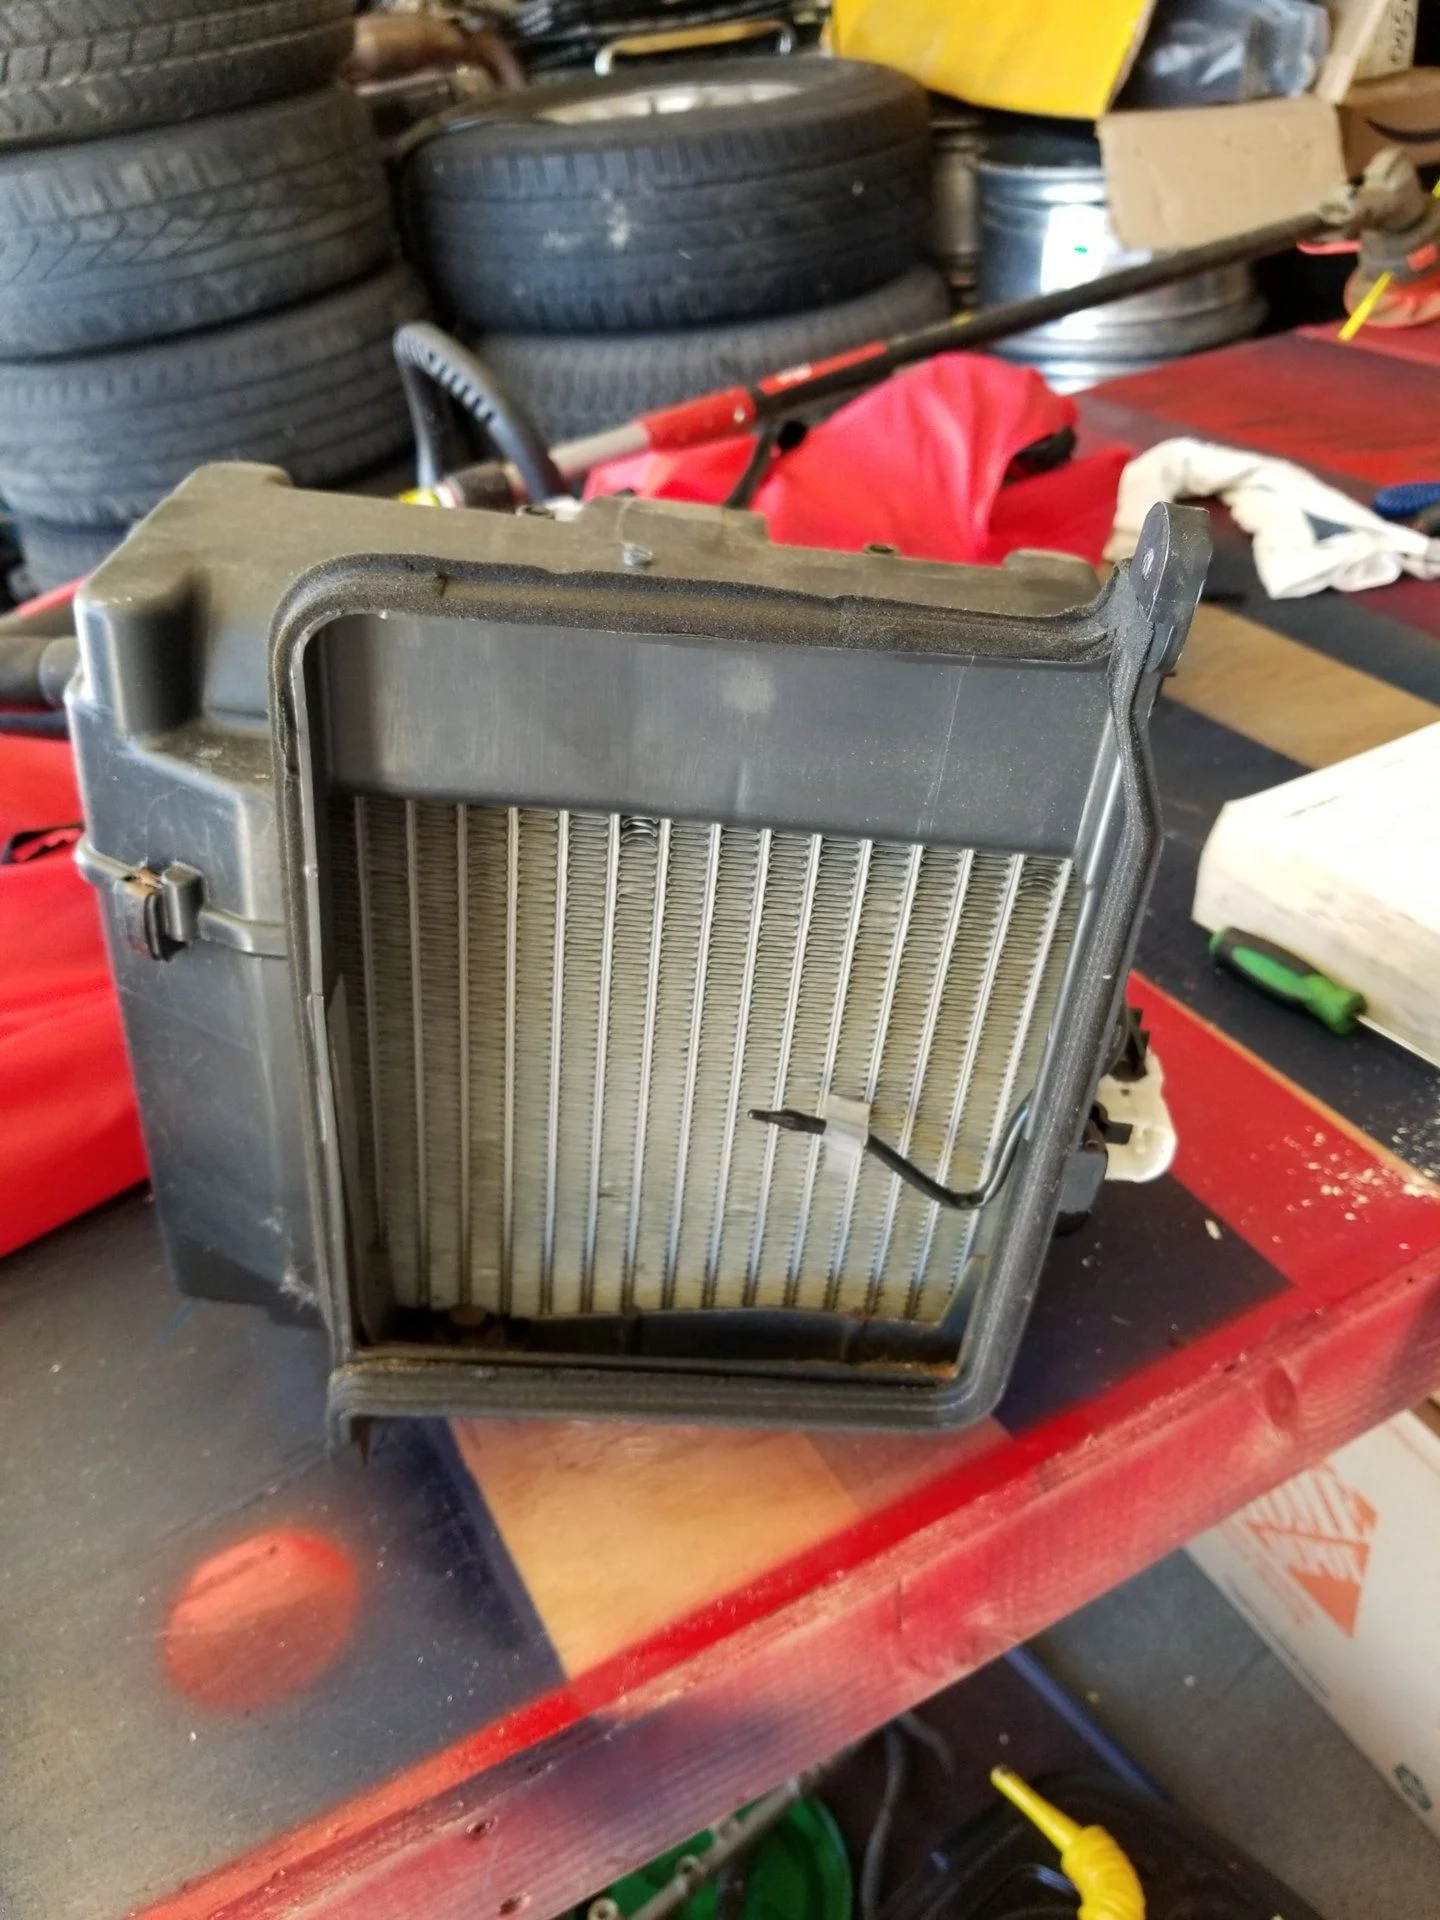
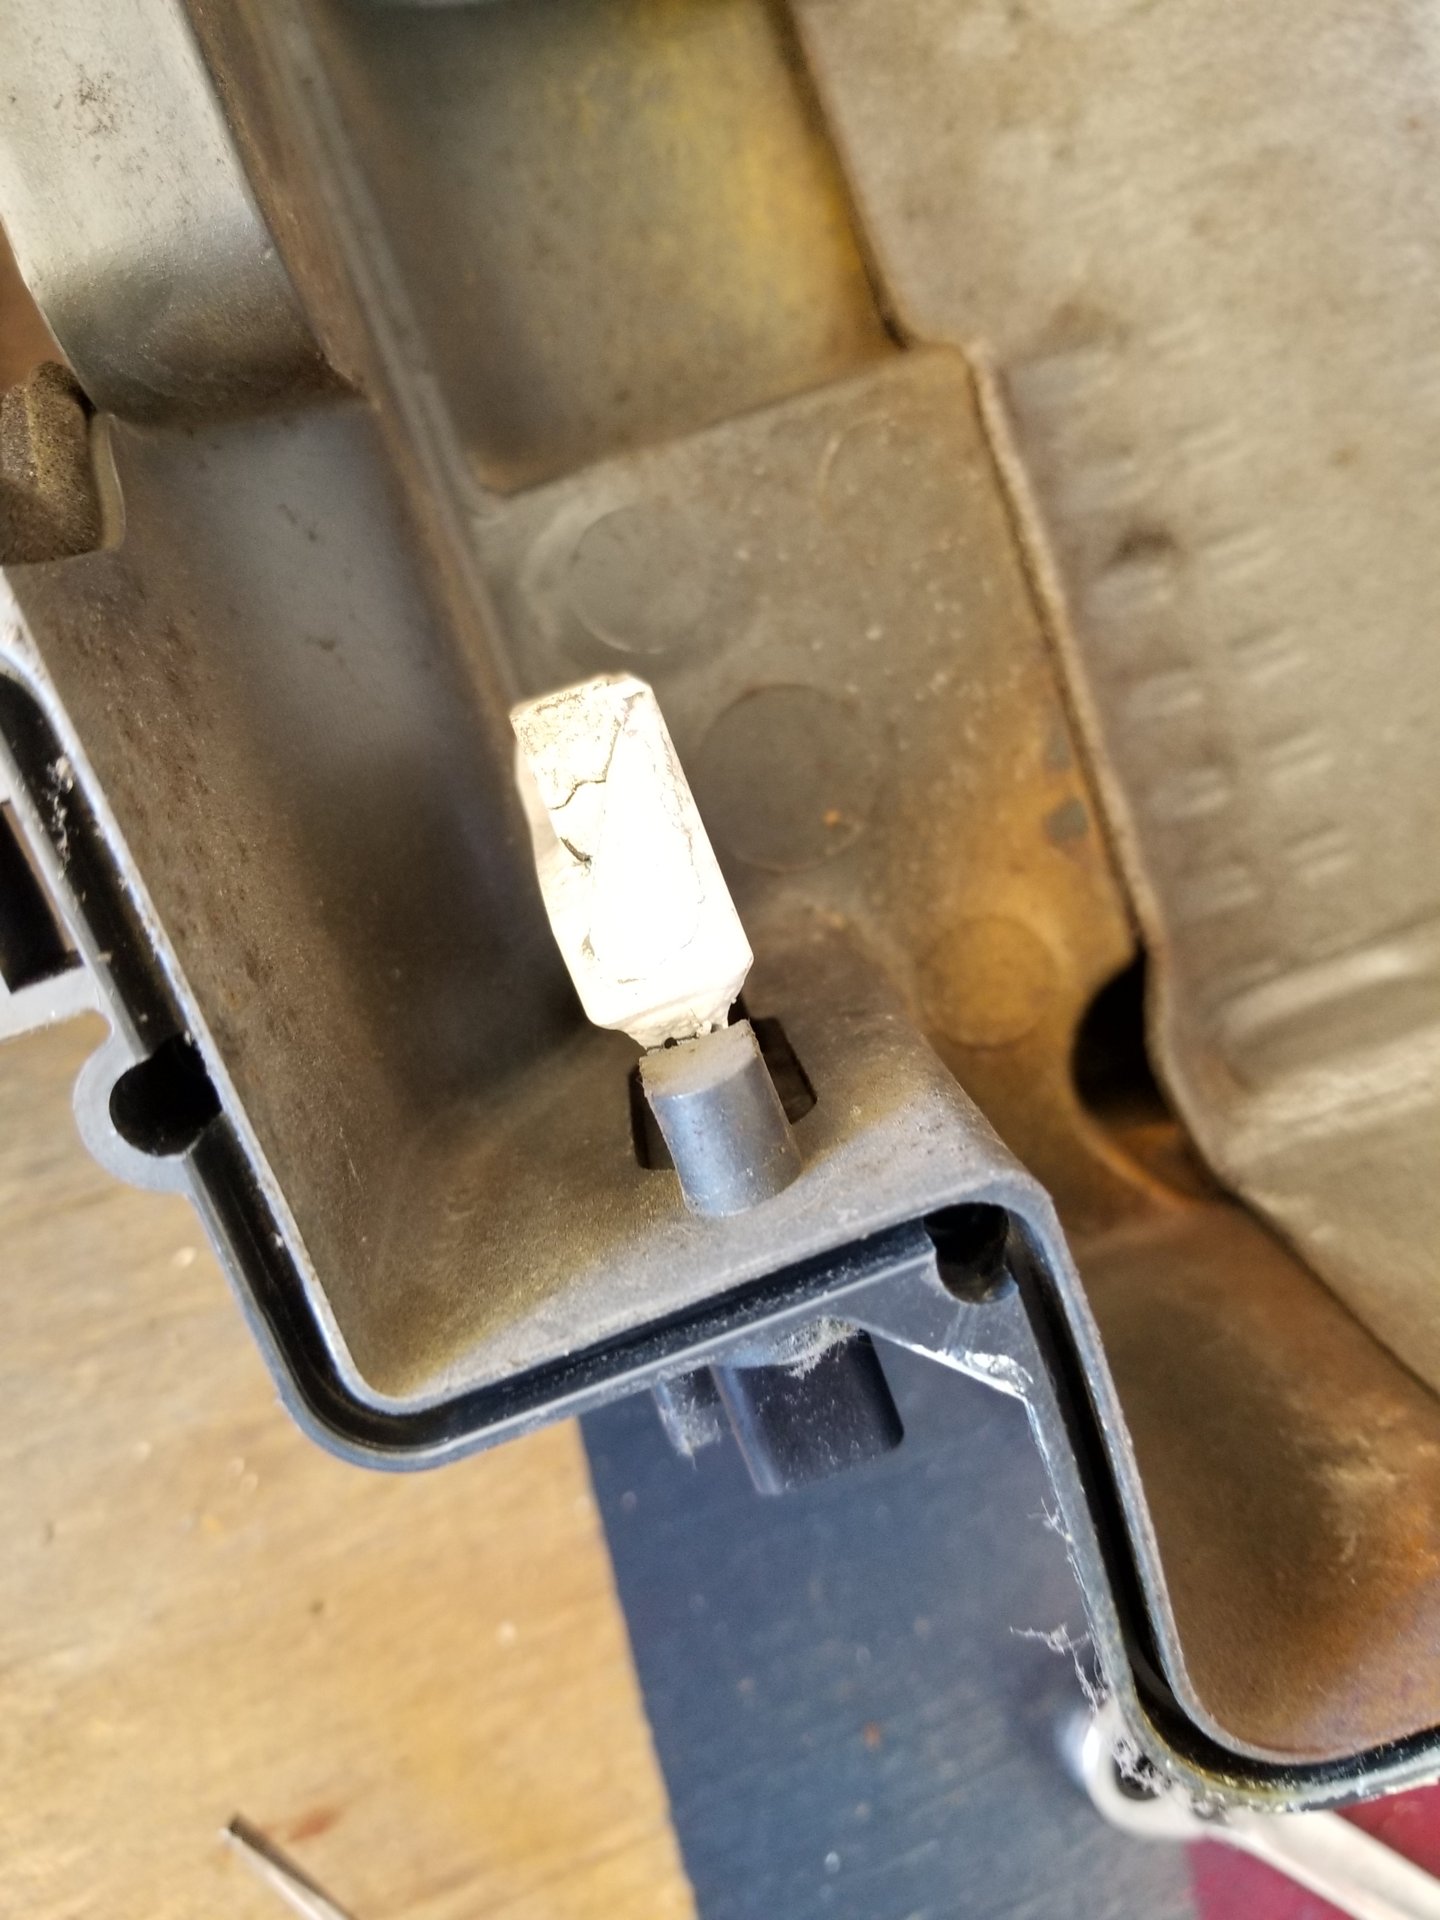
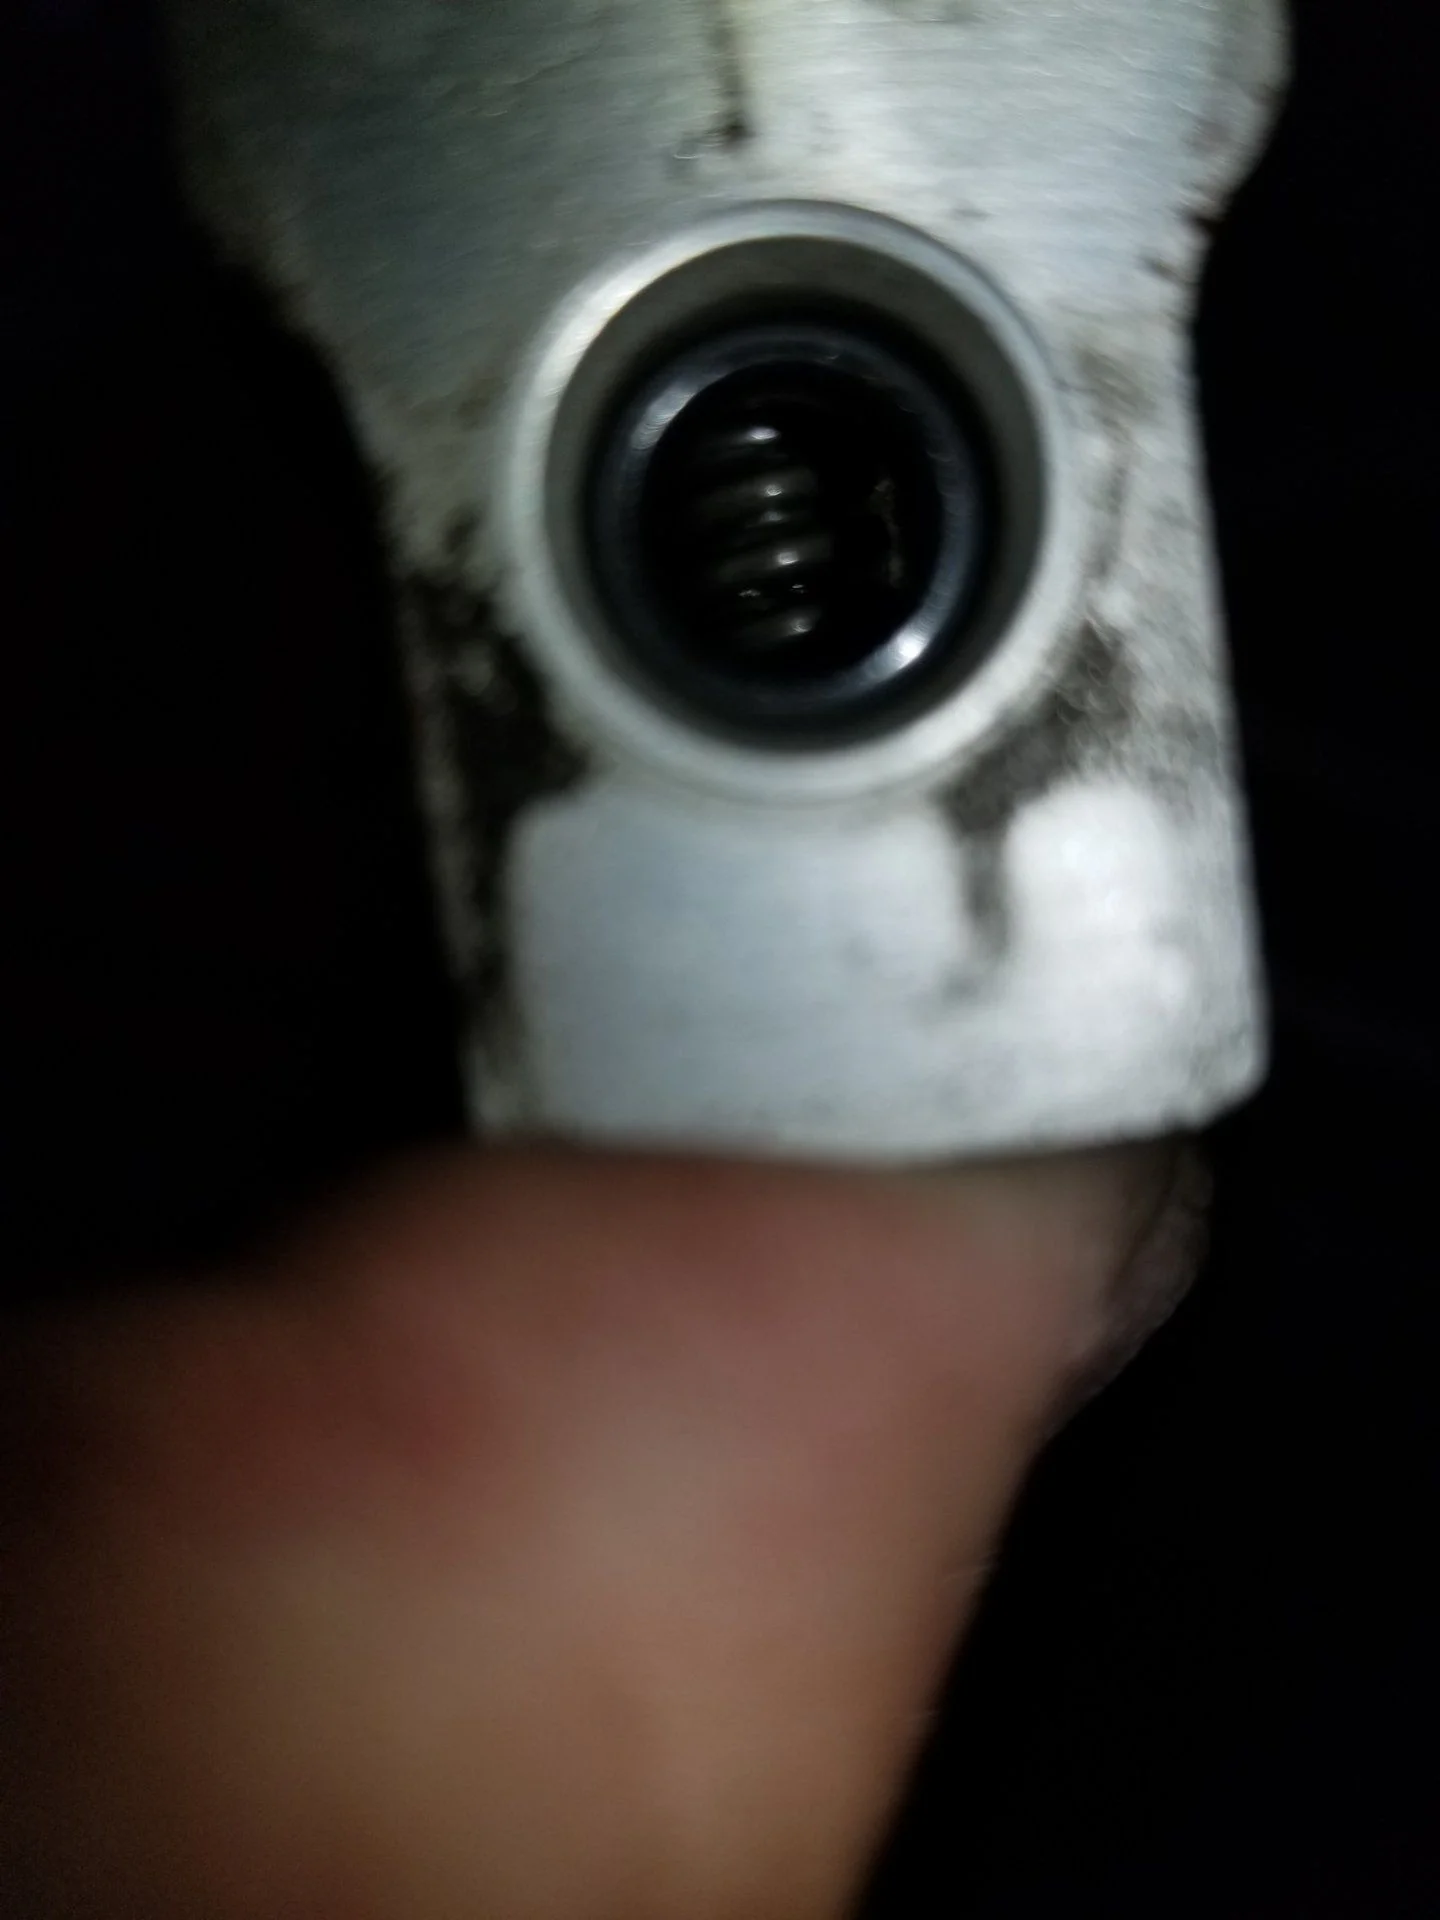
Decided to dig into the A/C finally to try to figure out why I'm not getting a full cool even with the system charged.
Took me times 15 minutes to get the Evaporator box out:
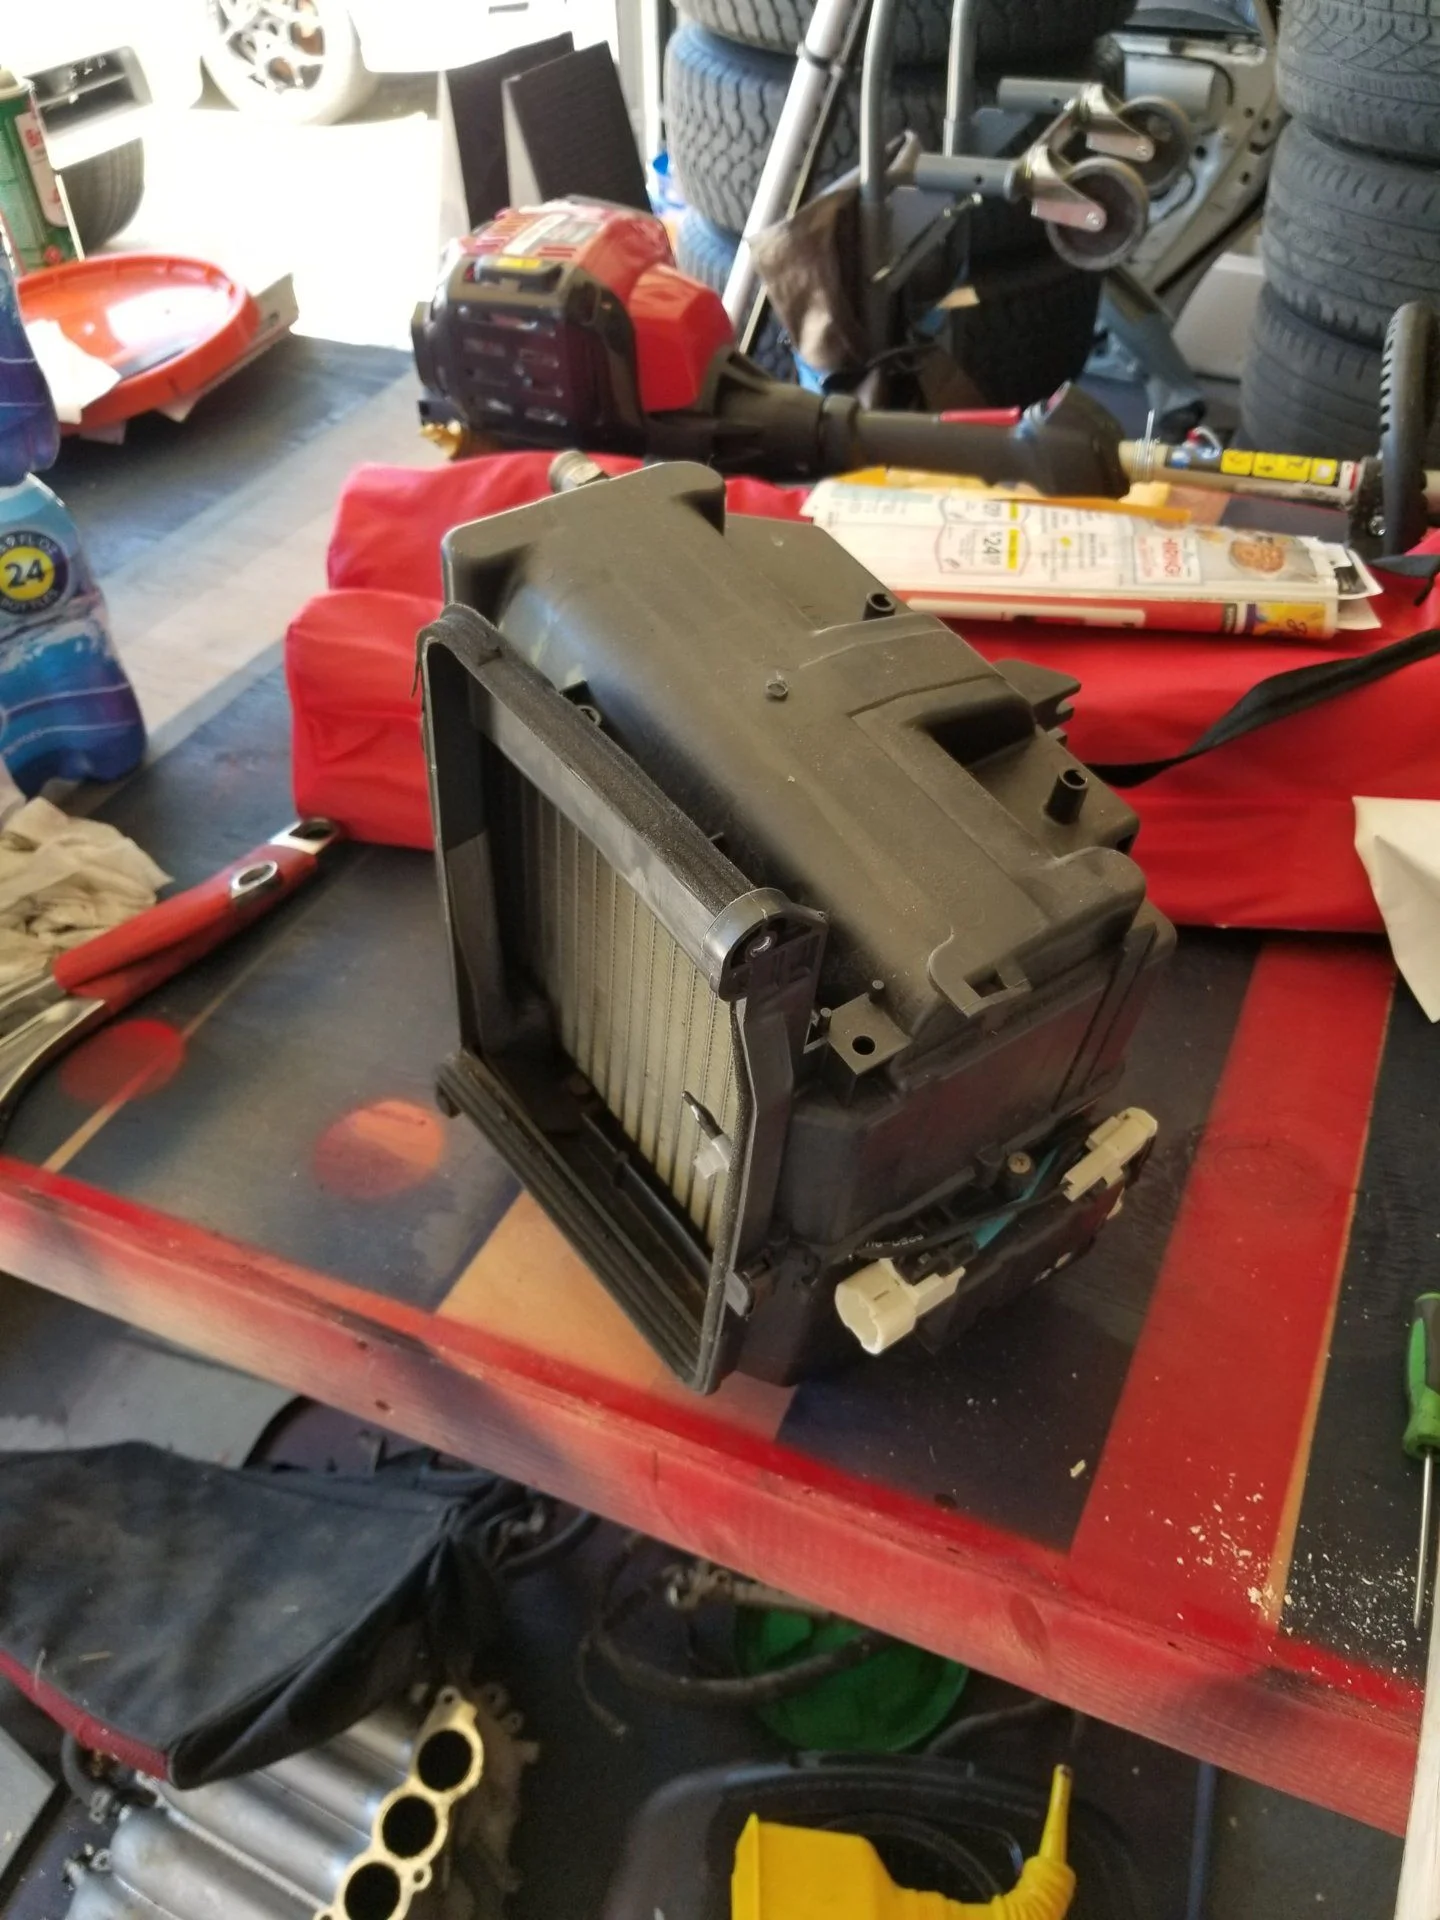
Looks fairly clean inside:
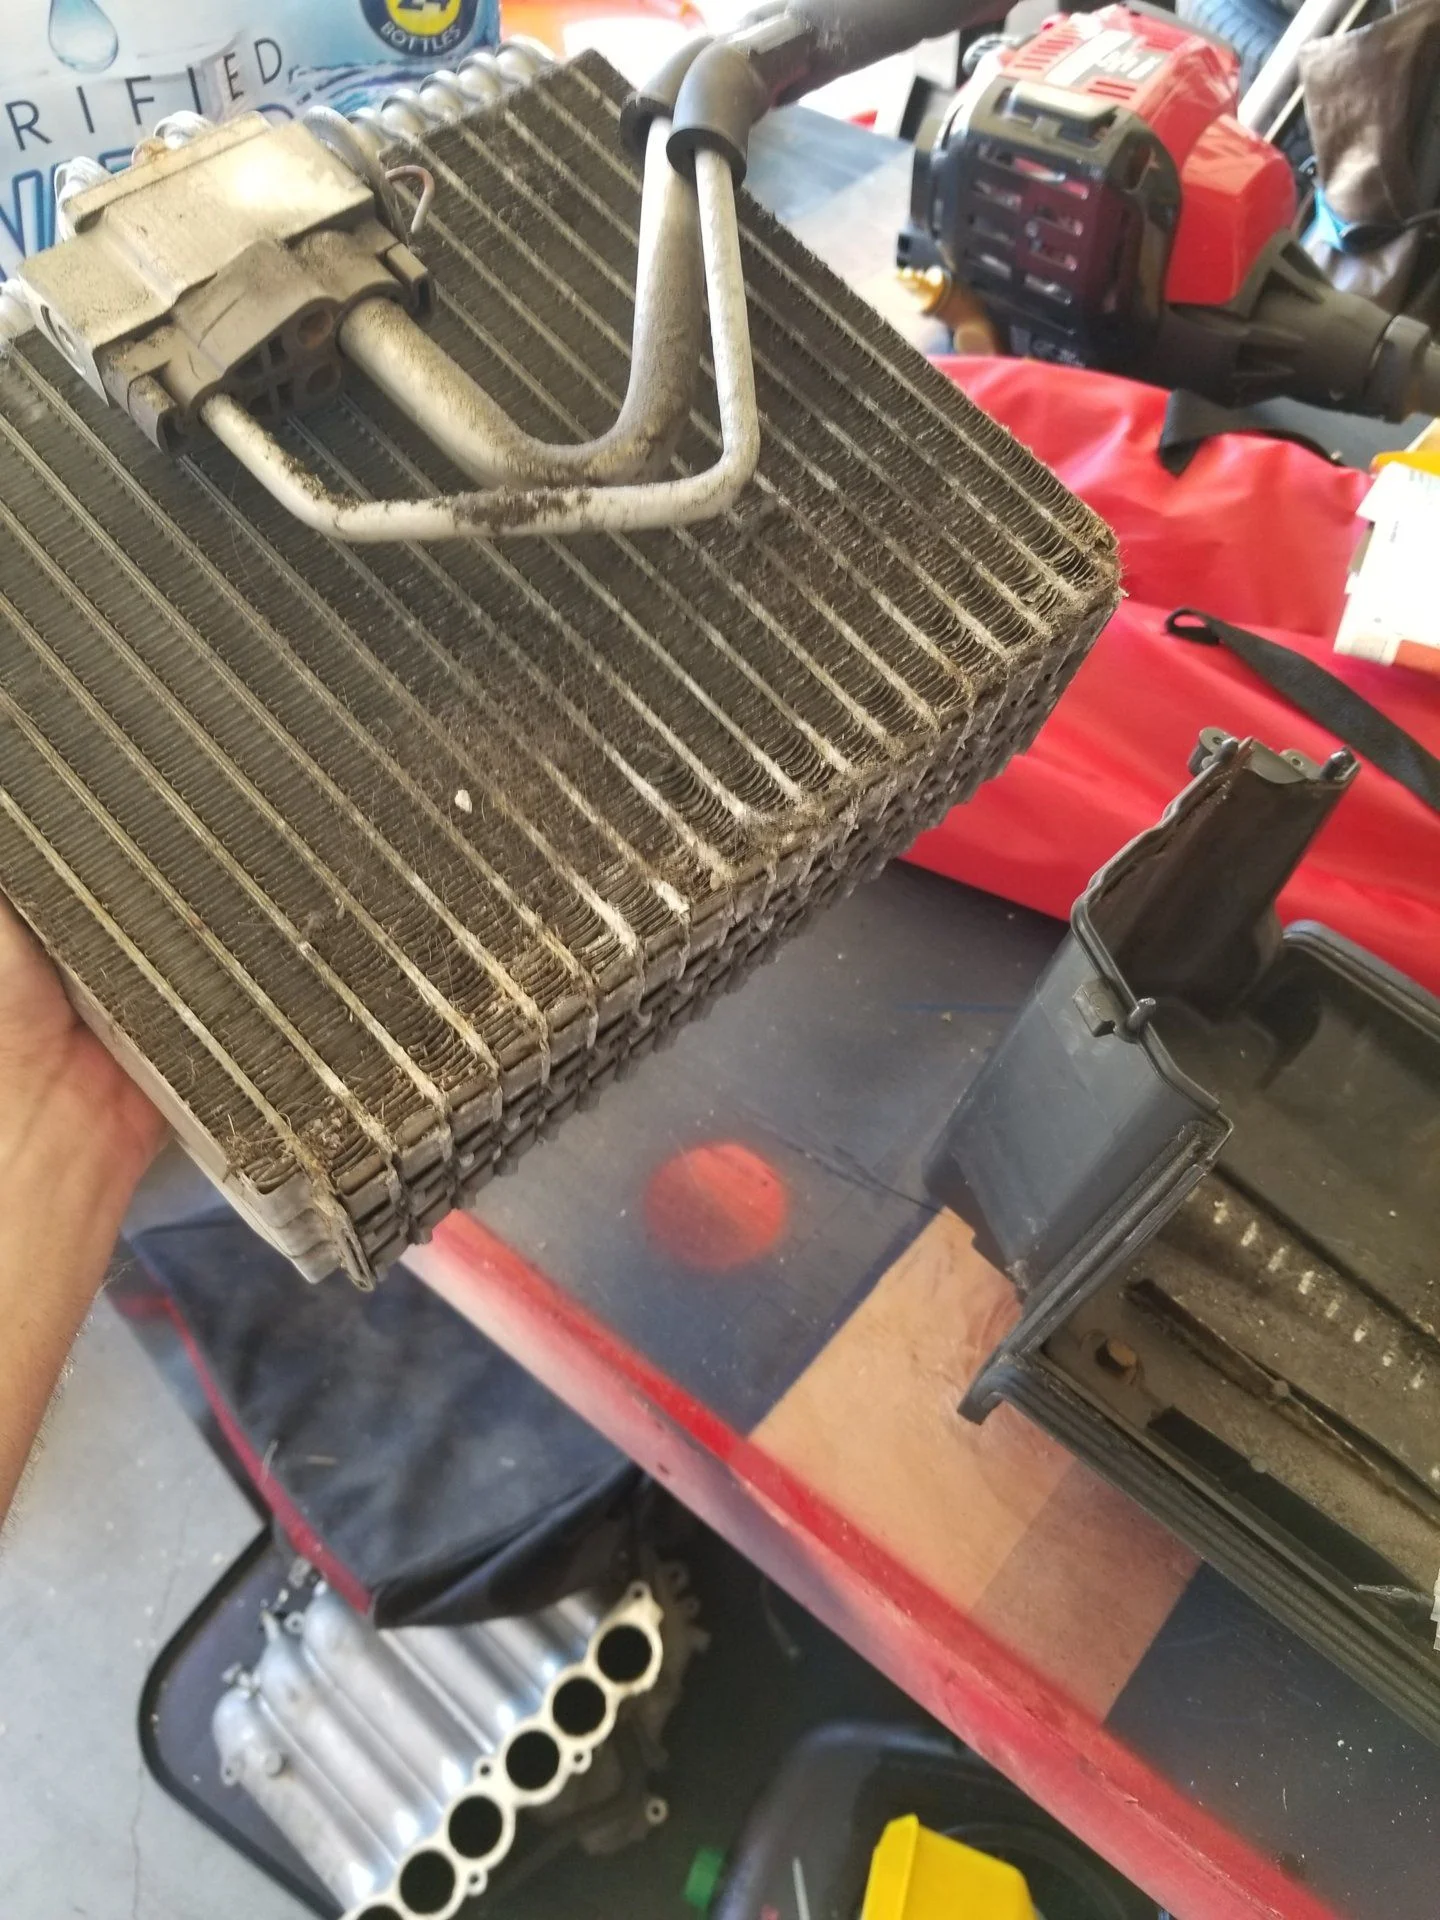
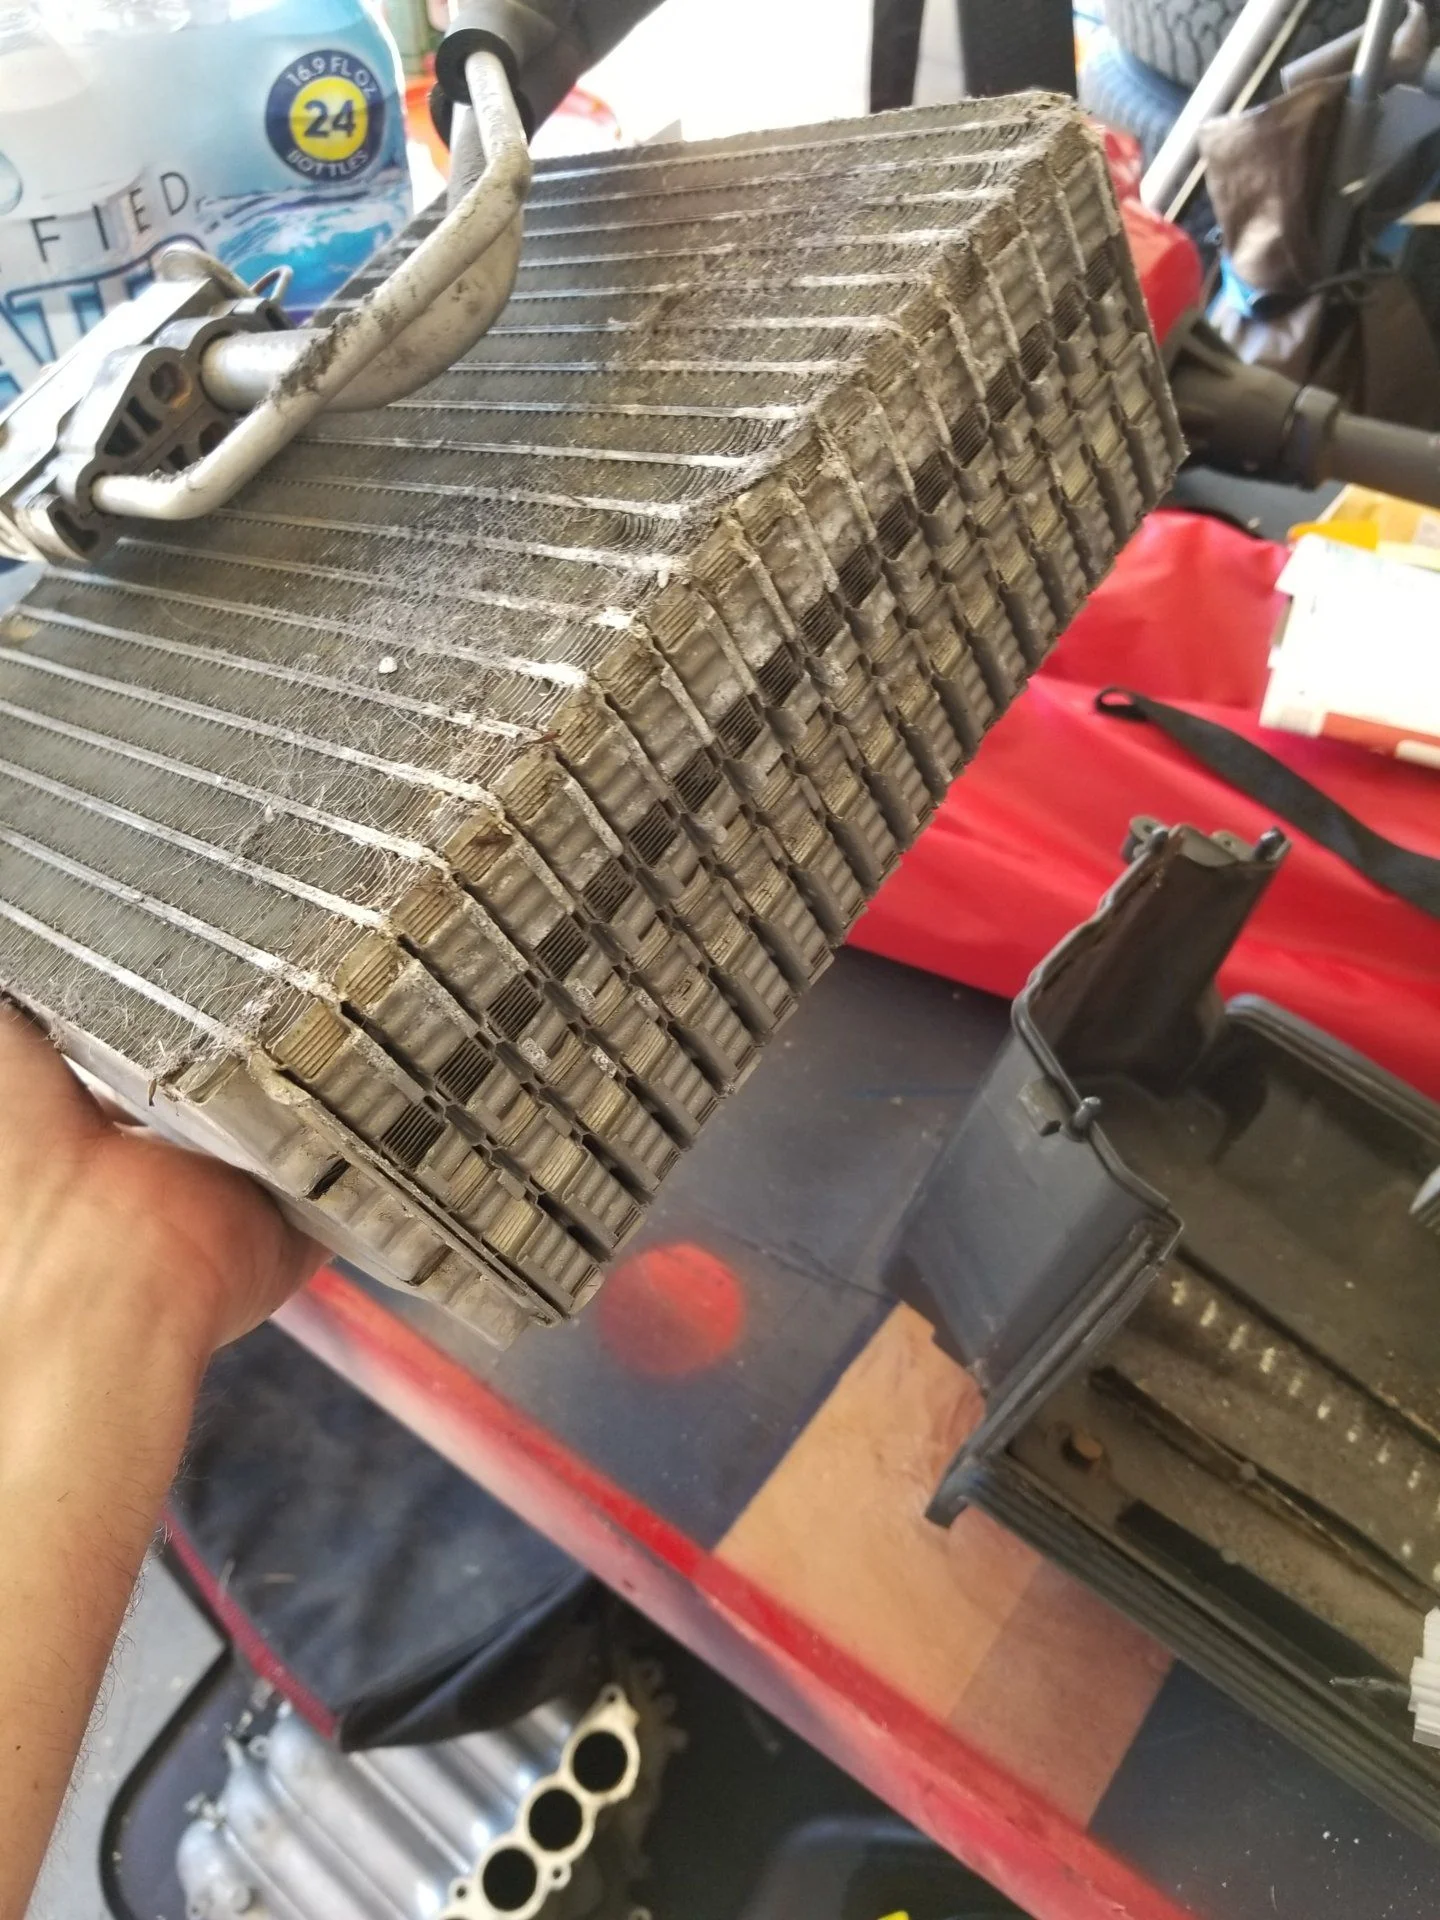
And the evaporator itself still looks to be in good condition:
The low speed resistor not so much:
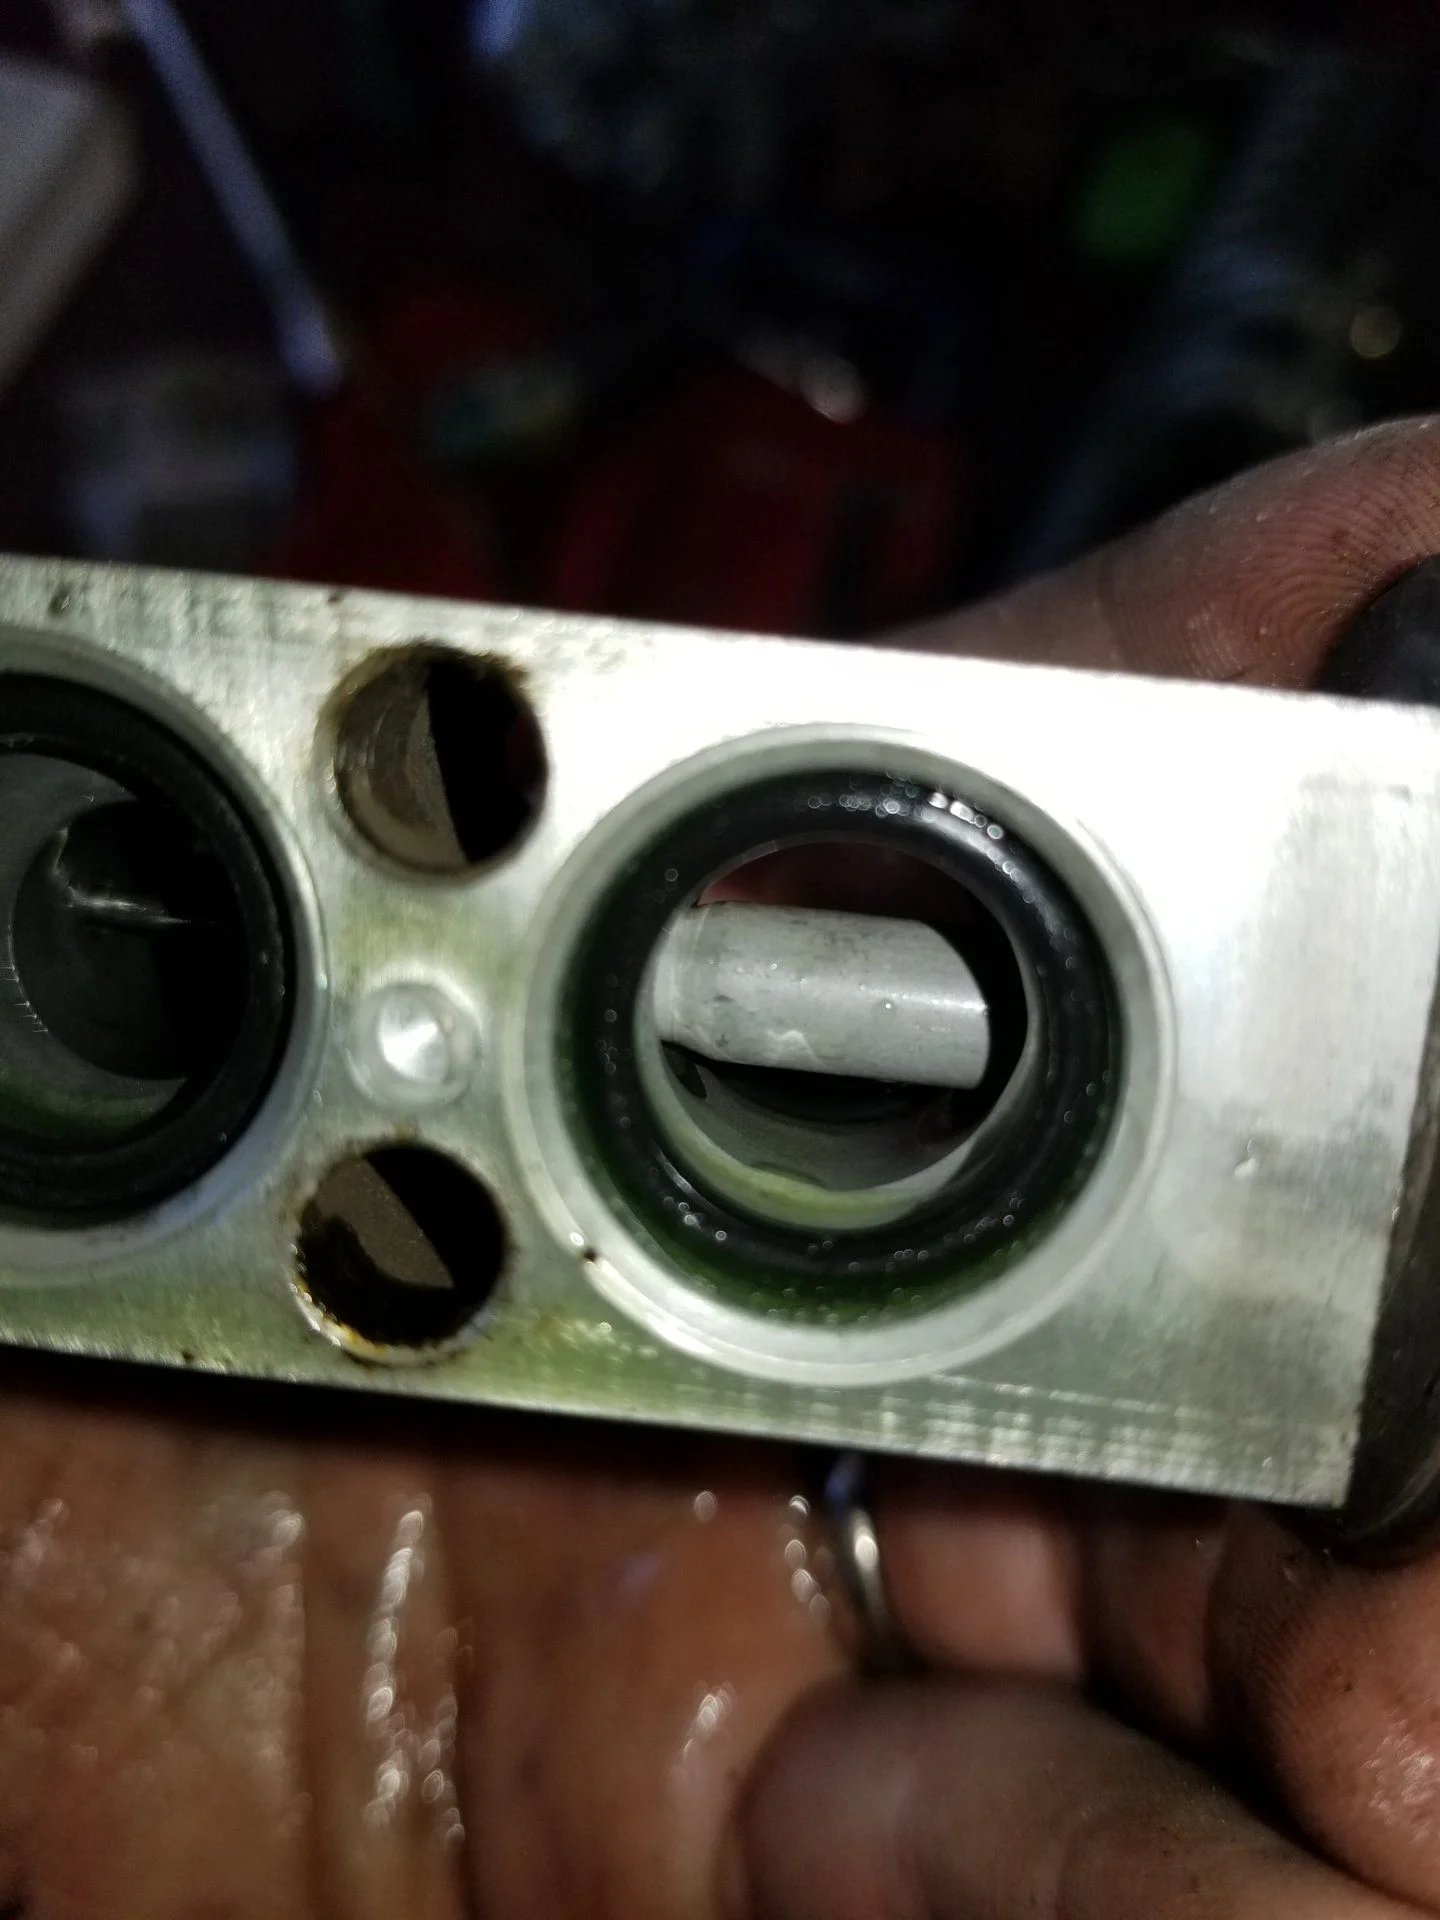
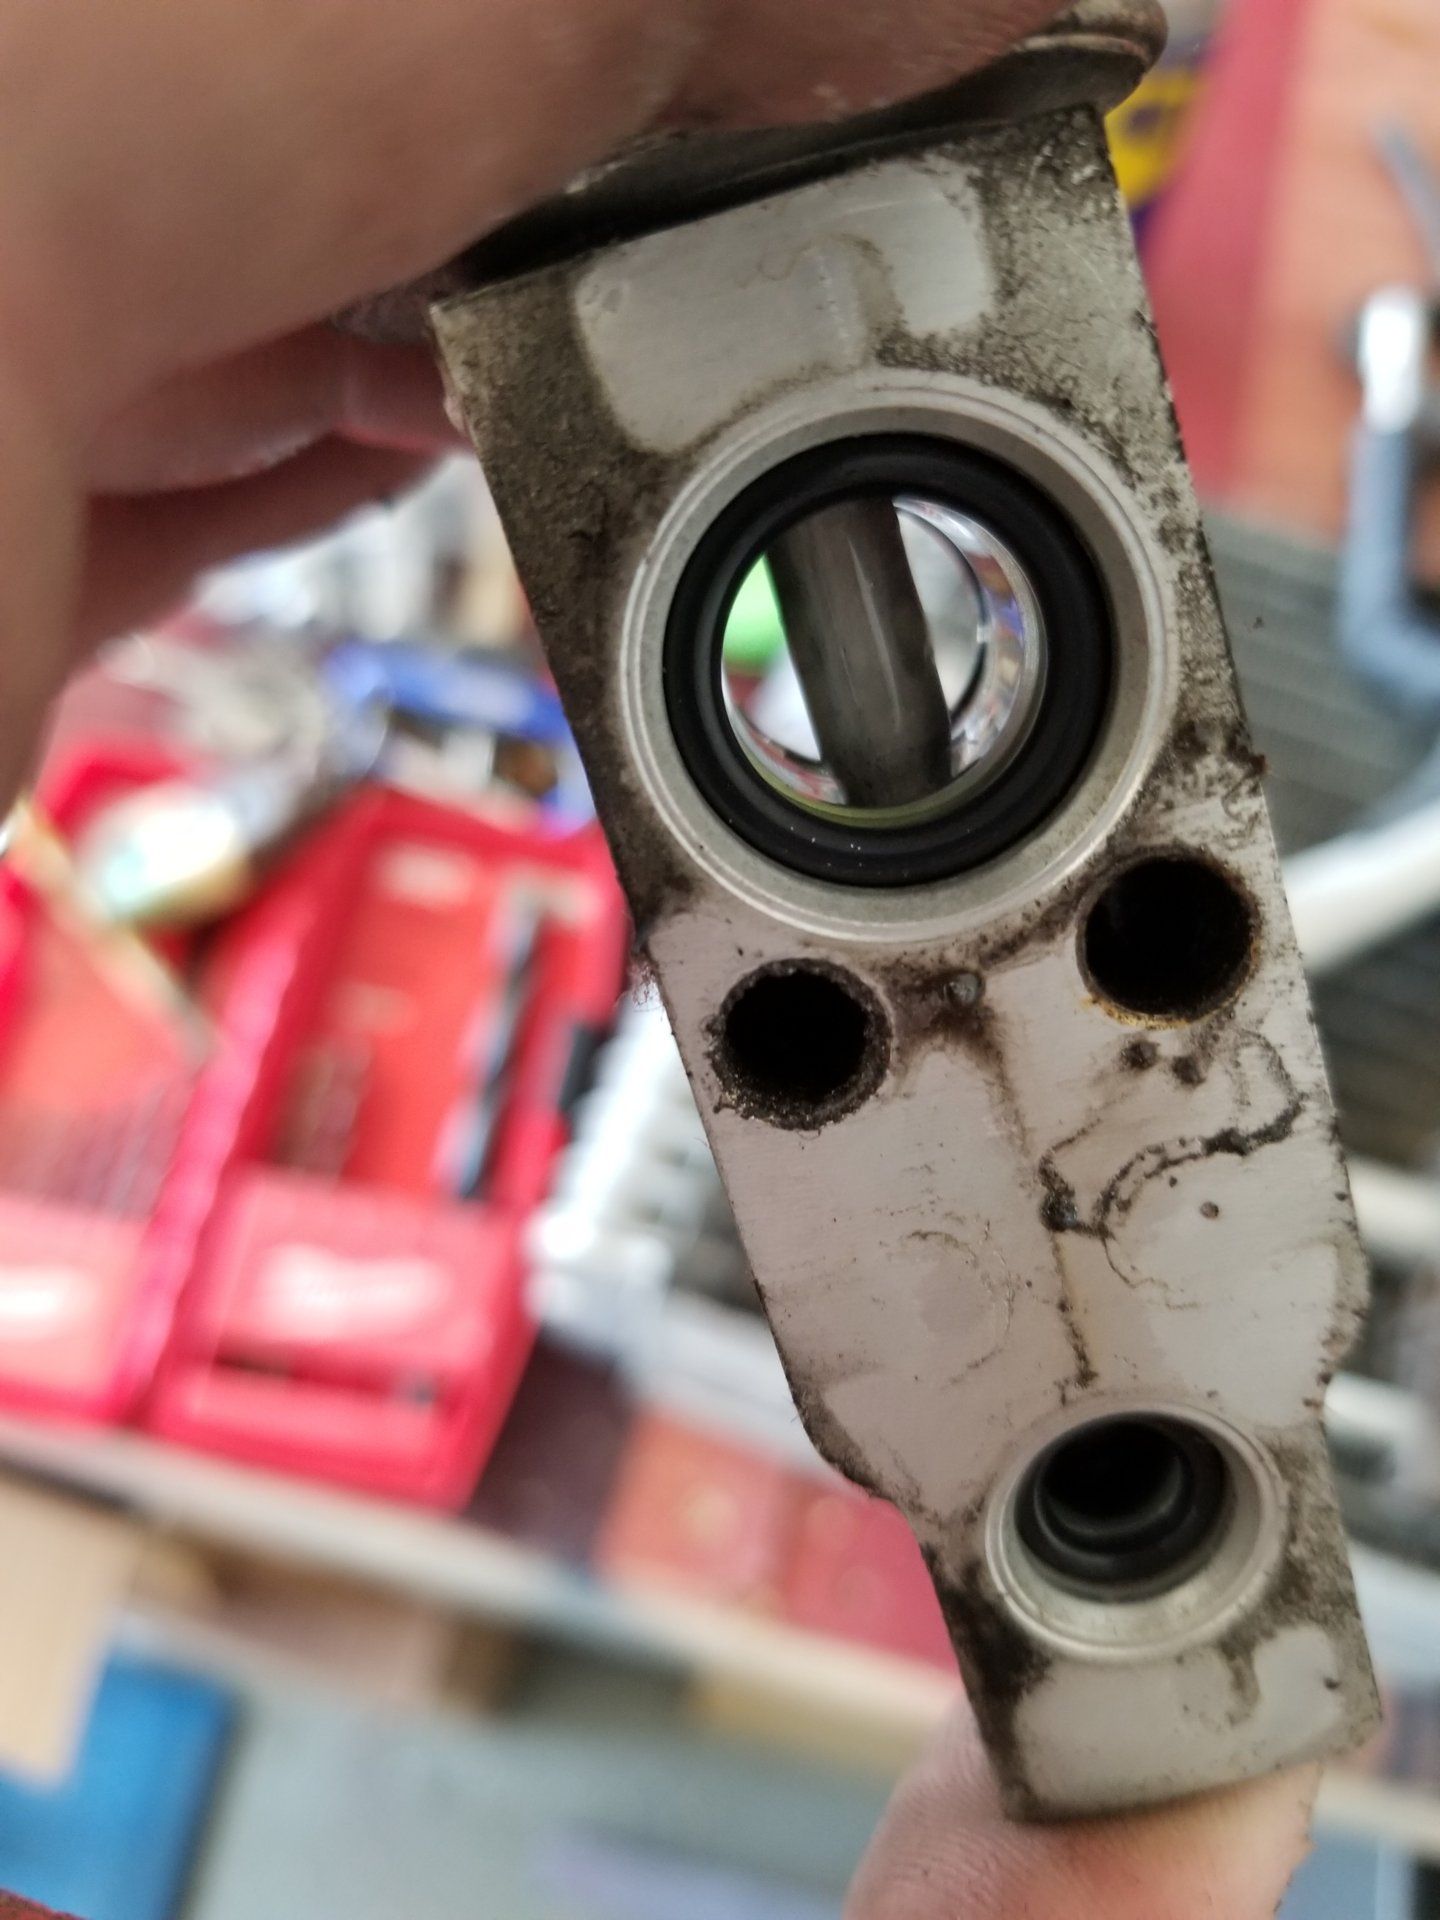
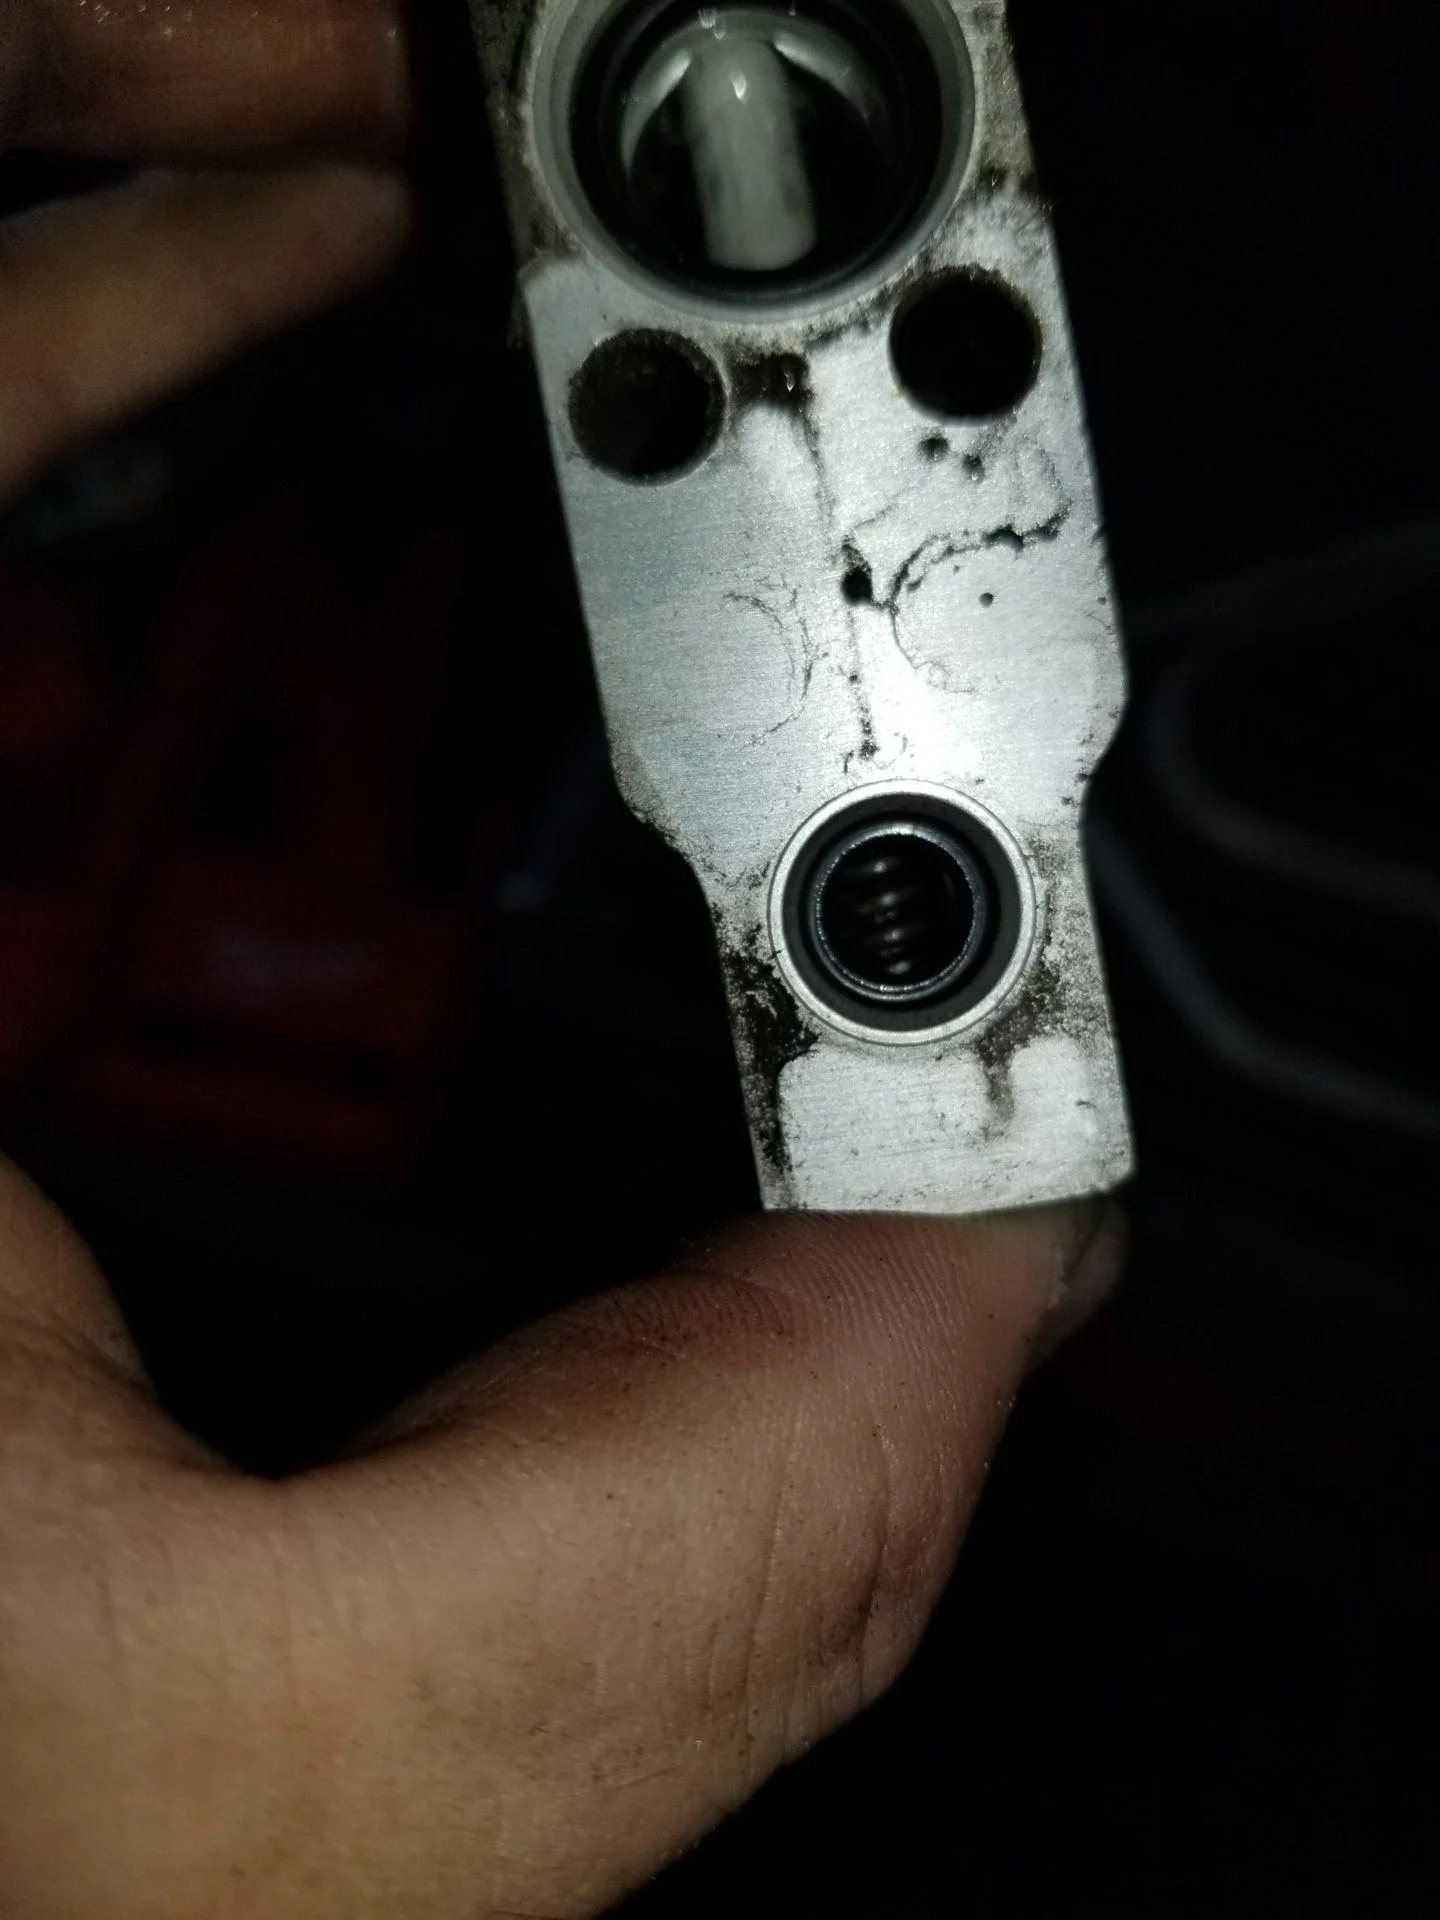
The expansion valve looks pretty clear as well:
So I'm a little stumped, it's an Auto AC system, and honestly haven't had too much experience with them since everything I've owned up till this truck has been a manual set up. I've ordered a new resistor and since I'm already in here a new thermistor (only $9) and the resistance test per fsm was a little slow to change.
The truck has 233k so I'm going to go ahead and install the parts I have. My next step is to look up the procedure to test the automatic air temperature sensor, however I feel it may be a "does it have power and ground? Yes, does the temperature change as desired? No, replace"
Took me times 15 minutes to get the Evaporator box out:
Looks fairly clean inside:

And the evaporator itself still looks to be in good condition:
The low speed resistor not so much:
The expansion valve looks pretty clear as well:
So I'm a little stumped, it's an Auto AC system, and honestly haven't had too much experience with them since everything I've owned up till this truck has been a manual set up. I've ordered a new resistor and since I'm already in here a new thermistor (only $9) and the resistance test per fsm was a little slow to change.
The truck has 233k so I'm going to go ahead and install the parts I have. My next step is to look up the procedure to test the automatic air temperature sensor, however I feel it may be a "does it have power and ground? Yes, does the temperature change as desired? No, replace"
Order up a fresh receiver dryer and some new o-rings...Decided to dig into the A/C finally to try to figure out why I'm not getting a full cool even with the system charged.
Took me times 15 minutes to get the Evaporator box out:
Looks fairly clean inside:
And the evaporator itself still looks to be in good condition:
The low speed resistor not so much:
The expansion valve looks pretty clear as well:
So I'm a little stumped, it's an Auto AC system, and honestly haven't had too much experience with them since everything I've owned up till this truck has been a manual set up. I've ordered a new resistor and since I'm already in here a new thermistor (only $9) and the resistance test per fsm was a little slow to change.
The truck has 233k so I'm going to go ahead and install the parts I have. My next step is to look up the procedure to test the automatic air temperature sensor, however I feel it may be a "does it have power and ground? Yes, does the temperature change as desired? No, replace"
Just getting to the re-assembly on my a/c project this afternoon. I'll post up some pics and results in a bit
@YotaFun your evap core looks similar to mine except I had whirlythings, leaves, hair and god knows what else packed into the bottom. I cleaned it up, replaced the expansion valve and buttoned it back up.
@YotaFun your evap core looks similar to mine except I had whirlythings, leaves, hair and god knows what else packed into the bottom. I cleaned it up, replaced the expansion valve and buttoned it back up.
Order up a fresh receiver dryer and some new o-rings...
Already done lol, I ordered everything but the lines and the compressor since the condenser looks rough
My evaporator had some debris, I cleaned it off, once I get my compressor dug out I want to see if the evaporator is clogged.
Quick update - I was able to get the a/c system back together yesterday afternoon. Here's what I did, replaced o-rings, shrader valves, expansion valve, ac rec/dryer, condenser (old one was leaking). For the most part it went ok - I broke a few bolts on the top brace and one on the a/c receiver dryer bracket but I'll come back to this later.
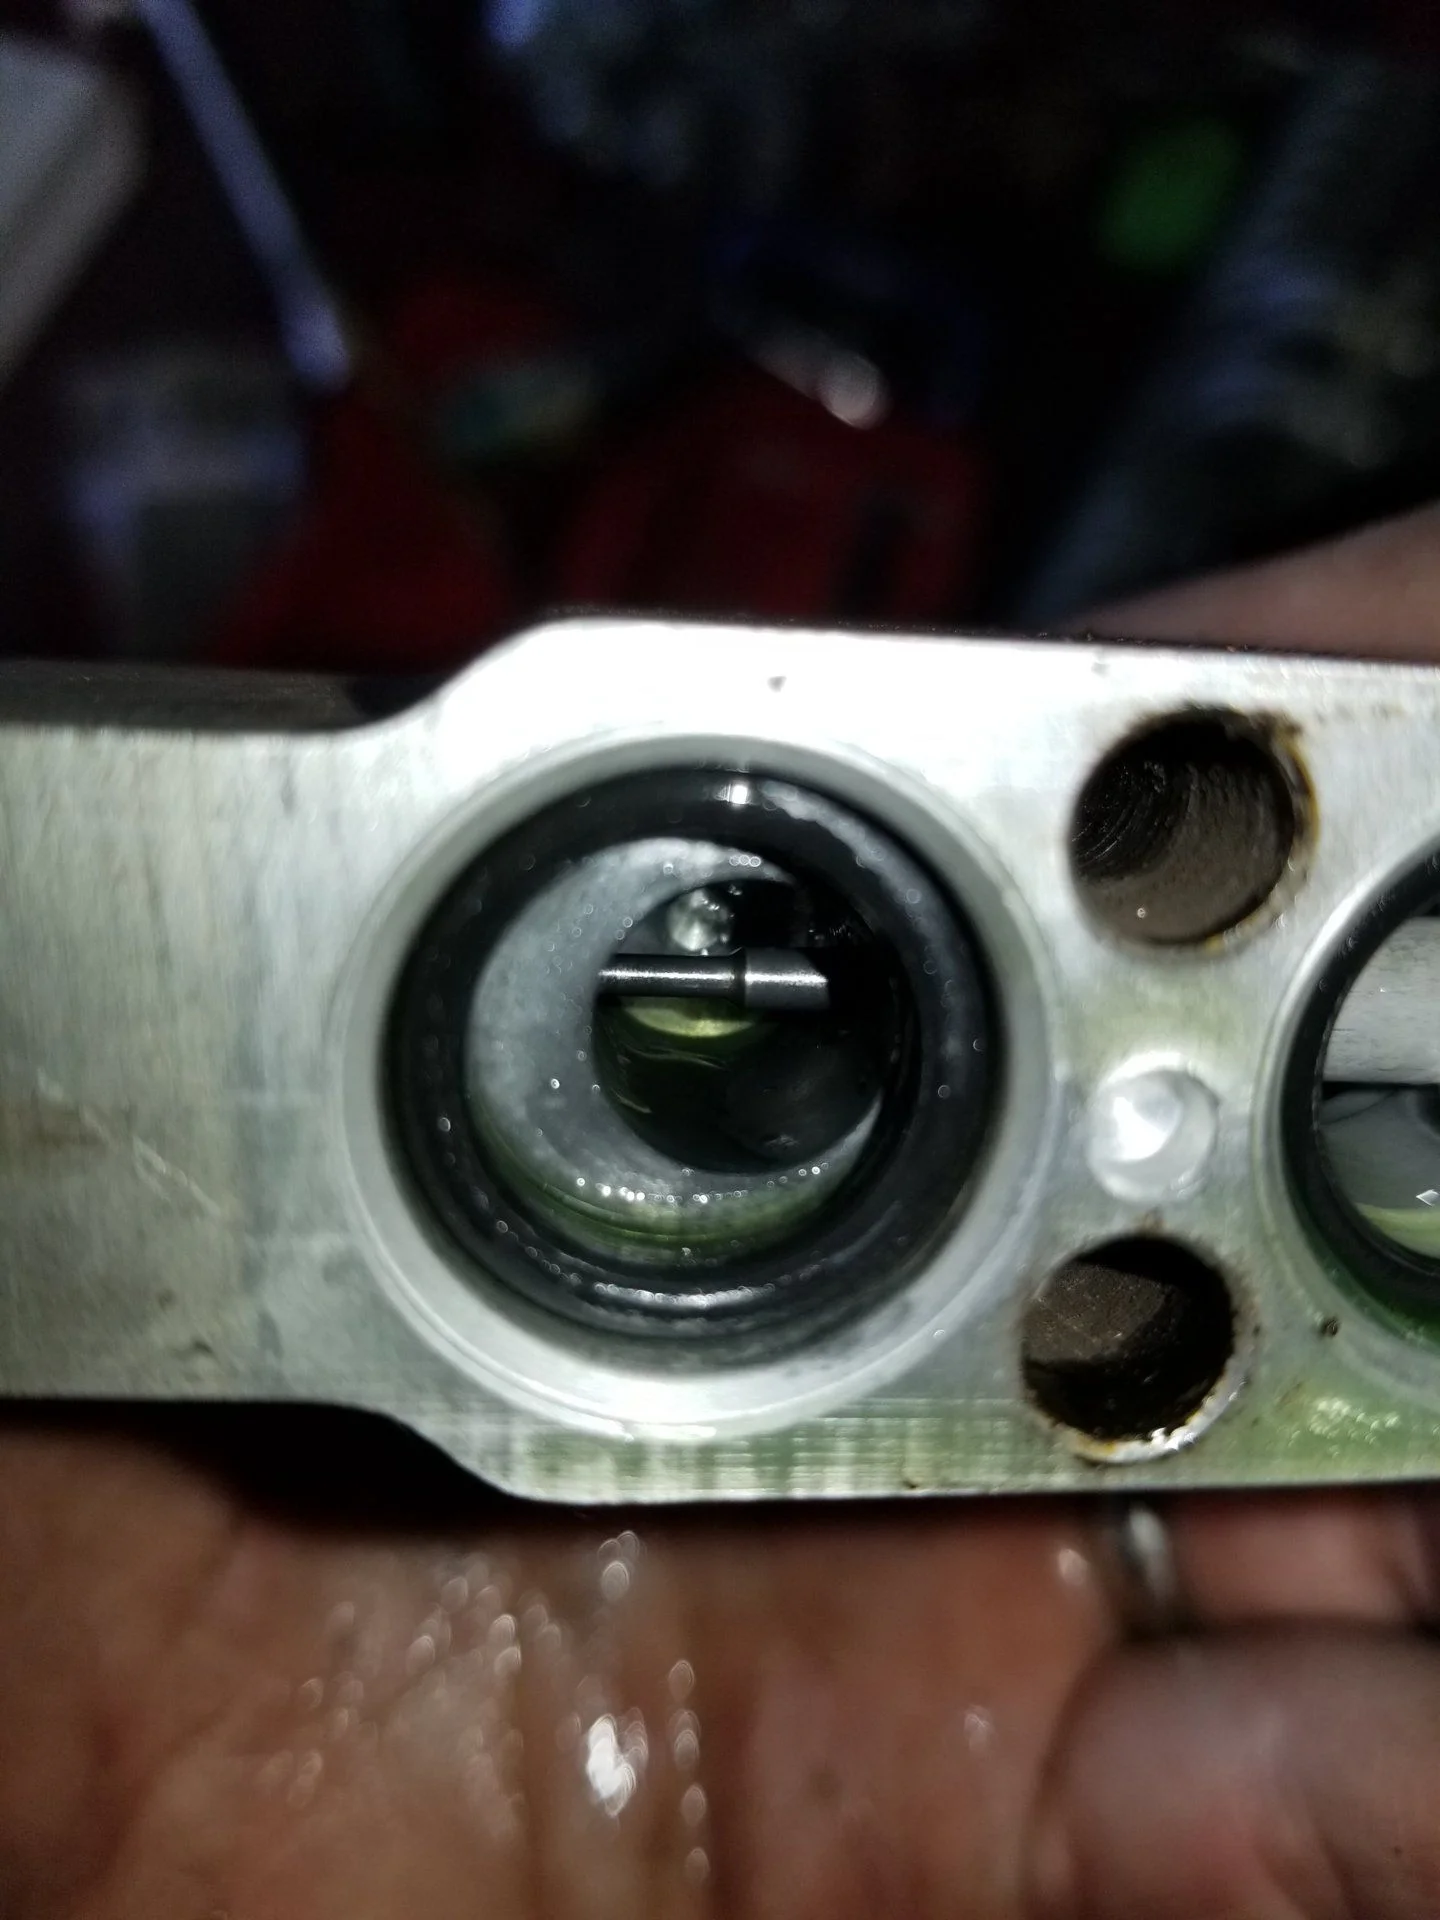
So I put the manifold gauges on yesterday afternoon and start to pump it down and I can't quite get to -25 on the gauge, concerned. I close up the manifold gauge valves to see if it'll hold a vacuum. It doesn't - WTF!!!!!
Imagine several hours of pulling gauges off and putting them back on. Checking my process online...watching another video. Reading more on MUD. Laying awake in bed turning the system over in my head.
Wake up today - walk out to the garage (fresh cup of coffee) double check the connections and notice this:

First one to spot the problem wins!
For a little background this is by far the most industrious I've been with my truck un-supervised. And I have no experience with AC systems prior to reading a few threads on MUD and watching YT videos... but this should have been obvious right?
So I put the manifold gauges on yesterday afternoon and start to pump it down and I can't quite get to -25 on the gauge, concerned. I close up the manifold gauge valves to see if it'll hold a vacuum. It doesn't - WTF!!!!!
Imagine several hours of pulling gauges off and putting them back on. Checking my process online...watching another video. Reading more on MUD. Laying awake in bed turning the system over in my head.
Wake up today - walk out to the garage (fresh cup of coffee) double check the connections and notice this:
First one to spot the problem wins!
For a little background this is by far the most industrious I've been with my truck un-supervised. And I have no experience with AC systems prior to reading a few threads on MUD and watching YT videos... but this should have been obvious right?
I should mention that it isn't the fact the valves/gauges aren't connected...
Are those your gauges, or borrowed?
I don't like the black tape on the high side line.
I see a Schrader valve on the yellow side, that and the site glass could be potential leaks...
I don't like the black tape on the high side line.
I see a Schrader valve on the yellow side, that and the site glass could be potential leaks...
@Pacer for the win! These were rented gauges from autozone. My uneducated eyes completely missed the electrical tape until this morning. I returned the gauges todayand borrowed a NEW set. Hooked it up and immediately achieved -30 and it's holding a vacuum. Note to self - scientific instruments should not be held together with electrical tape.
Leave the vacuum pump running for as long as you like, hours or even during the workday. The low pressure helps any moisture in the system boil off.@Pacer for the win! These were rented gauges from autozone. My uneducated eyes completely missed the electrical tape until this morning. I returned the gauges todayand borrowed a NEW set. Hooked it up and immediately achieved -30 and it's holding a vacuum. Note to self - scientific instruments should not be held together with electrical tape.
See if they'll sell you, or give you that "broken" set of gauges when you return the NEW set. I have an extra good line and that's a nice set of gauges otherwise...@Pacer for the win! These were rented gauges from autozone. My uneducated eyes completely missed the electrical tape until this morning. I returned the gauges todayand borrowed a NEW set. Hooked it up and immediately achieved -30 and it's holding a vacuum. Note to self - scientific instruments should not be held together with electrical tape.
Good to know - I work from home so will let it run through the remainder of the day.
When it comes to adding oil - I've changed 3 components so it seems like the mud rule of thumb is 2oz per component or should I go strictly by the exact amount in the FSM? Also, I didn't add the oil to the components prior to reinstalling them - I saw in a video that you can add the oil to the yellow hose which will add it to the compressor and then cycle through the system. Any guidance or concerns on this thought process?
When it comes to adding oil - I've changed 3 components so it seems like the mud rule of thumb is 2oz per component or should I go strictly by the exact amount in the FSM? Also, I didn't add the oil to the components prior to reinstalling them - I saw in a video that you can add the oil to the yellow hose which will add it to the compressor and then cycle through the system. Any guidance or concerns on this thought process?
Pacer said:See if they'll sell you, or give you that "broken" set of gauges when you return the NEW set. I have an extra good line and that's a nice set of gauges otherwise...
Will do - seems like the least they could do for all the aggravation and driving around
Well to close the loop on this project - system held a vacuum. Loaded the oil through the yellow hose. And I'm know blowing cold air. I think I can move on to the next task! @Pacer (and others) thanks for the guidance and words of encouragement!!

Decided to address the sluggish power windows today. Cleaned the contacts on the driver's side control panel. This eliminated the studder/hesitation when putting the windows up. We'll see how it does once the temps get below freezing but excited in the improvement none the less.
Before:

After:

Before:
After:
Last edited: