Builds The Mule: My OM617 swap and other improvements (1 Viewer)

This site may earn a commission from merchant affiliate
links, including eBay, Amazon, Skimlinks, and others.

I forgot to take pictures of my steering column modification, but you can kind of see the firewall plate in the background. The slip joint has plenty of play in it and to remove the steering shaft, all I have to do is remove the lower coupling, remove the steering wheel nut, then slide it out the bottom. I wanted to make sure I didn't put anything together and then not be able to get it back apart. It's totally possible to do this if you end up welding everything. All welds are backed up with hardware.

Overall, I'm supper pleased with the 4x4Labs steering shaft kit. As usual, it's pure beef! It's smooth as glass, there's no slop, and the only part I had to buy was a shaft collar to keep from being able to pull the steering wheel towards the driver.

The nylon washers were my way of spacing the shaft collar out and providing for a way to minimize any longitudinal slop while keeping the shaft collar spaced from the steering column tube.

Paint used was left over DupliColor "cast iron" paint. I love this stuff. It's quality spraypaint...
DSCN1330.jpg
DSCN1331.jpg
DSCN1357.jpg
DSCN1359.jpg
DSCN1368.jpg
 
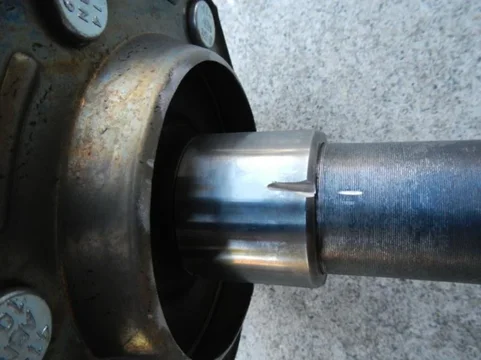
The first pic shows the slip joint and the octagonal steering shaft.

The second shows the amount you could pull the steering wheel toward the driver before the set collar and nylon bushings were installed. I figured that could give someone quite a scare not to mention it makes the upper yoke bind on the firewall--locking the steering wheel.

I also took this time to restore the steering wheel. The whole process took a pretty long time as there's a lot of epoxying, sanding, priming, sanding, epoxying, sanding...you get the point. I used POR-15 epoxy putty and it's pretty slick. You just wet it down and form it. While it's still malleable, just wet your finger and smooth it down. This really cuts down on the amount you have to sand--and believe me, you want to minimize that...

Overall I'm happy with how it turned out. I don't have any pictures to post of the wheel painted, but just imagine it looking nice and shiny black:flipoff2:. I'll post some up later. I'm curious to see if the paint the shop sold me will indeed resist cracking.
DSCN1351.jpg
DSCN1353.jpg
DSCN1344.jpg
DSCN1345.jpg
 
I'm getting to the point in this swap where I need to get the firewall buttoned back up.

I'm currently debating whether or not thermal insulation / sound deadening is even worth the time and money or if I should just apply rust preventative and top coat it.

I honestly don't know how much I can gain sound deadening wise considering everything else isn't "sound proofed."

If I did go ahead with it I think I'd like to use the Lizard Skin system.

Anyone have a lizard skin applicator gun I can borrow?

What do yall think?

(Here's a pic of my firewall now....lots of work left)
DSCN1442.jpg
 
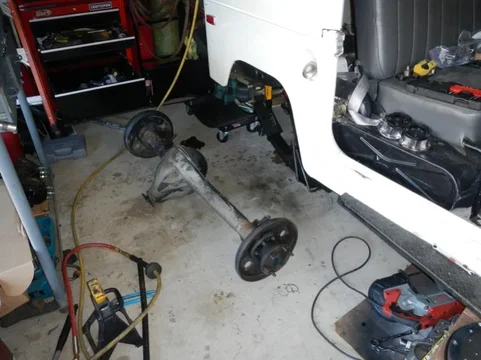
Been pretty busy lately with work and all, flying late nights and trying to get the "nuggets" trained up. Tackled the rear disc swap with parts from Poser. While I was in there I went ahead and replaced all the seals, bearings, and races. I also sprung for new wheel studs since the OEM studs were a little short. Pulled the rear axle image-3861940668.jpg Stripped, primed, and painted image-2656671869.jpg Super easy way to remove the race. image-433899613.jpg image-3727730251.jpg image-2450635575.jpg image-698863132.jpg Inner race removal. These crack easily. These were brand new races that I accidentally overheated (note blue color, damn!) Thanks to Georg for the new races. image-1611160766.jpg image-4021636709.jpg image-1402116040.jpg image-2555761807.jpg Making room on the caliper for the banjo fitting. image-3951285617.jpg
image-3861940668.jpg
image-433899613.jpg
image-3727730251.jpg
image-2450635575.jpg
image-698863132.jpg
image-1611160766.jpg
image-4021636709.jpg
image-1402116040.jpg
image-2555761807.jpg
image-2656671869.jpg
image-3951285617.jpg
 
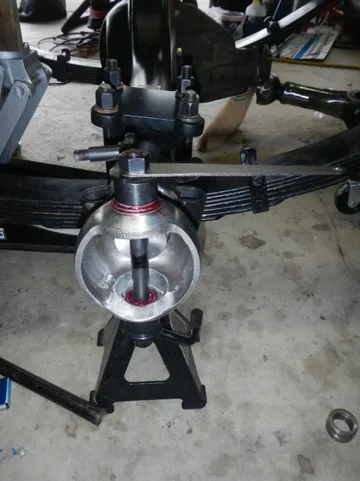
Next up was the front axle. I went full retard and pulled the front axle and stripped it in prep for a cut and turn back in October. We'll after some sage advice, I decided it needed to be in place before any engine placement...duh. Luckily a local dude had a 71 axle that I picked up for free. Had to center the knuckles and all that jazz... image-1142464021.jpg I'm ok with dirty as long as it's free... image-2977108093.jpg Cleaned up image-2251105638.jpg Cleaned up and in place. image-1900158192.jpg Centering the 62 knuckles up image-2014219521.jpg image-1765905958.jpg Grinding to fit the larger birfield image-688457563.jpg Marfield tack. Lots of measuring. image-2858524884.jpg there's a bracket you can't see supporting that brake line.. image-3436955231.jpg
image-1142464021.jpg
image-2977108093.jpg
image-2251105638.jpg
image-1900158192.jpg
image-2014219521.jpg
image-1765905958.jpg
image-688457563.jpg
image-2858524884.jpg
image-3436955231.jpg
 
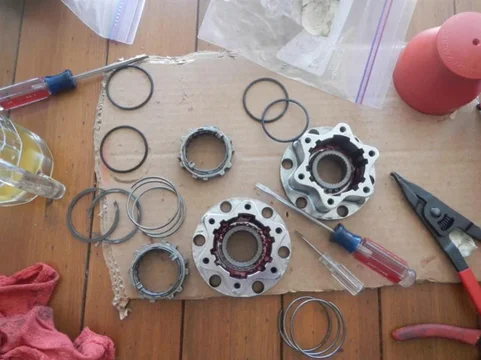
Rebuilt the Aisin hubs...


image-2994434357.jpg

image-2717168277.jpg

image-2498316043.jpg

image-1287484829.jpg
image-2994434357.jpg
image-2717168277.jpg
image-2498316043.jpg
image-1287484829.jpg
 
Just an update gents...

Work has been getting in the way lately; although, I can't complain about the flight time I've been getting--it means I have to do my ground job work on my days off or nights I'm not flying.

I did get the old scab plates for the motor mounts that were booger welded to the frame off last weekend which was a major pain in the ass. And I finally got the motor hanging in between the frame rails to check initial fitment. Looks like I'll have to relocate the oil filter assy, which is not a big deal.

I did make a decision NOT to use Lizard Skin on the firewall. With respect to sound deadening, you want it completely gone or to me it's not worth it. Analogy would be 100 crying babies in a room and you only took 90 away---you still have 10 crying babies...
 
you talk of cut and turn of the front axle. are you going spring over? if not what's your plan for oil pan clearance. I have one of these engines sitting on my garage floor waiting to go into my 40 with similar set up to what you have. I'm a little worried about oil pan clearance with the front axle so I'm always looking for ideas from others who have or are doing this swap. looks awesome so far. I like you swap to 62 knuckles. I may look into that
 
I've got the engine sitting where I think I want it with the cherry picker and ratchet straps and I think I have about 5" of clearance which seems to roughly match my distance from bumpstop to stop. I have a HFS 4" SUA lift with 1.5" shackles. I'll try to get a pic of it.

Does anyone have any tips for engine placement?

Questions:
1) I'm sure it depends, but what's the shortest driveshaft length I should shoot for? Right now I have about 24" from the mating surface of the speedo housing to the pinion flange.

2) Do I need the drive train to be level enough to have the TC output pinion (yoke) at least parallel to the front axles pinion? Seems like you don't want angles in the opposite directions.

3) I know I want to mount the drivetrain as high as possible. Should this be limited by the tranny tunnel, or should I just resign myself to having to retrofit the tunnel to accommodate? (right now the Orion tcase is hanging about 2 inches below the frame rail).

4) Alignment. Should I just make sure the drivelines are in line? What's the tolerance left and right?

I'm sure I'll think of some more.
 
I've got the engine sitting where I think I want it with the cherry picker and ratchet straps and I think I have about 5" of clearance which seems to roughly match my distance from bumpstop to stop. I have a HFS 4" SUA lift with 1.5" shackles. I'll try to get a pic of it. Does anyone have any tips for engine placement?
You have to notch the lower pan on the PS, as high as you can and over to the oil pick up:


I've got a 3" SUA lift and 2.5" extended shackles and hit the notched pan with the pumpkin, mine was brazed and it cracked causing it to leak like a stuck pig on the trail. I'm making a new one currently, it will be TIG welded and I'm adding extended bump stops. The only way to get away from doing this is 6"+ or SOA IMO ... just trying to save you some grief ;)

Tucker
 
Well I've been working on engine placement and engine mounts. I haven't tacked anything in yet, but I'm getting close to the final placement I believe. Lots of places to check for interference, etc, but overall I think everything is going to work out.

Pretty nervous with that much meat hangin' on the hook. I kept that tire under there just in case.
DSCN2014.jpg

Kind of like a couple of gunfighters looking at each other
DSCN2015.jpg

Stuffin' it in...
DSCN2016.jpg

DS block plate
DSCN2022.jpg
DSCN2014.jpg
DSCN2015.jpg
DSCN2016.jpg
DSCN2022.jpg
 
I'll definitely have to clearance the power steering pump pulley.
DSCN2034.jpg

Sitting about where I think she'll end up.
DSCN2024.jpg

The Orion low speed gear is a bit larger in diameter and hangs down a little bit lower than stock. I was going to fab up a skid plate anyways.
DSCN2031.jpg

Checking ergonomics of the shifter.
DSCN2036.jpg
DSCN2024.jpg
DSCN2031.jpg
DSCN2034.jpg
DSCN2036.jpg
 
Nice build man. I know nothing about those engines, but I admire your ingenuity. I wish someone would reply about engine placement for ya, I would if only I knew. Good luck man, keep it up.
 
What bellhousing is that? I was using the stock transmission mounts so placement was pretty obvious, I'd say your radiator will be the important spot with the mechanical fan (I'm running electric). Looks good to me ... you want it as high and far forward as you can get it, leaving some room for movement ;)

Tucker
 
many thanks for a great write up. I am in the opposing camp and going with a 4bt/ranger OD config. Although if I had it to do all over again, an LS1 looks like an attractive way to go.
 
What bellhousing is that? I was using the stock transmission mounts so placement was pretty obvious, I'd say your radiator will be the important spot with the mechanical fan (I'm running electric). Looks good to me ... you want it as high and far forward as you can get it, leaving some room for movement ;) Tucker

It's an Advance Adapters 712577 NV4500 bellhousing. Do you think 1" is enough clearance? I may go with a little more since I don't want the fan to eat the radiator.
 

Users who are viewing this thread

Back
Top Bottom