Builds Rods 65 FJ 40 thread

This site may earn a commission from merchant affiliate
links, including eBay, Amazon, Skimlinks, and others.

Engine

Well my son came home for the weekend and helped me pull the engine, tranny and transfer. Those are now located in my garage awaiting cleanup and paint. It's getting crowded in there. Not much to show but a before and after pic.

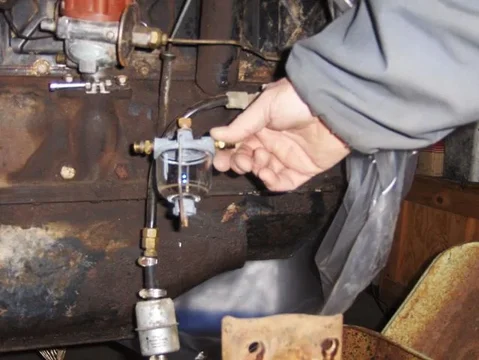
Right now I'm looking for the correct carb and fuel filter. Rebuildable of course. The carb I have is a carter and it works OK, only needs a whack with a rubbber mallet once in a while but it's not OE. The fuel filter is after market as well.

Hope to resume my rust repair on the tub later today.

Frame 2.webp

Frame 2a.webp
Frame 2.webp
Frame 2a.webp
 
How I spent the afternoon

Time to do a little rust repair. I cut out some rust and took some left over parts and made a new wheel well.

Still a little rough and I need to add 1/4" down the side so it matches. That will be a real pain trying to keep it from warping. Gonna take it slow.

HPIM2305.webp

HPIM2303.webp

HPIM2308.webp
HPIM2305.webp
HPIM2303.webp
HPIM2308.webp
 
good eye! My OE water pump took a dump and I had to go with a later version that would not support the hard part shown in your pic. At least not with the rubber hoses available from my NAPA. I have an OE pump traveling across the US right now and should get it mid week. I'll look for my pipe and make sure it has the port for the heater. If it doesn't I'm definately interested. My rig had an aftermarket (sears) heater and I don't remember how it was plumbed. Guess I need to research my photos.
 
A little progress

I got to do a little work on the cruiser today. Just about have the panel replaced, a little more welding and sanding.
rust repair.webp

I bought some parts and they showed up this week. The straps are for later cruiser but they will do until I can find the correct ones or at least the correct mounting point. They are in excellent condition so I had to get them! Mine should mount with a single bolt behind the door opening.
straps.webp

I also got the fuel filter thing worked out. The first one got destroyed in shipping but the second one cleaned up real nice.
fuel filter.webp

It's gonna be snazzy!
rust repair.webp
straps.webp
fuel filter.webp
 
thanks


Thanks. It's going slow but I THINK that after I plug the hole in the dash from the non oe cigar lighter I will be able to focus on stripping and sanding the tub, hood and front clip. After I dig out all the seam sealer that is. Getting that stuff out may prove to be a real pain, we'll see.

Has anyone got some tips on how to remove seam sealer. So far I've expiremented with a dremmil and some very fine attachments. Even tried a few super small drill bits. It works but it is time consuming.
 
Seam Sealer

Well I've been working on the removal of the old seam sealer. I've tried several ways and was making OK progress with a roto tool with a very small head. It was slow going and I'm going through tips like crazy.
HPIM2356.webp

HPIM2357.webp

So I tried a hand held torch an a small picking tool and that seems to go faster. Heat it up and it picks out pretty easy. I think I'll use the roto tool to clean out the rust before I apply the coating. I don't want to sand blast it because I figure I'll never get all the sand out of the joints and that may cause me problems later (?). I will apply the new seam sealer over the coating (masterseries). For those who have applied seam sealer before, what did you use and are you satisified with it?

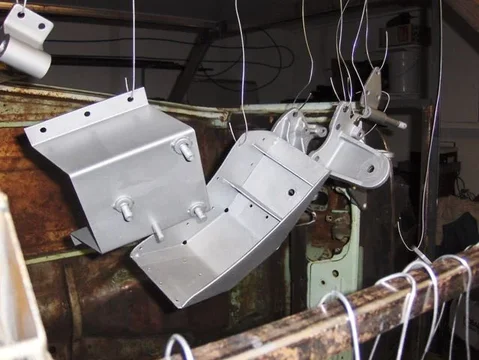
I've also been doing a little sand blasting. Most of the small pieces are ready to be coated.

HPIM2363.webp

Thanks for looking
HPIM2356.webp
HPIM2357.webp
HPIM2363.webp
 
progress

Sand Blasted, de greased to get my finger prints off, metal etched and the first coat of masterseries. So far I like. Oh ya one tip for those who go here after me. There is a reason the foam brushes at Harbor freight are so cheap. It's because they are CHEAP. Get better quuality for you project.
HPIM2364.webp

HPIM2365.webp

HPIM2366.webp

this stuff goes on easy and smooths out real nice. I may have to do a little sanding because of the foam brushes breaking down and leaving crud in the paint. Other than that the second coat would go on tomorrow.
HPIM2364.webp
HPIM2365.webp
HPIM2366.webp
 
Looking great!
Keep those pics coming...I enjoy following your progress :cheers:
 
thanks

Thanks guys, couldn't do it without MUD and those that make MUD a great place to be..
 
Some easy resto questions for the experts

Finally got a few minutes today to do a little separation of parts. My intent is to get all the parts that need to be painted black in one pile. i know the first pic isn't ALL the black parts but it should be a pic of black parts. Look them over (please) and let me know what is out of place. I know #1 is wrong ( part of the side mirror that should be body color). But what about the rubber spare tire stop. Was it black or some other color and then the latches for the under the seat tool box. Also circled in that pic are the fasteners for the drop down tail gate chains. What color were those?
HPIM2389.webp

What color was the spare tire mount.
HPIM2390.webp

then in the last pic. Is the black webbing type material still available? If not what is everybody else using?
HPIM2374.webp
HPIM2374.webp
HPIM2389.webp
HPIM2390.webp
 
spare tire bumper are black, spare tire mount pewter.

tool box latches I do think they were body color originaly, I did yellow Zink plated on my truck,
 
then in the last pic. Is the black webbing type material still available? If not what is everybody else using?

Maybe, try it out and let us know.............
Part number 5335960010 was superseded by part number 5335990301.
 
Originally Posted by Icantdive55
then in the last pic. Is the black webbing type material still available? If not what is everybody else using?

You may want to call Marks off road see if he has them in NOS you never know

Maybe, try it out and let us know.............
Part number 5335960010 was superseded by part number 5335990301.

Rod the new side shims were still available but they are rubber now, the expensive part is the small clips that that retain them
 
What color was the spare tire mount.


Up until the early seventies these were body color. I still have the blue one from my 68 I replaced with one out if a junk yard because of a broken bolt. Not 100% sure but the change might have happened with the lighter spare carrier that happened with the 72 model. The FJ25 almost everything was body color. Then things slowely started switching to pewter and black. I know by 68 the rear license plate light was pewter. Not too many years earlier it was body color.
 

Users who are viewing this thread

Back
Top Bottom