Builds Project - EffjJay Eighty - 2UZ powered (1 Viewer)

This site may earn a commission from merchant affiliate
links, including eBay, Amazon, Skimlinks, and others.

Interesting note: On K&N products for the this Tundra, they move the MAF further from the filter when it is a cone filter but not when they use a stock-ish filter.

Although I believe that the reason they move the MAF is that a cone induces more turbulence. I'm no expert, but that's my understanding. Split Second makes AFM to MAF kits and they say something like a minimum of 7" of straight pipe between a cone filter and their MAF unit.
 
Some hard steel line to use for the trans cooler so I can have minimal soft lines:

there is any other reason more than security to avoid soft lines .. ?
 
Although I believe that the reason they move the MAF is that a cone induces more turbulence. I'm no expert, but that's my understanding. Split Second makes AFM to MAF kits and they say something like a minimum of 7" of straight pipe between a cone filter and their MAF unit.

Thats what everyone is saying. So be it. Ill see if it runs ok. If not, ill just move it. Not too much extra work in the grand scheme of things

there is any other reason more than security to avoid soft lines .. ?
Not really. I like to bend tube and tuck it tight up to the frame. But the same could be done with hoses.
 
A few more pix

Some of the yummy OEM toyota goodness.
From Mark @ Vancouver Toyota. Thanks Mark ! :D The 2J is coming I swear

DSC09197.jpg


Some parts from summit

DSC09200.jpg


A few u-bends :bounce:

DSC09201.jpg


DSC09203.jpg


I see a very faint light down at the end of the tunnel finally... The big push is coming


:wrench:
 
Got a few more items checked off this weekend.

The transmission lines

DSC09206.jpg


DSC09208.jpg


DSC09212.jpg


I went on a scavanger hunt at the pull-a-part on saturday. Found a few cool items.

I picked up a stand alone box that holds a few relays and has two separate fuses. It was out of a late model camery
It will hold bosch relays and some denso style.


DSC09219.jpg


DSC09217.jpg


Access to the bottom is easy to repin

DSC09215.jpg


Its a beautiful thing

DSC09222.jpg


Drill out the hole on the mount so 12mm bolt fits. It mounts right to the inner fender of the FJ like it was made for it.

DSC09223.jpg


I have a few more things to fit thru the firewall before I reinstall the grommet
A nice fit though

DSC09224.jpg


DSC09226.jpg


:wrench:
 
I found a few wire harness clips that I was trying to find for my OEM auxiliary light switches.

Got a few extra EFI relays... Just in case... :p

DSC09229.jpg


I'll leave it at that for tonight.
 
wow amazing build... just read the entire thing!
 
Ahh, Camry's, Corollas, Supras, all the little cool doo-dads that can be re-used for a build and kept all Toyota things, always a fun bit. Post up more pics once you get that relay/fuse case pinned and set, I might just steal the idea for my spot and flood relays and wiring.

So that being said, we're now in the month of March, so get this thing Marching.

:D
 
Last edited:
Tonight may be the first time i've worked on it for a few weeks ;-(

Got the exhaust flanges so... hopefully ill wrap that up by tomorrow night at the latest ???

Work always has its way of getting in the way of my personal life...
 
Tonight may be the first time i've worked on it for a few weeks ;-(

Got the exhaust flanges so... hopefully ill wrap that up by tomorrow night at the latest ???

Work always has its way of getting in the way of my personal life...

FUERZA AMIGO!!! :clap: :clap: :clap:
(Force My fiend)
 
I love watching this build. I think this or a supercharger will be my options.

So, it seems like since I have a 96 FJ. I could get by with changing the motor, making a few customer parts: like the exhaust, cross member and I should be good. Right?
 
I could get by with changing the motor, making a few customer parts: like the exhaust, cross member and I should be good. Right?

Plus - motor mounts, allot of wiring, new ac lines, power steering lines. drivelines shortened front and lengthened rear, air box etc.

For being one of the most straightforward swaps ive done out of about 30, its the most time consuming by a longshot. Perhaps because im trying to make it look 95% oem :confused:
 
Wow I wish I had your time. Me and a buddy maybe trying this out in a few months. Should be a blast.
Money wise. What have you put into your fj80? Are you still thinking the way to go is to get a donor truck? They seem a bit hard to find.
 
Wow I wish I had your time. Me and a buddy maybe trying this out in a few months. Should be a blast.
Money wise. What have you put into your fj80? Are you still thinking the way to go is to get a donor truck? They seem a bit hard to find.

I havent put any money into the 80 itself other than the purchase. I had budgeted 2k on top of what I purchased the tundra for. I'm going to create a tally in the next few days so I can weep. lol

The trucks seem to be popping up on a regular basis on craigslist in the seattle area for some reason.
 
This is ghetto a he11 but heres a really short clip of a test start from today. I dont have the exhaust finished yet, but I buttoned up the front end despite not haveing the AC fittings finished. Im worn out on this project despite not working on it for the last 3 weeks.

I cant wait for the 80 to be done, or at least drivable so i can get rid of my pathfinder. The pos is ready to blow. Not a fan of nissans.

YouTube - Short clip 2uz fj80

 
Last edited:
I was told not to tig weld aluminum ac fittings because the aluminum oxides will contaminate the compressor/condenser/evaporator etc

So that leaves aluminum brazing. I did a little research and picked up some flux filler rod and gave it a whirl.
I spent a long time cleaning and deburring. Chemically cleaning, stainless steel brushing etc.

Fired up the torch and created this !

My own damn fault for not testing on some other material...dummass
Turns out the filler rod they sold me melts at 1050 degrees...

Pool of molten drool.

DSC09317.jpg


For reference - the one on the left is what the part is supposed to look like

DSC09320.jpg


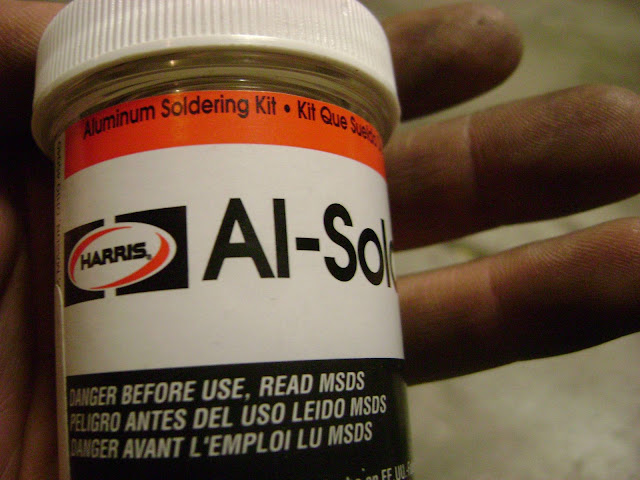
Turns out I need this other really expensive filler material :rolleyes:

Al-solder 500

DSC09336.jpg


This little amount cost 30bux !


Coil of solder

DSC09337.jpg


The ever important Flux

DSC09339.jpg


Heres the mockup

DSC09322.jpg


DSC09326.jpg


I got the parts mocked up and test fit. Broke out the torch and got to work. This worked about 500% better than the last try, but the fittings leak out of every joint.
I decided I cant wait for these fittings any longer so Im moving on.

DSC09340.jpg


DSC09341.jpg


Time to move on......without ac :hmm:
 
Time for some random items

The location I mounted the aux fuse/relay box on the inner fender, was the mount for the hood strut. Soooo, im going to fab a bracket to move the fuse/relay box out about an inch for strut clearance.

The tundra upper radiator hose was about 2" short at both sides. So I purchased a random gates hose that fit perfect. Ill see if I can dig up the reciept to get the part number

The tundra lower hose was too long by about 8" so I cut a section off and re-used a 90 degree piece of the stainless hardline from the 1FZ setup. Its a wienier

DSC09348.jpg


Went to pull a part yesterday and got a few "pins" that will allow me to add fuses in the unused OEM slots of the in cab fuse block

DSC09369.JPG


Did alot of cleanup in the garage with a buddy. He lent a hand cutting down the tundra body wire harness so now I have about 100 different color combos of wire for future toyota transplants

DSC09370.JPG


I reused the OE PS Resevior with a mount to the air box.
Here is the drain into the PS pump. The pump had a fitting that I was able to flip 90 degrees.

DSC09345.jpg


Thats it for now. Just wanted to throw up a few pix since you guys have been waiting patiently
 

Users who are viewing this thread

Back
Top Bottom