Project Duragoat: My 1974 FJ40 Build Thread

This site may earn a commission from merchant affiliate
links, including eBay, Amazon, Skimlinks, and others.

That looks great I really like yoru clean repair and install of the liner.

I have to do this to my hardtop tomorrow, though I am going to spray enamel and I went with white monstaliner on the inside.

I lover your Patina. Are you or have you thought about clearcoating the truck with a satin clear to seal in that look?
 
I would've kept the patina on mine but the rust was to bad. I guess after pushing a snowplow in Colorado for 32 years I knew there was no saving it. I say keep the patina it doesn't hurt when it gets scratched. By the way nice job on the build.
 
Patina

Fortunately I live in a relatively dry climate, just inland from San Diego, I have been periodically hitting the rusty spots with some rubbing compound and wax to try and keep the rust somewhat at bay.

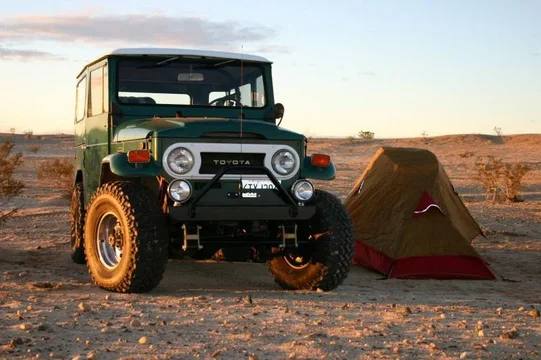
When I first got the rig it looked horrible, I was 100% sure I would blast it and repaint. But after hitting it with some compound and wax, it's amazing how the lacquer paint comes back to life. The look had really grown on me. The current plan is to leave it as is, keep it garaged when raining and focus some attention on the interior.
 
Center Console in a day

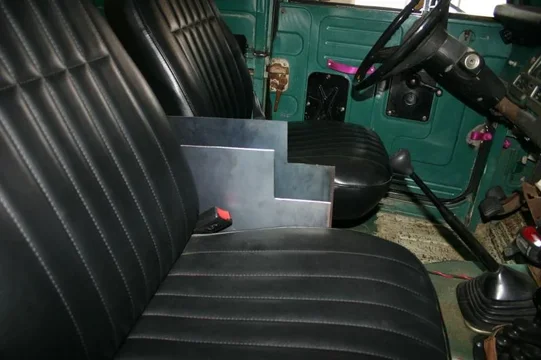
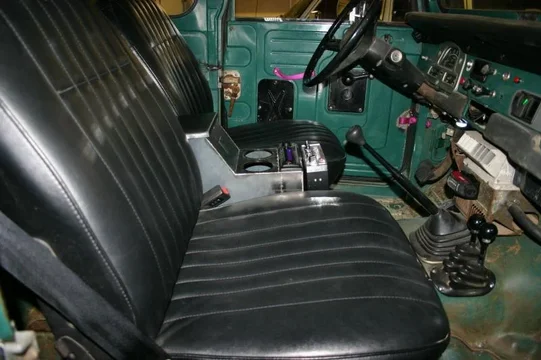
Had some time over the holidays to work on the center console. About choked when i saw what the tuffy's are going for. decided to fab one up out of sheet metal. OK, so it was a long day to get this done. wiring and install on day 2.


mock up with cardboard
cons1.webp

checking the basic shape/location

cons2.webp

worked out to be exactly 7.25 od side to side. happens to be same as most cd deck's. more pics coming.

cons3.webp
cons1.webp
cons2.webp
cons3.webp
 
Center Console in a day

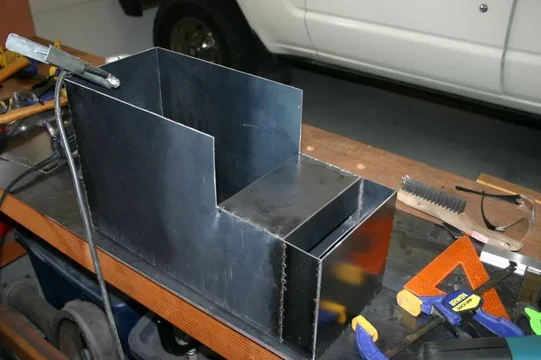
needed to add some length for the cd deck.

cons4.webp

Got lucky on the width, the holder fit just right

cons5.webp

decided to mount the CB externally so the bottom firing speaker could be heard. Turns out that the length of the CB was longer than the short section of the console, so it worked out well.

cons6.webp
cons4.webp
cons5.webp
cons6.webp
 
Center Console in a day

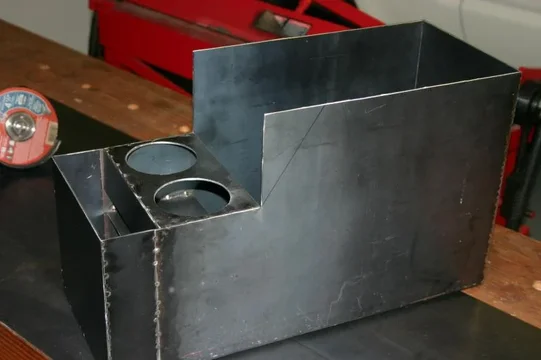
Top and mid plate for the cup holder.

cons7.webp

3" hole-saw on the drill press worked nicely.

cons8.webp

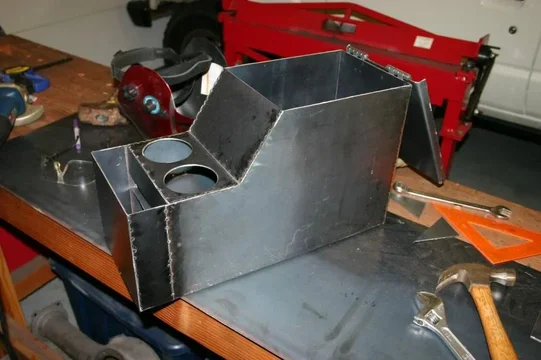
cut the upper section back to have a better angle. Was able to find some steel hinges at hardware store that i could weld in.

cons9.webp
cons7.webp
cons8.webp
cons9.webp
 
Center Console in a day

About done. the short edges on the lid were a bear to bend over. tried it on a small SM break and it didn't work well. finished up with torch, hammer and a vice. at this point, i was getting tired and was about 3 beers in! Good enough.

cons10.webp

cons11.webp

cons12.webp
cons10.webp
cons11.webp
cons12.webp
 
center Console in a day

Few more details. just made some brackets to bolt onto the seat frame.

cons15.webp

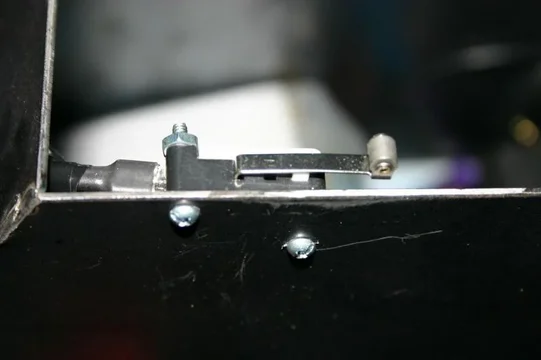
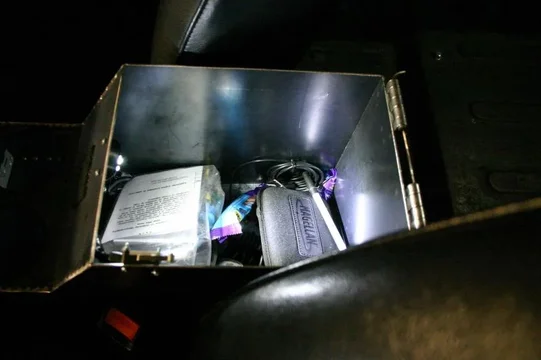
Added a contact switch and an LED pod to have some light when opened.
cons14.webp

cons13.webp
cons13.webp
cons14.webp
cons15.webp
 
Center Console in a day

Done. need to add a pad for the top one of these days, and decide to paint it or leave it natural. i found a spray that will keep it from rusting, for now, have that on it. eventually i will relocate the interior and exterior aux light switches to the front part of the console. for now, good enough. Not including the stereo, have about $45.00 in materials in it, sure beats 300+ for CCOT or SOR.


cons16.webp

cons17.webp
cons16.webp
cons17.webp
 
Switches

Had a little time today to relocate the switches from the dash into the center console.

cons18.webp

cons19.webp

The 4 switches will control
1. Dome lights
2. Fog lights
3. compressor (future)
4. Air Locker (future)

cons20.webp
cons18.webp
cons19.webp
cons20.webp
 
odds and ends

Have not had a dash for some time. after lots of research, decided to go with an aftermarket dash. FJ40 dash.com I have to say, for 1/2 the price, this is awesome.

Its 100% polyurethane and super stout.

dash1.webp


dash2.webp


dash3.webp
dash1.webp
dash2.webp
dash3.webp
 
First Trip after Rebuild

A year later, finally was able to get it ready for its maiden trip off road. Overall it was fairly light trip, mostly to see if everything was going to work.

When it was all said and done, few issues to resolve.

1. steering is all over the place at highway speed.
2. external electric fuel pump is so damn noisy, it almost dove me crazy. something is definitely not right.
3. got into the rear fenders a bit, need to put the 1 leaf back in that i took out to make the ride better w/o the top.

With that said, 300+ HP and gobs of torque sure is fun in the sand/dirt. almost fel guilty...:p

no wait, I'm over it!

trip11.webp

trip12.webp

trip13.webp
trip11.webp
trip12.webp
trip13.webp
 
Very good job! One year, to get where you are, is fantastic. A year has gone by on my wagon and i'm no where near finishing.
 
lookin good brian! :grinpimp: i'll pm you back in a minute.


georg
 
Great update! I want to do this to my 67 real bad. This swap is one of the best I have seen on mud. Thanks for sharing .
 
Fuel System

Started working on the fuel system. The first pic is the 3/8 fuel in line (top) and the 5/16 return line. I converted both to 6AN

View attachment 621498


This pic shows a small custom bracket to manage the lines. Hopefully this will keep the lines from moving around too much, also I located the fuel filter in a handy spot. all std 6an fittings. The bracket was located on some existing firewall through holes with captured nuts.

View attachment 621499

This was my first time using the braided hose and fittings, it was easier than i thought it would be. i cut the line with a chop saw and metal abrasive blade, blew it out with compressed air. i will do a final flush on the system before firing the engine. These lines flow straight into the frame rail, pretty much protected all the way to the pump/tank.

View attachment 621500
View attachment 621498View attachment 621499View attachment 621500

Any more detail on connecting the 6AN fittings to the engine lines? Not sure how the connection is actually made after you cut the original lines. Part numbers?
 

Users who are viewing this thread

Back
Top Bottom