pillguy's 4runner build (with pics)

This site may earn a commission from merchant affiliate
links, including eBay, Amazon, Skimlinks, and others.

How bout this?

dynamicimage.ashx
 
update

Well folks, I am still at it building my rear bumper. Forgot where I left off other than pondering what I should do with my muffler.....

A while back, I was at Chuck's to reinforce my frame brackets and added some 3/16" plate to the 1/4" in one area that has a potential weakness.

I also drilled all of my holes for my brackets, (7 per side including originals) I guess that should be enough...
so anyway here are some pictures....
IMG_1794.webp
test fit of bumper (above), bit lower than I would like it to be, but I would revise the design in my next life.
P1000335.webp
Here is one of the most tricky parts above, designing the internal frame brackets, everyone said to "plate" the frame, but I have never seen any pictures on the net so here are mine. 2 of them with welded bolts and painted.
They are very difficult to make esp. the back one as it sits about 10" into the frame and had to be cut and ground in a few special areas.
P1000338.webp

again, in the above picture, they are just loosely bolted to test fit. I hope that will be enough steel around them.
IMG_1794.webp
P1000335.webp
P1000338.webp
 
more pics

here is another view of the internals
P1000340.webp
Here is the bumper cut outs (back facing body of truck) so I can get my welder in there and weld them up.
P1000341.webp
and here is a view of the bumper on with the hitch. One problem with the hitch is that it sticks out, no way to get around that one....
P1000342.webp

Got more work done on it over the weekend. Welded it to the frame brackets so there is no going back. Off overall by less than 1/8th inch.
I also made some hardboard templates of the side protection and had them attached for a look and ideas, hard to envision as I am engineering this as I go.

Also, cut the sides of the bumper off at an angle to make the rear quarter protection.
Got one of the cut and bent, tough to bend it without a brake, but using the scoring method, I got it done.

I have it test fitted and it seems OK, sorry no picts of the progress today. I guess I can weld over some of my errors.
The drivers side is going to be tougher as I have to weld in the spindle and make sure everything works out OK.
P1000340.webp
P1000341.webp
P1000342.webp
 
one more view

Ok, last pictures of bumper P1000347.webp

P1000348.webp
in this last pic, you can see the extra reinforcement on the outer plate
P1000349.webp
comment welcome....
P1000347.webp
P1000348.webp
P1000349.webp
 
This gonna be finished by 2012 :flipoff2:.
Looks good Andrew.
 
Thanks for the vote of confidence;)
As mentioned, it has been a challenge to think out and then actually put something together. Probably a combination of analysis paralysis on my end and my first big fabrication project.
I want it to be functional as well as a bit stylish. What threw me was whether to use 2x2 on the quarter panel section like I have seen some 62s, tacos, etc vs. plate steel on the 4runners.

The routing of the exhaust eliminated the use of 2x2s alone and I have decided to brace the plate with 2x2 attached to the frame bracket.
It appears that I sustained some minor hidden damage last year at MM when I dropped on my rear bumper and dented my tail pipe. This design should address this issue.

One thing I do need are some ideas on is how to design a step into the rear quarter plates thatcan be removed and installed quickly or be permanent.

A
 
not sure if this is exactly what you're talking about but I have always liked the way Marius did his rear bumper. The sides behind the wheel well have a kick out which help against crunching the quarter panels and could also double as a step I suppose.
marius bumper kickout.webp
 
Ted,
Nice, I like that and will consider doing that, looks like 1.5" DOM, is would that be a reasonable size?

A
 
sounds about right, no reason why it has to be dom though. if you have a piece of schedule 80 laying around that would work just as well. Also, the s-80 could be bent with a pipe bender instead of requiring a tube bender.

For that matter, you could build a shaped box out of 1/4" flat plate and achieve the same effect.
 
Well folks, I am still at it building my rear bumper. Forgot where I left off other than pondering what I should do with my muffler.....

A while back, I was at Chuck's to reinforce my frame brackets and added some 3/16" plate to the 1/4" in one area that has a potential weakness.

I also drilled all of my holes for my brackets, (7 per side including originals) I guess that should be enough...
so anyway here are some pictures....
View attachment 396085
test fit of bumper (above), bit lower than I would like it to be, but I would revise the design in my next life.
View attachment 396086
Here is one of the most tricky parts above, designing the internal frame brackets, everyone said to "plate" the frame, but I have never seen any pictures on the net so here are mine. 2 of them with welded bolts and painted.
They are very difficult to make esp. the back one as it sits about 10" into the frame and had to be cut and ground in a few special areas.
View attachment 396087

again, in the above picture, they are just loosely bolted to test fit. I hope that will be enough steel around them.

Andrew,
Nice work on the internal nut plates. So how did you locate both nuts on that bracket and blind fit all the cuts/contouring so it would fit and bolt up? Build thread within a build thread.
 
Andrew,
Nice work on the internal nut plates. So how did you locate both nuts on that bracket and blind fit all the cuts/contouring so it would fit and bolt up? Build thread within a build thread.
Larry, process of elimination I guess would sum it up.
Well the first set went into the trash (practice weld pile).
I drilled all the holes first (mainly side holes and one at very end of frame rail) Then, I measured and cut out the bracket pieces themselves so the would have around an inch or more of overlap around the holes based on the distances on the outside of the frame.
I welded together with angle bracket as a jig and rounded the joint on the outer edge with a file and a grinder. The file gives me the ability to get a better finish than the grinder. (really needed a bench grinder)

I also had to deal with some protrusions inside the back bracket so sI did a lot of hand filing the edges and ground one area of bottom of the back one to get them to fit.

Once that was done, then I set them in there and took a sharpee and placed a dot where the center of the hole was on the outside of the frame on the bottom of frame rail. Easiest to do since I was not fighting gravity.
Once that was drilled, I test fitted it again and had to "adjust" the hole if needed with a file, then test fit again.
If that was good, then I would weld the nut on and put it in again.
Place the bolt on it and tighten it up.
This way it would hold it in place to line up and mark the other hole. Then drill away and repeat the process.

If I was happy with it I would weld the other nut on and I was done.
When I welded the nuts, I notices you had to be careful or you would blow out the side of the nut if you applied too much heat. I practiced on some small ones and scrap steel to learn how to apply the correct amount of heat. I usually hit 3-4 sides of each nut to be sure.
One thing I learned, coat threads with something or put the bolt in to avoid spatter from getting in there.:grinpimp:

Now, I need to know how to keep the side plates from slipping as I tack weld them. There does not seem to be a good way to keep them in place beyond my magnets. Any ideas?
 
update 2

OK all,

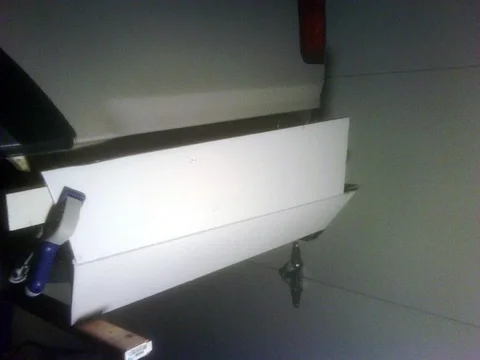
Here is how I built the quarter panel protection (QPP)
First, I places a piece of wood bolted to the body where the bumper attaches to get an idea of how the QPP would line up.
IMG00119-20100216-2059.webp
You can see how tight the confines of my garage are with this picture. All I can say, it was cold working this weekend.
Next, I got approximate measures for the QPP and laid them out on foam board and cut them out. Used a bevel to get the approximate angle needed and cut and glued in some gussets to hold in the angle in place
IMG00120-20100216-2102.webp
Next I laid out the panel on steel, traced it out and then cut away. THe bend turned out nicely (scored a line and ground nearly through the panel to bend it) and I will weld up the bend
IMG00118-20100215-1730.webp
Here is what it looks like in place.
I am thinking of welding a 1" x 3/16" on back of the top area to strengthen it. Not sure what else to do.
I am done for tonight as it is too cold to do any more. I will get a few more pictures up in a few days. Obviously, won't be ready for Ralphs.

A

PS: I think I have a solution to the "holding them in place" to weld. Guess I will have to make some angled blocks out of wood and use one of my big pipe clamps to hold it in place while I tack it in.
IMG00119-20100216-2059.webp
IMG00120-20100216-2102.webp
IMG00118-20100215-1730.webp
 
... The file gives me the ability to get a better finish than the grinder. (really needed a bench grinder)
...

Are you using flap disks on your 4 1/2" grinder yet? Depending on grit choice, they can yield a nice surface finish too (and fairly quickly)
 
Are you using flap disks on your 4 1/2" grinder yet? Depending on grit choice, they can yield a nice surface finish too (and fairly quickly)

I tried a few flap disks (HF crap) on other parts and thought they did not do well.
On a side note, I think the dewalt cutting disks (lowes) are far superior to the norton disks at HD.

Another thing I noticed was the quality of the grinders themselves. I think the ones with a trigger switch rather than a locking switch are much safer.
 
I've found flap disks to be a much faster way to take off weldment, not to mention usually yielding a better surface finish than grinding disks like Larry said.

I picked up a bunch of flap disks from Northern awhile back, they are ok.

Stay away from Makita 4 1/2" angle grinders. Mine only lasted a couple years, not particularly heavy use.
 
Stay away from Makita 4 1/2" angle grinders

Guess you got a lemon then :confused: I have 2 of them that have been put thru very hard use over the years. These are older models, say early 2000's. I have recently retired one of them due to an overworked bearing. I use these two grinders more than any other tool I own, they survived 2 trail rig buildups :eek:. I would stay away from DeWalt 4 1/2" grinders. That POS gets hot within 5 minutes of use on easy cleanups. Dunno about Milwaukee, I don't like their trigger flap on the bottom :meh:

I agree on the Dewalt grinder, it does get hot, but runs without vibration. I also have a porter cable, it met my criteria for cheap, multiposition handle and trigger switch (lockable)
see this post
https://forum.ih8mud.com/tools-fabrication/278686-best-grinder.html
I hate my HF grinder,:bang: it was a "hamedown" tool....
 
Nicely documented pillguy. Wish I understood more about all that you are doing. Is the bumper really as wide as some of those photos make it look?
 
Nicely documented pillguy. Wish I understood more about all that you are doing. Is the bumper really as wide as some of those photos make it look?

No, I cut it off the other day, so it sticks out only about 2" at top from quarter panel. I still have some grinding to do.
 
back at it

Well folks,

got a bit more work done before the cold set in again. Here is a more step by step of how I bent the sides.
First, I traced out the foam board cut out on steel and cut with a grinder
P1000370.webp
next, using my shop press (LOL), I started bending away, found I had to regroove again because it was too stiff. (sometimes a good problem to have)
P1000374.webp

next, using my handy dandy bevel, I bent up the piece till I got it right (almost there)
P1000376.webp
P1000370.webp
P1000374.webp
P1000376.webp
 

Users who are viewing this thread

Back
Top Bottom