
Mine won’t program. I am wondering if there is a difference in the JBL and Pioneer amp CANBUS or cabling. There are 3 connectors in my harness kit. Two of them fit, and one doesn’t. The one that does not fit anything, looks like it’s for the dual antennas (fm/am).The steering wheel controls have to be programmed.
Navigation
Install the app
How to install the app on iOS
Follow along with the video below to see how to install our site as a web app on your home screen.
Note: This feature may not be available in some browsers.
More options
Style variation
You are using an out of date browser. It may not display this or other websites correctly.
You should upgrade or use an alternative browser.
You should upgrade or use an alternative browser.
Nav to Non-Nav Conversion Walkthrough
- Thread starter Tak555
- Start date
This site may earn a commission from merchant affiliate
links, including eBay, Amazon, Skimlinks, and others.
Subbed!
On the 7-8 wires you extended:
Did you just clip them and the entire bundle was then able to move freely?
I started my relocation last night and after removing all the electrical tape it seems like the bundles are still intertwined pretty deeply with everything else.
Did you remove the seat and the nav dvd drive? Was it worth it? Did you leave the HVAC computer in place in the passenger kick panel?
Every walk through I see on this topic seems vague haha.
Are the wires extended just because they're too short? How are the steering wheel controls programmed? Thanks!Here is a close up view of the 7 wires (going up) that need to be extended on my ‘04.
I am going to try to run a CAT5 cable and use 7 of the 8 strands inside.
View attachment 1999319
subbed
Do you need to replace the back up camera or did you not have one?
On the 7-8 wires you extended:
Did you just clip them and the entire bundle was then able to move freely?
I started my relocation last night and after removing all the electrical tape it seems like the bundles are still intertwined pretty deeply with everything else.
Did you remove the seat and the nav dvd drive? Was it worth it? Did you leave the HVAC computer in place in the passenger kick panel?
Every walk through I see on this topic seems vague haha.
On clipping the wires, the way I did it was unplug the harnesses, undo all the tape holding the wire bundles together and start trying to reroute it. It immediately hangs up on I think 3 or 4 of the wires, so you clip them off--leaving enough on each end to get the new wire lengths soldered in later-- and then again start trying to reroute it. Take your time and you can get it decently un-tangled-ish on your way to above the glovebox. You wont hit any other wire length snags until the area above the glove box door. Here you will hit the other 3 or 4 that will need clipped. This inter-section of wires above the glovebox was where I spent the most time trying to de-tangle and get them all routed towards the center dash area for the new hvac unit. I never got it amazingly untangled, but i got it enough that I felt comfortable with it. Once I found all of the 7 recommended wires that need snipped, I got it fully route to the center dash and then found there was an 8th wire that was just too stretched for my liking, so I snipped that one as well--so I had a total of 8 snipped. I then measured measured about how much wire I'd need to solder in for each wire, cut some lengths, and then backed the wiring back out over to above the glove box and let it hang there while I did the solder work. Once it was all done, I think routed it all back through to the center and then did some clean up and organization with electrical tape and zip ties. HTH
I personally did not remove the nav DVD, but I had always planned to. I've since converted back to the original Nav and have the dvd in use (although its actuall got a problem and doesnt like to work most of the time... haha) Pulling that drive is pretty quick and easy, just pull the 4 bolts for the seat, disconnect the seat wiring, and then you can get to the drive.
I also left the old HVAC computer in its original spot. I have no idea how difficult it is to remove that, but it didnt look like fun to me, so I left it. Again, good thing I did cause I am now plugged back into it and using it as original.
Are the wires extended just because they're too short? How are the steering wheel controls programmed? Thanks!
Yes 7 (I actually found 8) were too short and need extended. Different wiring harnesses between the Nav and non-nav GXes.
Steering wheel controls are programmed depending on which head unit you go with. On the Chinese/AliExpress micronavi unit I used, you needed to purchase the can-bus adapter with it, and then it was able to program the steering wheel controls via an andriod function built into the head unit.
Do you need to replace the back up camera or did you not have one?
There are guys who have figured out how to re-use the factory camera, but it is not plug-and-play. The stock camera is 6volt, and the head units are running 12volts out to the camera. I don't know all the details on how to get that to work, but I know some guys on the FB groups have done it. However, most seem to just get a new after-market camera, install it in place of the factory camera, and run all new wiring back to the new camera.
Mine won’t program. I am wondering if there is a difference in the JBL and Pioneer amp CANBUS or cabling. There are 3 connectors in my harness kit. Two of them fit, and one doesn’t. The one that does not fit anything, looks like it’s for the dual antennas (fm/am).
Does that third connector look like this? If so, thats the Prado 120 antenna connector--completely not necessary on the GX. Cut it off at the blue wire like so and chuck it.
As for differences between amps... when I bought mine, the seller specifically asked me which amp I had--asked me for a picture. So could perhaps be an issue if you get the wrong one... But I have no idea. I was thinking all the was needed was the canbus adapter for that.
sleepycruiser
I will get by….I will survive
Anyone have the temp controls from a 2006? My 2006 is stamped 09/05. Please Pm me!
HI! what pins did you use to highlight the climate control buttons? do you have a wiring diagram for the button illumination?With the help of MANY people (from IH8MUD to GXOR to google), I'm happy to report that I've successfully converted my GX470 from the stock/OEM navigation/stereo to an android head-unit with non-navigation climate controls. I'll document my experience here...
*** FOR NOW, THIS THREAD WILL BE A WORK-IN-PROGRESS***
(It'll probably take me a few days to a few weeks to properly document everything here, but I'll try my best...)
Huge thanks to Adonis (@JSsinodA ) for all the help! For those who care, I'm not that handy... I've never installed a car stereo before, and the extent of my car know-how is fairly basic (I can do basic suspension, oil changes, tire rotations, etc.)... POINT BEING, if I can do this, pretty much anyone can... JUST MAKE SURE TO GIVE YOURSELF ADEQUATE TIME AND DON'T BE IN A RUSH! I completed this project over a three-week period, most of which my GX dash was completely ripped apart... it looked like I was driving a stolen car.
Final product:
Steps that I will cover:
Anyhow... I'll start including details when I have time!
- Purchase Parts!
- OEM climate controls / brackets / bezel ~$200
- Headunit - AliExpress Android 8.1
- Backup Camera
- Antenna Y-adapter and micro-adapter
- USB inputs
- Test your OEM climate controls once you receive them from salvage yard - Need to make sure they work!
- Back-up camera - Run the lines
- Install Non-nav climate controls
- Trim climate controls so that Android head-unit will fit
- Extend the wires (7 required... 1 additional to make life easier)
- Illumination fix - Splice wires to ashtray light
- Install new Android head-unit
-----------------------------------------
STEP 1 - PURCHASE PARTS!
1. OEM Non-nav climate controls, brackets and bezel - Sourcing these parts can be challenging... I'm in Southern CA and with the help of others, found them at a scrap yard in Texas. It cost me $225 to get the climate controls, bezel and brackets removed from the donor car and shipped to my doorstep.
Below are the OEM Lexus part numbers for the non-nav climate controls, listed by production year... (I lifted this directly from @theferg post below... he is also a great resource for this conversion!). It is essential that you get the right part number, otherwise the controls won't work properly.
88650-60770 (11/2002 - 10/2004) (folks have also seen an 88650-60B50 for these years as well)
88650-60771 (11/2004 - 07/2005)
88650-60772 (08/2005 - 12/2005)
88650-60773 (01/2006 - 07/2009)
You can find your production year in the drivers side door jam label:
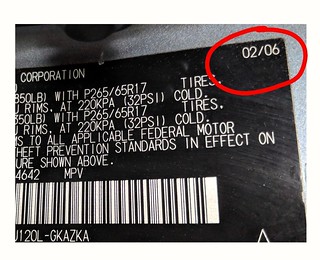
(Also note that those with production dates on the switch-over months--ending/beginning months--seem to kind of have a crap-shoot of a time figuring out which one is the actual one since some sites list the production dates slightly differently. This list I posted has been spot for the good handfuls that have done this on GXOR fb page.)
When you finally get the climate controls, you can find the part number here:

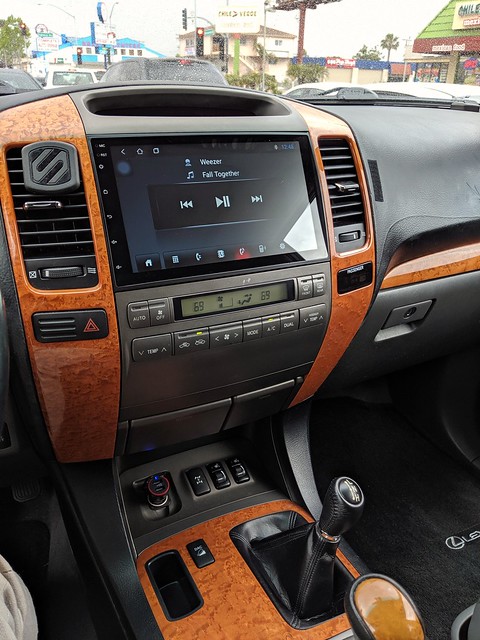
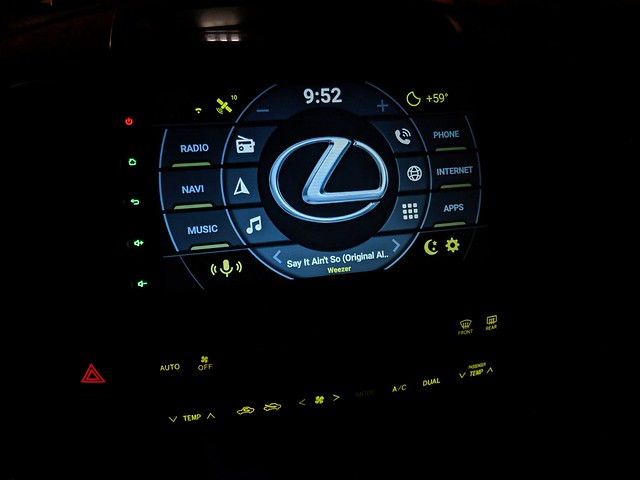
2. Aftermarket head-unit - The common choice is the 9" Android head unit from AliExpress (China). You should get the 8 Core 2G 32G CANBUS version... it ran me $250 shipped, and arrived in about a week or two.
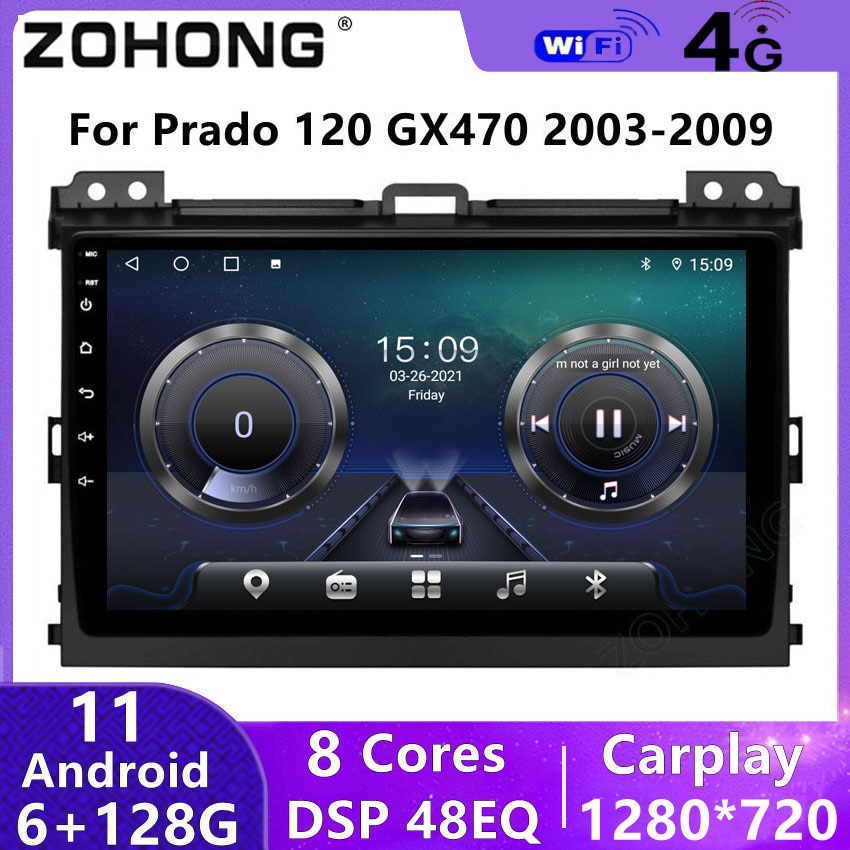
94.03€ 39% OFF|Dsp Carplay Android 11 Voor Toyota Prado 120 Voor Lexus GX470 Auto Stereo Multimedia Player Gps Navigatie Audio Radio Dvd 2 Din|car dvd player|radio gpsradio gps navigator - AliExpress
Smarter Shopping, Better Living! Aliexpress.comwww.aliexpress.com
Theoretically, once you do the climate control conversion, you should also be able to choose a double din HU from a more common manufacturer (i.e., Alpine, Kenwood, etc.)... I believe that Crutchfield sells new bezels and mounting hardware for non-nav versions of the GX470. But personally, at $250, the above Android HU is worth trying out... that's what I went with, and so far so good.
3. Backup Camera - I used the following camera, but honestly I'm not that happy with it... It's just not that clear, and comes in a little grainy and streaky (if that makes sense). But ultimately, it works.
Amazon product ASIN B07HNRYHZ6
4. Antenna Y-adapter and micro-adapter
Amazon product ASIN B01I97Y49IAmazon.com: SCOSCHE MDAB 1988-05 GM Micro/Delco Antenna Adapter; Tip only: Car Electronics
5. USB inputs
From https://m.facebook.com/groups/838842209580227?view=permalink&id=1528995660564875HI! what pins did you use to highlight the climate control buttons? do you have a wiring diagram for the button illumination?
I'm starting to mod my wife's 2004 and have the climated controls from a non nav truck but can't see where to plug it in? Is there an additional harness that is needed?
Its behind gloves box compartment.I'm starting to mod my wife's 2004 and have the climated controls from a non nav truck but can't see where to plug it in? Is there an additional harness that is needed?
Its the 2nd ECU next to the blower assembly. That is why you need to extend 7-8 wires.
I found using security cable from home depot are better than using solid thermostat wire.
You need at least 10 ft.
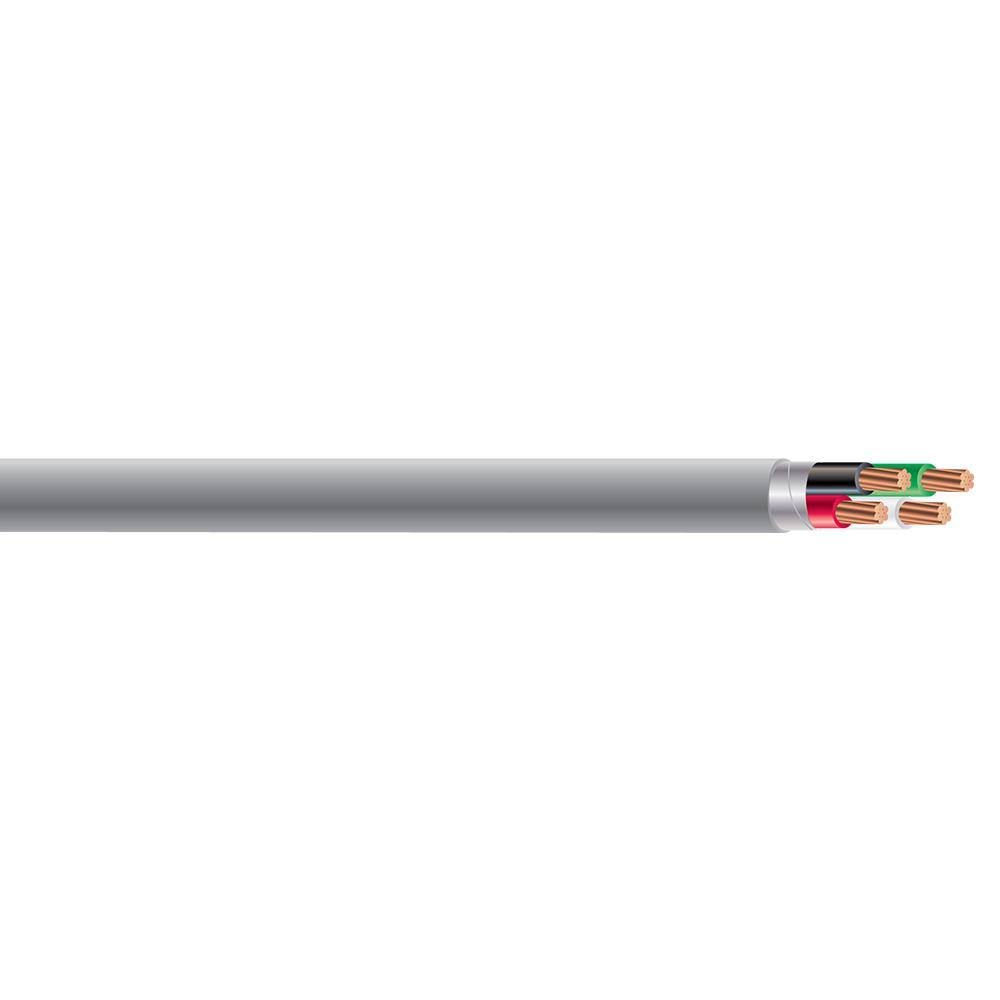
Southwire By-the-Foot 18/4 Gray Stranded CU CL3R Shielded Security Cable 57573099
Ideal for fire alarms, security systems and data communications, this Southwire Gray 18/4 CL3R Security Wire is applicable in indoor or outdoor locations. Can be used in either dry or damp environments.
www.homedepot.com
so I'm suppose to cut them free from the loom to get the length I need to get over to the control area?
Yes.so I'm suppose to cut them free from the loom to get the length I need to get over to the control area?
There are 3 connector.
5 from one and one each from the other 2.
I even have to extend one more about 4-6" to be able to reach without stretching too much.
You also need to add a pin to wire to dash light. And potentially relocate one ground like post #33 above. I am not sold the green wire needing to be cut and reground somewhere else. I am still in process.
So I went back and re-read things an it makes more sense. Thanks for the help.
Rick
Rick
So my mod was to revert everything back to the stock non nav console. This was triggered by the truck killing the battery which turned out to be the multi-disk changer behind the glove box. But me an my wife have no use for the Nav system, back up camera or the touch screen so I found a 2003 locally and got the entire center dash console for 300.00.
When it came to the snipping of wires I ended up cutting 9 to get all the wires where I felt comfortable. For the wire itself I went to Ebay 10-5ft 20 gauge stranded lengths of different color wire for 13.75 shipped. I like using different color wire in case I need to trace my work.
Just incase someone does the same as me, you'll need to plug the clock display into the trucks harness and not as wired from the factory into that massive square plug. Otherwise it's plug and play once the climate control wires are moved over.
And I have a good display, nav deck and single din radio if anyone wants them, just pay shipping.