Nakamichi Update - '99 LX 470

This site may earn a commission from merchant affiliate
links, including eBay, Amazon, Skimlinks, and others.

Now I know how to add my camera to the back of my 2000 LC

Thanks.

Welcome!
I hope that helps!
Since I wrote that I have tapped the reverse signal down in the driver footwell.
It is nice to have that screen pop on automatically.
I will update...
 
I made the connections with the wiring from the head unit. When I installed the head unit I had tucked that wiring back under the center console, so I just went in and retrieved the plug and ran it into the passenger side rear quarter.

Then I secured the camera in the center of the upper tailgate and mounted it close to the body, so it was not sticking out too much - hope that makes sense? I wanted it to be protected and not be too obvious, or get too much road spray.

The wiring tucks into the license plate light nicely - no holes drilled!

The only thing I have not done is tap into the reverse light wiring so it comes on automatically. I will probably do that when I run the power line to the back of the truck for the fridge.

View attachment 1865437 View attachment 1865439 View attachment 1865440

Updates - I did run a dedicated line to the back for fridge, start here: We're in! '99 LX - new to us!

I also tapped the reverse signal line in the footwell for reverse camera:
1596730414350.webp


I used the posi-locks that Crutchfield sent w/ the head unit.

The above pictures is not that great - here is a better one from @cwmoser

1596730526542.webp
 
OK I figured I would post this in this thread, and hopefully this might be a resource for someone down the line.

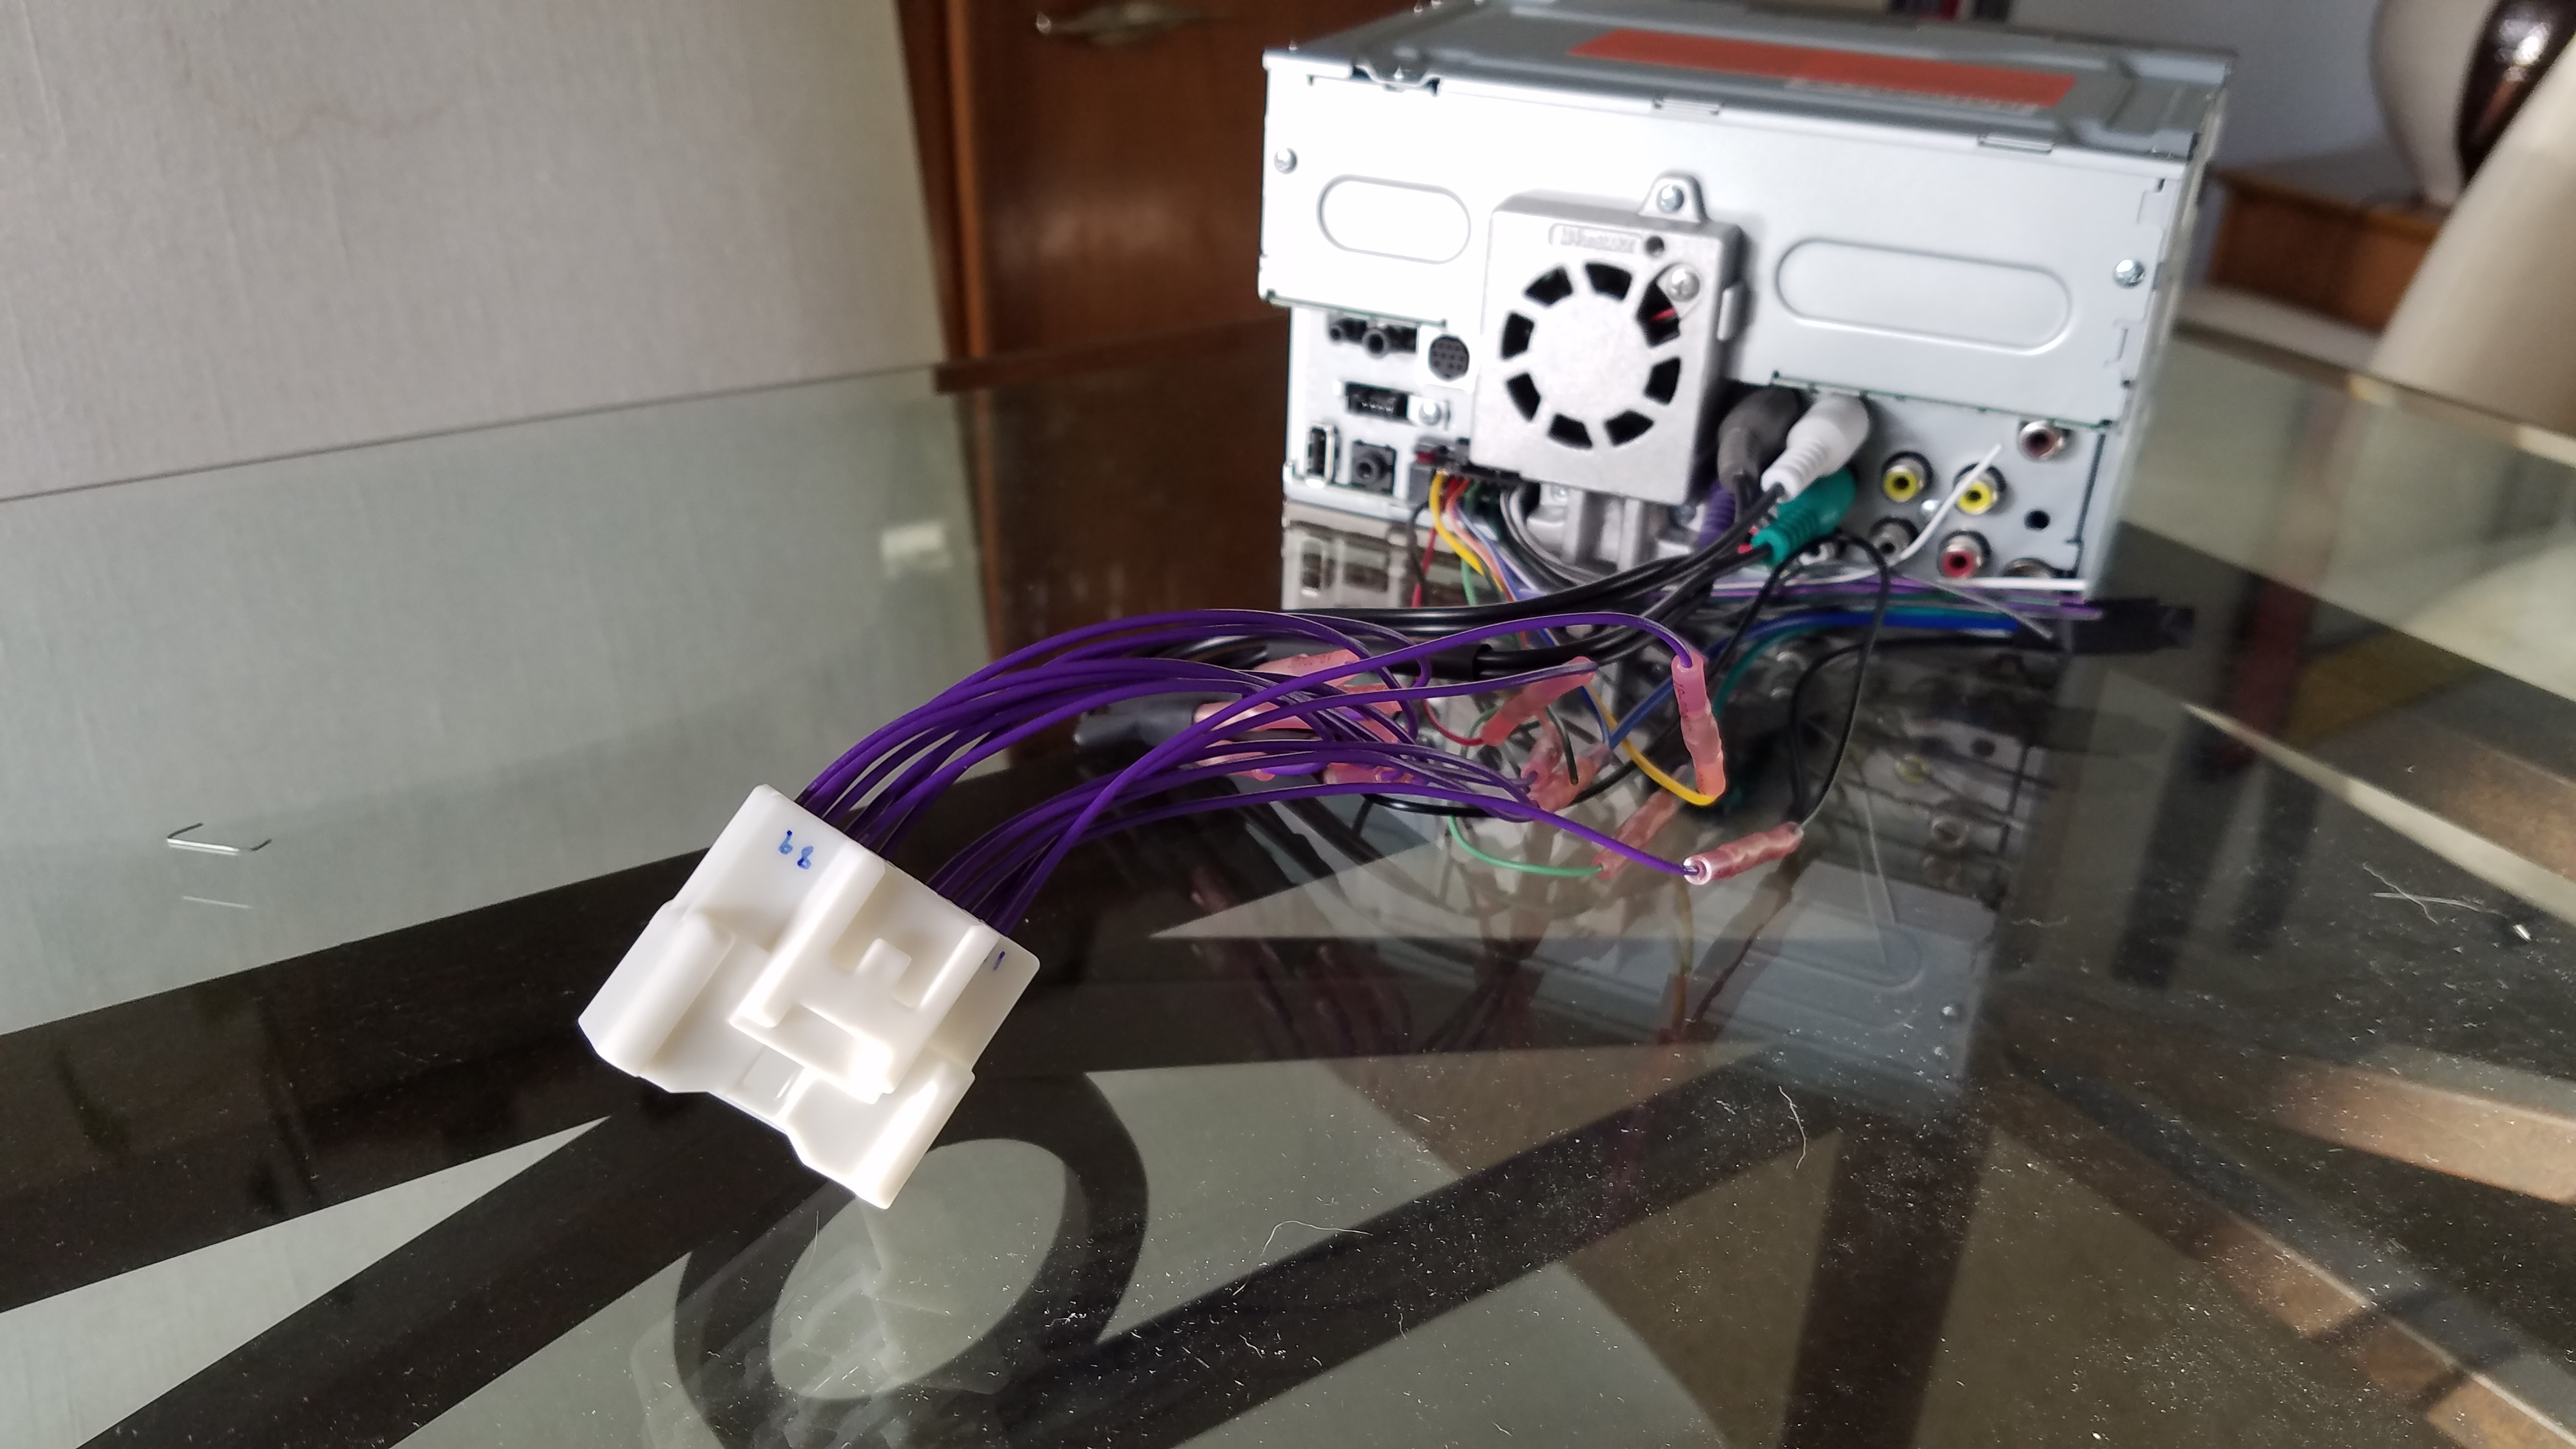
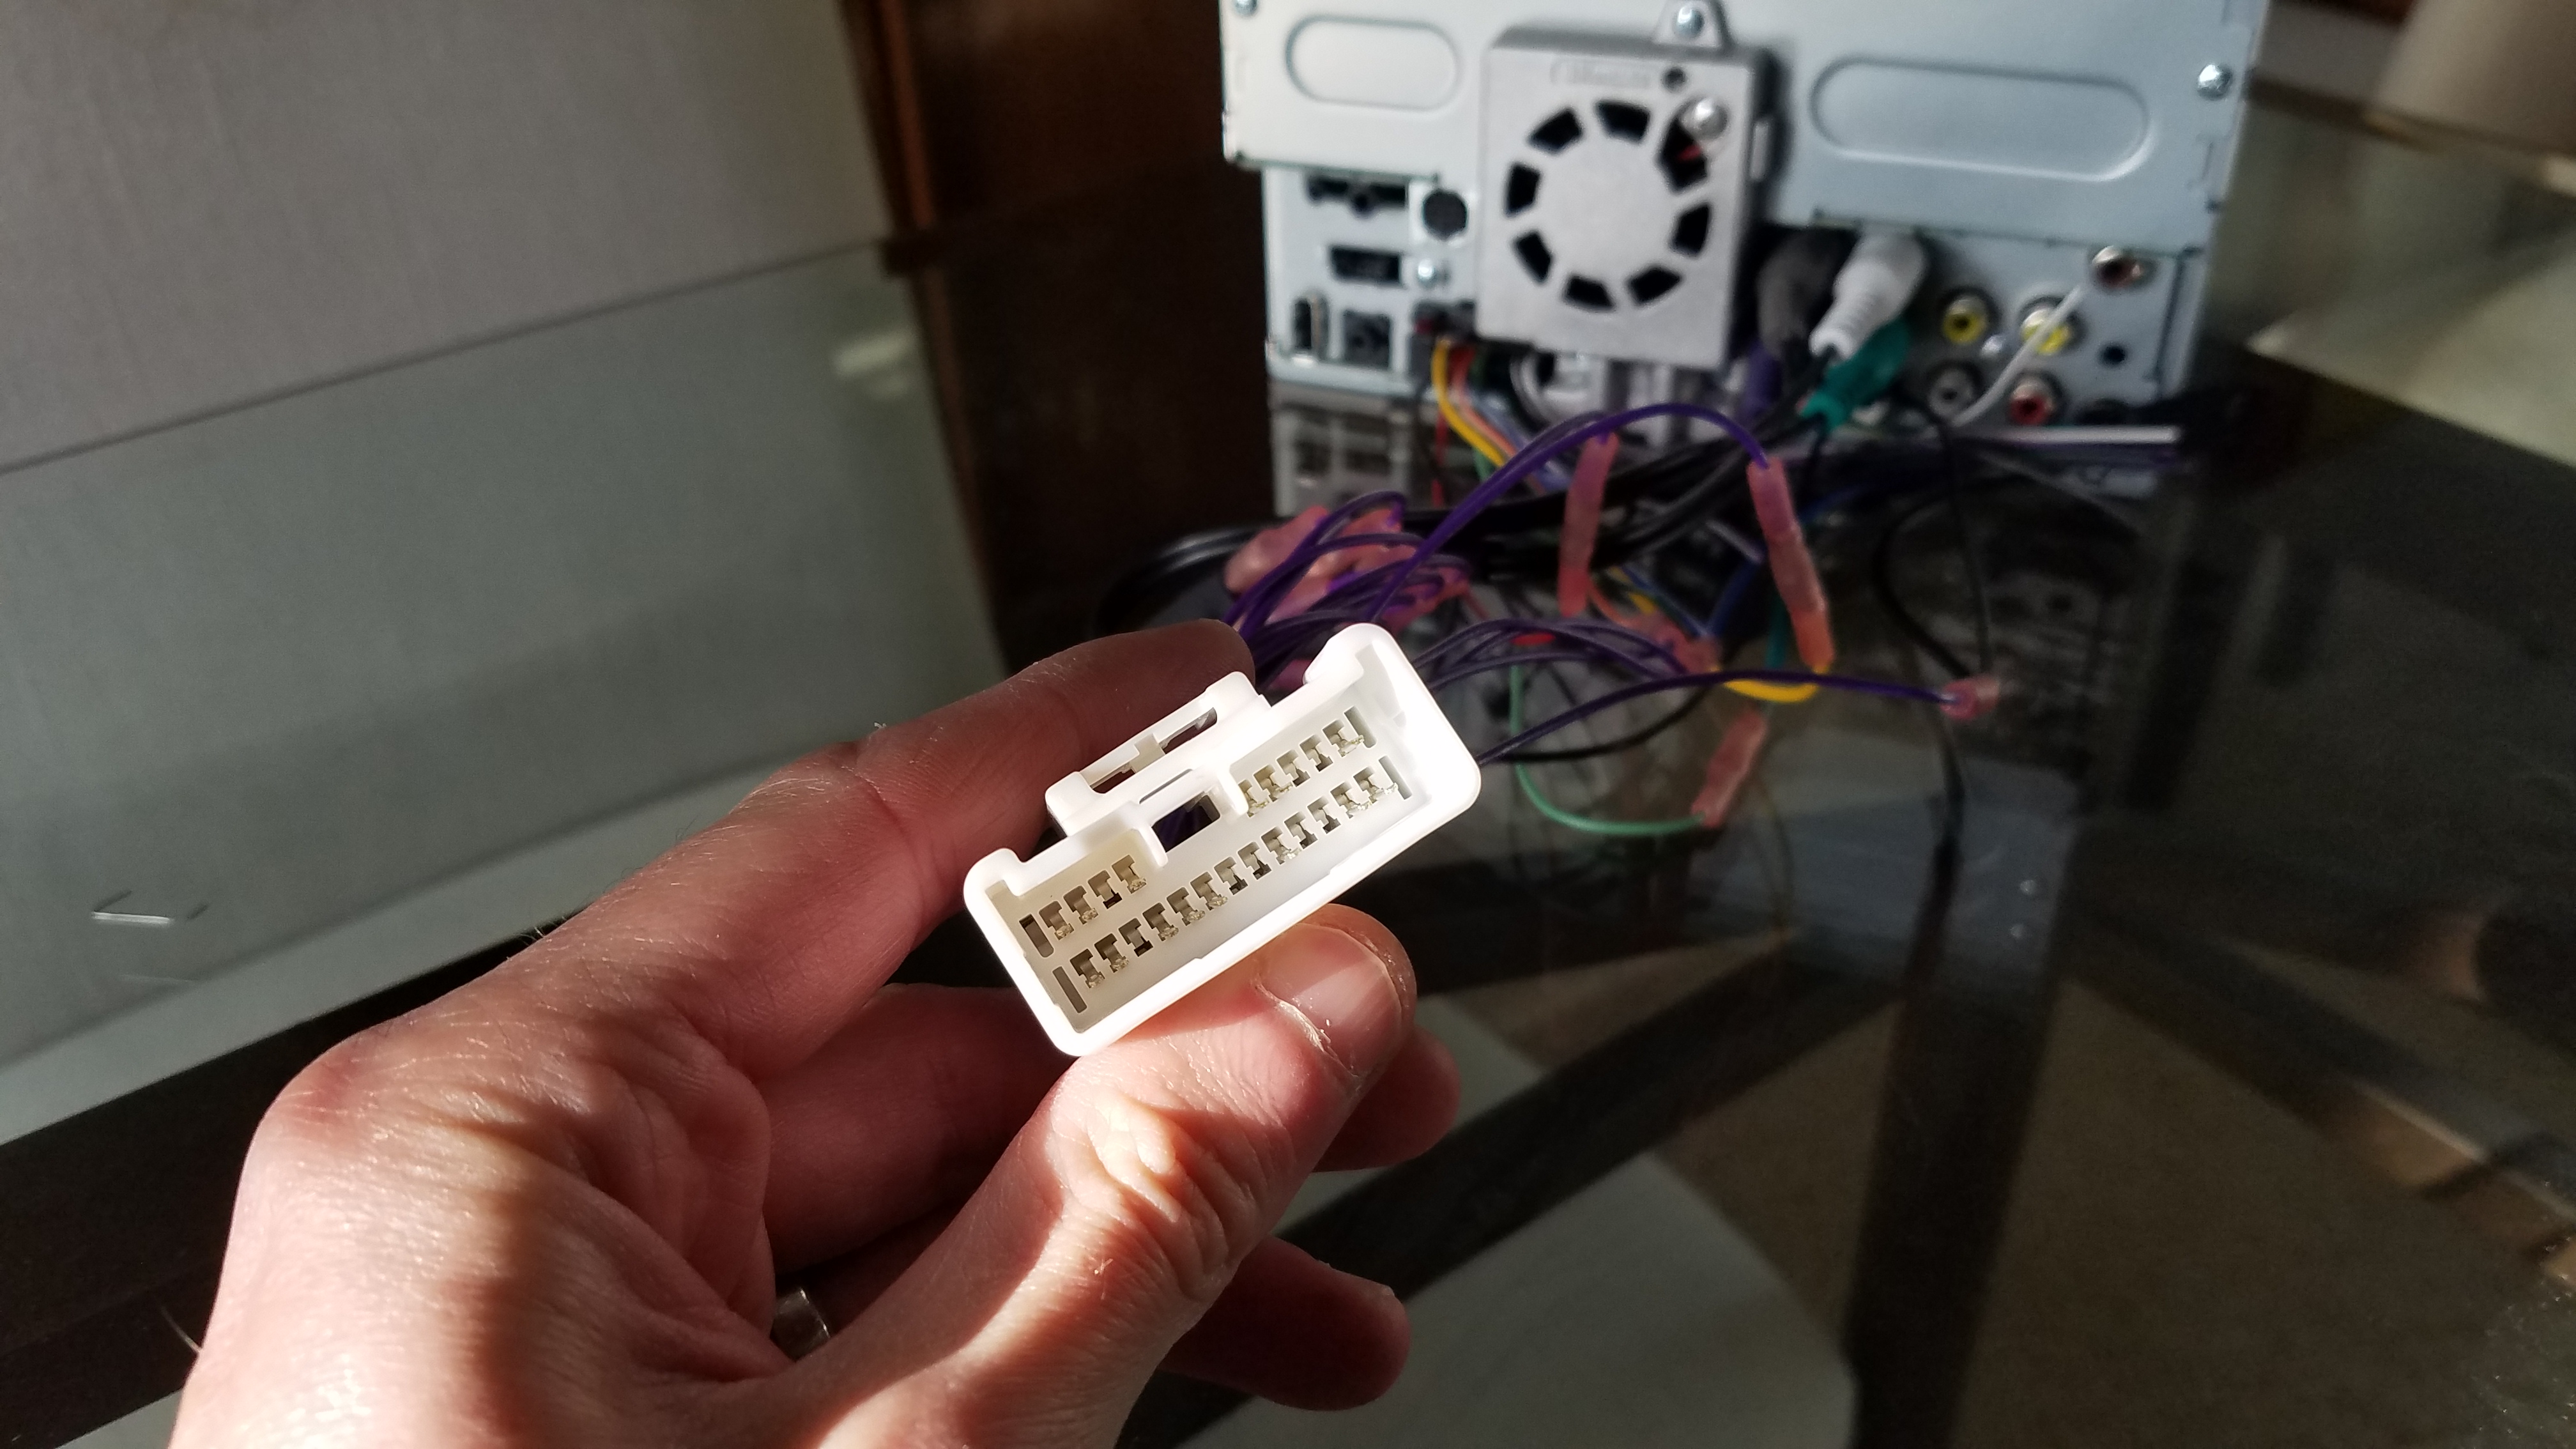
My Nakamichi unit was having some output issues, and I was getting weird audio levels in R/L-I wanted Navi/BT so I decided it was time to switch. Of course..nothing being easy with an 00' AHC -Nakamichi Lexus, even something as simple as a head unit is a struggle. Luckily @PabloCruise posted some good info on how to build your own harness adapter. I decided to make this quick little infograph series to help anyone else out.

I wanted to wait until I had it in the car plugged in and working. Only hiccup was one of my ground terminals broke away from the harness, was a PITA to de-pin but I got it crimped up and back in. Luckily no ground loop needed, and it was just a bad ground : ).

I went with a single din unit, because this one looked simple and not riced out. I am using a tablet for music, gaia, maps, movies etc. so I really just needed something that played audio. My original plan was to build a box that could hold the RAM slider mount, but after a few hours of tinkering I realized it wouldn't be stable unless very beefy (16g, cross bars, and a weld) so I mounted it on the dash (still not happy about that but oh well its already cracked).

1.webp


2.webp


photo_2020-08-24_19-24-16.webp
 
OK I figured I would post this in this thread, and hopefully this might be a resource for someone down the line.

My Nakamichi unit was having some output issues, and I was getting weird audio levels in R/L-I wanted Navi/BT so I decided it was time to switch. Of course..nothing being easy with an 00' AHC -Nakamichi Lexus, even something as simple as a head unit is a struggle. Luckily @PabloCruise posted some good info on how to build your own harness adapter. I decided to make this quick little infograph series to help anyone else out.

I wanted to wait until I had it in the car plugged in and working. Only hiccup was one of my ground terminals broke away from the harness, was a PITA to de-pin but I got it crimped up and back in. Luckily no ground loop needed, and it was just a bad ground : ).

I went with a single din unit, because this one looked simple and not riced out. I am using a tablet for music, gaia, maps, movies etc. so I really just needed something that played audio. My original plan was to build a box that could hold the RAM slider mount, but after a few hours of tinkering I realized it wouldn't be stable unless very beefy (16g, cross bars, and a weld) so I mounted it on the dash (still not happy about that but oh well its already cracked).

View attachment 2415359

View attachment 2415361

View attachment 2415374
Finding those terminals and crimpers is gonna save someone quite a few dollars!
 
Huge thanks to @PabloCruise for the research and write up! I just got this done last weekend and everything is working great. This really does update the truck nicely.

After having my first few orders for the 90980-11503 connector cancelled by dealerships that claimed it didn't exist, I ended up shotgunning orders and 3 eventually showed up at my house. So, for anyone else considering this, I have 2 extra connectors that are available for the price of shipping, or local pick up in the Tacoma area. For Toyota dealerships that can't find this, it does seem to be a "Lexus only" part, so ask them to search the Lexus parts database and they might have more luck. For anyone wondering which dealerships came through with this, send me a PM and I'll let you know, as I don't necessarily want to endorse any publicly.

stereo1.jpg


stereo2.jpg


stereo3.jpg


stereo4.jpg


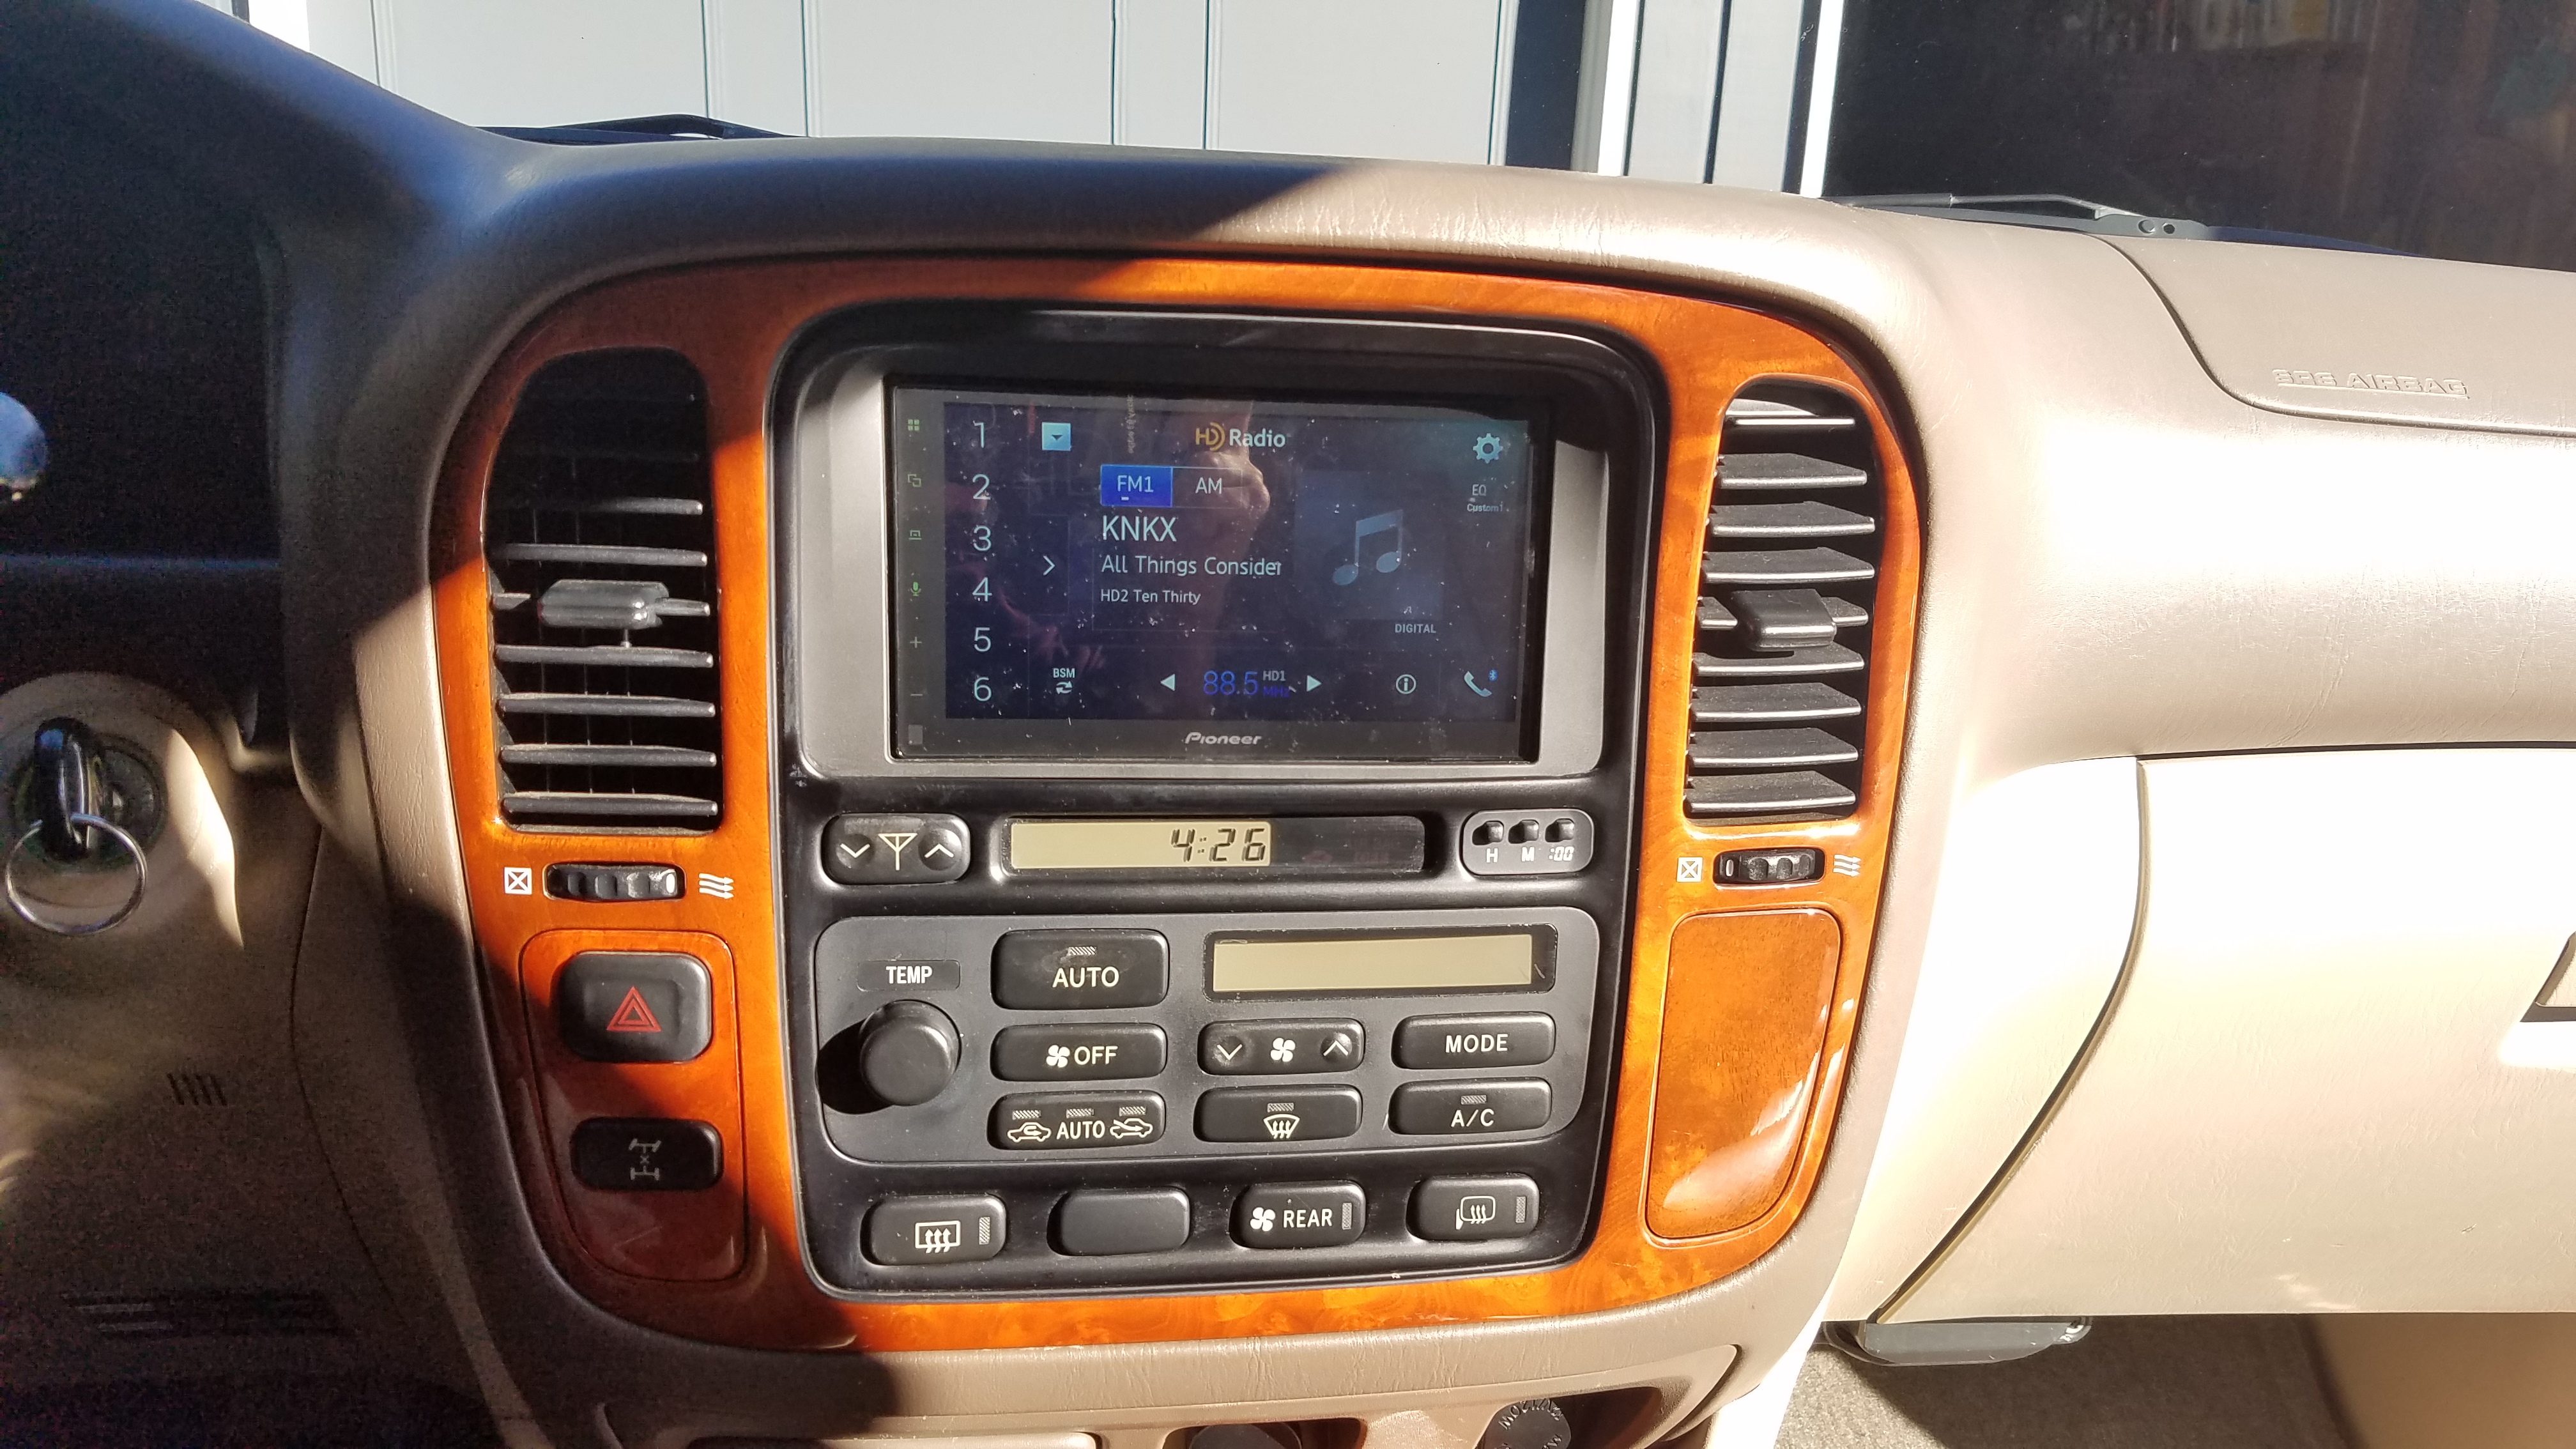
I went with the Pioneer DMH2660-NEX, so far things are working well. After the initial install, it was recessed probably 1/4" behind the trim bezel. I put some nylon bushings behind the bracket to push it out closer to flush, which was a big help. It's still probably about 1/16" recessed, but I'm about at the limit for the length of the factory bolts. I'll pull one and get a longer set in the next week or so and that should make for a nicer finished look.
What brand trim bezel is that, and how did you get it to stay in place?
 
What brand trim bezel is that, and how did you get it to stay in place?


It was the "DKMUS" brand, ordered from Amazon. As you'll see in the reviews and other comments here, the fit isn't perfect, and there's no obvious way to hold it in place. I first thought, I'll use just a little dab of super glue on the corners to hold it. That ended up a disaster, glue ran down onto the face of the bezel as I adjusted its position, which I sort of knew would happen. I then had to use acetone to get the glue residue off, which also took all of the black paint/coating off the bezel. So after a slight detour repainting the thing, I ended up using some extra 3M body molding adhesive tape I had laying around. I cut the tape in half lengthwise so I had thin short strips and used that to hold it to the back side of the wood console trim from the truck.

The stereo was recessed too far back after my first attempt, so I've been playing with nylon bushings behind the bracket to dial in the depth. It's pretty close now, but I need some longer bolts to get it right where it needs to be.
 
@BenCC should figure out something which is plug and play. I'd buy one in a heartbeat.
 
@BenCC should figure out something which is plug and play. I'd buy one in a heartbeat.

That would be great! I'd think it could have some "ears" that you pass the bolts through that hold the HU in. That would both locate it up/down/left/right as these have quite a bit of movement all around, and hold it securely in place. You could then simply snap the vent/climate fascia back on and everything would be right where it needs to be.
 
@steppecruiser Do you think a less expensive crimp tool would work? I find it hard to justify spending $50-70 on something I won't use very often. I was thinking of getting this one or this one.
 
Does using the 22 pin adapter and pinning it ourselves bypass the factory amp, or continue to use it? Just picked up a 98LX and bringing the radio to the 21st century is on my hit list.
 
Does using the 22 pin adapter and pinning it ourselves bypass the factory amp, or continue to use it? Just picked up a 98LX and bringing the radio to the 21st century is on my hit list.

Following the instructions in this thread will retain the factory amp. You will wire the RCA pre outs of your new head unit to the 22 pin connector, which then feeds the factory amp inputs.
 
Following the instructions in this thread will retain the factory amp. You will wire the RCA pre outs of your new head unit to the 22 pin connector, which then feeds the factory amp inputs.
Thanks. And if I ever need to bypass it then I can just solder together the speaker wires going into and out of the amp?
 
I'm not sure that would work... RCA preouts are not the same as signal for a speaker... If you intend to bypass the amp, then wire the actual channel outputs from the new head unit to the pins and not the RCA outs.

If you intend to add an amp in the future, you could wire up RCA outs and run them manually down to the amp location, but that would probably be overkill unless you are sure you will add the amp.
 
Ugh...reading these posts makes me want to get my pin terminals from eastern beaver so I can wire upy harness plug! I'm so impatient!
 
Just to clarify some things in these instructions....

When you separate the four RCAs, each one will have a bare ground wire and a shielded color wire.

In the diagram I see the the Signal Positives (FR+, FL+, RR+, and RL+) all correspond with a solid color wire. I assume those are the shielded wire from the RCA.

Then I see the signal negatives (FR-, FL-, RR-, RL-) which I assume are the ground wires off each RCA. These are the ones labelled GRAY/BLACK, PURPLE/BLACK etc right? Just want to make sure I put them in the connector right the first time!

I've wired up plenty of stereos and amps in my time, but never made my own harness!

Yes, that's exactly right. The insulated solid color wires are the signal + and the bare ground wires are the signal -. Just for an additional sanity check, I also did a continuity check after crimping , the center pin of each RCA to the insulated wire, and the outer "ring" portion to the bare ground.
 

Users who are viewing this thread

Back
Top Bottom