My HJ60, TDIC on 35's (1 Viewer)

This site may earn a commission from merchant affiliate
links, including eBay, Amazon, Skimlinks, and others.

some more footage of the driving...
Exactly at 10minutes in the movie, you can see my PS front hitting the rock causing the broken birf. Went to a total stop out there, but did not notice the lack of traction until later, so i mudded on. :steer:
Wonder if this would have been avoided without a autolocker front.


Separate thread here.
 
Last edited:
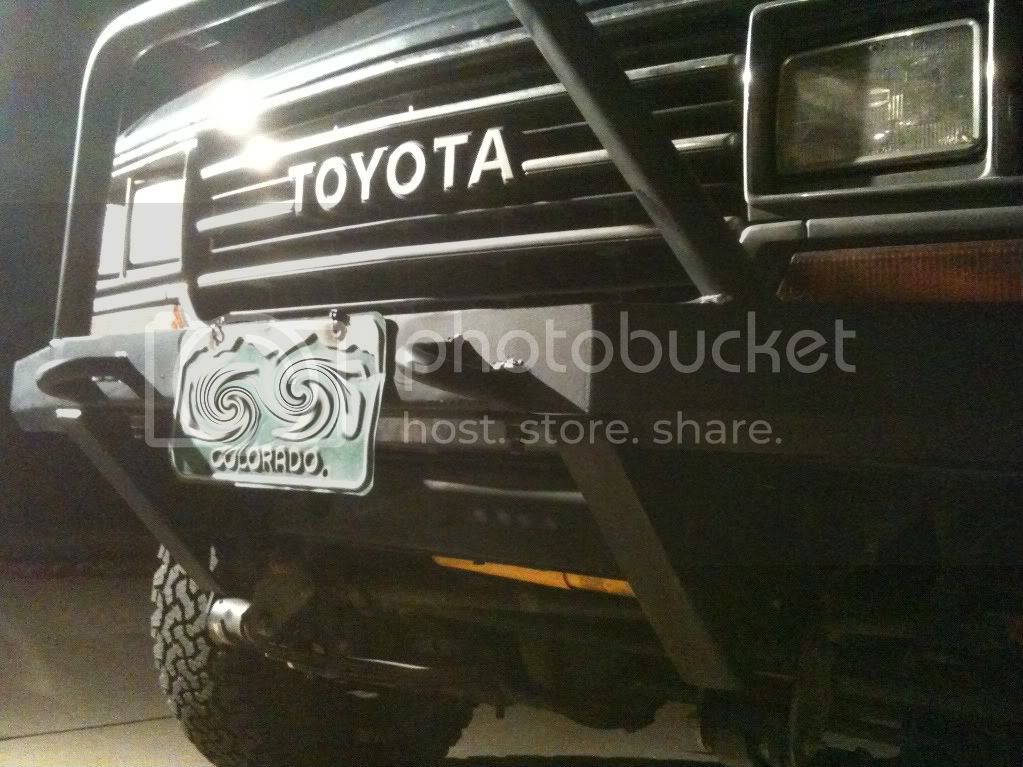
Went wheeling this weekend, but finished my bumper and rear locker mechanism first.

Bumper done. The paint was still a tad soft while mounting, but had to go wheel!
DSCF2513.jpg


The side protection, 2cm from body.
DSCF2529.jpg


Mounted, 10 minutes before takeoff. Nice and high!
DSCF2526.jpg


Hooked the locker acuator up with industrial wire/cable.
Welded the original grab end to the wire end.
DSCF2515.jpg


This is the one end going up front to the handle, the rubber protected end going back to the locker.
Filled the rubber pice with white water repellant grease.
DSCF2516.jpg


Made a bracket in the back, this one also protects the cable and rubber from excessive wear.
DSCF2519.jpg


Wire runs up to the frame, accross the transfer case, and shoots trough the body right in front of the driver seat.
DSCF2525.jpg


Hooks up to a modified e-brake from a lj70 with a ball mount. Right in front of the seat.
I cant tell comfort-wise if its there, i just know it! ;)
DSCF2520.jpg


Hooked up everything, adjusted the wire ends and joy, it works perfect!
Locker on: __________________________Locker off:
DSCF2521.jpg
DSCF2522.jpg


The rear locker was probably used 100-200 times this weekend, everything works lovely and just the way it should!

Looks great, now you just need a matching hand brake lever for your front locker:grinpimp:

I think that is a better design than the factory design, really. The factory setup is very Rube Goldberg.

Josh
 
Thanks, Josh! The design is pretty solid, only thing i could see breaking, is the little ball mount mounted to the handle. Easy fix if it should brake, i actually carry a spare! ;)

Jup, i got the lever for the front laying around, but i lack the rest. haha!
Using a autolocker front now, and 2LO. If i could get my hand on a front long spline inner, i would move the oem locker up front, and the auto rear again.
I miss beeing autolocked in the rear, it did a really good job! is a powertrax.
 
dammit, now i gotta rework the rear brakes. Soo much mud in there, probably needs just a good cleaning.
Anyone experienced that the lower wire that hooks on to both brakeshoes, just pops off the swing thing? that one scared me, thought i had bad wheel bearings, since the wire made a awful sound grasping on the back of the wheel studs... crap... hate brakework.

EDIT:
Above issue sorted.

Another brake MC issue (solved) here:
https://forum.ih8mud.com/60-series-wagons/418392-trail-fix-internal-leaking-mc.html
 
Last edited:
Okay, had to do some fiddle to the rear drawers.

I like anti-slide-around-mats.
28092010068.jpg


I also like tie-downs. Theese three are flush, spring loaded rattle free.
28092010069.jpg


The tools and spare parts, all in there. Fluids are in the quarters and side rooms.
28092010070.jpg


Now i gotta do the same to the seat backs, adding some tie downs there too.
I weigh 1300kg front and same on the rear axle (rear 1308kg), this is full tool and recovery kit.
Also is fresh water, coffe, optimus 3,4kw stove, food for 3 days, and burn/emergency kits.
 
now, i need some inspiration for the front bumper...
i'm thinking something mid-agressive, and maybe adding some shackle protection... and a more solid skid for the belts and pulleys, trees seem to end up there all the time... but the skid has to be easy to remove too, if needed.

as for the bumper, it should carry the warn 8274 and the two 8" luminators...
And it's not street legal with a bush guard to save headlamps and such, maybe i should make a few holes to slide in a protection bar when i'm going wheeling. (?)
that plastic in the front and the headlights are really crisp...

Now the engine needs to get of the garage floor and into the rig!
 
Thanks, Shotgun... I need all the inspiration i can have, that one does look good.
I'll try to make a snug bumper a little higher, since i have 2" BL.

Soo, i've been doing the engine swap and mild overhaul.
Lots of stuff done, but mostly service-related.

It's a month since i pulled it, doing it day by day, as time appears.

Ripped out the original 2H, its done it's 500k Kilometers.
2011-01-15175039.jpg


This beauty has potential, even tough she does look sore.
2011-01-15113517.jpg


The engine lift in progress, adjustable height ;)
2011-01-16174602.jpg


Behind all that brown and black and white and gooey stuff there is a beauty!
2011-01-16183905.jpg


I'm using the previous intake manifold, looks better and is already drilled and tapped for the boost gauge. Elbow grease...
2011-01-24162231.jpg


This scene on the intake manifold explains some of the lack of power... hah!
Only two of the six intakes were actually blowing air where it should, the rest is in some puddle of mud.
2011-01-16135908.jpg


Gone like the wind... strange I still had 0.9 boost... (!)
2011-01-16135842.jpg


Turned the exhaust manifold, and changed all the studs, some were broken, some broke.
5mm drillbit and flathead screwdriver fast fix.
2011-01-27123048.jpg


Cleaning...aargh...
The front crankshaft oil seal is one of many that needs replacement...
2011-01-19113741.jpg


Cleaning is what eats time, the service is pretty easy!
2011-01-21151315.jpg


This was all a mess... cant figure out how it ran as good as it did when i test fired it. Did it over again and should now be perfect!
2011-01-21160358.jpg


Rear oil seal is changed from retainer easily when the oil pan is off.
I'm using the old oil pan since it already has the welded on oil return from turbo.
2011-01-24121824.jpg


Good feeling when things are looking better...
2011-01-26120414.jpg


Now mostly all gaskets, oil seals and filters are done, turbo serviced and mounted.
The block itself gets a good rub before mounting, and and i will wash it when in heated garage. Not cool to wash in 17degrees minus...
2011-01-28140426.jpg


Engine back in the cruiser, only thing i messed up was the threads on the engine mount, needs a good cleaning!
2011-01-29162619.jpg


I've cleaned the rad and IC, the IC was packed with oil film after running the crankhouse ventilation through there...yuck!
Most things getting back to where they belong, itching on!
The EDIC motor and controller, all clutch components, alternator, servo pump, starter and misc has been serviced for further love.

The PTO gearbox was not mounted on the transfer befor lift in, smooth with all that space to lift the engine and tranny in.

:bounce:
 
Wow, that motor is pretty. Great work man, I need to stop complaining about the "cold" we get up this way seeing you work in those conditions!
 
looks great! but when are you gonna bite the bullet and go SOA??? ;)
 
Wow, that motor is pretty. Great work man, I need to stop complaining about the "cold" we get up this way seeing you work in those conditions!

Thanks... great thing about this half tonne engine, it keeps you warm whatever you do with it. Amazing!

looks great! but when are you gonna bite the bullet and go SOA??? ;)

Yeah... Now this is my DD, so i'm really not leaning into soa right now.
The cruiser would not be street legal then, and it is controlled every two years.
My next EU-Regulations control is in March, and i gotta go in there on 31"s.

Without this hazzle, it would already be sprung over! If i could choose for a trail rig, i'd go for portals! mmmmh...
 
Thanks, Johnny! Sexy is spot on!

Shotgun, the lights are 4x Dick Cepek lazer beams, with 100w 24v bulbs, 60w would probably be enough.
Lights up the full 180 degrees in front of the cruiser, but i've aimed them down for better usage offroad.
The Luminators in front do the job while on the road, rarely use the Cepeks on the road.
 

Users who are viewing this thread

Back
Top Bottom