My '64 FJ40 Build - Cave Cricket (1 Viewer)

This site may earn a commission from merchant affiliate
links, including eBay, Amazon, Skimlinks, and others.

Joined
Jan 21, 2016
Threads
6
Messages
142
Location
Michigan
I've always had an affinity for FJs for no apparent reason, maybe because it isn't a Jeep? Anyways, I am super excited to get started on one of my own.

The story of this particular FJ is a bit unknown, but it's safe to say that it'd begun its transition to becoming part of the earth again, it was already home to a family of bees, couple spiders and most notably A LOT of Tennessee Cave Crickets...hence the new name of this rig: The FJ40 Cave Cricket.

IMG_2373_zpswpgebobg.jpg


These things were EVERYWHERE inside and on the rig. We do not have these things up in MI...or at least we didn't a couple months ago... :confused: I've killed A LOT of them so far, but I'm still finding a couple a week FOUR MONTHS after bringing the FJ home!

Anyways, back to the story. Not a lot known about this thing, it was sitting on top of a mountain in Tennessee for what looks like the better part of a decade, at least. Even upon first inspection it was obvious that it would need A LOT of work, but I'm young and have never done anything like this before so I guess I just didn't know any better. Plus, its the first real contact I've had with an FJ and the price was too good to pass up.

Side story - Early April, two weeks before I picked this FJ up my wife and I were in Nashville on vacation and late one night while walking back from Broadway to our hotel we were talking about the FJ, the plan, etc and to our disbelief we walked up on an FJ40 in the road. I believe I said, "OMG, look an FJ!". As it turns out it was a younger guy about my age and he'd run out of gas, so we gave him a push and off he went rolling down the hill and into the gas station. I think it was a 70s model, and I think it was red? Not sure if he was a Mud member, but if this sounds familiar to you let me know! So, THAT was actually my first real contact with an FJ.

Back on track again. The first time I saw my FJ was the day after the story above. Then my dad and I drove back down a couple weeks later to rescue it. Here's a couple pics from the rescue operation.

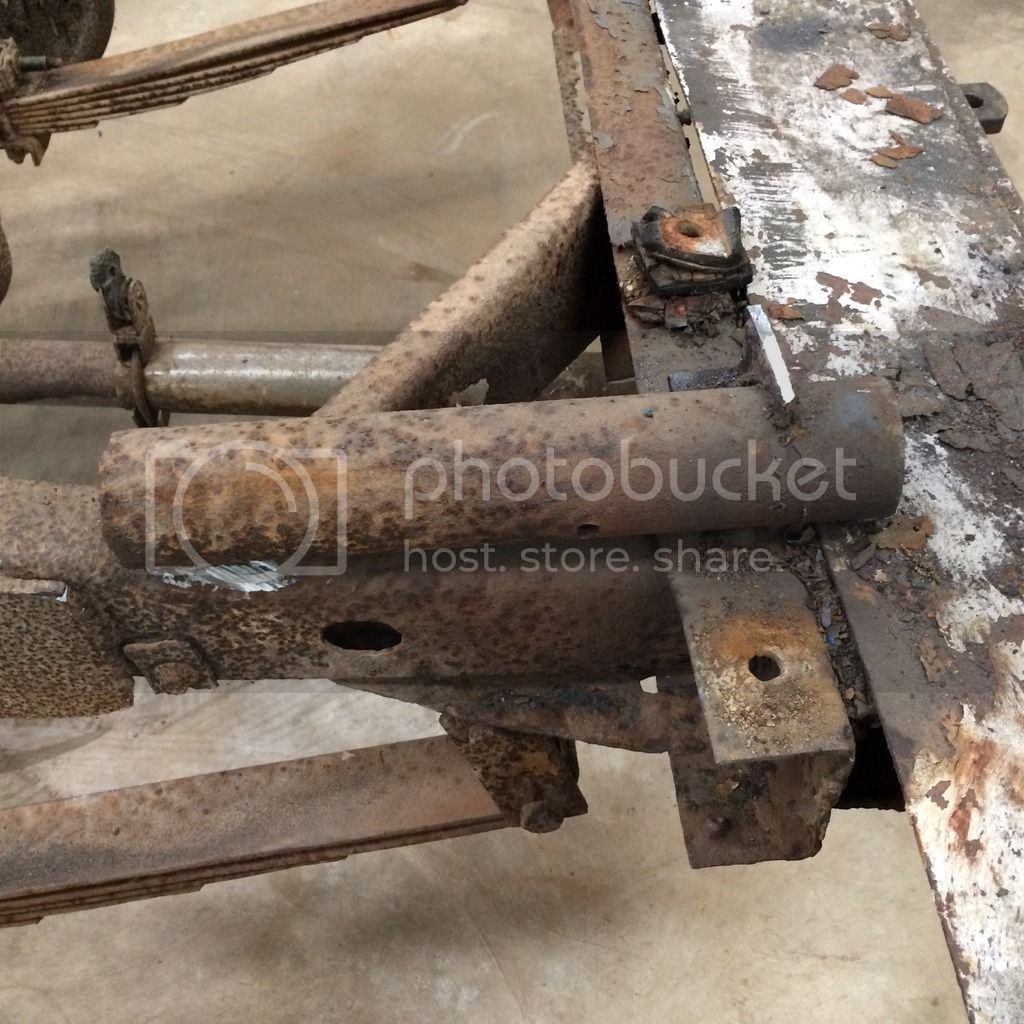
First glimpse was pretty special
IMG_2326_zpswuz2xfag.jpg


IMG_2327_zps5ukwxx9k.jpg


Trailer winch coming in clutch

IMG_2331_zpsbfrvk1j0.jpg


Surprisingly, two of the tires still had air in them. I know that because they popped as we drug it up onto the trailer. Turns out both front hubs are locked up as is the rear end, so we literally drug it onto the trailer, it didn't roll.

The drive home took about 8 hours and I was already overwhelmed with the love the FJ received. Every stop we had people coming over to check it out and chat. :cool:
 
So the plan at this point was to strip it down, repair body as needed and swap one tons, V8, linked suspension and run 37s. Yes, sorry purists this isn't a restoration but rather an offroad toy build. I can only hope that you appreciate the fact that I am BRINGING THIS FJ BACK FROM THE DEAD! Because let me assure you, it probably should have stayed on top of that mountain.

Now that I've dove in a little, the build has already went up a notch. Unfortunately just about EVERYTHING on this rig is rusted out. A lot of it so much that I've decided to build a completely new frame and am completely rebuilding everything from the firewall back. Because I'm going to be doing all the fab anyways, I've decided to stretch it about 15". It's being built as a decently capable offroad machine, so the stretch helps get the wheelbase where I want it without making it look like Frankenstein and also gives me a little more room for a backseat AND storage in the tub.

So specs as of now:

'64 FJ40
Custom rect tube frame strectched 15" with slight dimension mods
Body stretched 15"
3 link front, 4 link rear
Coilovers front and rear
5.2L V8 w/auto trans
Offroad Designs Magnum t-case
37s tires
110-115" wheelbase
etc
 
So anyways, back in time a little bit again. Once we got it back home first order of business was to clean it out and see EXACTLY what we had to work with.

IMG_2353_zpsuq3fze1t.jpg


We broke off about 80% of the bolts holding the top and sides on. :( Certainly a sign of things to come.

IMG_2356_zpsz3r9qkpq.jpg


Once we got all the old trash out of the interior it was VERY OBVIOUS that the floor in the rear had once been replaced, and new metal was set in the floorboards to keep Fred Flinstone from driving this bad boy around.

IMG_2370_zpscue3mkyr.jpg


IMG_2369_zpsrpqqkeat.jpg


Since all four tires were locked up it was interesting getting the FJ into the back of my barn. We ended up using my old truck to push it, bumper to bumper, around the yard and into the barn. :grinpimp: I wish I got it on video, but it was only my wife and I and we were both needed to pull it off.

How about that front bumper! :rolleyes:

IMG_2368_zpsmw5pbmst.jpg
 
We started pulling it apart, things did NOT look good. :mad:

IMG_2452_zpsi6pcpx8a.jpg


The PO most certainly treated this thing as a tool rather than a treasure. In addition, he was kind of a hack. :eek:

The body was welded to these pipes (not tube) which were welded to the frame. I just don't know.

IMG_2467_zpsd5n5sw4x.jpg


The body/tub is pretty rough. Fortunately the hood and grill are in pretty good shape, firewall isn't too bad either. The rest though...

4764841C-36C2-4448-BDC7-C942130A4CF5_zpsna5yl1xi.jpg


That's a 1"x6" piece of wood acting as the rocker...

DEE9E142-96BD-4E18-8125-DE434B1F83FD_zpslkwbhkv2.jpg


I wonder if that board is as old as I am?

So anyways, best to cut the bad out and start new.

A76BEC39-CF98-426A-BEEA-CE7EA55B56E6_zpshchnbkcc.jpg


5E55F690-A81A-4E40-A7EB-187948E0FC9C_zpscbm9odc8.jpg


0A608A64-B250-4CEA-9B30-386F88D5E835_zpsunjhsfzw.jpg


Even though this thread is just kicking off, I am a few months in already and it feels SO GOOD to get to this point, almost done with the destruction and onto fabrication. :bounce: More later.
 
OK...uhh huh....hmmmmm, well...damn...Sweet mother of Pearl...I think you are certainly on a errand of mercy. The '64 is for sure a rare bird, but you know what you want to make it into. This poor ole Cruiser certainly only had a couple of toes left on earth and well on it's way to FJ40 heaven. You are doing good and are saving it. Just keep the Land Cruiser look to it as best you can and put it back into service. I wonder what it's story was?
Keep us updated with the pics and progress reports!! Oy Vey!...dang....unreal...
 
Last edited:
Thanks and yes I will keep the look as much as possible. I hope I can pull the stretch off as well as it looks in my mind. Will absolutely be keeping the hood and grill as original as possible - to me these coupled with the front fenders are the staple of the 40 look. I wanted to get rid of the big fender mounted turn signals but my wife insists we keep the look. We'll see. :hillbilly:

I forgot to mention in the prior post, when the PO redid the tub interior he used some THICK material - we are out of the sheet metal realm. Not only did he remake the fender wells but he also skinned the inside of the tub sides as well. At first I didn't realize this - not until I started cutting it out anyways. They're definitely stout! Very glad that part is over!
 
Wow, this is an impressive goal, can't wait to see what she turns into. Good on you for saving it.
 
As mentioned previously, even the frame was in bad shape. I knew from the start that I was going to chop and replace the back part of the frame to give me extra room to stretch the wheelbase and fit a big axle. Once I figured out I was going to have to completely rebuild the back half of the tub I figured what better time to stretch it than now, right? I knew that eventually I wanted it stretched anyways, and besides, stretching the frame would be the easy part. Dangerous rabbit hole for sure.

So after the tub was off and motor was pulled I got a chance to really inspect the frame. Do not like.

IMG_2472_zpsugp2yy9j.jpg


90C64F73-F4C0-4AE1-937A-D1C647F8B074_zpshujka7gp.jpg


Lots of that - even areas where the frame was boxed it looked really bad, very weak and even thin in some spots. CRAP!

A lot of time was spent staring at it trying to figure out what I've got myself into and what to do about it. Not too late to run...but I REALLY want a 40!

If we have to redo the rear, stretch the middle and patch the front we might as well go big and start from scratch!

So we're going for it!

E285B432-9DB4-43C9-A283-9190AA42A9DC_zpsidmelijb.jpg


Material wise I went with 2"x5"x0.188" for the bottom rails and 2"x4"x0.188" for the other rails. Little heavier duty than OEM but not too heavy, I hope.

I decided to make a couple of mods to the design to *hopefully* accomodate my choice of components.
- The stock frame has about 24" between the frame rails in the front, I pushed them out to 28". Hopefully this makes squeezing the V8 in there a little easier.
- In the back the stock frame flairs out to about 38" inside to inside - I went with 36" on the inside dimension (40" outside to outside). Hopefully this will make it easier to accommodate coilovers
- The stock frame flairs out in a V shape from basically where the tub mounts in front all the way to the back. The stock geometry is about 5 degrees from parallel on each side. I maintained this value but stopped once the rails go back vertical for the rear axle.
- I made the transition from lower rail to front upper (engine area) much steeper than factory frame. I don't have a good reason, it just seemed right.
- Obviously I built the frame 15 inches longer - I added this length in the bottom rails.

EDIT: For clarification, here is a pic of the frame rail layout. I didn't end up right at 5 degrees like I planed so I only got 8" of separation not the 10" I'd planned for, so I spaced the front out to keep the rear dimension the same.

53D94907-267C-40C1-A6F6-3586AD5C75C4_zpstarymdzh.jpg


This is the front rails (parallel) and the bottom rails (+15 inches) flair out at ~5 degrees each side

A4EDAD7D-ED3F-4E4A-AF87-50D25187FBCE_zpsjpnwxzud.jpg


For all the joints I edged them so that I could get a decent amount of weld in there so that I can grind it all flat and plate over it for added strength.

F7DFF3BC-5E65-4C94-8AD9-A4887D9532C3_zpsnwtmvqn6.jpg


30765AC1-11BD-4238-8E0A-95821937FAAD_zpszk7bd1il.jpg


8B40E7C3-6FFC-4B3D-882B-7C07A73965CB_zpsv4kufsqx.jpg


B2C7790D-8051-4529-9BBE-20B55E1193D3_zpstoh7ybxj.jpg


Was SUPER excited to get the new frame set in place of that old rusty hunk of junk. Somewhat of a milestone as we have begun the fabrication phase. :D

So yea, at this point I basically rescued a hood, grill and firewall. :eek:
 
Last edited:
Try to save the dash too. The grill and dash on the old ones give more character than the newer 40s. I think the widened frame in front will be more of a obstacle than asset honestly. A v8 fits well with the stock width. With crawlers the narrower the better. I would just turn it into a fj43 with the wheel well opening moved to the back corners. A guy on pirate did this, it turned out incredible. And crawls well. I think it's called the going big build. It's cobalt blue, if that helps. Making it a fj43 would give factory soft and hardtop options as well as other factory Fj options to make it more Fj and less custom crawler thing.
 
Yes I have read the Goin Big build in detail twice, very awesome.

Point taken on the width of the front rails. At this point it wouldn't be but 10 minutes to chop the two crossmembers and narrow the whole thing up. Thanks for the input, off to research ideal front rail width.

And the dash is in pretty good shape too. It will be saved and reused with new gauges. Thanks again
 
As mentioned previously, even the frame was in bad shape. I knew from the start that I was going to chop and replace the back part of the frame to give me extra room to stretch the wheelbase and fit a big axle. Once I figured out I was going to have to completely rebuild the back half of the tub I figured what better time to stretch it than now, right? I knew that eventually I wanted it stretched anyways, and besides, stretching the frame would be the easy part. Dangerous rabbit hole for sure.

So after the tub was off and motor was pulled I got a chance to really inspect the frame. Do not like.

IMG_2472_zpsugp2yy9j.jpg


90C64F73-F4C0-4AE1-937A-D1C647F8B074_zpshujka7gp.jpg


Lots of that - even areas where the frame was boxed it looked really bad, very weak and even thin in some spots. CRAP!

A lot of time was spent staring at it trying to figure out what I've got myself into and what to do about it. Not too late to run...but I REALLY want a 40!

If we have to redo the rear, stretch the middle and patch the front we might as well go big and start from scratch!

So we're going for it!

E285B432-9DB4-43C9-A283-9190AA42A9DC_zpsidmelijb.jpg


Material wise I went with 2"x5"x0.188" for the bottom rails and 2"x4"x0.188" for the other rails. Little heavier duty than OEM but not too heavy, I hope.

I decided to make a couple of mods to the design to *hopefully* accomodate my choice of components.
- The stock frame has about 24" between the frame rails in the front, I pushed them out to 28". Hopefully this makes squeezing the V8 in there a little easier.
- In the back the stock frame flairs out to about 38" inside to inside - I went with 36" on the inside dimension (40" outside to outside). Hopefully this will make it easier to accommodate coilovers
- The stock frame flairs out in a V shape from basically where the tub mounts in front all the way to the back. The stock geometry is about 5 degrees from parallel on each side. I maintained this value but stopped once the rails go back vertical for the rear axle.
- I made the transition from lower rail to front upper (engine area) much steeper than factory frame. I don't have a good reason, it just seemed right.
- Obviously I built the frame 15 inches longer - I added this length in the bottom rails.

EDIT: For clarification, here is a pic of the frame rail layout. I didn't end up right at 5 degrees like I planed so I only got 8" of separation not the 10" I'd planned for, so I spaced the front out to keep the rear dimension the same.

53D94907-267C-40C1-A6F6-3586AD5C75C4_zpstarymdzh.jpg


This is the front rails (parallel) and the bottom rails (+15 inches) flair out at ~5 degrees each side

A4EDAD7D-ED3F-4E4A-AF87-50D25187FBCE_zpsjpnwxzud.jpg


For all the joints I edged them so that I could get a decent amount of weld in there so that I can grind it all flat and plate over it for added strength.

F7DFF3BC-5E65-4C94-8AD9-A4887D9532C3_zpsnwtmvqn6.jpg


30765AC1-11BD-4238-8E0A-95821937FAAD_zpszk7bd1il.jpg


8B40E7C3-6FFC-4B3D-882B-7C07A73965CB_zpsv4kufsqx.jpg


B2C7790D-8051-4529-9BBE-20B55E1193D3_zpstoh7ybxj.jpg


Was SUPER excited to get the new frame set in place of that old rusty hunk of junk. Somewhat of a milestone as we have begun the fabrication phase. :D

So yea, at this point I basically rescued a hood, grill and firewall. :eek:

Nice fab work! This is a good one I will follow till it's done, thanks for sharing!
 
Yes I have read the Goin Big build in detail twice, very awesome.

Point taken on the width of the front rails. At this point it wouldn't be but 10 minutes to chop the two crossmembers and narrow the whole thing up. Thanks for the input, off to research ideal front rail width.

And the dash is in pretty good shape too. It will be saved and reused with new gauges. Thanks again
I like how you did the kickups for the suspension on the front and rear of the frame, I would consider kicking it back down in the front to mimic the factory frame so you don't have to cut up the grill too much to mount it up front. Keeping the frame stock width would probably be best to allow room outside of the frame to mount coils or coilovers. I would probably recommend getting the basic body finished first before completing the frame so your not having to rework the frame. Look at front fender setups that come up to the hood line. Cambell enterprises sells nice front clips for this, metaltech also sells nice diy fenders for this. For the rear fenders consider bringing the rear fender cut to almost the top of the bed rails. These two mods will allow for more suspension travel without deviating too much from the cruiser look. Cambell enterprises built a really sweet silver 40 with blue tubing with these mods as an example, cant thing of which mag its in. Don't be afraid to mount the body a few inches higher than stock from the frame(like 2 or 3). This will protect the body more, and give you more drivetrain room under the body. Cutting 1.5 to 2 inches off of the rockers tucks the sliders up more and looks better I think. Center of Gravity is your friend, try to keep it as low as possible, and with that wheelbase I would go more toward a 40 inch tire. 37s with that wheel base is like running 33s on a stock cruiser wheel base. If you try to keep the fuel tank under the passenger seat it will probably climb better. Ive observed the more weight I have in the rear(which is where most people relocate the tank to), the harder it is for me to crest obstacles. A lot of the parts you don't use, even though rusty, may be able to be sold to make a few bucks. These are just a couple basic points Ive observed in builds over the years that I think make a major difference. Hope some of them will be useful to you.
 
Nice fab work! This is a good one I will follow till it's done, thanks for sharing!

Thanks, hope you plan on sticking around a while! :skull:

I like how you did the kickups for the suspension on the front and rear of the frame, I would consider kicking it back down in the front to mimic the factory frame so you don't have to cut up the grill too much to mount it up front. Keeping the frame stock width would probably be best to allow room outside of the frame to mount coils or coilovers. I would probably recommend getting the basic body finished first before completing the frame so your not having to rework the frame. Look at front fender setups that come up to the hood line. Cambell enterprises sells nice front clips for this, metaltech also sells nice diy fenders for this. For the rear fenders consider bringing the rear fender cut to almost the top of the bed rails. These two mods will allow for more suspension travel without deviating too much from the cruiser look. Cambell enterprises built a really sweet silver 40 with blue tubing with these mods as an example, cant thing of which mag its in. Don't be afraid to mount the body a few inches higher than stock from the frame(like 2 or 3). This will protect the body more, and give you more drivetrain room under the body. Cutting 1.5 to 2 inches off of the rockers tucks the sliders up more and looks better I think. Center of Gravity is your friend, try to keep it as low as possible, and with that wheelbase I would go more toward a 40 inch tire. 37s with that wheel base is like running 33s on a stock cruiser wheel base. If you try to keep the fuel tank under the passenger seat it will probably climb better. Ive observed the more weight I have in the rear(which is where most people relocate the tank to), the harder it is for me to crest obstacles. A lot of the parts you don't use, even though rusty, may be able to be sold to make a few bucks. These are just a couple basic points Ive observed in builds over the years that I think make a major difference. Hope some of them will be useful to you.

Thanks, a lot of good thoughts here.

I do plan on bringing the rails down in front, but I want to get the motor, axles and steering box positioned first so I can drop the rails once and not have to redo them later on. Definitely don't want to chop up the grill, or hood. Those in combination with the fenders MAKE the FJ40 look in my eyes. Speaking of fenders, I had planned on going metaltech but I'll give Cambell a look too. Thanks for the heads up.

In regards to tires...40s on a 40 has a much better ring to it than 37s do...CRAP! :D
 
Last edited:
In the tub we got the floorpan on the passenger side cut out tonight. Fortunately the door seal area is in better shape on the passenger side than the drivers side, however I'm still not sure I'll be able to reuse it. I need to dig into sheetmetal and bodywork a little more to figure out what's fixable.

And to bring the thread up to current, I already got some new metal for the tub.

E78C8F69-58DF-43C6-BB85-4DF03C337253_zps5wpa5two.jpg


The tub sides and rocker panels are from CCOT and are mint, the new floorpan though...:confused:. I had been watching a floorpan on Ebay for a while which looked pretty decent but then it disappeared. I found the one that I got on Amazon and bought it right away. I read the one and only review which said that if you are doing a full on resto than this panel wasn't for you but I figured it'd be good enough for my build...jeez I'm really note sure that is true. This thing is HORRIBLE! Besides not even really fitting, the ridges aren't the right style, nor are they the right size, length or even straight! And the trans hump cover thing that's added on? Not to mention the s*** welds or lack of fit and finish in general. So disappointing. I am strongly considering returning that piece and fabbing my own.

Anyways, time to learn some sheetmetal skills! :eek:
 
I am currently battling a few issues that I'd love to have some input on.

1 - How or where should I start putting this tub back together? The rockers or the rear quarters?

2 - Any tips for getting the windshield hinge screws out? I've tried impact, tried heat and tried impact WITH heat and can't get a single one to budge. I've cut or broke every other bolt on this thing with no regard but these worry me because I'm sure if I weld a nut to them that I will snap them off. I may not have a choice, but I don't want to have to deal with those screws being broke off in the tub or windshield frame. :mad:

3 - On the rockers, I bought the inside and outside panel and although I'm not exactly sure how that all goes together yet, is it possible to buy the door seal part? I think it maybe gets sandwiched between the inner and outer? The part with the crazy curves and bends and the lip on top? Because I am at minimum going to need the drivers side and would prefer to have the passenger new too.
If u can't get them out with heat, it may be easiest to just drill them out. Use a good drill bit and lots of cutting oil. I would work from the front to the back on the tub. The door seal part will have to be sourced used. Classic cruisers in Colorado can cut out one for u. Why did u order 40 quarter panels if your stretching it? I think u can order a 43 half tub. I think u can order a 43 3/4 tub. Landcruiser heaven or aqualu I think.
 
If u can't get them out with heat, it may be easiest to just drill them out. Use a good drill bit and lots of cutting oil. I would work from the front to the back on the tub. The door seal part will have to be sourced used. Classic cruisers in Colorado can cut out one for u. Why did u order 40 quarter panels if your stretching it? I think u can order a 43 half tub. I think u can order a 43 3/4 tub. Landcruiser heaven or aqualu I think.


When I bought the quarters I wasn't planning on stretching it. I wanted to, but wasn't going to. The the frame thing came along, so I decided to go all in! This part really doesn't worry me at this point though.

I am NOT looking forward to drilling those hinge holes out. I've tried to drill a couple bolts out on other stuff in the past and really suck at getting lined up in the middle and square. Ugh!

Thanks for the tip on door lip things. I also emailed CCOT because I see they have them for newer models, so we'll see what they say.
 

Users who are viewing this thread

Back
Top Bottom