My '64 FJ40 Build - Cave Cricket (1 Viewer)

This site may earn a commission from merchant affiliate
links, including eBay, Amazon, Skimlinks, and others.

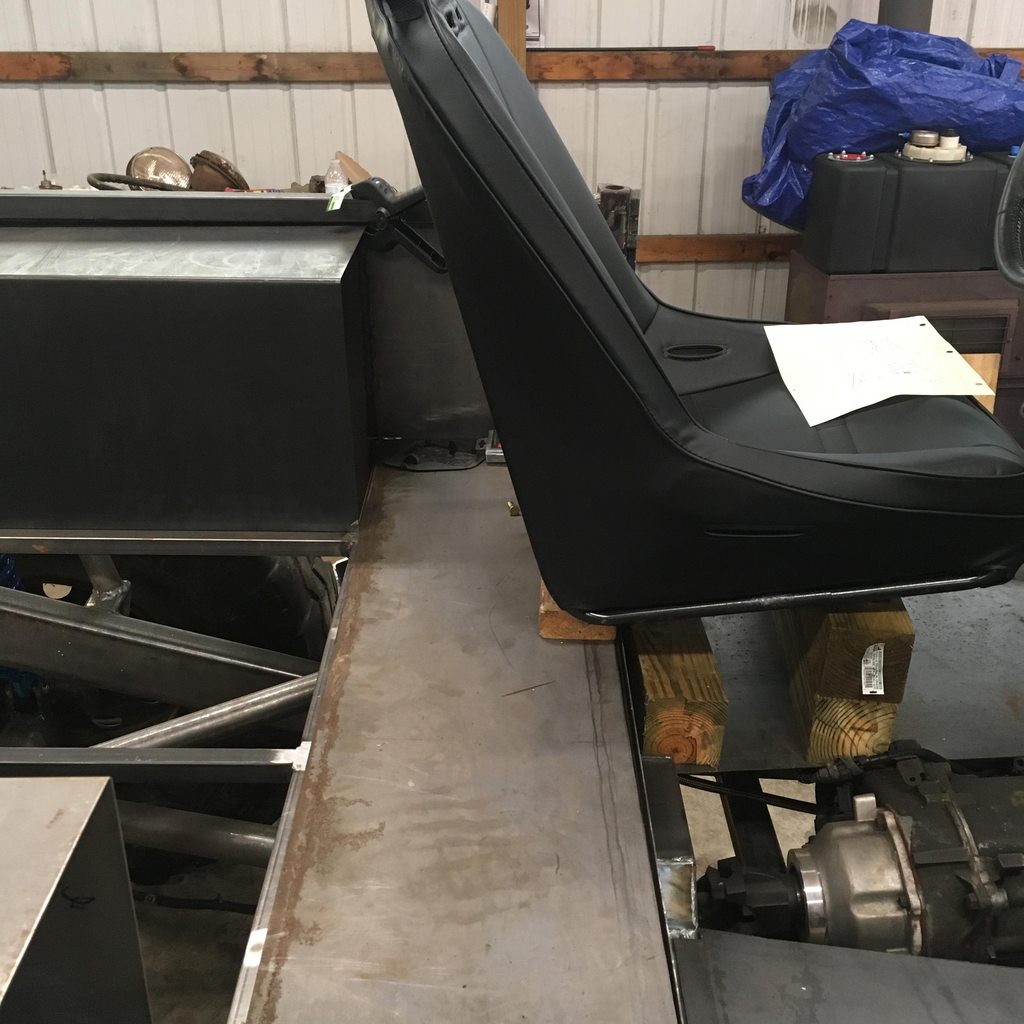
Here's a couple more of the cage

QbBqeNgh.jpg


IEyKvegh.jpg


I also started working on the front fenders. They are similar to metal tech, but I am tying them into the grill hoop. This allows a little more room for the front tire during flex since the front axle is stretched from stock and also will help support the grill hoop forward and back. The idea is to trim the front panel up and leave about 1" below the hood.

idNKohDh.jpg


R8FcFefh.jpg


Still working on refining it. I didn't realize when I drew it in Bend Tech that the front part where the 90 degree bend meets the 27 degree bend up and over the tire that I wouldn't be able to do that in one piece because there is not enough room between bend one and two. It's either impossible to load into bender or if done from the other direction the existing bend will be limitation because it will run into the die. So two pieces it is.
 
Last edited:
It looks like I am going to get lucky and not have to cut the inner fenders at an angle.

gxfX3EJh.jpg


This is within an inch of where the seat position felt most comfortable to me, so there is plenty of room.

It was pretty fun getting to sit in the seats, definitely pretended I was driving it. :grinpimp:

It's been a bit since I checked in here. I love how this build is progressing. Really. Just one thing for me: those seats.
Rather than argue about it, do us both a favor and just take one and prop it up in your break room. Sit in it on breaks and then ask yourself if you feel better after the break than before.
 
Spent A LOT of time on the rear disk brake conversion - in the end it cost nearly $600 which was double what I anticipated. :lol:

Got it wrapped up though, but had to modify a couple sets of caliper brackets and weld them together to make a hybrid in order to get it all to work. Also did not anticipate having to buy new wheel studs, ouch are those expensive for what they are!

6uk6YTYh.jpg


NEXT!

Spent some time figuring out how to mount the radiator, ended up having some tabs welded on by local fab shop. The bottom mounts will hold the weight, up top I made some little adjustable arms to locate the radiator front to rear. Super happy with how those turned out. Made from some 1/2" solid stock drilled and tapped for the 1/4-28 heims.

hbAqreYh.jpg


ojBDaB7h.jpg


And spent all weekend getting the front fender tubes finished up and skinned. Had these in mind since day 1, I realize there isn't much 40 left to this thing so I really wanted to keep the fender look while making them more robust than the stockers. Just isn't the same when you see one without the big ol fenders up front. :)

I51r6j2h.jpg


Eun1A8gh.jpg


Based on what I read from people doing the Metaltech fenders I prepared myself for a war to skin the fenders, but I did each side in two pieces and it wasn't that bad? Will grind the welds, but ran out of flap disks.

Also trimmed up the skirts (is that the right name?) between the hood and fender and got them mocked up. Still debating between welding them vs bolting to the fenders - advice welcomed.

DUURYkIh.jpg
 
Always enjoy coming back to this thread.
 
How wide is your rig from sidewall to sidewall?

With that tire and wheel combo it is stupid wide - but I don’t plan on running them. Can get measurements if you’re interested though.

The plan is to get some Racelines with more backspacing to narrow it up. It’ll still be wide since the axles are full width, but narrow it up a bit. I think those wheels on there now are only 3.5” backspacing, was planning on going 4.5 to 5” - need to do a little measuring to see what’ll fit but that’ll narrow it at least an inch per side, plus running normal 12.5” wide tires will help too.
If you want to get the least amount of tire scrub possible(maybe you already know this)you can draw a line through the upper and lower balljoints, where that line hits the ground-that is where you want the center of the tire to be for least amount of tire scrub which is called steering axis inclination. That would result in better handling/braking on the street, and will keep power steering fluid temps down offroad as well as be easier on steering components. Since you have such wide axles you could aim for perfect sai which would affect your wheel choice in regards to backspacing. I went for maximum width on my rig and didn't pay any attention to SAI but my axles are narrower than your by quite a bit probably.
 
If you want to get the least amount of tire scrub possible(maybe you already know this)you can draw a line through the upper and lower balljoints, where that line hits the ground-that is where you want the center of the tire to be for least amount of tire scrub which is called steering axis inclination. That would result in better handling/braking on the street, and will keep power steering fluid temps down offroad as well as be easier on steering components. Since you have such wide axles you could aim for perfect sai which would affect your wheel choice in regards to backspacing. I went for maximum width on my rig and didn't pay any attention to SAI but my axles are narrower than your by quite a bit probably.

Great point. Out back the limiting factor is tire to coilover clearance under full flex - in previous post from when I installed coilover a there’s a picture showing this clearance is only an inch or two under “garage conditions”. Up front the limitation will be the tire getting into lower links at full steer. At this point those are the only two limitations I know of, not sure which one is the more limiting factor yet. Plan to get the least amount of scrub I can though.
 
After much debate and a few beers I confirmed that the front fenders were cool but I had messed up - it's hard to see in the pics I posted above but how about this:

5hUveX6h.jpg


I was planning on adding a tube to the slider to extend it out some, but the bottom corner of the fender was still going to be vulnerable...or a hang-up rather. I wish I'd angled the tube in so that it ended in line with the existing rectangular slider and not be hanging out there, but I didn't, so...chop chop!

gbJB9azh.jpg


FePxQVoh.jpg


vts8k1yh.jpg


I like that a lot better.

All of the gauges are going to be Autometer Pro-Comp Ultra Lite. The fuel gauge was a bit of a struggle. First it was on me, I ordered the wrong one but even the one I meant to order isn't perfect for my application. My sender is 10 ohms when full, 112 when empty and Autometer doesn't make a gauge that works that way. However, the old Fords are 73-10 so I decided to go that route and make it work.

Full:

0ifvOv9h.jpg


Empty is good:

V1wYC1Yh.jpg


The middle isn't too bad, but lets be real the empty is what matters most. If I remember right, 1/4 and half read a little low, 3/4 full is "full" on the gauge.
 
I've done a couple other small things while waiting for the bumpstops and hydro assist gear to show up.

First I worked on the transmission tunnel cover. The plan to to fabricate a completely new unit, however after some failed mock ups I decided to reuse the front part of the old one - I would have reused more actually but this was the only usable bit as the rest was paper thin and had a bunch of holes.

i0DGg5Ph.jpg


f0WtH6uh.jpg


Amazing how a couple pics sums up so much time and effort! :shaking:


I started thinking driveshafts, and then I quickly noticed while laying under the rig that I'd have to modify my transmission crossmember to clear the driveshaft. The reason is because I WAS thinking two-piece front shaft, but now I am not. It will be roughly 45" flange to flange, but a traditional CV style will be easier to package and less likely to vibrate.

Anyways, the crossmember was simple and straight but right in front of the CV assembly so there would be clearance at ride height let alone droop. The modified crossmember will attach UNDER the CV and allow for more driveshaft angle than the CV will handle (based on mockup with a spare from my truck).

Original:
V9ITD9ph.jpg


Modified:
HU43h4Lh.jpg


Sorry no pics installed
 
And last update for tonight, bumpstops.

I have wanted these for 10+ years, it was a no brainer when I went with the coilovers that these would be part of the plan also.

The fronts had to be frenched into the frame for clearance reasons. The rear were outboarded slightly.

I tried REALLY hard to make the cut outs on the frame the EXACT size of the bump stop can so that it didn't warp during welding. I did really good, but still just a tiny bit of warpage and the bumps wouldn't easily slide into the cans so I decided to slice them and add a pinch bolt.

Front:

Y9yOUmWh.jpg


lHm0JfFh.jpg


Rear:

aCHiiNxh.jpg


T3qkZhAh.jpg


Parting shot for now! :grinpimp:

WMadJxRh.jpg
 
Very Nice. The devil's in the details now, keep going!
 
Thanks guys.

Since the last check in I have been working on lots of different tasks, so lets get caught up.
First I figured out what to do with the brake system. I ended up going with what I feel is the best set up but damn it requires LOTS of fittings! Lets back up a tad though.

I am reusing the master and booster from the Ram since I already have it and it worked great on the truck before. However, I am ditching the OEM distribution valve and RWAL module for two reasons - one it's converted to disks in the rear now and two the rear ABS never seemed to ever work anyways. So, I picked up a manual proportioning valve for the rear, and got the one with the pressure sensor to be used as the brake light trigger too. Mounted it right under the master.

From the proportioning valve there is one line to the front and one to the rear. The line to the front crosses over to the passenger side along the firewall and then down to the upper link mount. The rear line runs along the driver side frame rail to the rear upper link mount. Then each is converted from double flare brake line fittings to -3an stainless braided flexible lines, then converted back to double flare, hard brake line to another adapter to go back to -3an, then into a tee at each axle which splits with double flare hard line that runs out to the end of the axles where there is another double flare to -3an adapter and another stainless braided flex line which finally connects via banjo bolt to each brake caliper. Lots of adapters and fittings, definitely more money than I had budgeted for the brakes - oh well.

Unfortunately I have already forgotten the thread of the two fittings for the master cylinder (the blue and green ones in pic below), I will try to find in my notes and update later for my own long-term records since they aren't super common or easy to find.

lk149mVh.jpg


z5e84Thh.jpg


You'll notice the booster is SNUG to the edge of the body, and I don't have a pic but the master is VERY CLOSE to the hood...but it all fits with clearance, not much, but some.

And a pic showing the tee, line, adapters and flex line. Now that the brake line brackets are welded on the axles are ready to come out for the final welds in a couple spots and then sandblast/paint. :grinpimp:

77CsYEGh.jpg


The front banjo bolts are 3/8-16, these are for the Dodge Dana 60 calipers which are on this front end. The rears were 7/16-20 for the Chevy calipers that everyone uses to convert the D70 & 14 bolts to disc brake.
More in a few minutes.
 
While I was in between designing, ordering, waiting and building the brakes I have also been working on something less important - the rear seat. However, it is important because I need to get it done in order to determine the exact location of the crossbar for the rear shocks towers and also because it determines the location of the fuel cell...which dictates the size and location of the trap door to get to the storage below the tub. So yea the rear seat is the hold up. Here's where we are at.

I couldn't justify spending $400 on a new bench seat where no adult will ever really ride for more than a few minutes at a time. I got pretty tired of playing the Craigslist game for used Jeep seats too. It was my wife's idea one day when we were using the OLD seat that came out of this thing as a mock up (to not hold things up as mentioned above) - what if we re-did that thing?

2CGyhpBh.jpg


I immediately dismissed the idea, but a day later I came back around to it - why not? Well it is too wide, uncomfortable as all hell, so springy it may eject any passenger who isn't strapped to it, ugly, very ugly...Ok ok, yes there are a lot of reasons, but I can change all of them.
We stripped it down. The seatback was just plywood with some weird straw like material. Bye. The seat bottom was spring based, also went bye bye in favor of foam. So there was the blank framework. I cleaned it up, narrowed it 1.25" and started putting it back together. New legs were built too, more on that later.

cw9Bod0h.jpg


5t5YEVhh.jpg


We used these inserts which press into the wood to make it 1/4-20 thread and remain flush. This allows the seat back and base to be bolted to the frame without any nuts inside of the seat.

78bYT4yh.jpg


Currently I am awaiting my second set of foam for the seat bottom. The first set I got was a tad too soft for my liking - more like a couch cushion than bench seat so I am working with the company to get a firmer foam. Then it just needs a cover which is easy!

So the new legs got flanges on the bottom and will bolt through the tub floor to another set of flanges which are welded to the frame. This is similar to how the roll cage goes through the body, and also give the rear of the tub another area of support.

The rear is just a 4" long piece of 2" DOM on a corner gusset - that worked out sweet. The fronts were a little more complicated as I had to cut a 90 degree bend. Overall though, it packaged up about as well I as could have asked for this late in the build process. Here is a pic of the mounts under the tub, looking up from the front to the back

sCkZY4ch.jpg


Here you can see the crossbar between the shock towers which also bolts THROUGH the tub walls. Not you can see the bolts for rear seat flanges too.

4nwD8Tmh.jpg


That's all I have for fab, but in the meantime I have been working on inner fenders for the front and also buying/building my air system set up for sandblasting and painting soon! :grinpimp::grinpimp:
 
Wow. Lots of skill in your build-- am super impressed. Even the little (but really not so little) things-- your beads on the welds--hey I used to weld at the ranch-- as a lawyer in the big city? Not so much but those are great welds. Also impressed with your ingenuity on overcoming issues. Well done!!
 
Thanks guys!

Since the last post I made it to Moab for the first time ever! We were there for a week and it was great but I lost more than a week of work on the rig because there was a week spent getting the bike ready beforehand...yea I was on a motorcycle, not four wheeling. :rolleyes: It only got me more fired up to get the rig done and go back though!!!

ptuEA5Xh.jpg


We spent 4 days on motorcycle only terrain (technically not in Moab), but did hit Poison Spider and Gold Bar Rim one of the days. We were out there during Bronco week, it rained every day including the day we did Gold Bar Rim so we spent our lunch break near Golden Crack sitting under a rock with a group of Bronco guys which was cool to chat a bit about their trucks and stuff, comparing how we approach the obstacles differently, pretty neat!

I only saw one FJ40 out there and unfortunately it was right at the start of the trail and the hood was up! Doh!

Man was it heaven out there.

Anyways, back to the build.

For the front inner fenders I made these simple Aluminum screens bent to fit then sprayed them with bedliner material. The spray was kind of inconsistent on the first one so I bought (wasted my money) on a small can of Herculiner but it didn't work because for whatever reason it went through the screen instead of sticking to it and building up a layer like the spray. Anyways, it worked and they are all done and installed.

b68eppNh.jpg


hMsrXymh.jpg


So then back to the bench seat. I bought a couple yards of vinyl to wrap the foam, basically folding it over to the back and stapling it like we do on atv/motorcycle seats.

VsngjEIh.jpg


Overall I think it turned out pretty good, maybe even slightly better than I expected. Frame needs paint still, but it's done for now.

fOlVL8hh.jpg
 
Last edited:

Users who are viewing this thread

Back
Top Bottom