Marlin Crawler Steering Upgrade Kit (1 Viewer)

This site may earn a commission from merchant affiliate
links, including eBay, Amazon, Skimlinks, and others.

FJ40JOHN

SILVER Star
Joined
Jul 12, 2003
Threads
36
Messages
366
Location
Cypress, TX
Anyone running this? Didn't see much in search.


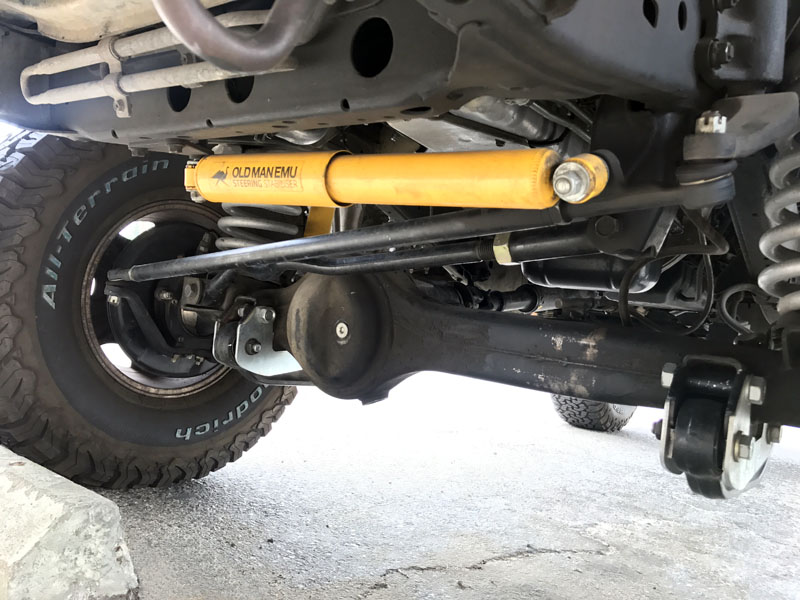
Looks like a decent deal for a full set of TREs and heavier links. Couple that with a rebuilt box/pump and new hoses and the whole system should be gtg, right?
 
Last edited:
I’ve got the 80 series kit and my brother had a kit for his 62. They are stout links at .250 wall and the TREs are 555 which are made in Japan and are high quality. I’d go for it if you need some new rod ends and links but it took them about 3.5 weeks for them to ship mine out a few months ago so get on it.
 
I’ve got the 80 series kit and my brother had a kit for his 62. They are stout links at .250 wall and the TREs are 555 which are made in Japan and are high quality. I’d go for it if you need some new rod ends and links but it took them about 3.5 weeks for them to ship mine out a few months ago so get on it.

I figured the TREs were half the cost anyway, might as well get new links as well.

I run this after I got busted up on old sluice. Stout

Excellent. Good to hear. Mine doesn't see much wheeling, but one less thing to worry about for a small admission price is good with me.
 
I run this setup. Quality stuff. Some people say that these links replace the 'weak link' in the steering, therefore causing the next weakest link to take the abuse. My tie rod was bent, from wheeling. I suppose the sector shaft will be the next weak link. 🤔
 
I guess it depends why it bent...I drove into a big rock, many times. Less a weak link on the truck and more a weak link in my ability to pick the correct line:)
 
I guess it depends why it bent...I drove into a big rock, many times. Less a weak link on the truck and more a weak link in my ability to pick the correct line:)
Right? I'm pretty easy on my rig, but the PO wheeled it pretty hard. My tie rod may have been bent, straightened, and bent again. Not really sure.
 
Just installed the @Marlin Crawler HD steering kit. They were easy to work with, shipped super fast, packaged bomb proof, and had everything needed.

The quality is awesome.

The install was cake with a pickle fork and a 5 lb Sledge. It went way faster than I thought It would, Let's say 1.5 banana :banana:.

Tools
Pickle fork
5 lbs stubby sludge
19 mm deep socket
Wire cutter dikes
3/8 ratchet
Large adjustable wrench
Blue Loctite 242 Optional
Strap wrench

Just make sure you
*Center the tie rods on the Dom steel bars best you can.

*Match the length of your old steering linkage.

*Use a strap wrench when tightening the retaining nuts to make sure the tie rod boots are centered and not angled extremely when installed, levelish.

*check the holes on the vehicle for the tire rods for any birs or imperfections, so as to not tear up the boot.

Screenshot_20200719-191327.png


Screenshot_20200719-190634.png


Screenshot_20200719-190447.png


Screenshot_20200719-192217.png
 
Last edited:
@marl
I run the Marlin upgraded drag link & tie rod.

MBR sure to paint the bar & the tie rod ends. Otherwise the the ends rust.
Thanks I was thinking about that, I thought man you should have these powder coated didn't even think about it.

I'm in California we don't get my rust here, maybe I'll rub them down with a little oil every oil change.

Any suggestions with them already installed?
 
@marl

Thanks I was thinking about that, I thought man you should have these powder coated didn't even think about it.

I'm in California we don't get my rust here, maybe I'll rub them down with a little oil every oil change.

Any suggestions with them already installed?
Black spray paint, if it’s still legal there.
 
Are the tie rods just the stock 80 series ones ?

The 555 brand tie rods provided looked to be much larger diameter they were all so much heavier than stock as well as the securing is not a pinch clamp. The HD kit threads in to the d o m steel with a lock nut to secure it.
 
Something happened to my relay link, so I bought the Marlin replacement kit:

1.jpg


Since the driver's side tie rod end is left-hand thread and the passenger side is right-hand, you can't simply tighten one jam nut against the other unless you do it in stages and hold your tongue just right, or somehow secure the rod from spinning (I couldn't get a strap wrench to hold, and was not interested in using a pipe wrench). I'd get the jam nuts tight by progressively tightening one while holding the other, being careful to not tighten too much each time (or one end would spin free).

I finally got sick of this lame little dance and just welded a 1 1/8" nut to the passenger end so I could hold the rod itself rather than the opposite jam nut:

2.jpg

3.jpg


(The tie rod lock nut is not shown in the above pic - this was taken while the paint was drying.)

I only welded one nut onto the link on the passenger's side, as there is not enough clearance between the link and the steering stabilizer on the driver's side for a second weld-on nut. It's likely this clearance is tight on my rig because I have an aftermarket stabilizer and my axle has been moved forward by ~30 mm...regardless, one weld-on nut is enough.

I think this turned out nice, but it took much way longer than I thought it would to grind out the nut threads. Do wish I had done this 3 years ago when I bought the rods and joints, and before powder coating (doh!).
 
Thanks for the write-up. I just ordered the Marlin Kit for my 94.
 
Something happened to my relay link, so I bought the Marlin replacement kit:

View attachment 2378247

Since the driver's side tie rod end is left-hand thread and the passenger side is right-hand, you can't simply tighten one jam nut against the other unless you do it in stages and hold your tongue just right, or somehow secure the rod from spinning (I couldn't get a strap wrench to hold, and was not interested in using a pipe wrench). I'd get the jam nuts tight by progressively tightening one while holding the other, being careful to not tighten too much each time (or one end would spin free).

I finally got sick of this lame little dance and just welded a 1 1/8" nut to the passenger end so I could hold the rod itself rather than the opposite jam nut:

View attachment 2378252
View attachment 2378254

(The tie rod lock nut is not shown in the above pic - this was taken while the paint was drying.)

I only welded one nut onto the link on the passenger's side, as there is not enough clearance between the link and the steering stabilizer on the driver's side for a second weld-on nut. It's likely this clearance is tight on my rig because I have an aftermarket stabilizer and my axle has been moved forward by ~30 mm...regardless, one weld-on nut is enough.

I think this turned out nice, but it took much way longer than I thought it would to grind out the nut threads. Do wish I had done this 3 years ago when I bought the rods and joints, and before powder coating (doh!).
If you had bought the rods from Front Range Off Road there would have been two flats machined into the rod for a wrench to hold the rod while tightening the jamb nut, no need to weld nuts onto the rod. I would like to stress the fact that upgrading our tie rods does not require a one stop shopping “kit”. 555 rod ends are not an upgrade. If you want a rod end that possesses significantly more beef, GM one ton rod ends are the common choice.
 
I didn't weld my Marlin HD kit, I felt like a little blue Loctite was good insurance though.

I also didn't think to paint mine before installing. I'm imagining a mess if I try and paint them while installed 😂

I just had the alignment yesterday, I'll probably just leave them as is.

If I did it again I would have spray-painted them or gone fancy and have them powder coated.
 
I just ordered this kit.

Everyone still happy with theirs?
It's a nice kit, luckly got it on a 4th of july sale, the rods/tre's are bare metal, I cleaned mine well and then sprayed them black then hit with clear. I had to run a tap down one of the ends fyi, also there are no wrench flats to use as a counter hold when tightening the jam nuts so might want to sort that out or just use a pipe wrench or something if you don't care.
 

Users who are viewing this thread

Back
Top Bottom