I used black steelit paint, city racer decal and new nos clamps from @ToyotaMatt on my air cleaner refreshThanks Mate, really appreciate the offer. I did manage to locate one, a little rusty but I'm currently working on cleaning it up for repaint.

Even came with a vintage filter lol

Thanks again!!
Hodakaguy
Navigation
Install the app
How to install the app on iOS
Follow along with the video below to see how to install our site as a web app on your home screen.
Note: This feature may not be available in some browsers.
More options
Style variation
You are using an out of date browser. It may not display this or other websites correctly.
You should upgrade or use an alternative browser.
You should upgrade or use an alternative browser.
Hodakaguy's FJ40 Thread
- Thread starter Hodakaguy
- Start date
-
- Tags
- fj40 restoration
This site may earn a commission from merchant affiliate
links, including eBay, Amazon, Skimlinks, and others.
More options
Who Replied?- Thread starter
- #82
Did you do the shackle reversal?
No reversal, just the Hell For Stout shackles.
Hodakaguy
- Thread starter
- #83
That thing is looking great on the new wheels and tires!
Thanks mate!
Hodakaguy
- Thread starter
- #84
I used black steelit paint, city racer decal and new nos clamps from @ToyotaMatt on my air cleaner refresh
View attachment 3588635
That looks Sooooooooooo nice! Nice job and thanks for the info!
Hodakaguy
- Thread starter
- #85
A few more items out of the way.
Time to replace the TOYOTA emblem on the front bezel, the previous owner spray painted the whole thing silver and it just doesn't look right. I ordered a correct OEM replacement badge to swap it out with.
The silver badge.

New vs Old.

I was able to loosen one side of the bezel which allowed my skinny arms to reach back behind the badge and remove the two nuts securing it in place.


Yep....that's better! I know....I still need to get the HF Winch off the rig and get a mechanical or 8274 on in it's place. On the list!


Cleaned and checked the plugs. Plugs looked good and they all were fairly close to spec on gap, .050" for the DUI distributor.

Setting valves.
Exhaust valves were all very close, just a tad loose. The intake valves were quite a bit on the loose side. I brought all the valves back into Toyota spec (Hot clearance specs).


Earlier this week I was in Salt Lake City UT and had a chance to stop by the Landcruiser Heritage Museum.....Amazing place! If your into Landcruisers this is a must see! I took a TON of pictures, way to many to put into my 40 thread here.
* I posted the rest of the pictures on a separate thread here if you'd like to see the collection: LandCruiser Heritage Museum - A visit in pictures. - https://www.advrider.com/f/threads/landcruiser-heritage-museum-a-visit-in-pictures.1724057/
A few teaser pics of the Museum.


Hodakaguy
Time to replace the TOYOTA emblem on the front bezel, the previous owner spray painted the whole thing silver and it just doesn't look right. I ordered a correct OEM replacement badge to swap it out with.
The silver badge.
New vs Old.
I was able to loosen one side of the bezel which allowed my skinny arms to reach back behind the badge and remove the two nuts securing it in place.
Yep....that's better! I know....I still need to get the HF Winch off the rig and get a mechanical or 8274 on in it's place. On the list!
Cleaned and checked the plugs. Plugs looked good and they all were fairly close to spec on gap, .050" for the DUI distributor.
Setting valves.
Exhaust valves were all very close, just a tad loose. The intake valves were quite a bit on the loose side. I brought all the valves back into Toyota spec (Hot clearance specs).
Earlier this week I was in Salt Lake City UT and had a chance to stop by the Landcruiser Heritage Museum.....Amazing place! If your into Landcruisers this is a must see! I took a TON of pictures, way to many to put into my 40 thread here.
* I posted the rest of the pictures on a separate thread here if you'd like to see the collection: LandCruiser Heritage Museum - A visit in pictures. - https://www.advrider.com/f/threads/landcruiser-heritage-museum-a-visit-in-pictures.1724057/
A few teaser pics of the Museum.
Hodakaguy
Fitting your hand in there to replace that front emblem must have been tricky lol. Are you adjusting the valves and checking spark plugs as routine maintenance or is it having issues running?
Thanks man - looking good!Did you do the shackle reversal?
- Thread starter
- #88
Fitting your hand in there to replace that front emblem must have been tricky lol. Are you adjusting the valves and checking spark plugs as routine maintenance or is it having issues running?
I was just adjusting valves as routine maint, making sure they were all set correct. The engine runs great when warm, misses a tad when cold. Engine is low on compression. I'll eventually pull the engine and do a complete overhaul so everything is like new again.
Hodakaguy
- Thread starter
- #89
More Details.....
When I purchased my 40 the rear view mirror was an aftermarket unit that is made from cheap plastic. The mirror vibrates while driving distorting the view and looks like a cheap plastic. A bit of internet sleuthing shows that you can still get the correct OEM Toyota metal units so I ordered one up from a Ebay vendor for $55. With the mirror in hand it's time to install.
New mirror ready for install. Looks great!


The aftermarket plastic mirror. This mirror uses bolts to hold it in place instead of spring clips like the OEM unit. The OEM unit has a much cleaner look.


Side by side.


Installing the new mirror base bracket. I used a bit of Loctite 243 on the threads to attach the mirror base to the windshield frame. The new mirror does not come with the required screws so you need to pick them up separately from your favorite local supply store.


Once the base is installed you can snap the new mirror arm onto the base. The fit is tight. I removed the mirror from the arm so it wouldn't get damaged, installed the arm by pressing and working the arm back and forth, then re-installed the mirror on the arm. Looks waaaay better!


Hodakaguy
When I purchased my 40 the rear view mirror was an aftermarket unit that is made from cheap plastic. The mirror vibrates while driving distorting the view and looks like a cheap plastic. A bit of internet sleuthing shows that you can still get the correct OEM Toyota metal units so I ordered one up from a Ebay vendor for $55. With the mirror in hand it's time to install.
New mirror ready for install. Looks great!
The aftermarket plastic mirror. This mirror uses bolts to hold it in place instead of spring clips like the OEM unit. The OEM unit has a much cleaner look.
Side by side.
Installing the new mirror base bracket. I used a bit of Loctite 243 on the threads to attach the mirror base to the windshield frame. The new mirror does not come with the required screws so you need to pick them up separately from your favorite local supply store.
Once the base is installed you can snap the new mirror arm onto the base. The fit is tight. I removed the mirror from the arm so it wouldn't get damaged, installed the arm by pressing and working the arm back and forth, then re-installed the mirror on the arm. Looks waaaay better!
Hodakaguy
RevISK
SILVER Star
Hodakaguy,
How did you order your 16" wheels from the Japanese vendor? Their website ordering process seems to be geared towards the domestic Japanese market only
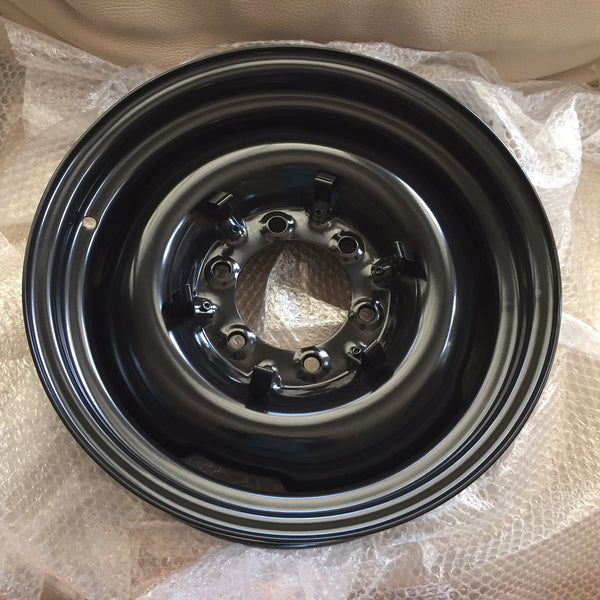
16" Wheels / Rims for Land Cruiser FJ40 FJ45 FJ55 FJ60
Reproduction 16" wheels for Toyota Land Cruiser 40 / 55 / 60 Series, with clips! Accommodates OEM chrome hubcaps. Stunning OEM level quality. Modern construction. Welded not riveted. Non split rim. Cruise at 70 mph in safety and comfort all day long. Comes powder coated in gray or black...
www.cityracerllc.com
Thank you very much16" Wheels / Rims for Land Cruiser FJ40 FJ45 FJ55 FJ60
Reproduction 16" wheels for Toyota Land Cruiser 40 / 55 / 60 Series, with clips! Accommodates OEM chrome hubcaps. Stunning OEM level quality. Modern construction. Welded not riveted. Non split rim. Cruise at 70 mph in safety and comfort all day long. Comes powder coated in gray or black...www.cityracerllc.com
Apologies for the out of sequence question.
- Thread starter
- #93
Thank you very much
Apologies for the out of sequence question.
Sorry for the delay, looks like it was answered. I ordered them directly off the US site.
Hodakaguy
- Thread starter
- #94
Ok...time to get the E-brake hooked back up and the leaks stopped.
Earlier in this build thread I pulled apart the E-brake as it was missing a retaining clip and had ground itself up. I ordered a new E-brake parts kit as well as a Valley Hybrids modified double seal speedometer housing but have yet to get them installed....well today is the day!
First up I drained the oil out of the transfer case. Then I removed the drive line, the E-brake drum, speedometer cable & Drive, and the E-brake backing plate. Here's the leaking seal on the back of the speedo housing.

4 Bolts and the speedo housing is removed. I'll clean up the gasket material and get the surfaces prepped for the new gasket.

Here's some pics of the Valley Hybrids modified housing. They machine the housing deeper to allow two seals to be utilized instead of one, ensuring a better seal and a leak free driving experience. The kit comes with everything you need to complete the job minus sealant.


Changing out the O-rings on the speedometer drive. There are two O-rings to change out here (Provided with the kit), one internal and one external.

The internal shaft just slides out of the housing. There is a notch to line back up upon re-assembly.


A pick works nicely to remove the inner O-ring.


I used Loctite 515 on the speedo housing gasket.


Speedo drive and cable back in place.

Re-installing the backing plate. 11.5 ft lbs.


Assembling the new brake hardware.


Continued Below....
Earlier in this build thread I pulled apart the E-brake as it was missing a retaining clip and had ground itself up. I ordered a new E-brake parts kit as well as a Valley Hybrids modified double seal speedometer housing but have yet to get them installed....well today is the day!
First up I drained the oil out of the transfer case. Then I removed the drive line, the E-brake drum, speedometer cable & Drive, and the E-brake backing plate. Here's the leaking seal on the back of the speedo housing.
4 Bolts and the speedo housing is removed. I'll clean up the gasket material and get the surfaces prepped for the new gasket.
Here's some pics of the Valley Hybrids modified housing. They machine the housing deeper to allow two seals to be utilized instead of one, ensuring a better seal and a leak free driving experience. The kit comes with everything you need to complete the job minus sealant.
Changing out the O-rings on the speedometer drive. There are two O-rings to change out here (Provided with the kit), one internal and one external.
The internal shaft just slides out of the housing. There is a notch to line back up upon re-assembly.
A pick works nicely to remove the inner O-ring.
I used Loctite 515 on the speedo housing gasket.
Speedo drive and cable back in place.
Re-installing the backing plate. 11.5 ft lbs.
Assembling the new brake hardware.
Continued Below....
- Thread starter
- #95
Continued from above...
Ensure your seal surface on the drum is smooth and not chewed up. Apply a light coat of grease here as well. Pic taken before the drum was cleaned up.

I cleaned the end of the splines/threads then re-installed the drum. I used Loctite 515 to seal the end of the splines, oil leaks here otherwise.


Torqued to 94 ft lbs and staked the nut.


Drive shaft re-installed.

Time to change and re-fill the vital fluids. I drained and re-filled the transmission with Redline MT-90, MT-90 is a GL4 oil and is designed to allow synchronizers in the transmission to function properly. I've had great luck with MT-90 in the past and usually results in improved shifting. I drained/filled both axles and the transfer case with Valvoline 75w-90 syn. While I was there I also topped off the knuckles on the front axle with some Caterpillar Extreme 5% Moly Grease (Cat part# 452-6016).

Drove the 40 all day today and not a single drop of vitals fluids leaking so far, E-brake is working perfectly again. Sweet!
Hodakaguy
Ensure your seal surface on the drum is smooth and not chewed up. Apply a light coat of grease here as well. Pic taken before the drum was cleaned up.
I cleaned the end of the splines/threads then re-installed the drum. I used Loctite 515 to seal the end of the splines, oil leaks here otherwise.
Torqued to 94 ft lbs and staked the nut.
Drive shaft re-installed.
Time to change and re-fill the vital fluids. I drained and re-filled the transmission with Redline MT-90, MT-90 is a GL4 oil and is designed to allow synchronizers in the transmission to function properly. I've had great luck with MT-90 in the past and usually results in improved shifting. I drained/filled both axles and the transfer case with Valvoline 75w-90 syn. While I was there I also topped off the knuckles on the front axle with some Caterpillar Extreme 5% Moly Grease (Cat part# 452-6016).
Drove the 40 all day today and not a single drop of vitals fluids leaking so far, E-brake is working perfectly again. Sweet!
Hodakaguy
- Thread starter
- #96
Took the FJ40 & the M38 to our local car show, Cool Desert Nights. Did the cruise on Thursday night and we had four 40's in the cruise...way cool!
The show was great and we spoke with a ton of amazing people. Sooo much fun. The 40 took a first place award!


We arrived early to get a nice spot In the shade...1st and second in line")

Had another 40 as company. Way cool.


Hodakaguy
The show was great and we spoke with a ton of amazing people. Sooo much fun. The 40 took a first place award!
We arrived early to get a nice spot In the shade...1st and second in line
Had another 40 as company. Way cool.
Hodakaguy
DeskJock
SILVER Star
Way to go brother!!!
- Thread starter
- #98
My FJ40's Mini Me lol. After driving the Samurai the 40 feels like a tank!
Hodakaguy


Hodakaguy
Similar threads
Users who are viewing this thread
Total: 1 (members: 0, guests: 1)