Gas Struts for rear lift gate on '73 - Where do you fin 'em?

This site may earn a commission from merchant affiliate
links, including eBay, Amazon, Skimlinks, and others.

As said above, the end pieces just unscrewed. If I had it apart, I would show you more... But there is REALLY nothing to see...

Shawn
 
The Napa Part # 819-5565 refers to the Manufactures Part # 5200-50.

I Googled this part number and found several distributers. I just installed item number 5200-50. RV Gas Strut I had a pair of them delivered for under $37, which is what Napa wants for each spring.

The tube end is 15mm dia. which fit perfectly into the upper portion of the old chrome tube after I removed the plastic end connector. After fitting the gas spring into the old tube, I cut the other plastic connector to length so that it was exactly the length of the fully expanded tube.

Works like a champ. Now I just stand back and watch as my rear gate is lifted to its max height.

Thanks. I ordered a pair. Probably be here late next week. This conversion makes more sense than trying to change out the ends, and retains the stock look.
 
The Napa Part # 819-5565 refers to the Manufactures Part # 5200-50.

I Googled this part number and found several distributers. I just installed item number 5200-50. RV Gas Strut I had a pair of them delivered for under $37, which is what Napa wants for each spring.

The tube end is 15mm dia. which fit perfectly into the upper portion of the old chrome tube after I removed the plastic end connector. After fitting the gas spring into the old tube, I cut the other plastic connector to length so that it was exactly the length of the fully expanded tube.

Works like a champ. Now I just stand back and watch as my rear gate is lifted to its max height.

I ordered a pair of 5200-50 gas struts and received them today.

This sounded like a one banana job, but I quickly ran into complications.

When installing them per the above instructions, they jammed with the lift gate about five inches short of closing. Measuring the struts, they needed to close another 3/4".

It's possible to hacksaw off the thread on the tube end (thick end) of the gas strut. I also cut the plastic coupler on the rod end to the same length as the threads. This will allow it to seat deeper in the old spring strut assembly and fully collapse.

The problem with that is the gate does not fully come up. If you are six foot or taller, you'll not like this at all. This is because the gas strut is now recessed inside the old spring strut assembly.

The only way to both lengthen the travel and take up the excess space that I could think of at the spur of the moment was to cut a few coils off the old springs and try them. By trial and error I found a length that works reasonably well, but the coils bind just as the assembly closes. Works, but not ideal. Also note that I have a 1971, which appears to be the same model year the above instructions were written for.

It's definitely an improvement over the old setup, which was a royal pain to try to set the tension right, plus tighten and loosen the locking collar, which was worn out. But because of the issues I ran into I'm hesitant to recommend it. At some point I'll probably use a naked set of gas struts and get rid of the old spring tubes entirely. But for now this works.

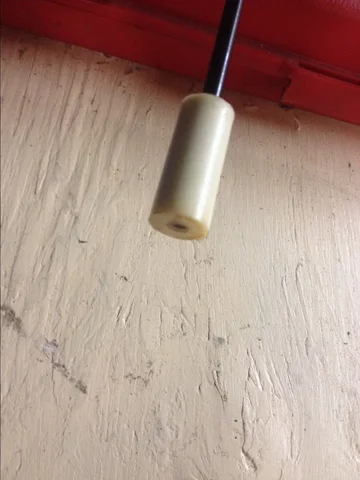
BTW, inside of each of the old spring struts was a white delrin plastic rod, 5/8" in diameter and 1.5" long. I don't know if this is factory, or if someone added these to try to overcome weak springs. Tossing this out in case someone wants to try to shim their springs up instead of replacing them with gas struts.
 
Mine had the same spacer in the bottom of the tube, so I will assume this was factory.

I had a problem of the NAPA part number changing and the strut not even fitting in the tube. (read earlier in the thread). It seems that either NAPA or the manufacturer is changing the part slightly which I assume would not effect the original application but causing problems with this mod.

Shawn
 
Here's a few pics of mine.
Rear Lifts 002.webp
Rear Lifts 003.webp
Rear Lifts 004.webp
 
I ordered a pair of 5200-50 gas struts and received them today.

This sounded like a one banana job, but I quickly ran into complications.

When installing them per the above instructions, they jammed with the lift gate about five inches short of closing. Measuring the struts, they needed to close another 3/4".

It's possible to hacksaw off the thread on the tube end (thick end) of the gas strut. I also cut the plastic coupler on the rod end to the same length as the threads. This will allow it to seat deeper in the old spring strut assembly and fully collapse.

The problem with that is the gate does not fully come up. If you are six foot or taller, you'll not like this at all. This is because the gas strut is now recessed inside the old spring strut assembly.

The only way to both lengthen the travel and take up the excess space that I could think of at the spur of the moment was to cut a few coils off the old springs and try them. By trial and error I found a length that works reasonably well, but the coils bind just as the assembly closes. Works, but not ideal. Also note that I have a 1971, which appears to be the same model year the above instructions were written for.

It's definitely an improvement over the old setup, which was a royal pain to try to set the tension right, plus tighten and loosen the locking collar, which was worn out. But because of the issues I ran into I'm hesitant to recommend it. At some point I'll probably use a naked set of gas struts and get rid of the old spring tubes entirely. But for now this works.

I did this mod today and am very happy with it. I ordered the old NAPA part#819-5565 struts about a year ago, of course they didn't fit, so I tried again by ordering from Adventure RV Gas Spring 50Lb 17 Ext 10.25 Comp W/Plastic Ends - $10.49 I ordered the 5200-50 for $31 shipped and was actually sent the 60lb struts. I decided to use them anyway and did the same as mentioned previously by unscrewing one plastic connector, trimming its mounting screw off, and then cutting roughly half of the other plastic connector off so that it is flush with the threads of the old tube when the strut is placed inside. I then reassembled everything with the struts inside the old tubes and DID NOT have any problems with them jamming short of closing or the hatch not extending fully. The hatch is roughly parallel to the ground at full extension and I can press it up less than .5" further before the hatch reaches the end of its range of motion. I'm also happy w/ the 60lb versions as they aren't hard to close, seem like they would be stout enough to hold the hatch open while driving (dog in the back, lumber etc..), and get the hatch open in a hurry. Thanks to those that came up with the idea.:beer:
DSCF0283.webp
 
Followup.... It's been four months since I installed mine. And other than not opening up fully, they work well. You just have to remember the inside door handle is lower than usual and avoid whacking yourself in the head, which has always been an issue for anyone tall. What I especially like is being able to drive down the road with the rear hatch open for cooling. Unfortunately that can suck in exhaust fumes, so I need to look at extending the tailpipe a bit further out into the slipstream, but that isn't the fault of the struts.
 
Just Got em

At my local State Trailer Supply I bought these. Cost 10 bucks a piece. I'll have them installed tonight! Thanks for all the FAQ's.

Thanks Poser for always putting stuff up here.
 
I did this mod today and am very happy with it. I ordered the old NAPA part#819-5565 struts about a year ago, of course they didn't fit, so I tried again by ordering from Adventure RV Gas Spring 50Lb 17 Ext 10.25 Comp W/Plastic Ends - $10.49 I ordered the 5200-50 for $31 shipped and was actually sent the 60lb struts. I decided to use them anyway and did the same as mentioned previously by unscrewing one plastic connector, trimming its mounting screw off, and then cutting roughly half of the other plastic connector off so that it is flush with the threads of the old tube when the strut is placed inside. I then reassembled everything with the struts inside the old tubes and DID NOT have any problems with them jamming short of closing or the hatch not extending fully. The hatch is roughly parallel to the ground at full extension and I can press it up less than .5" further before the hatch reaches the end of its range of motion. I'm also happy w/ the 60lb versions as they aren't hard to close, seem like they would be stout enough to hold the hatch open while driving (dog in the back, lumber etc..), and get the hatch open in a hurry. Thanks to those that came up with the idea.:beer:
I just did this mod using the http://www.adventurerv.net/gas-spring-60lb-ext-comp-wplastic-ends-p-2605.html and I have to tell you it was easy and works like a charm.

Remove the provided end, drill out your spacer with 1/4" bit almost all the way through, drill the last 1/4" with a bit that will allow you to screw the spacer on the end. Screw it down even with the end.
Struts1.webp

Remove the metal retaining ring, pry it out and toss it.
Strut2.webp

Insert it into the tube and mark it at the end of the tube and cut the plastic end.
Strut3.webp

should look like this. Put it back together and you're done, now time to get them re-chromed. Great mod.
Strut4.webp

I'd like to thank 40Zen for the lead on the gas shocks.
 
Bump for a fellow mudder
 
I ordered the suggested shocks, but run into same problem as above, they were too long and would bind before the hatch closed. I started cutting off little at a time until the hatch would close, (still has a little bind, but closes). Same problem as above, does not push the hatch all the way up. Still better than before, at least I dont have to tighen the jam nut to hold it up.
 
Hey all, any chance you might have a clue about what I might have done to eff up my window struts? I put my hardtop back together, then after cleaning, lubing (trying to shine) and reassembling the struts, I now find that the window won't close without risking bending the top reinforcement bar/breaking window! I have tried every possible configuration (as it had been months since I had taken everything apart), have looked at other builds just to see the pictures of the piston positioning (which I have correct). Is there some part/spacer that goes under the top reinforcement bar? Am starting to question my sanity at this point.
 
Gents - I am doing this mod right now and have a quick question. There is a plastic "spacer" that inserts into the piece you would normally twist to tighten down the strut when the lift was up. Do I keep that think in or yank it. I just had everything rechromed and now that spacer provides a level of resistance against the smaller tube even if not screwed down at all. Thanks!!
 
I left that piece in just don`t tighten the collar down to tight. This is one of best mods.
JP
 

Users who are viewing this thread

Back
Top Bottom