Navigation
Install the app
How to install the app on iOS
Follow along with the video below to see how to install our site as a web app on your home screen.
Note: This feature may not be available in some browsers.
More options
Style variation
You are using an out of date browser. It may not display this or other websites correctly.
You should upgrade or use an alternative browser.
You should upgrade or use an alternative browser.
Frankie - '87 FJ-60 Refurbishment Plus a Few Mods
- Thread starter 60Works
- Start date
This site may earn a commission from merchant affiliate
links, including eBay, Amazon, Skimlinks, and others.
More options
Who Replied?- Thread starter
- #42
Great job dude... So the front belts that you got, those are OEM correct? Are they inertia belts or are they just the standard retractable?
Thanks, Greg. OEM, yes. The new belts allow the webbing to roll in and out as you move in the seat, like to adjust the radio, and lock down when you brake hard. I'm sure they would lock on acceleration too but with Land Cruisers that's never gonna happen.

Maybe for the V8 guys.
The back seat belts ratchet you down tighter and tighter with every bump. It's very annoying.
- Thread starter
- #43
Sorry for the delay in new pictures. Work's been killing me lately. I have to remind myself that hard work = more Cruiser parts.
The headliner seemed to have shrunk a bit, either from the washing or from the rubberized fabric contracting when not under tension, and I had to pull pretty hard towards the back. I pulled the hoops and clamped it for a few days then pulled again to get the wrinkles out and glue the edges.
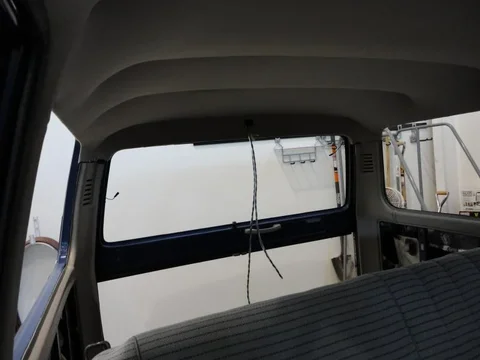
The window wasn't too bad to get in but the chrome trim was a major PITA. I hired a glass company to put in the windshield and they wouldn't touch the trim. On the dark blue I think the chrome looks good but on a white or tan Cruiser I would leave it off and save money, time, and frustration.
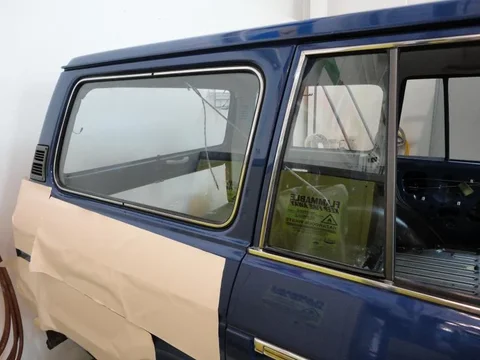


The headliner seemed to have shrunk a bit, either from the washing or from the rubberized fabric contracting when not under tension, and I had to pull pretty hard towards the back. I pulled the hoops and clamped it for a few days then pulled again to get the wrinkles out and glue the edges.

The window wasn't too bad to get in but the chrome trim was a major PITA. I hired a glass company to put in the windshield and they wouldn't touch the trim. On the dark blue I think the chrome looks good but on a white or tan Cruiser I would leave it off and save money, time, and frustration.

- Thread starter
- #44
While I was futzing with the headliner my helper was working on the heater. When she pulled it from Stinky it was stuck to the floor with an inch of melted candy pooled in the intake cup. It was really, really gross so she disassembled it and cleaned all the pieces.

Clean as new.

The heater lines had some surface rust so I cleaned them up and painted them.


Clean as new.

The heater lines had some surface rust so I cleaned them up and painted them.

- Thread starter
- #45
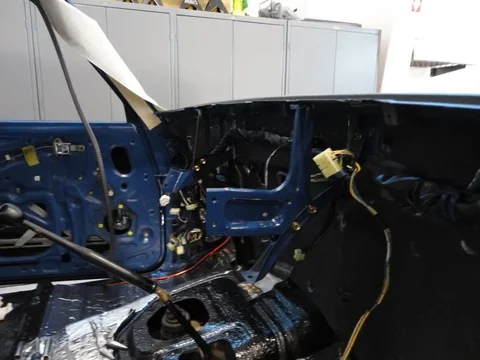
I added more sound block to the side panels, placing it around the interior struts. This was ordinary duct insulation from the local lumber yard. It's cheap and the last roll I used has held up for over a decade with no visible degradation.

I put the side panels up temporarily with only a few fasteners to get a sense of progress and to clear the shelves of parts before they got damaged.
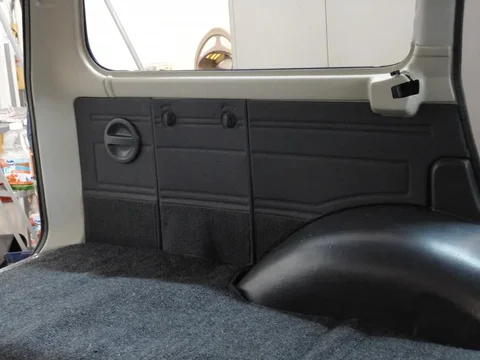
It's starting to look like a Land Cruiser again.


I put the side panels up temporarily with only a few fasteners to get a sense of progress and to clear the shelves of parts before they got damaged.

It's starting to look like a Land Cruiser again.

gregnash
Anal Retentive Analyst
Dude you attention to detail is inspiring... I am in the process of building new panels for my rear. Did you rebuild the original panels with new backing or did you find good replacement ones?
The cardboard in mine is completely shot so mine will necessitate a complete replacement but with less than $60 for all the materials so far (grey marine vinyl, 1/8" closed cell foam, and 4'x4'x1/4" sureply board) I am not complaining. Just hope that I can line up the holes properly when I do the nutcerts.
The cardboard in mine is completely shot so mine will necessitate a complete replacement but with less than $60 for all the materials so far (grey marine vinyl, 1/8" closed cell foam, and 4'x4'x1/4" sureply board) I am not complaining. Just hope that I can line up the holes properly when I do the nutcerts.
- Thread starter
- #47
Thank you, Greg. The side panels I used were in excellent shape. All I needed to do was clean them and replace some of the fasteners. If you are needing to replace yours, you might look into a set of WagonGear replacements or a set of take off's. You could probably use a router to match-cut new cardboard panels if your old set aren't totally destroyed and can be used as a template.
I had a local apholstery shop do that for the tailgate carpet onto an 1/8th inch thick plastic sheet. The plastic didn't work so well because it came off a roll and it had taken a round set. I still haven't gotten it flat enough to stay clipped.
I had a local apholstery shop do that for the tailgate carpet onto an 1/8th inch thick plastic sheet. The plastic didn't work so well because it came off a roll and it had taken a round set. I still haven't gotten it flat enough to stay clipped.
- Thread starter
- #48
- Thread starter
- #49
gregnash
Anal Retentive Analyst
Thanks for the info Jugg... I would love a pair of Kevin's panels but I have other stuff that I need to spend the money on at the moment, so maybe down the road, definitely getting a tailgate panel from him in the future for sure though.
Mine will be similar to what Reevesci did with his except I found 1/4"x4'x4' sheet of Sureply that was pretty rigid and cheap. I will line the back with sound dampener and then have the marine vinyl on the front. Will be a good little project for me and the misses.
Mine will be similar to what Reevesci did with his except I found 1/4"x4'x4' sheet of Sureply that was pretty rigid and cheap. I will line the back with sound dampener and then have the marine vinyl on the front. Will be a good little project for me and the misses.
bluehawk
Appalachia Cruisers
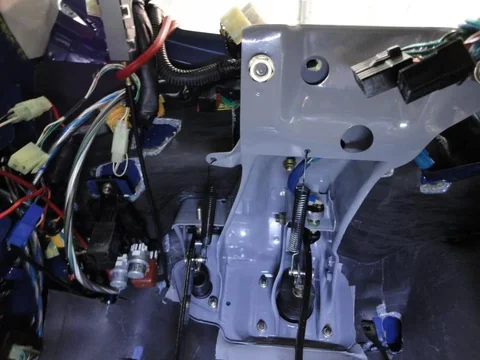
Installing the bucket helped hold up the wiring harness and insulation. As I mentioned before, getting the bucket holes to line up with too thick of insulation was a major pain.
View attachment 740952
View attachment 740953
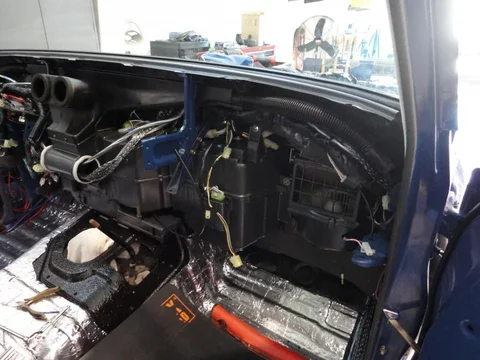
The blower, heater core, and AC installed.
View attachment 740954
Just took my heater, a/c unit and blower out and was wondering if you just cleaned yours up or painted them? Did you replace the foam pieces in each of the units? Thanks and your ride is looking awesome

- Thread starter
- #52
Thanks bluehawk. It's nice to get feedback.
I disassembled and cleaned everything with soap and water, no paint on the plastic. I replaced some of the foam gaskets. The light grey rings around the outputs to the side ducts are new. The foam donuts to the center vents was still intact. Most of it was in surprisingly good shape.
It's fun to put the badges back on. I cleaned and clear coated all the emblems.

Somewhen about this time the tail gate and lift gate returned from the paint shop. I put assembled them but didn't install them right away. The tail gate in particular would have been in the way until I was done in the cargo area.
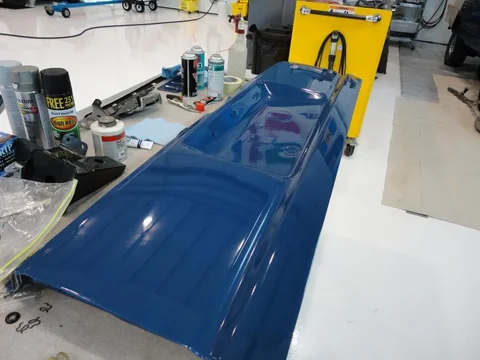
That bench was a little cluttered.


I disassembled and cleaned everything with soap and water, no paint on the plastic. I replaced some of the foam gaskets. The light grey rings around the outputs to the side ducts are new. The foam donuts to the center vents was still intact. Most of it was in surprisingly good shape.
It's fun to put the badges back on. I cleaned and clear coated all the emblems.

Somewhen about this time the tail gate and lift gate returned from the paint shop. I put assembled them but didn't install them right away. The tail gate in particular would have been in the way until I was done in the cargo area.

That bench was a little cluttered.

gregnash
Anal Retentive Analyst
Looking awesome dude as always. How hard was it to get the emblems out intact?
- Joined
- Jul 22, 2012
- Threads
- 584
- Messages
- 16,437
- Location
- Winter Park, Florida
- Website
- www.cruisermatts.com
go in through the taillight housing, push them out
Last edited:
- Thread starter
- #57
Thanks, MAN.
The emblems come off fairly easily, Greg. The pins sticking through the body are flat on 2 sides (the vertical sides I think, it's been a while). The cone shaped 'nut' that snaps onto the pin is flexible. Pinch it gently with angled, needle nosed pliers and it releases, no need to twist it. If you're careful, they can be reused.
The tailgate badge was the hardest to access.
- Thread starter
- #58
The wheel wells and fenders arrived from the painters and the engine compartment quickly started to take shape. The donor truck had a nearly new OEM radiator and Juggernaught's had a leak so a little musical radiators took place, moving Stinky's to Jugg, Rusty's to Frankie, and Jugg's to the recycler. There was a similar dance with alternators.

I had the windshield, hatch, and quarter glass installed by an autoglass company. Those guys made it look easy but, as I mentioned, wouldn't touch the chrome trim.

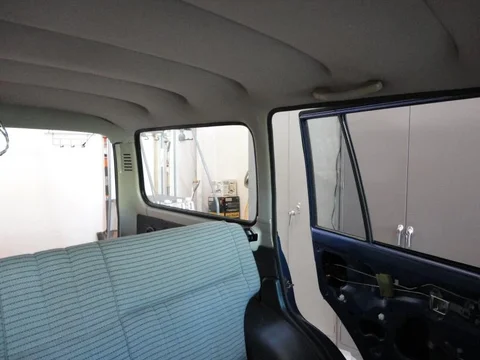


I had the windshield, hatch, and quarter glass installed by an autoglass company. Those guys made it look easy but, as I mentioned, wouldn't touch the chrome trim.


Last edited:
- Thread starter
- #59
I chose to stick with the OEM exhaust. It costs more but it bolts right in and replacements always fit.
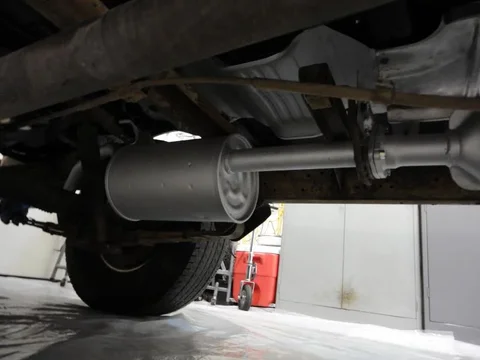
Yes, I painted the exhaust... Does that mean I need therapy?
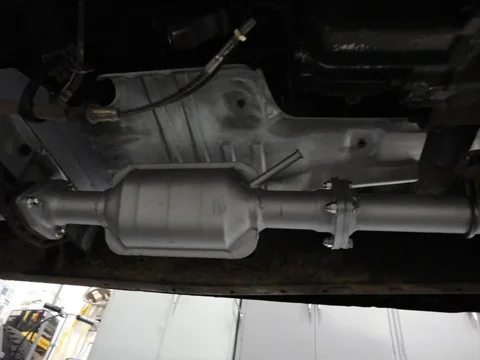
SOR's bolt in replacement cat. Fit was good except for the odd choice of angle with the sensor probe.
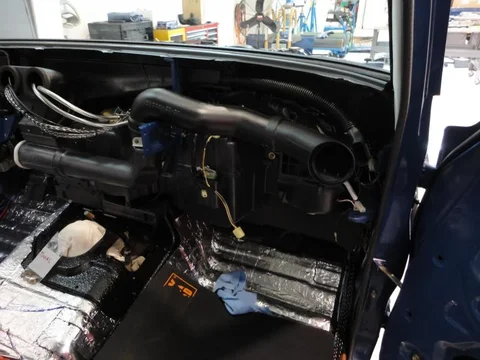
For those of you wondering how the ducts are routed behind your dash.


Yes, I painted the exhaust... Does that mean I need therapy?

SOR's bolt in replacement cat. Fit was good except for the odd choice of angle with the sensor probe.

For those of you wondering how the ducts are routed behind your dash.

My CAT from SOR (Kalifornia version) fits differently... 
Great looking build, btw.


Great looking build, btw.
Similar threads
- Replies
- 9
- Views
- 684
Users who are viewing this thread
Total: 1 (members: 0, guests: 1)

