Builds Family haulin' (2 Viewers)

This site may earn a commission from merchant affiliate
links, including eBay, Amazon, Skimlinks, and others.

I thought I needed the input for mock up but I guess I don't. The case is apart with the bearing retainer removed. Since you have set one up Mace I think you know what you are talking about, thanks for the heads up.

I did order a 32 spline input to match my tranny output and was planning on leaving the 203 chunk apart until I got that. It's suppose to be here by the week's end.
 
Having a input to make sure the bearing retainer is centered is idea. BUt it does not have to be spline specific..

Make sure that the adapter and the Bearing retainer aer the same size. I have noticed a slight difference between some of the ones I have played with (genreally ferd vs chevy)

You will also want to work on plugging all of the unnecessary holes and making a stop for the lower gear shaft..
 
I did notice that the threaded holes went all the way through and I was thinking of using some of those holes to mount a plate with the notch cut out that will retain the lower gear shaft. Do I need to worry about sealing the shaft?
 
not the shaft, it has an O ring. but you do need to anchor it.
 
Dude .. if you plan run 33" - 35" I though tyou have no issues with 3.70 .. actually with 4.11 you gonna be in the Hi rpm range .. over 2500 - 3000 rpm .. and you dn't really need it ..
 
I don't think I could justify throwing this thread in the hardcore section if I were going to run 33s. I do have a set of 38s that I'm going to shoe-horn under it. ;p I ran the rpm calculator and with my overdrive and 4.11 ratio I'll be spinning about 1800 rpm at 65mph which is a sweet spot for the 4bt. Yeah, 33s would be too small and if I go down in tire size it will only be to a 37. I think 37s fit a SOA just right on an FJ60.

Funny side note: My mom is visiting us and she is not into the whole lifted truck thing and when we passed a F350 superduty with a big lift she said "I just don't like the look of that, the tires are too SMALL". Right then she made me happy.

Tapage I noticed how your front fenders are trimmed and I like the line they follow. Since I'm trying to keep it from getting too high I know I'll be trimming fenders and I thought yours were done well. For the rears since I'm moving the axle back just a little bit I am thinking I will have to trim the body mount bracket attached to the frame so the tire doesn't hit it when compressing the suspension. Has anyone else running big meats on an FJ60 run into that bracket?
 
What it's the OD number for your auto tranny .. ?

Point taken .. you are right with 38" or at least 37" ( that really have 37 inche ) you would be in the nice spot with the 4.11

Why move the rear axle back . ?

Actually I leave my rear axle in the factory place and have no rub issues with my tires .. and don't need to do any fender cut yet ..

At front was obligatory coz with the SR I hit the fender at each flex :frown:
 
ratios for the 4L80e: 1st-2.48 2nd-1.48 3rd-1.00 4th-.75

I was going to move the rear axle back 1-3 inches because I'm worried the tire will hit the front of the fender when stuffing plus it would help my departure angle a little. So I figured it would be easier to cut the rear of the fender since the front is where the door is and would be harder to cut. I plan on cutting the quarter panels and that might be enough for clearance when stuffing the tire but the body mount looks like it will be real close. However, it sounds like I might not have to touch it. Just thinking ahead. I won't cut anything until I do a flex test once it's back together.
 
Actually I'm always thinking in cut my rear fenders .. and as you mention was much more simple cut rear than front .. with the door to close there.

Someday I will do to keep it match with the front fenders .. and you have grear OD in the 4L80E much more than I have in my H55F ..
 
I am now the father of two. My boy was born last sunday and everything was good. All I have to say is that an Epidural makes the process smoother for everyone :). I was able to get some stuff done before he came so I'll post that stuff.

Costco has a pallet of these for $50 so I picked one up for a future on-board air set-up.

P7020023.JPG


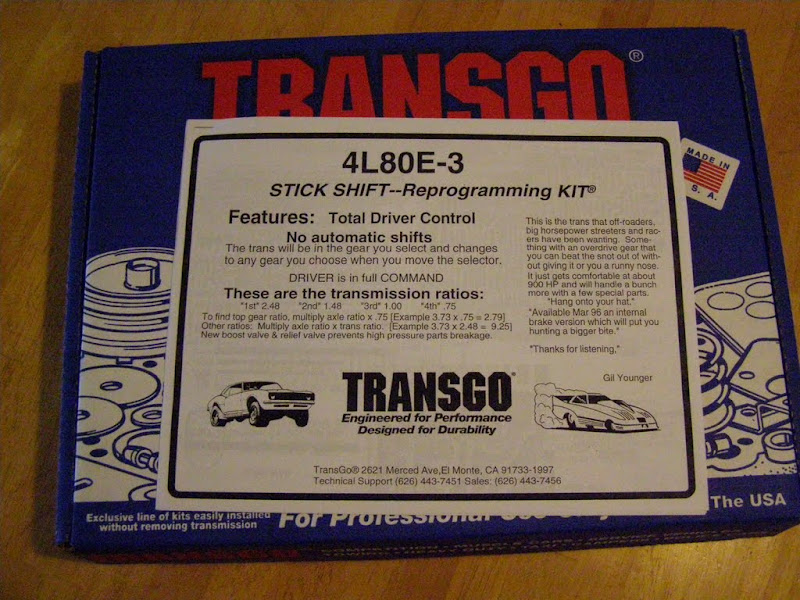
I decided to go with a 4L80e because of the strength, the overdrive, and the fact that it will bolt straight on to the chevy adapter on the back of my 4bt. I did want an auto this time but the controllers were pretty spendy. Then I read about a trans-go kit that will allow full control of the 4L80e without a computer. I didn't find much on the web about it (drivability, shift quality, etc.) but I decided to go with it anyways (the kit). I feel I'll get the best of both worlds, stays in the gear I choose like a manual but no clutch to deal with on the technical wheeling stuff. It will cushion my drive line some and absorb some of the massive torque built low in the rpm range. I'll be wiring in the lock-up on the torque converter to lock in any gear I want which ='s engine braking and manual-like efficency.

Here is the kit

P7020021.JPG


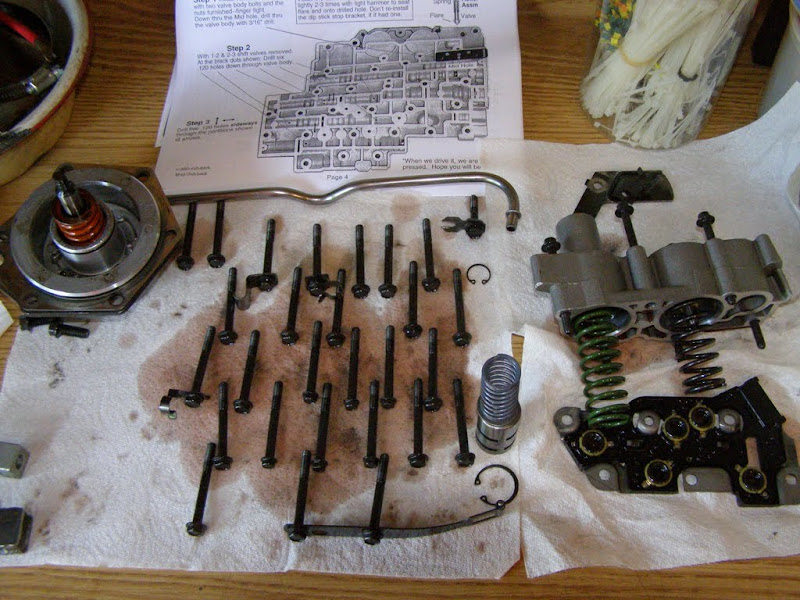
I read that instruction booklet 5 times since I've never worked on an auto before. The instructions started to make sense and once I got into it, it wasn't so bad.
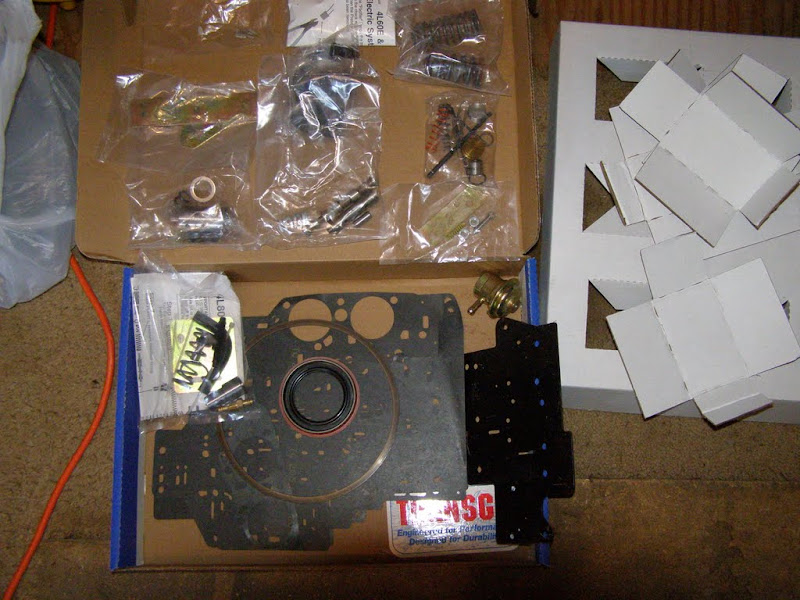
Inside the box

P7050040.JPG


I started to separate the valve body and kept everything in order so I knew which bolts went where.

P7050041.JPG


Then I pulled the pump out since there are some internal mods you can make with the kit.

P7050042.JPG


Back side of the pump

P7050043.JPG


Front side of the pump

P7050044.JPG


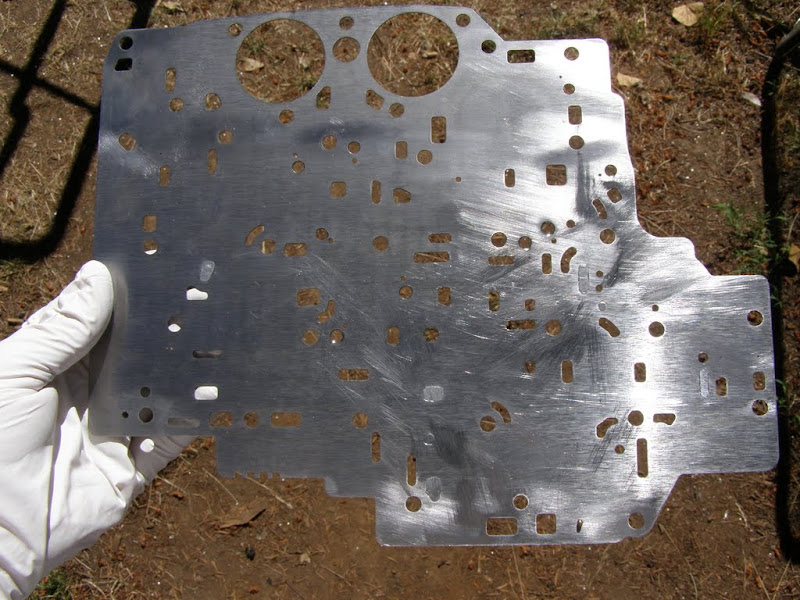
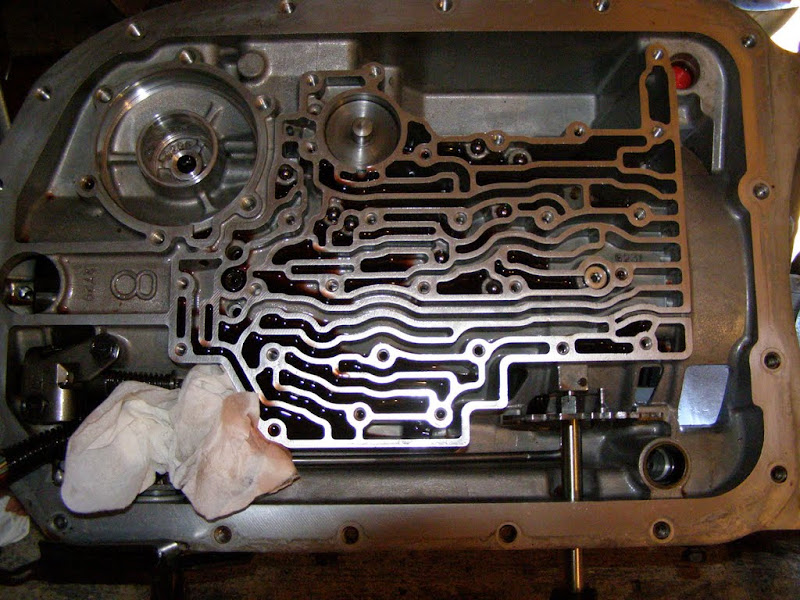
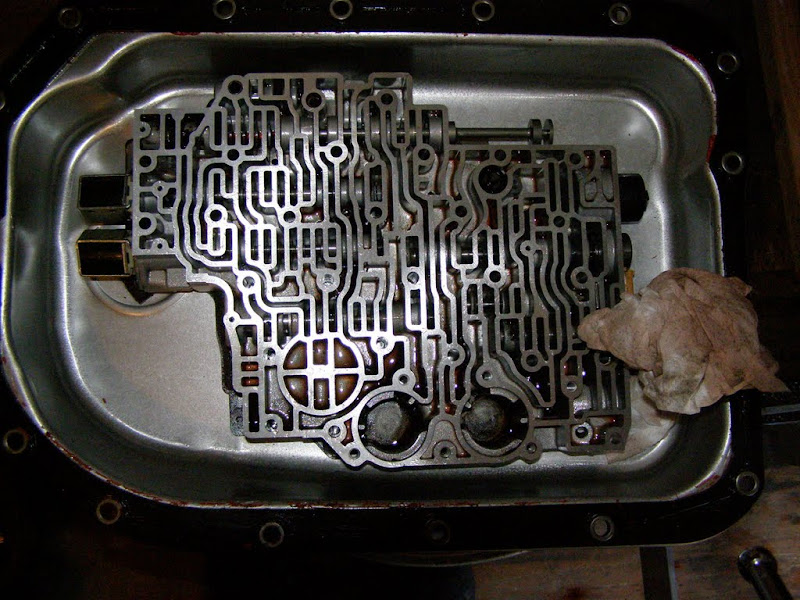
With the tranny sitting upright (like in a vehicle) this is the bottom of the top half of the valve body.

P7050045.JPG


With tranny upright, top of the bottom half of the valve body

P7050046.JPG


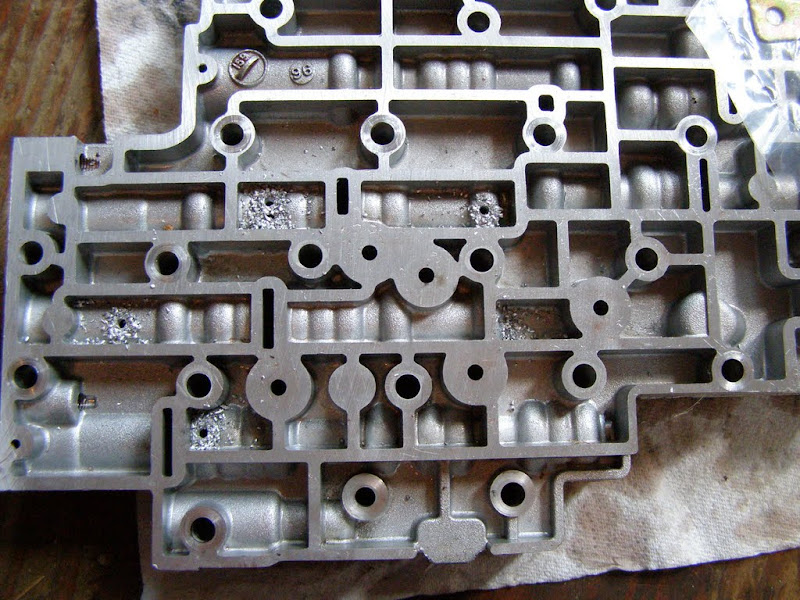
No turning back now! The kit requires some drilling to the valve body to modify the flow.

P7050047.JPG


The separator plate that goes between the two halves of the valve body. Had to plug in some holes and file them smooth.

P7060049.JPG


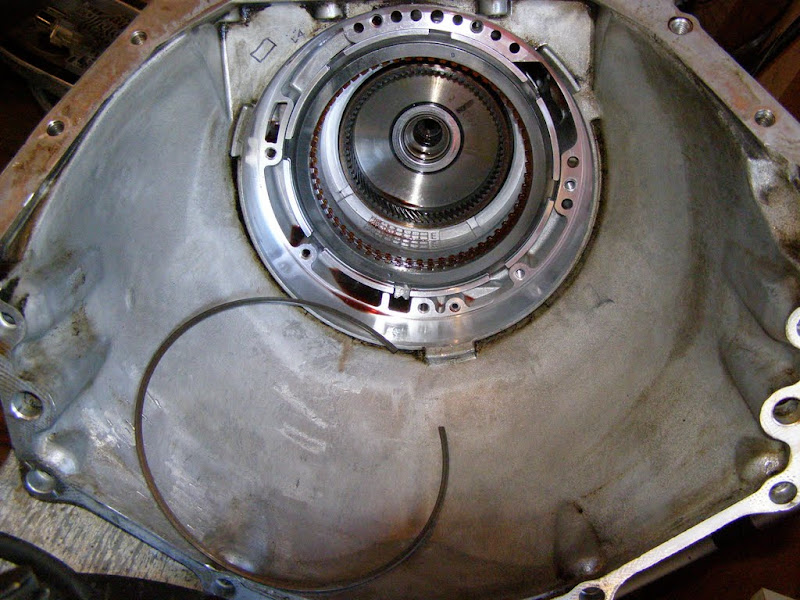
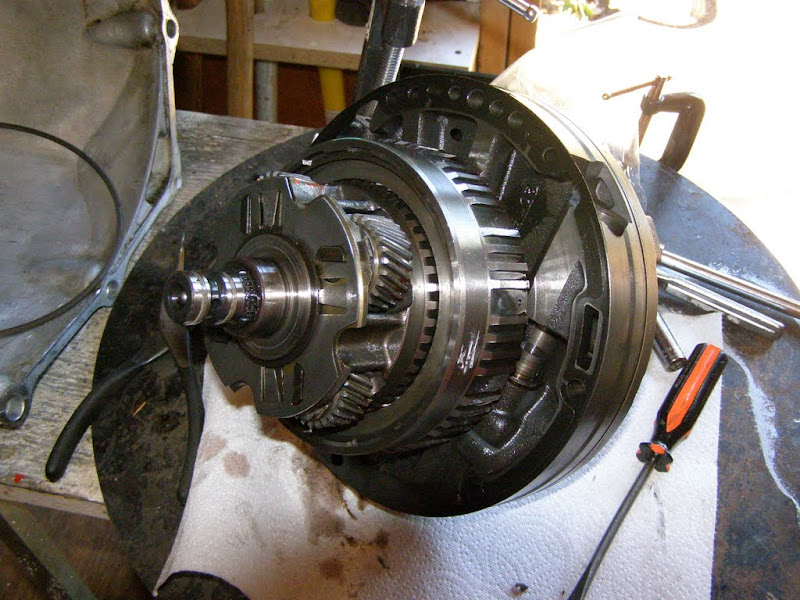
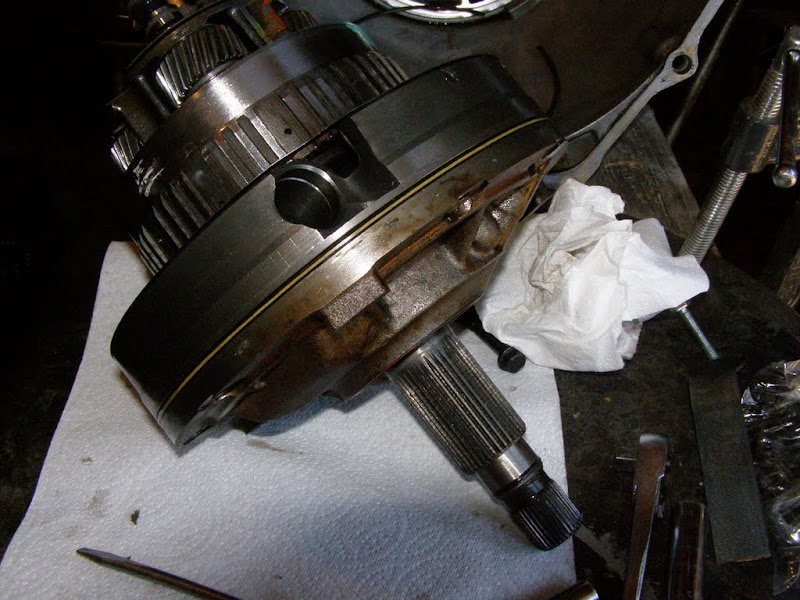
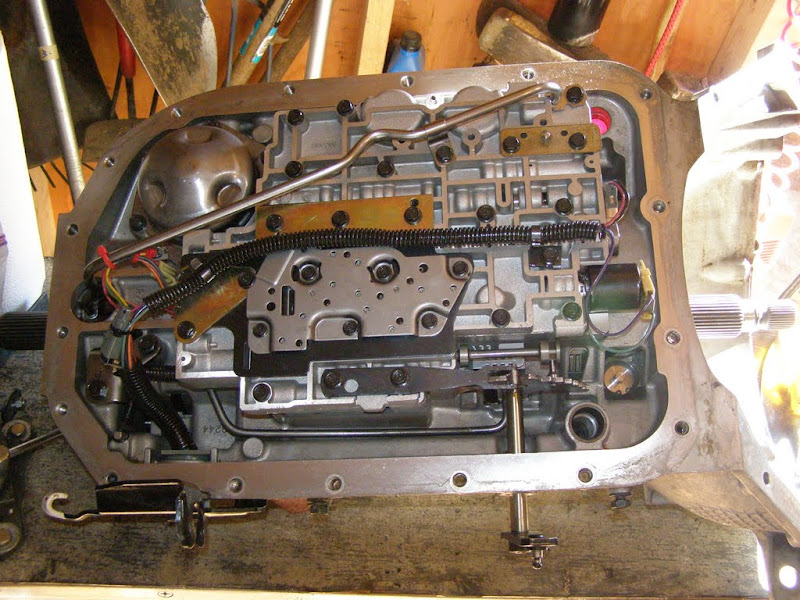
I found some the friction plates behind the pump that looked to be worn out so I changed those out. I didn't dig any deeper and while the wise choice would be to just pull out the internal chunk and rebuild it I didn't want to get into it that far. I did buy a rebuild manual and figure I'll be do a rebuild down the road after studying the manual. I'm just hoping there is life left in the tranny. This is one of the unfortunate compromises to get this thing back on the road sooner. So I cleaned up the valve bodies, got rid of the shavings and old tranny fluid still sitting in the channels and put it back together with some stiffener plates. I hooked up the unit that controls the torque converter lock-up since I'll need that. Overall it went together fine. I did have some roller bearings come out on the overdrive planetary that I had to get back in but once I figured out the trick it just took a little time.

Things back together

P7060051.JPG


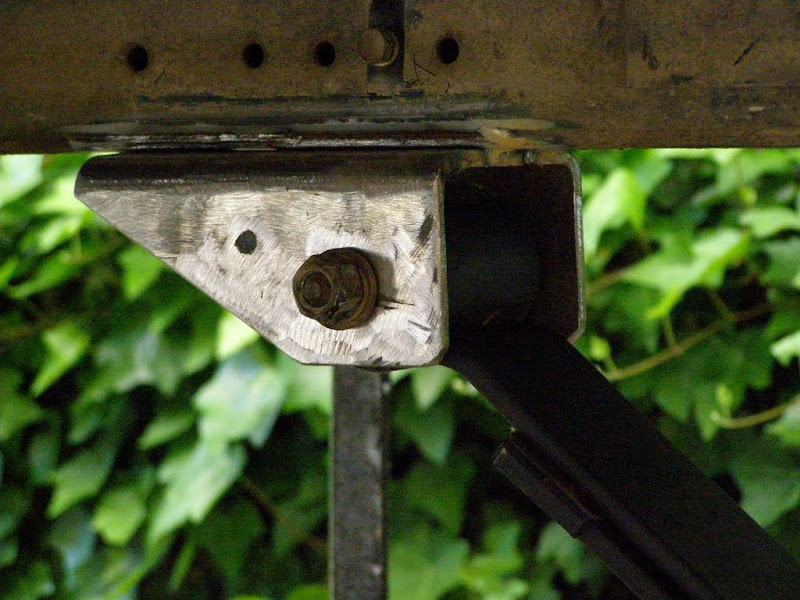
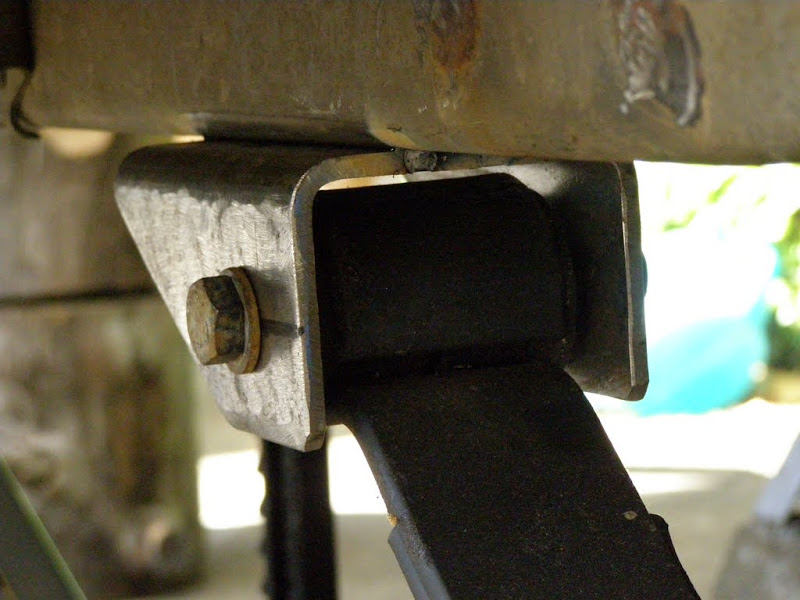
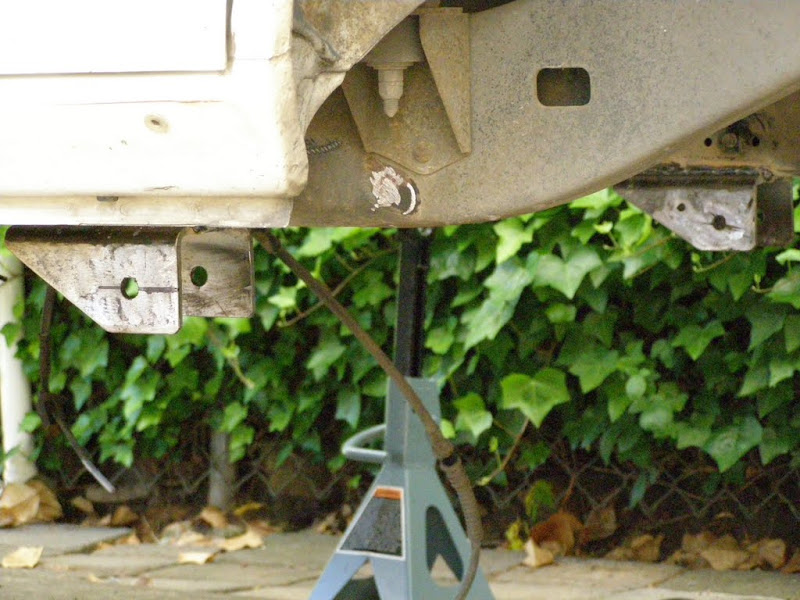
Picked up a 9/16 drill for the holes on the rear spring mounts, drilled them, and after aligning them on the frame I tacked them on.

Passenger side

P7070052.JPG


Driver side

P7070053.JPG


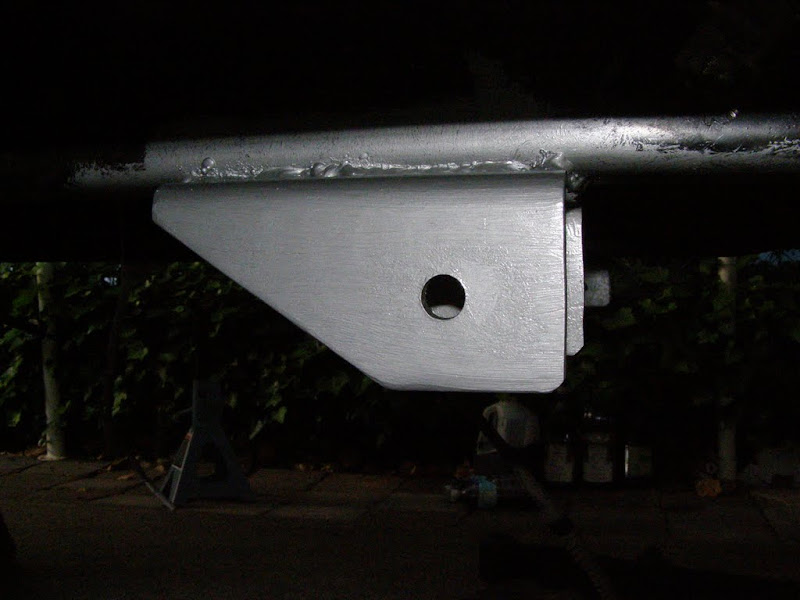
After double checking I burned them into the frame.

P7070055.JPG


P7070058.JPG


Threw some paint on them. I think I'll throw a coat of black paint over the whole frame once I'm done grinding off old bracket and welding on new ones.

P7070059.JPG


That's it for now.
 
Last edited:
thanks Tapage. I always took things apart when I was a kid and really I'm still just tinkering with my toys. It just costs more!
 
thanks Tapage. I always took things apart when I was a kid and really I'm still just tinkering with my toys. It just costs more!

I like to play with toys also .. and "wiring" it's my best but auto trannys .. mmm not :eek: at least if I do, when shift it in D and push the pedal the rig with luck run backwards :D
 
touche.,cant wait to get mine home though... I think I could have got it done just as fast as they did :doh:. No complaints though they're doing a good job and I just dont have the room (or time) to take on the projects that I had done. I still got some fenders to cut, on board air to install (the york), finish my half doors, fab my rear bumper, and then send it over to Metal tech for a cage!
 
I still got some fenders to cut, on board air to install (the york), finish my half doors, fab my rear bumper, and then send it over to Metal tech for a cage!

so what your saying is another "2-3 weeks" right? ;p
 

Users who are viewing this thread

Back
Top Bottom