Barn Rebuild: The family heirloom

This site may earn a commission from merchant affiliate
links, including eBay, Amazon, Skimlinks, and others.

Soon I have to decide if I want original 9mm brakes, or a full conversion to un-boosted 10mm brakes from a later vintage. I'm leaning towards the newer parts for serviceability and parts availability.

I had this dilemma too. I found a dual circuit Aisin master from a 90ish Camry. 10 bucks on eBay but probably even less at the pick and pull JY. You still have the 9mm threads in the back of your wheel cylinders of course but you can get an adapter at autozone that goes to m10x1. It is probably simplest at the end of the day to salvage 16 of the m9x1 nuts from your original system for the wheel cylinders and switch to 10 mm between the MC and the flexible brake lines.
 
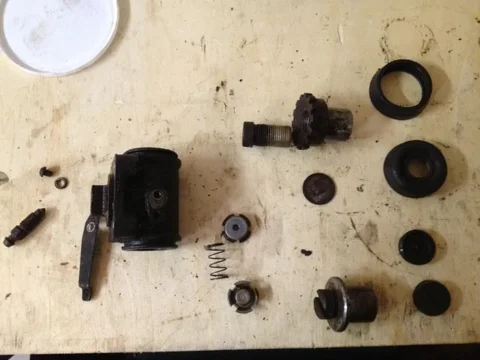
cleaning

Yes, I used a 1" wood chisel to scrape off all the stuff, then the wire brush, then the degreaser, then the parts washer, then I found this thread, and did all of that again + the heavy-duty oven cleaner....https://forum.ih8mud.com/40-55-series-tech/337328-how-clean-dirty-transmission-transfer-case.html

Just don't let it set on there for hours, because the sodium bicarbonate (baking soda) with water will react with the aluminum...I am pretty sure it is diluted enough that it doesn't do any harm (maybe make the finish less shiny) but it eats through that grease/baked on mud/clay pretty good!!!!
8513885809_16f7be19c1.jpg


if you look towards the end of my build thread you can see my process, it worked well, now I am waiting on gaskets to bolt it all back together....
 
I started assembling the suspension today. I also ordered some m9x1 tube nuts and 25 feet of high nickel steel tubing from my local hydraulic specialty shop.
image-3366305820.webp
 
Who rebuilt the head ? ,getting ready to pull the one in the 1979 fj40. Thanks, Mike
 
Brooks Elliott in Austin. I was living there when I had the work done. Now it is sitting in a bag, waiting for me to get around to having the block measured so I can decide what to do with it. I guess a full rebuild is in order, but to hone or to bore... that is the $1000 question.

His work was top notch. He re-sleeved all the valve guides with bronze liners, installed all hardened exhaust seats, saved the intake valves, and modified SBC exhaust valves to have new harder valves for unleaded gas. New springs, shims, seals, freeze plugs, etc. were also added at this time.

One caveat (other than the fact that he is not local to you) he is slow. If you want this engine running before the month is over, don't bother.
 
image-169457996.webp

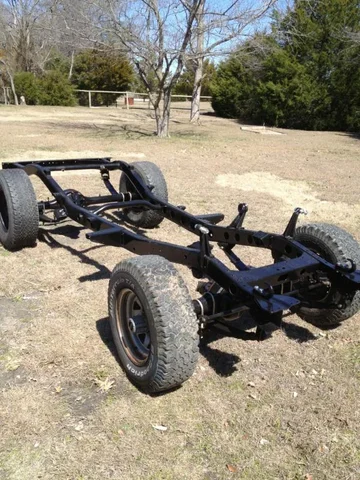
Pieces are starting to come together here.


image-1514188130.webp

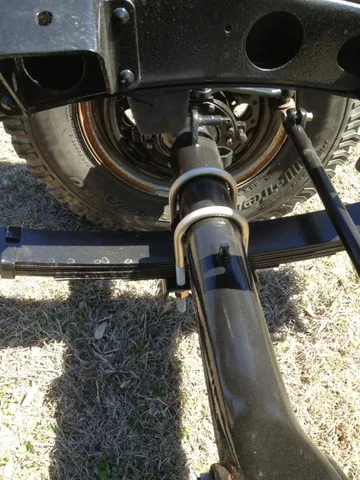
Look at this image. Do I need to flip my front springs around? I set up all springs so the long side was mounted to the spring hangers and the short side went to the shackles. The front bump stops do not align with the axles. Do I need to flip?
image-329204139.webp
image-169457996.webp
image-1514188130.webp
 
Thanks.

I have the rear springs set with long side front and short to rear also. They are correct? The alignment with the bump stops in closer, but not perfectly square.
 
The springs should be set with the military wrap at the frame hanger, are they not? Remember the axle travels in an arc as the leaf spring compresses, so it doesn't necessarily have to sit square to the bump stop when stationary, just as long as it lands on the bump stop when compressed.
 
I flipped the fronts and all looks better. Military wrap is a new term for me. Is that the loop on the second leaf that wraps around the bushing eyelet in the first leaf?
 
Heirloom said:
I flipped the fronts and all looks better. Military wrap is a new term for me. Is that the loop on the second leaf that wraps around the bushing eyelet in the first leaf?

Yip. It's there as a backup in case the primary spring with the bushings housed in it breaks.
 
It seems that the rears are backwards as well, given the info here. I'll swap them tomorrow.

Also, despite my work week almost over, my parts have arrived to start "spring brakes".

image-2094704705.webp

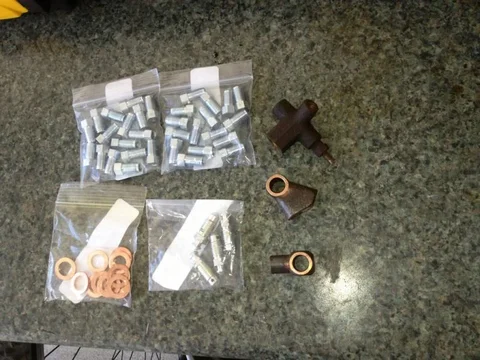
What you are looking at are m9x1 tube nuts, washers for the banjos, and new bleeder screws. I also have 25 feet of hard line, 6 rebuild kits for the slave cylinders, two new wheel cylinders, and a pile of recently wire-wheeled and repainted brake parts. Tomorrow will be productive. Having time off work is expensive!

Question: any recommendations on double flaring tools? I need to make lines soon (may start tomorrow) and I don't currently own the tool. I am inclined to use the loaner from Autozone or Oreilley's if available, but don't want trouble from bad tools. If I buy the tool kit, budget will be $70 or less (no Rigid or Mastercool). Any experience out there?
image-2094704705.webp
 
I just got an OTC double flare kit from Amazon today, $27. Tried my 1st ever double flare on a piece of junk tubing and was successful.
 
Thanks for the input, guys. If the less expensive "two bars and wing nuts" double flare kits are working for you, I feel better about using them. My previous experience with such a tool was met with less desirable results. I think that instance is due to a super-cheap tool and more difficult tubing material, though.
 
I use a regular one , if it works for natural gas it will work on cruisers. Mike
 
Best one I've used to date for double flares on brake line is from Matco , theirs uses a locking slot that centers the u-frame over the die to keep on-center to the brake line unlike the other brands . This prevents the old Blue-Point type flaring tool misalignment and resulting cracked flare ends .
Had mine over 10yrs now, never had one flare that leaked or had any of the dies break either .
Sarge
 

Users who are viewing this thread

Back
Top Bottom