Barn Rebuild: The family heirloom

This site may earn a commission from merchant affiliate
links, including eBay, Amazon, Skimlinks, and others.

Yes/no

I was a professional wrench for an independent shop for the first 3-4 years out of high school. I did everything there except full overhauls.

What that means is that this is my first foray into completely tearing apart and reassembling the rotating parts of an automobile engine, but I'm not exactly diving into the deep end without a few swim lessons. I've been through a few top-end rebuilds and some minor bottom-end repairs.

I have done a few complete overhauls on small engines, but a Briggs and Stratton engine requires a slightly lower level of competency, IMHO. I'm not counting that.

Well, I'm at the recognizing-parts-and-their-names stage. Knowing what they are and where they go, and some of the tricks can be assembled into a full Teardown. Thanks for documenting for the rest of us.
 
Well, I'm at the recognizing-parts-and-their-names stage. Knowing what they are and where they go, and some of the tricks can be assembled into a full Teardown. Thanks for documenting for the rest of us.

Tear-down is not the problem. I was a part puller for an auto salvage lot in high school.
 
Great write up on the rebuild! :beer: I'm gonna have to copy and print out your engine and u joint rebuild when I get to doing them. Thanks for all the detail and pics for those of us who've never tackled such a thing!

I'm asumming you're rebuilding the engine back to factory specs, did you shave the head or any other engine mods?

Best regards, ty
:beer:

when you get done, drive her up to the razorback ramble so we can all gawk in person.

Factory specification engine build. I think the cylinder head was resurfaced, but the machinist said it was straight enough that he barely took off any material at all.

I was able to go with all standard size parts and bearings. This engine will be about as stock as a modern rebuild can be, excepting the hardened exhaust valves and seats.


Family history: this vehicle is inherited from the maternal side of my family. This lineage gives me my "do it yourself" attitude and resourcefulness when I have limited supplies available.

My paternal side is the side that encourages attention to detail, getting it right the first time, and patience.

This means that my uncle was the type of guy that, stuck in the mountains with a hot engine, would just get water from the river for his radiator. Also, he would not be the type to go back and drain the cooling system when he got home to refill with distilled water and coolant.

Long story short, I need thermostat housings for a 1958-1967 F135. Upper and lower. Mine are so corroded that the gasket surfaces allow light through. I already posted in the MUD classifieds and in the LSLC Dallas clubhouse.

#16 and #17 in the picture
cooling system components.webp
 
hi, I have a thermostat housing that I just swapped out of my 1970 1f that might fit. It was leaking and I had one from a 2F i tore down a year or so ago. The problem with it is that the bolts holding the two halves snapped off so you would have to drill them out to pull it apart. It might be a PITA, but i can send it down to you if you are interested.

regards, ty
:beer:

Can you post a picture of the condition? Thanks for posting.

I tinkered with my thermostat housings today. Using a large, flat, fine cut file I was able to carefully resurface the housings a bit. They aren't in perfect shape, but they might seal. I'm keeping mine as a back-up plan.
 
here they be. you can see where the heads snapped off the bolts. I'm outta pocket next week so if you want it, i'll have to send it to you the week after.
hope all is well, ty
:beer:
thermo1.webp
thermo2.webp
thermo3.webp
 
Thanks for the pictures. The top half is different than mine. I'll have to get a proper picture to show what I am dealing with here, but my upper half looks to be about twice as tall as the one you have pictured.
 
Well, I was going to detail the installation of the cylinder head, but my camera malfunctioned.

I got a couple pics of the rocker assembly.


image-19791941.webp

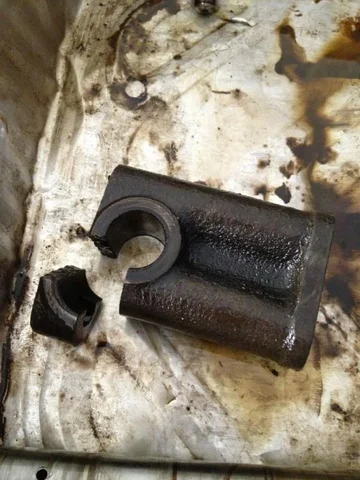
Make sure you keep track of what rocker goes where. They are not all the same. I had to disassemble to clean the pieces, but also I had a broken tower to replace.


image-3779363928.webp

I reassembled and installed both assemblies to the cylinder head. You don't have to worry about the little spring-loaded oil fitting until the end. Make sure you installed the rocker shaft correctly so it oils appropriately. Open to the center with oil holes dripping to the bottom.


image-1594768403.webp


image-826216966.webp


image-645478944.webp
image-19791941.webp
image-3779363928.webp
image-1594768403.webp
image-826216966.webp
image-645478944.webp
 
There is a hard line joining the oil pump to the oil passages in the block. In order to get this line installed, I had to remove the 4 Phillips bolts that hold the oil pump cover. Insert the line, get everything started, tighten the pump cover bolts first, then the fittings for the oil line second.

Be careful. The block has 2 threaded holes beside each other. One is for the pressure line, one is only a return port for the pressure bypass valve in the regulator. Accidentally running oil pressure to the wrong port would lead to no oil going anywhere it is needed.
image-4214279438.webp
 
I don't have any great pictures today. I was having decreased motivation for productivity.

I did make a wooden stand to rest the engine on for transport to the barn, cleaned/painted the flywheel, and inspected my clutch parts. Bearings are shot (expected). Friction disk is just flush with the rivets. Super close to gouging the flywheel, but didn't. Pressure plate is ok, but very dirty. I'll probably order the kit and only reuse the flywheel.

A side note. Other than 1-ton and bigger Diesel engines, I have never experienced a heavier flywheel. I'm betting this will be hard to stall when all is said and done.

I spent the rest of the day fixing my father's garden tractor. He's been mowing around his house with my manual reel mower the last few weeks, then brush-hogging the rest. The "turf" has looked better.
 
You almost have to work at it to stall an F Series engine. When I drive my uncle's 911 after driving my 40 I have to really think about keeping the RPMs up as that thing feels like it wants to stall by comparison.
 
Nice build! I read this thread some months ago, but have been off mud for a few months. wow you moving fast. Keep it up! Can I get a chemistry lesson about your parts prep and paint adhesion? Specifically the phosphoric acid part.

I also painted the transmission case. De-gunked with diesel. De-dieseled with simple green. De-greened with denatured alcohol and compressed air. I primed with rattle can rust reformer (the phosphoric acid preps the metal for adhesion) and painted to match the transfer case and engine block.

[/QUOTE]

What the Truck?
 
One of the properties of an acid is that it donates protons to chemical reactions.

Rust is the result of iron atoms losing electrons (oxidation) to become positive ions (cations). These iron cations attract negative oxygen ions (anions) to form iron (III) oxide, AKA rust.

Acids, by donating protons to solutions, pull those oxygen ions out of the iron (III) oxide and replace those with the a anion component of the acid. In the case of phosphoric acid, this is phosphate. The reaction between rust and phosphoric acid results in formation of water and iron (II) phosphate and iron (III) phosphate.

Leaving iron phosphate on the metal surface gives a mildly protective surface. If you were to dip the part in acid, the iron phosphate stays in solution, and you pull raw steel from the tub (slightly less matter at this point).

Next post will be about etching.
 
Another property of acids is reactivity with metallic atoms and ions. Many metal prep products use phosphoric acid because it is kind of in the middle in terms of acidity.

To test acid strength, I once took two rusty land cruiser bolts and dropped them into two different acids. No pics, sorry. One bolt went into acetic acid (gives vinegar that distinctive flavor). The other went into fairly concentrated sulfuric acid. After 5 minutes, there was no noticeable change in the vinegar treatment. The sulfuric acid had cleaned the bolt of rust. The threads were worthless, because the combination of rust and acid had eaten the bolt.

After a week, the vinegar bolt was clean, albeit bad threads from rust damage. The sulfuric acid solution contained few solid particles at all. It had completely reacted with the matter that once made up the bolt.

Suffice to say, phosphoric acid is strong enough to etch metal and leave a textured surface for paint adhesion. It is weak enough that there is not a strong chance of disfiguring your classic vehicle.

Attached is a picture of what used to be a pretty rusty air cleaner bracket that I dipped in phosphoric acid (in the form of concrete etcher/rust stain remover) for about 1.5 hours. There was a 45 minute soak, followed by wire brush to remove the loosened stuff, followed by another 45 minutes. Notice how the surface looks more or less similar in texture to a sand-blasted part. This took longer, but I had no sand in my shorts, so I'm happy.

9348533106_eae44b690b_c.jpg
 
Last edited:
Today, I made it out to the barn to put a little sweat equity in the Land Cruiser. I dug through bins of parts to find some brackets, bolts, and bits.

Then I started cleaning, painting, organizing, and assembling stuff. Let's add photos, so I can save a few thousand words from this post.

I dug out the fuel pump. Looks like oldie-but-goldie type with manual primer. I bench tested it with my fingers over the inlet and outlet to find out that it might still work! Armed with excitement, I used some WD-40 and a brass-wire brush to gently clean it up. Not Concourse d'Elegance quality cleaning job here, but I can live with it.

9345748377_200d13cb51_c.jpg


Then, I sorted out some bolts. When my clutch parts arrive, I want to be ready to assemble the drivetrain on the chassis. I found motor mount bolts and a few others that go in the block.

IMPORTANT: The threads for the motor mounts are M10x1.25 JIS bolts. For whatever reason, the block is threaded M10X1.50 for the alternator brackets. This confused me a bit, but luckily I figured it out before getting out my M10x1.25 tap and chasing threads.

9345747333_b44d341d80_c.jpg


I found some clean bolts that looked like they should be the correct ones for the side cover. I assembled with my new SOR gasket. I did not use any silicon to provide additional sealing. I hope I don't need to.

9345743823_577f07cfd6_c.jpg


I cleaned my oil pan. The contents were so nasty that my parts washer solvent is ruined. For that matter, the pump is clogged. I need to remedy that soon. After getting the 1-2 mm thick sludge layer out in the parts washer, I still had another stubborn gritty layer lining the interior of the pan yet. This was rectified with a gasoline soaked rag and elbow grease. The exterior of the pan was sand blasted. The crotch between the skid plate and the pan was still dirty, so I picked at it until I was fed up. I painted of the rest and installed using new zinc-plated bolts. Pretty, huh?

9345742635_560846c5a9_b.jpg


I don't know why my camera was taking grainy pictures. I am not a very good camera handler or caretaker. That may be a major contributor to the picture quality.

Tip for installing old-fashioned gaskets:
Preface: Modern gaskets with wire reinforcements are great. They are reusable and can handle apes who over-torque everything. The silicon is pliable for long periods of time and seals imperfect surfaces admirably.

I like the old-school sometimes. Maybe it is misguided nostalgia (you are in the 40 section of MUD, by the way), but I think old soft cork gaskets are great. The new version of cork that almost seems semi-synthetic is cool, too. Flimsy rubber gaskets are not in my favor. The biggest reason I see for fresh cork gaskets leaking are from over-torquing. The trick is to watch the gasket as you tighten your fastener.

Tighten the fastener until you feel resistance at the gasket. The is where it starts compressing. Add just enough torque that you begin to see the gasket swell out of the gap it fills. If you get enough gasket displacement that it distorts, you just ruined the gasket. When finished, there should be the faintest bulge at each bolt when looking from above. Looking from the side, the gasket should be linear, not wavy. Wavy is distorted and over-tightened.

9348529790_636887ec6f_b.jpg


The alternator bracket should be installed before the motor mount, because it is easier that way.

9348527282_fd75180e62_b.jpg


The shorter motor mount goes on the driver side (with the alternator bracket).

9348524856_93c5f1f612_b.jpg


The longer motor mount goes on the other side.

9348526094_4d6b31ee13_b.jpg


And finally, I put on the valve cover, just to see what it would look like (and to keep dust out of the motor). Valve cover got new zinc nuts for style points.

9345735339_67e10de5b4_b.jpg


I'll try to figure out what happened to my camera so I can take better pictures next time.
 
Thanks for the chemistry lesson! That removed all the rust from my brain matter! So where do I get the phosphoric acid? Is that the same acid that's in concrete etchers? I also saw that Jadcruiser had used an acid to clean his plastic washer and radiator bottle to near perfect coloring. I can't remember what acid he used or if it was even available here in the USA. He is located in Mexico. Any ideas on what to use to restore the plastic bottles?


As for cork gaskets and Ape like tightening...........I have no idea what you are talking about. :)

What the Truck?
 
Read the back of the label to be sure, but most concrete etchers contain phosphoric, and are available at your local hardware/paint supplier or home improvement store. Muriatic acid (sulfuric) can be found at your local pool supply or home improvement store. Acetic acid is the cheapest... buy white vinegar at the grocery. Usually a gallon is $3-4 in my neck of the woods.

If you are trying to clean a plastic bottle, I would try vinegar first. That is weak and cheap.
 
Today was productive. I started by strapping my engine up to the hoist and removing the engine stand. This way, I could start to assemble the bell housing and new clutch.

First, I went to install the pilot bearing. Two years ago, when I took the engine out of the Land Cruiser, I used the "bread" trick to get the old pilot bearing out.

Apparently, the outer race didn't come with the rest of the bearing. It seems that I forgot that little detail from two years ago.

9359601743_93646ef111_c.jpg


To remedy this, you need a die grinder.

9359600749_88c9c18d0e_c.jpg


Use the grinder to make little slots 180* apart from each other. Be careful not to grind into your crank. The goal is to grind the race until it is paper thin at these two spots so you can crack the race in two and remove it easily.

9362374412_be8f565645_c.jpg


I have had luck in the past with striking the race with a hammer and a punch to get the halves to separate. Today, I used a pry bar to get them out. As long as you don't damage the crank, it is the right way to do it.

Now, get your pilot bearing. I used the poor-man's pilot bearing installer SST, also known as a 27 mm impact socket. The socket you choose MUST be the right size to only contact the outer race. I always choose one that is just big enough that the outer edge bottoms out on the crank. This is how I make sure the pilot bearing is square.

9359593431_8d0dcfd7c3_b.jpg


In this case it is not a big deal. The crank is machined with a lip so the bearing bottoms out square in the crank. Not all engines are designed to be so fool-proof.

9359592481_de396921fb_b.jpg


After installing the pilot bearing, I installed the bell housing. Old hardware was cleaned up and reused. The bell housing must be installed before the flywheel, which is a mild inconvenience compared to popular American V8 engines.

9362368426_0eddde8685_b.jpg


Then the flywheel goes in. Don't worry about clocking it wrong, there is a big pin so you can only install it one way. I reused the hardware, including the sheet metal tabs that you fold up to prevent the bolts from backing out. I figured a drop of blue thread-lock would add another layer of confidence for me.

9362365204_29c274fe2e_b.jpg


Note that the tabs hadn't been folded in the picture yet. I took care of that after putting the camera down.

Now the clutch goes on. This is a little harder than some vehicles with the bell housing in the way, but I had the engine hanging in the air, unencumbered and unobstructed.

Here the clutch alignment tool is positioned to show you how to orient the disk. In order for the clutch to function correctly, the raised portion of the disk must face the transmission. The flush side of the disk faces the flywheel.

9359586275_465535f3f9_b.jpg


I took the tool out, slid the disk up into the bellhousing, then reinstalled the tool in the disk and the pilot bearing. The clutch alignment tool can hold the disk in place if you are careful.

9359585407_0690b302f7_b.jpg


Now, before trying to wrestle the pressure plate into place, make sure that you rotate the crank so that at least two bolt holes will be accessible from the opening at the bottom of the bell housing.
 

Users who are viewing this thread

Back
Top Bottom