- Thread starter
- #241
Took my 3 boy over to a friends place to help him get ready for winter - he heats his house with a wood stove, so the boys and I went to help with the firewood on his property.

Follow along with the video below to see how to install our site as a web app on your home screen.
Note: This feature may not be available in some browsers.
This site may earn a commission from merchant affiliate
links, including eBay, Amazon, Skimlinks, and others.

Great write up on the install. Did mine when I got the bumper on and did nearly the same though I think I ran mine through the rubber grommet.Nothing major going on, and now that winter has come with a sudden vengeance (we got a foot and a half of snow in a couple of days) I was getting the plow on the quad and pushing snow a fair bit.
After not finding anything to my liking as far as LED floods that would fit the signal recesses in the ARB bumper, I decided to finally fill the holes with the provided signal lights and wire them in. Total job, about an hour, and that was with fiddling a bit looking where to access the existing signal wires. I finally decided to pop the covers off the front signals and discovered a large gap where I could easily feed the wires and connect within the front signal housing.
View attachment 3172964
There is a fairly large gap area down towards the bottom corner where I fed the wiring:
View attachment 3172965
View attachment 3172972
View attachment 3172974
Wired it in and the signals are now working in the bumper...
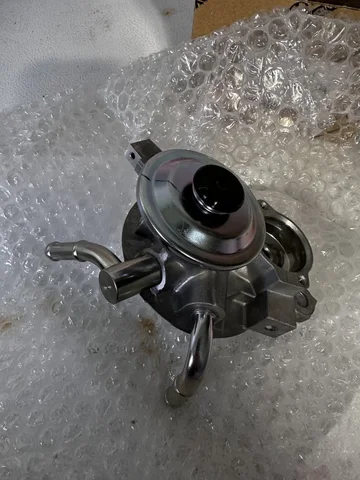
With the colder weather, I am also noticing that I am getting air into the fuel... and the likely culprit is the fuel filter housing with the primer pump. The original with the heater attachment is no longer available, so I settled for the new replacement without the heater as there is no other choice. I did hit Dave Stedman up to see what he could find and if there was anyone selling reseal kits for the older ones. He found NADA....
So I now have one of these on the way in case anyone else comes across this issue on their machine:
View attachment 3172989
| # | Number | Name | Make | Qty | Qty Supplied | Price | Subtotal | |
|---|---|---|---|---|---|---|---|---|
| 1 | 223906A511 | SOLENOID ASSY, FUEL CUT | Toyota | 1 | 102.48$ |
 (My solenoid's resin housing crunched when I was undoing the tiny 8mm on top...)
Yeah, methinks the warmer climate would be very lovely right about now!! If thems folks will have us. Having land cruisers will likely up our chances a fair bit!Goodness me. We are BOTH waiting for F/C solenoids now! I ordered mine when megaZ was having a new years sale. Not shipped yet...
Hope this solves your issue once and for all. We should just move south, buddy. Warm diesel is a happy diesel!

 for sticking with it and also figuring out how to fix a “unfixable “ problem. Hopefully the shutoff valve will fix the problem.
Thanks. Owning a land cruiser is not for the faint of heart to be sure. Most of us would not be able to afford one of these if we could not do our own maintenance and troubleshooting, especially with the stealerships charging $200/hr and ridiculous pricing on parts.Sorry for your problems but
 Thank you for sharing the solution.


No doubt! I cannot see how this would not resolve this. The fuel pump would be the next thing to look at, but it seems to be working fine, there is good power and boost when the fuel is there. So providing the steady supply of un-aerated fuel is the first port of call...Well done! Big job! Couldn’t agree more. Do it once and do it right. Fingers crossed this solves the issue!
Yeah that’s just it. Doesn’t seem like it but it very well could be something that isn’t visible to the eye which it is or you’d have seen it and fixed it by now. The frustration is real.No doubt! I cannot see how this would not resolve this. The fuel pump would be the next thing to look at, but it seems to be working fine, there is good power and boost when the fuel is there. So providing the steady supply of un-aerated fuel is the first port of call...
What clinched it for me was when during my troubleshooting I connected a temp lift pump to push the fuel to the filter and I used a chunk of clear hose and I could see the air bubbles coming from the tank end. That was when I double clamped everything back to the tank (annnd realized I needed a new solenoid on top of everything else, lol)You go buddy! Funny enough we seem to be paralelling through this. I'm getting stumble at start up and white hazy smoke for a minute or so.
I just ordered fuel line. I still have air getting in from somewhere too. My fuel injectors still show bubbles when cracked while running, so I'm getting air ingestion too. I ordered 10mm which should be here Tuesday. Fingers crossed for both of us. I haven't gone back past the filter yet like you're doing, but we shall see.