1987 FJ60 build

This site may earn a commission from merchant affiliate
links, including eBay, Amazon, Skimlinks, and others.

More fun! I guess the added heat was too much for the starter solenoid, I yanked the starter and replaced the solenoid, returned my Advance Auto parts Gold battery under warranty, got a silver in exchange (grrrr!!! Stupid store!)

Now it's leaking from my front axle pinion seal. Gt one on order and will change it when I get it.

Some pics when I change it. I am searching for a TBI parts car to get rid of my carb. Only for fun, it kicks over every time
 
you'll need a fabbed up fan shroud, especially now that a/c is operational. It makes a big difference in cooling and in the air flow across the a/c condenser, which means cooler air from the a/c.
 
It's been in the high 90's and the engine sits around195 with the a/c running, and it cools just fine. I have a new radiator, 185 degree thermostat and new water pump, so things are optimal. I may rethink that with some off road stuff when I am not moving so much.
 
damn I wish you had told me, I think I have an extra one I would have given you
 
I think they're normal screws, but I don't have those. Home Depot or ACME :)
 
rear bumper 1.webp rear bumper 2.webp tail light lens.webp FJ62 mirror.webp

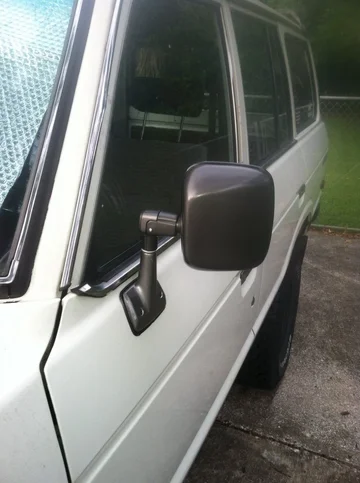
Mounted my genuine imitation FJ62 mirrors. Love it, I can see behind me now.

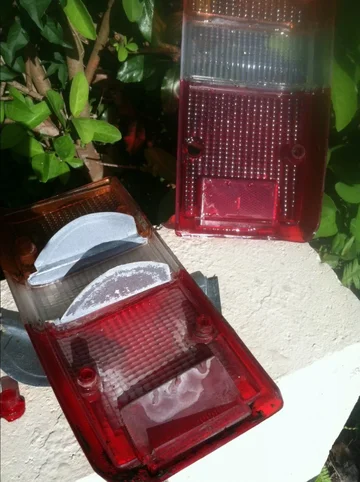
My girlfriend told me I had no tail lights. They worked, but the inside of the lens was filthy, so I took them apart, cleaned them, and then put in new bulbs.

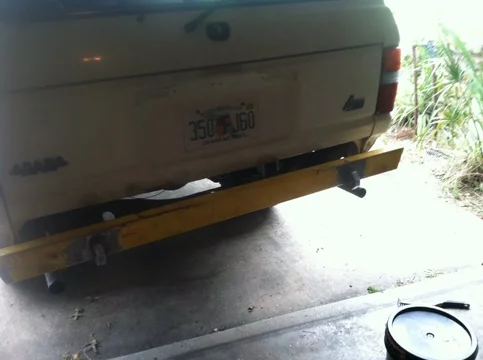
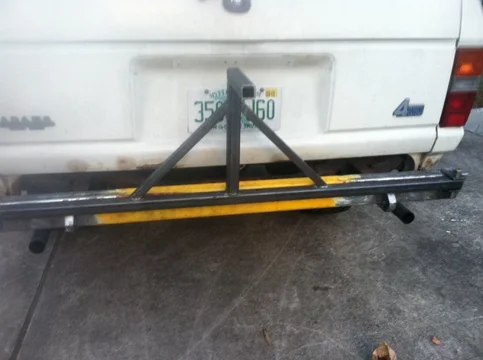
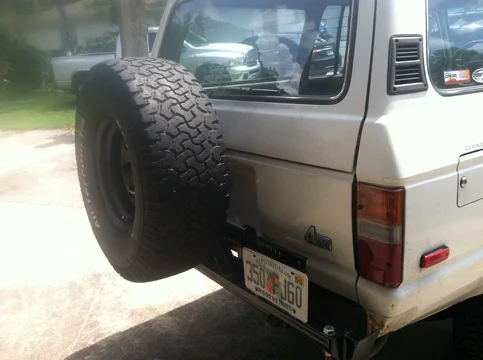
Started my rear bumper build. Made some sparks today, tacked the rear bumper to the arms I made from 1X3 steel bar stock.

More to come, as I plan to mount the rear tire and high lift our there, too.
 
Looking good man.

PS I had those Taiwan mirrors from the PO... found them to be a bit fragile. Dont bump them too hard ;)
 
rear bumper closed back.webp rear bumper open.webp rear bumper side view.webp rear bumper closed side.webp

Rear bumper build cruiser porn! Adults only!!!

I tacked up the rest of my bumper and tire carrier.

Still have to mount the oil lite bushing in the hinge part, add a tag mount and light, make a plate with some wheel studs to hold the spare and make a high lift jack mount on the tire carrier.

I should have decent visibility out the rear window, from what I measured. rear bumper side view.webp rear bumper open.webp rear bumper closed back.webp
 
IMG_1538.webp View attachment 938835 IMG_1536.webp IMG_1535.webp Found a guy who welds for money, and gave him $50 for the welds in the thick material.

Ground everything down, then took a flap disc to it for a long while.

I put a piece of pipe with an oil lite bushing in the swing arm of the tire carrier, and used a Grade 8 3/4 dia bolt as my pivot.

I cut off a 1/2 dia muffler clamp and used it to make the latch part. I welded a nut to the bottom and just thread the latch into the nut, through the swing arm.

I used wheel studs to hold the spare to the carrier, (obvious choice), and to hold the hi lift to the back of the carrier, (not so obvious). I will always have a lug wrench with me to take things off, so that seemed like a good idea to me.

I covered everything with primer, then with rustoleum, two coats.

Mounted to the frame with 3/8-18 grade 8 bolts.

Hung the spare and jack, and took some pictures. It seems very sturdy.

The rear window is pretty unobstructed, I am happy about that.
IMG_1538.webp

IMG_1533.webp
 
Last edited:
John, I am researching my AC install. Don't know too much about it, but I know with knowledge of the model of operation, and some pointers
I will get it.

I don't have it now, but will get a Sandberg 508 compressor and put it on the driver's side.
I need to find a "dryer" for it and hose connections between the Toyota and the Sandberg.
And O rings. Where does one get those?

Hints, directions, pointers and shrugs would be appreciated. Since it started snowing today, won't need
for several months, but I like to plan ahead.

I need to post of pic of the snow on the rig in the next day or two, so people can compare what difference
3 days make in weather up here. Last Sat, Monday and Tuesday were great working weather. Not so
much today nor this coming Saturday when I get some time again.

Next major event coming up will be exhaust installation on Monday

dougbert
 
Doug
I used a compressor from a mid 90's Tahoe, mounts on the drivers side.
I used the hose from a Tahoe, with the muffler in it, and had the ends that fit the Toyota fittings on the condenser and evaporator put on it at a local hydraulic hose shop.
I used the stock wire to the a/c clutch to trigger a relay, which runs power from the battery, through a fuse to the clutch.
I used the stock tachometer in the dash, since it also sends some signal through some voodoo electrical magic to the a/c amplifier, (on the heater box, passenger side, inside where your passenger's feet go), that allows the a/c clutch to get power.
The stuff under the dash stayed stock, and works just fine.
I pulled a vacuum in the system, made sure it was sealed, and charged it with just under a can of Freon.
Blows cold, I ended up adding the rest of the can a few days later.
There are more details and pics in my thread, post #119 and #120

IMG_1320.webp
 
Last edited:
Started working on the rust holes in the driver's side floor. I found out it was much worse than I thought, once I started grinding back to good steel.

I made a patch piece and worked on tacking it in place. Wasn't easy to make the patch piece mate up to the curvy floor, I got it pretty close.

The welding isn't going too well. I burnt through the floor material a few times, and couldn't get the weld bead to follow the wire. I had the speed turned down very slowly, still too hot.

More tomorrow......
drivers floor hole.webp
drivers floor patch.webp
 
That kind of rot is pretty intimidating. I've got a project truck where the whole body looks like that floor.
its been a project truck for 15 years now haha.
Maybe one year I will find enough time to have a go at it
 
My tribute to Seurat: floor 1.webp floor2.webp

I got some time to finish the welding on the floor. I searched u tube, and it seems like the best way to go without blowing through the floor material is to just weld a dot in one place, then a dot in another place, and so on, until the seam is filled. I did that for quite a while, and filled it in pretty well.

There were still some light holes I could see from underneath, so I mixed up some JB Weld and filled in the holes. I now have a solid floor!

Pics are of after the welding was done, before the JB Weld. I will post the after JB Weld and paint this weekend.
 

Users who are viewing this thread

Back
Top Bottom