1978 LPB Teardown and Rebuild

This site may earn a commission from merchant affiliate
links, including eBay, Amazon, Skimlinks, and others.

Man... i was really hoping you were going to rebuild your stock master cylinder ... being that it's exactly like mine and i can't find any rebuild kits for it.

PICT0001-2.jpg


Excellent job on the rebuild !!
 
any updates?


Yeah - nuthin to spectacular but I have been collecting bits and pieces of the puzzle.


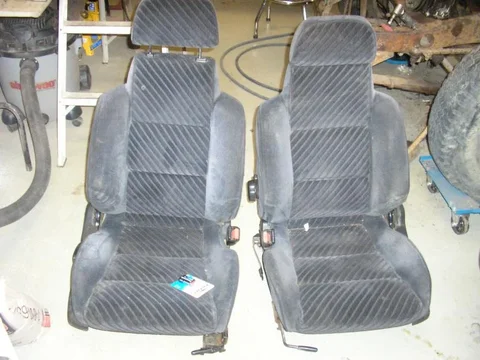
The 90/91 Acura Integra and Honda Civic Si supplied the seats for my 81 mini Toy and I really liked the snug sport buckets off road. I couldn't find a good set at the wreckers but did find these.
The full story - I found a mid eighties 2WD toyota truck with really cool seats, not the ones I was looking for but really cool. As I checked them out I realized they were not original to the truck. They were a great seat but missing the headrests. So as I searched for the Integra/ Civic Si seats (not DX- silly single arm headrest) I found a 90 Prelude with those same really cool seats. These seats have the same snug fit side bolsters but with a bonus. The lumbar (lower back) is adjustable with a lever on the side - pull the lever to get more support. Also the side bolsters in the seat back are adjustable in width by a rotating knob. There is also a "memory" button so that when you flop the seat forward to grab something from behind the seat you don't have to search for the right angle when you get back in - it automatically goes to the last angle that you pushed the memory button at. And lastly there is a lever to fine tune the seat back angle between the "clicks". All of this is only on the drivers side. Passengers are SOL.

I will strip the covers off of these and wash them. Then I'll decide if I will get them re-upholstered. They are small enough for the cab and if I mount them right and high enough it should make the driver position more comfortable. I will be fabricating my own framework for them to sit on. The camera flash washes them out but they are black(ish).
P1010007_32.webp
The other item I was looking for had me searching for old Ford trucks (circa 1979) and Volvos (circa 1982).
P1010005_37.webp
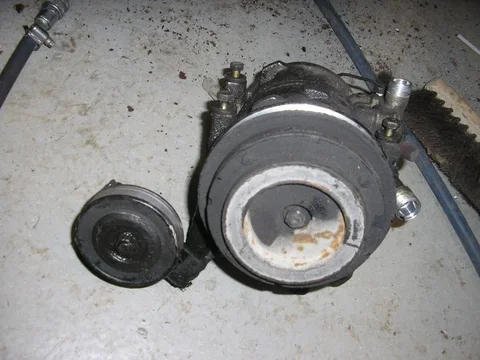
York AC compressors for on board air!
P1010006_33.webp
P1010007_32.webp
P1010005_37.webp
P1010006_33.webp
 
I found one in a Ford truck and the other in a Volvo
P1010008_30.webp
The one from the Volvo says its the higher flow rate 210 but I will need to take off the pulley to check. I only grabbed two cuz they don't make them anymore and thats all I could find.
P1010009_28.webp
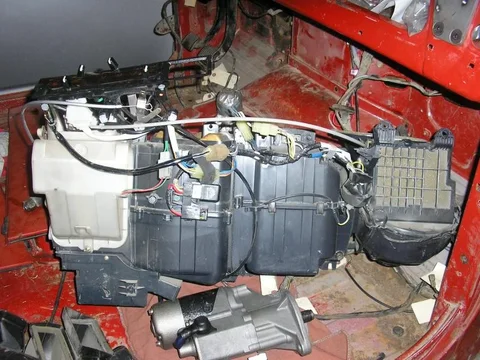
I also grabbed this AC compressor from an 88 4WD Toyota pickup - four bolts held it to the bracket - 7 bolts held the bracket to the 22RE!! I actually removed the ENTIRE hvac system.
P1010012_24.webp
P1010008_30.webp
P1010009_28.webp
P1010012_24.webp
 
The rest of the HVAC

Condenser
P1010014_23.webp
Evaporator/ blower/ heater core / dryer and all control cables, wiring harness, ductwork and pressure lines. I could go with Nostalgic Air or something like it but I found this system in a truck at the wreckers and for a hundred bucks I'll take a stab at fitting it under the dash. It didn't look this big when I decided to pull it and once I had it out I almost left it there. Once I got it home and into the cab I think it could work. Worst case I'll engineer my own housings and just use the components (evaporator and heater core).
P1010011_23.webp


As I continue planing and fabbing this build I find myself going farther and farther away from originality. While I am aware of this it does not bother me. There are certain mods that I want and others that are upgrades for safety and drivability. I find that once I decide to go in a certain direction that it presents an opportunity to do another mod. I believe this is what is meant when some say a build takes on a life of its own. I still have that "minds eye view" of what I want in the end. A daily driver needs comfort so AC and seats I like will help.
P1010014_23.webp
P1010011_23.webp
 
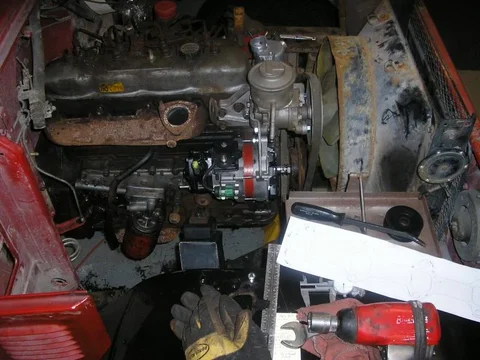
As I mentioned somewhere above I am going to completely mock up the engine bay/ front clip as well as the cab interior before I tear down for final coatings etc. To that end I need to mount all the accessories
P1010003_43.webp
I've got an issue with the alternator pulley not lining up - this is with factory brackets so what's wrong?? Doesn't really matter as I still have a York and my AC compressor to fit in somewhere so I see a custom bracket in my future, I will likely have to move it anyway.
P1010004_37.webp
I can't seem to get the arm off of the manual box in order to use it with my mini truck PSbox. Is there a trick to it. I tried the BFG and some mild heat with a puller - any ideas out there? Or just more heat and a bigger puller?
P1010013_25.webp
P1010003_43.webp
P1010004_37.webp
P1010013_25.webp
 
looks good. Remove the box and use a press to get that arm?

Also, I thought of doing the same thing for the AC. I would have built my own housing etc.

After much thought, up here I would use the AC one month of the year.

I did however rebuild my heater :)
 
Kevin,a dedicated pitman arm puller is alot more stout as these arms can be a bear to remove.Dont be afraid to get it hot,just be careful,because it will POP off when it goes.Some more heat should do the trick...Your build is motivating me to get going on mine,maybe we can make the 2010 45 run,,hurry up!!
 
x2 what whitey said about the pitman arm.

Another trick is to heat it up and then touch a crayon to the shaft. The wax will actually draw into the splines and amazingly breaks a lot of rust loose somehow. It's like magic or something.

I also might spray some Kroil on there for a couple of days to let it soak and loosen some rust before you try too much.

That alternator pulley angle is wierd. It looks like the same setup we've got, but ours lines up. I'll compare those pics to ours when I'm up in the shop tomorrow. I like the York idea (a lot, I think I've got room to fit one in my 45--I've also got a 210 that is in beautiful shape). Between the PS, the York, and the A/C you're going to have a LOT of stuff going on at the front of your motor!

Dan
 
I can't seem to get the arm off of the manual box in order to use it with my mini truck PSbox. Is there a trick to it. I tried the BFG and some mild heat with a puller - any ideas out there? Or just more heat and a bigger puller?
Snap-on CJ119B - if you were closer I'd loan you mine. I guess even the Snap-on puller can break sometimes. Put on some extra eye protection.
center_arm1.webp
 
Between the PS, the York, and the A/C you're going to have a LOT of stuff going on at the front of your motor!

Dan


Two battery brackets, turbo and intercooler also:confused: - we'll see if I can make it all fit under the hood :meh: I don't want to give up anything either. I will most likely make a custom bracket for the alternator/york/AC combo all together. There are lots of mounting points on that side of the motor to use. Probly stall the 3B on a hot night turning left blowing my air horns :hillbilly:
 
Well I have no photo proof but I have made contact with the local Garrett turbo dealer and am about to pull the trigger on a new turbo. I am investigating just what material is best for a custom header to mount it on. The york or the A/C has to go so I am leaning toward the A/C because I think I used the A/C like four times last summer in the corolla and I plan on going topless sometimes.

I have mounted the PS and Alt with battery brackets, rad mount and shroud and just can't make room for both York and A/C without moving the Alt and PS pump which at this time seems like too much work.

I solved the issue with the Alt pulley not lining up - the pulley on the Alt is the wrong one - the right one has a spacer built in the moves the V forward a bit. So I need to get the other one.

I am going to get the stock A/C third crank pulley and tensioner to run the York and also change the clutch on the York to the wider belt type. Custom bracket needs to be fabbed for the York too.

I will supplement with photos this weekend.

The bed thread is basically dead and all pricing is in the link in my sig - prices are going to rise a bit when I get around to it. I just delivered a full bed in pieces to a local cruiser guy (so now I can buy that turbo :D)
 
Slow and tedious progress...

I ordered the stock A/C tensioner and third crank pulley from SOR for a decent price - should be here by the end of next week.
3BAIR.webp
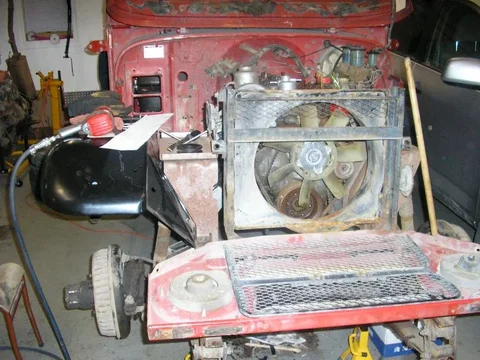
With the fender, rad support, apron, air cleaner housing etc. set in place the gobs of room suddenly disappears :eek:
P1010019.webp
As most of you will know that is the stock exhaust manifold flipped - It will be replaced by a custom header I am building to mate to the T3/T4 turbo I have the local Garrett dealer making for me. I should get it some time next week. Once I have it I can complete the header fab. I have also ordered a cheap intercooler and piping kit from some online e-bay dealer. I'm sure the quality is suspect but even if I toss the cooler I came ahead just on the tubing compared to buying from the local speed shops.
P1010021_10.webp
3BAIR.webp
P1010019.webp
P1010021_10.webp
 
Some more random shots and comments. I'm kinda going in several directions at the same time...

So in case I haven't mentioned it, the junkyard A/C system will not be going on. Between having the York or A/C I choose the on board air system. I'll be fine around here where A/C is only needed 5 days a year... remind me later, mid summer in Phoenix, when I'm sweating my U-know-whats off :D.
P1010023_13.webp

P1010025_10.webp
I removed the steering box completely and took it along with the power unit to work...
P1010026_2.webp
P1010023_13.webp
P1010025_10.webp
P1010026_2.webp
 
I used a pitman puller but could not get the arms off without an Oxy/Acetylene torch. With regards to the alternator, my parts source has agreed to swap pulleys or give me a complete alternator to solve the belt issue. On a related note - I will be reproducing the vacuum reservoir that typically rusts through and becomes useless. It will be made from 16 Ga. stainless steel and be the same size and shape as stock. I will also be doing the mounting bracket for it - likely in steel.
P1010027_8.webp
P1010027_8.webp
 
On a related note - I will be reproducing the vacuum reservoir that typically rusts through and becomes useless. It will be made from 16 Ga. stainless steel and be the same size and shape as stock. I will also be doing the mounting bracket for it - likely in steel.

Ooooh.... One of the bits I haven't sourced yet...... Keep us posted.

I think you're making the right decision in terms of ditching the AC. I don't have AC on any of my trucks, and don't miss it. Even when I'm driving through Phoenix or Vegas or something and it's super hot. I can deal with being hot a couple of weeks a year, and onboard air from a York is the bomb!

Dan
 
They are new Toyota BJ fenders. I've only set them in place with a couple of hand tight fasteners to check clearances and all the holes seem to line up with the tub, side step etc. The BJ fenders are different than the FJ's in that they have a string of captured nuts around the shock towers for a rubber skirt that came on BJ units. A minor difference but since I had the option I took it. Hilltop Cruisers had them in stock when I was filling my trunk...

With just two of four bolts at the frame mount they seem very sturdy and by the time I put the rest in I'd be able to jump on them I'm sure - though I doubt I'll try ;)
 
Update

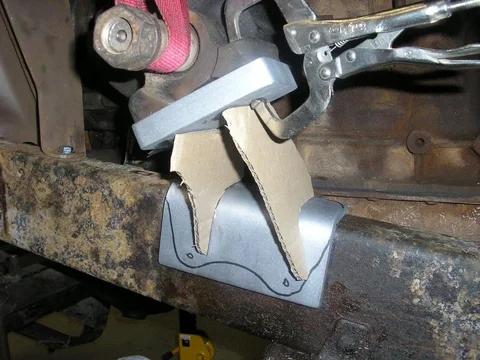
Power steering box braket fab...

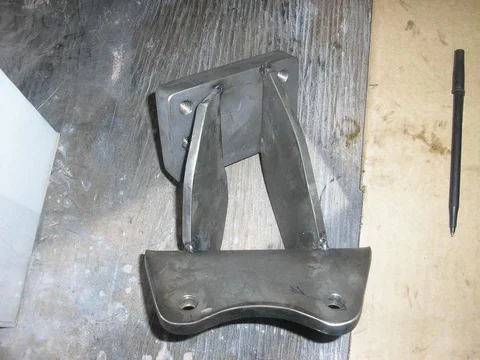
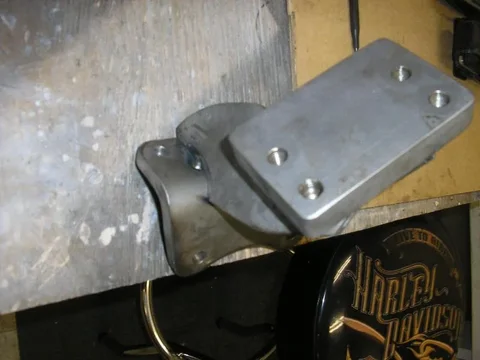
So I attached the box to the column and supported it where it "wanted" to be. I made up an angle plate at work measuring 3/8" thick x 6" long with flanges 2-3/8" x 3-1/8" OD (2 and 2-3/4 ID) for the frame end of the bracket. This represents the same size as the original manual steering box bracket. I also made a 3/4" thick plate measuring 2-3/4" x 4-1/4" for the box to bolt to. I drilled and tapped the plate with M10x1.25 thread to match the box foot pattern. I don't show it here but I loosely installed the fender to make sure the box would clear - it is very close but no alteration of the OEM fender is required.
P1010010_28.webp
I mocked up some cardboard elements to take to work and replicate. What you see here is exactly what I brought home cut from 1/4" plate. After some grinding and fitting I decided at the last minute to install the pitman arm and found my gussets interfered with the swing of the arm and had to cut them down quite a bit.
P1010009.webp

P1010006_35.webp
P1010006_35.webp
P1010010_28.webp
P1010009.webp
 
Tacked up and ready for welding

P1010011_25.webp

P1010013_27.webp

P1010012_26.webp
P1010011_25.webp
P1010012_26.webp
P1010013_27.webp
 

Users who are viewing this thread

Back
Top Bottom