Navigation
Install the app
How to install the app on iOS
Follow along with the video below to see how to install our site as a web app on your home screen.
Note: This feature may not be available in some browsers.
More options
Style variation
You are using an out of date browser. It may not display this or other websites correctly.
You should upgrade or use an alternative browser.
You should upgrade or use an alternative browser.
1978 LPB Teardown and Rebuild
- Thread starter Awl_TEQ
- Start date
This site may earn a commission from merchant affiliate
links, including eBay, Amazon, Skimlinks, and others.
More options
Who Replied?Awl_TEQ
Supporting Vendor
- Thread starter
- #283
Moving on to the exhaust header...
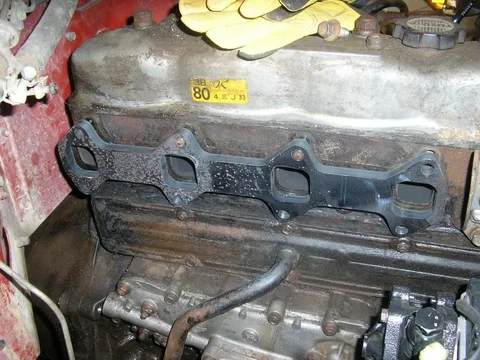
I had a manifold plate laser cut out of 1/2" plate using the original gasket as a guide to draw the CAD file. Made a mess on my desk for sure.

It fits pretty close - I just have to clearance a couple of bolt holes to make it slip right on cleaner. The ports are oversized approximately the thickness of the tube so that the tube can be slipped into the plate 2/3ds of the way and be welded inside. I will have the plate milled flat after welding if we can find a way to fixture it in the mill.
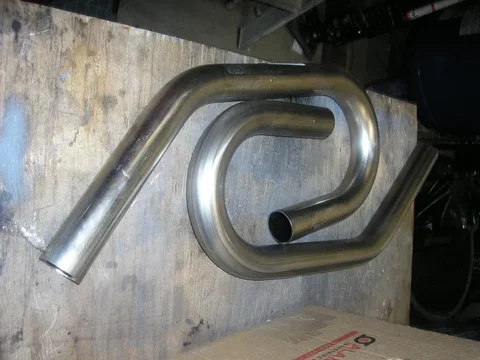
And I have some mandrel bent 1-3/4" tube to hack up. I was going to do a simple design like the 13BT manifold but now I'm thinking a full 4 into 1 before the turbo flange with a pyro port.


I had a manifold plate laser cut out of 1/2" plate using the original gasket as a guide to draw the CAD file. Made a mess on my desk for sure.

It fits pretty close - I just have to clearance a couple of bolt holes to make it slip right on cleaner. The ports are oversized approximately the thickness of the tube so that the tube can be slipped into the plate 2/3ds of the way and be welded inside. I will have the plate milled flat after welding if we can find a way to fixture it in the mill.

And I have some mandrel bent 1-3/4" tube to hack up. I was going to do a simple design like the 13BT manifold but now I'm thinking a full 4 into 1 before the turbo flange with a pyro port.

Awl_TEQ
Supporting Vendor
- Thread starter
- #285
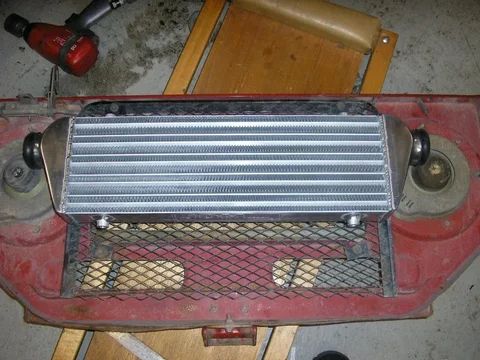
Also form e-bay, some IC pipe etc.

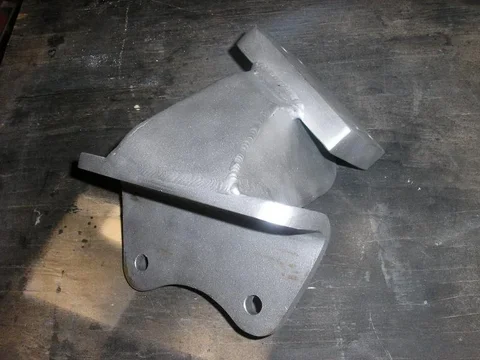
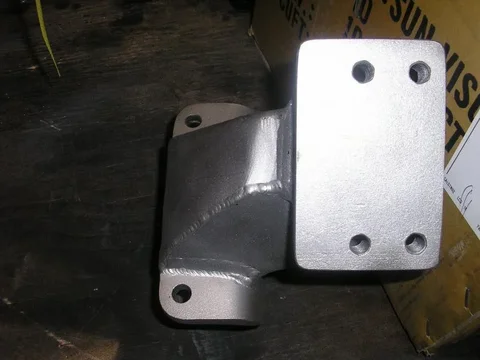
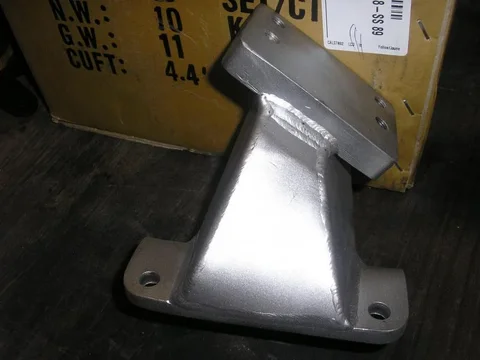
I made some tapered 12Ga brackets at work to help move the rad back to make room for the IC. I was going to remove the original brackets and make my own but this is quicker and I am getting tired of removing good Toyota engineering.

Oh, and I picked up my all new T3/4 turbo last thursday from the local Garrett dealer including the mounting flange for the header. When I say local I mean less than 100 yards from my shipping door at work (after a search online - I actually hit the distributer link, put in my postal code and said "hey, that looks like the building next door!!"
 )
)


I made some tapered 12Ga brackets at work to help move the rad back to make room for the IC. I was going to remove the original brackets and make my own but this is quicker and I am getting tired of removing good Toyota engineering.

Oh, and I picked up my all new T3/4 turbo last thursday from the local Garrett dealer including the mounting flange for the header. When I say local I mean less than 100 yards from my shipping door at work (after a search online

 )
)
Kevin,And a few more...
eventually it will be plated and powder coated like the rest of the frame....
]
I´m not a friend of powder coated metal, if this builds cracks(thin little cracks) & it will do over time, moisture comes under the coated parts and it will rust * ( you can`t see that at the beginning) that´s why I would make a normal paint structure and grease the frame at the end.
Cheers
Peter
* the sooner you can see the rust, the better you can fight him
Last edited:
merbesfield
SILVER Star
Have you checked the gap between the fenders and the side aprons? I remember on Buckroseau's build he had issues.
They are new Toyota BJ fenders. I've only set them in place with a couple of hand tight fasteners to check clearances and all the holes seem to line up with the tub, side step etc. The BJ fenders are different than the FJ's in that they have a string of captured nuts around the shock towers for a rubber skirt that came on BJ units. A minor difference but since I had the option I took it. Hilltop Cruisers had them in stock when I was filling my trunk...
With just two of four bolts at the frame mount they seem very sturdy and by the time I put the rest in I'd be able to jump on them I'm sure - though I doubt I'll try
Awl_TEQ
Supporting Vendor
- Thread starter
- #288
Kevin,
I´m not a friend of powder coated metal, if this builds cracks(thin little cracks) & it will do over time, moisture comes under the coated parts and it will rust * ( you can`t see that at the beginning) that´s why I would make a normal paint structure and grease the frame at the end.
Cheers
Peter
* the sooner you can see the rust, the better you can fight him
That's why it will be zinc plated under the powder. Powder is 10 times more durable than wet coat paint. The main frame will be hot dip galvanized and smaller brackets and parts will be zinc dichromate. I would zinc plate the frame but that process won't cover inside the frame and between the double frame channels like hot dip will.
Have you checked the gap between the fenders and the side aprons? I remember on Buckroseau's build he had issues.
Perfect fit merb - no gaps at all. Were buck's fenders OEM Toyota? I've heard the CCOT repros need massaging to fit - no personal experience. I've also heard they (CCOT) addressed the fit and re-tooled their dies.
I like your shop bar stool.
Keep up the pics!
Keep up the pics!
merbesfield
SILVER Star
I am glad to here the fender fit is good. It would save me a ton of time not having to rework my originals. Mine are OEM not repops.
Question about the zinc. I thought paint would not stick to zinc plating?
Question about the zinc. I thought paint would not stick to zinc plating?
Awl_TEQ
Supporting Vendor
- Thread starter
- #291
I don't know about paint but powder certainly will. We did a job for the City of Calgary where we fabricated all the raillings for the Centre Street Bridge. Their specs were to hot dip galvanize and then powdercoat all the steel. I've seen it in a lot of similar apps also.
Interesting side note - while the bridge was closed they shot a scene for one of Steven Seagal's movies on the bridge (Exit Wounds) - a shoot out with helicopters and motorcyles with explosions etc. They did a car flip that rolled a bit too much and damaged our newly installed railing and we had to rush to replace it before the dedication. The bridge has a lower deck and we were working down there the day they shot some helicopter scenes. They kept doing low runs down the river and poping up over the bridge at the last second and had a guy hanging out the door with a 50Cal blasting away - shells falling all over - pretty cool stuff. Too bad it was one of old stone face's movies . Fun work site but I kept dropping tools in the river - lost like three torpedo levels...

Wikipedia - Centre Street Bridge
Exit Wounds trailer - flashes of the bridge at 1:05... Rolling cop car hit my rail at 1:24 - my brush with fame

Interesting side note - while the bridge was closed they shot a scene for one of Steven Seagal's movies on the bridge (Exit Wounds) - a shoot out with helicopters and motorcyles with explosions etc. They did a car flip that rolled a bit too much and damaged our newly installed railing and we had to rush to replace it before the dedication. The bridge has a lower deck and we were working down there the day they shot some helicopter scenes. They kept doing low runs down the river and poping up over the bridge at the last second and had a guy hanging out the door with a 50Cal blasting away - shells falling all over - pretty cool stuff. Too bad it was one of old stone face's movies
 . Fun work site but I kept dropping tools in the river - lost like three torpedo levels...
Wikipedia - Centre Street Bridge
Exit Wounds trailer - flashes of the bridge at 1:05... Rolling cop car hit my rail at 1:24 - my brush with fame

That's why it will be zinc plated under the powder. Powder is 10 times more durable than wet coat paint. The main frame will be hot dip galvanized and smaller brackets and parts will be zinc dichromate. I would zinc plate the frame but that process won't cover inside the frame and between the double frame channels like hot dip will.
Hi Kevin,
I've just started to follow this rebuild after having met you in person last month. I hope to continue to follow along and see the truck as it progresses. It's looking great so far.
For your consideration, my experiences with a hot dipped galvanised frame on my '77 FJ45. Personally, I'd never galvanise a frame on a wheeling truck because when the inevitable breakages occur, welding on a galvanised frame is a PIA as well as pretty unhealthy. I have had to do it enough times in the field to know and it is no fun at all.
I have not gone back far enough in the thread yet to see what the intent is for this truck, so if it is intended as more of a DD and show truck, I'm sure the galvanised frame will keep it for all eternity. What I can say positively about my own galvanised frame is that it will be the only thing left standing when the rest of the truck has oxidised away.
Hope to see you out at a meeting again soon (e.g. this Wednesday?). Your attention to detail would be a good influence on some members of the club
Cheers,
Jim
Question about the zinc. I thought paint would not stick to zinc plating?
Hi Mark,
paint stick on zinc see Porsche
but they use a special zinc paint ( primer) for their cars.
Zinc plated parts are not so easy to paint, the zinc surface must be very, very clean, than you can make a normal paint job
( I did that on some car parts and it works)
but I would never zinc plate car parts again, it`s not necessary for normal use - dd included -
make a good paint job (special paint for chassis/underside) grease the inner sides/underside of your car and control it from time too time.
Cheers
Peter
By they way I don`t know any professional old car restoration companies who do such a " zinc job "
but if you want feel free to zinc plate your Toyo
Last edited:
forgotten 
I have nearly 30 years experience in rust prevention on my BJ43
- was my dd for 25 years - saw never a garage in that time & looks still good for his age ( ok some work was necessary but not sooooooooo much )....
....

I have nearly 30 years experience in rust prevention on my BJ43
- was my dd for 25 years - saw never a garage in that time & looks still good for his age ( ok some work was necessary but not sooooooooo much )....
....

Awl_TEQ
Supporting Vendor
- Thread starter
- #295
Jim, yes, I hear what your saying about welding on galvanized. This build is an expedshowDDwheeler . Last time I built a truck up (81 Toy p/u) I had it painted, lifted, tinted, new interior etc. with no real thought as to what the long term plans were for the truck. But almost before the paint was fully cured I had it slipped into a washout lying nearly on its side in mud.
So, with some thought and reflecting on that history I glean the following: I like a built up and detailed rig, an efficient and comfortable DD, and an upper middle class capable trail rig - all in one. Once this build is done it will be wheeled, scratched-n-dented and I don't mind that. Adds character. With limits of course. Eventually, if the damage gets intense, I would just redo portions of the build applying lessons learned. At the same time this truck is an antique so preservation is a consideration.
I don't intend to do any full on rock crawling (famous last words). But presented with an obstacle mid run, with the support of my peers close by, I won't bypass with out giving it a try first. My driving skills will be the limiting factor moreso than the truck.
Truthfully this build will be 95% DD so I will go ahead and galvanize/ powder the frame and other bits. If welding is required on the trail or in the shop I can deal with that when I get to the other side of the bridge.
I will be at the RMLCA meeting tomorrow with a tailgate top rail for 45kevin - see you there.
Peter, thanks for your input. I remember the zinc coated Porsche info from the 1987 928 sales literature I used to drool over. Man I really wanted that car - egg shape and all - even test drove one, very nice power and control with the transmission in the rear and engine up front - good balance.
Last edited:
Kevin
you want galvanize
do it
but the warranty Porsche * give on theirs truly professional galvanized bodies ( the new Panamera included) is:
10-year long-life warranty against rust holes in the bodyshell.
it`s not more than other car producer give, without galvanizing.
Cheers
Peter
* http://www.porsche.com/canada/en/accessoriesandservices/porscheservice/warrantyperiods/
Last edited:
Awl_TEQ
Supporting Vendor
- Thread starter
- #297
Slipped to the second page 
merbesfield - a couple of pics for you of the OEM fender and apron
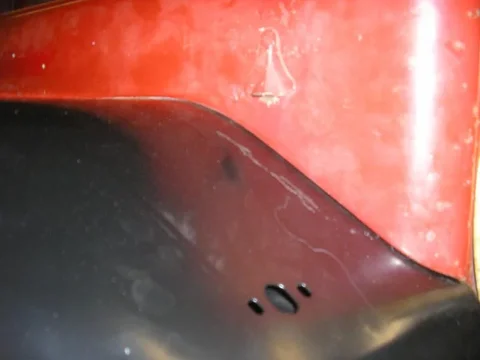
thats a reflection of some sort at the left side - I can't see any daylight through the two parts

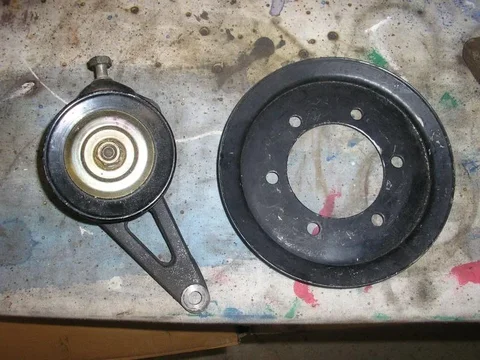
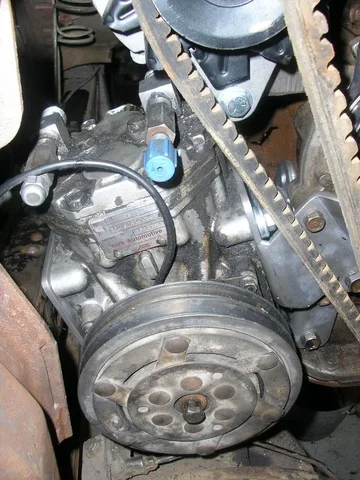
I've got the York compressor fully mounted now - I had misplaced my camera for a few days and don't have a shot of the bracket on the bench but here it is mounted. I'll post pics the next time its off or during tear down for coating.
more to come in 30 mins - gotta put the kids to bed


merbesfield - a couple of pics for you of the OEM fender and apron

thats a reflection of some sort at the left side - I can't see any daylight through the two parts

I've got the York compressor fully mounted now - I had misplaced my camera for a few days and don't have a shot of the bracket on the bench but here it is mounted. I'll post pics the next time its off or during tear down for coating.

more to come in 30 mins - gotta put the kids to bed
Awl_TEQ
Supporting Vendor
- Thread starter
- #299
I reinstalled the front clip with just enough bolts to make it sturdy so that I can continue the mockup of the engine bay...
One advantage to making my own exhaust header is that I can locate the turbo to facilitate the runs of tubing for the inlet and intercooler.
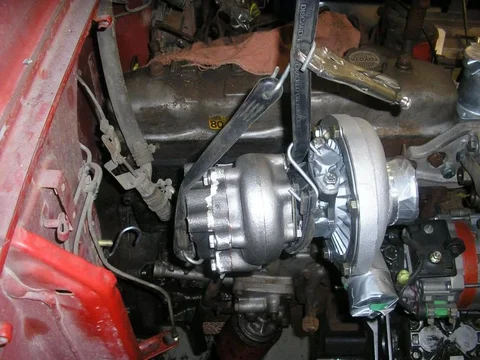
With the turbo hanging from the ceiling I think that a good height would be such that the charged air outlet could point horizontally away from the engine making the intercooler tubing fairly simple. This height also gives me a clear path to the inlet. I just have to figure out the air filter. Obviously I will be moving the rad back and altering the fan shroud.

The intercooler tubing will be cut and fabricated/welded so that there is only one length of tube between the turbo/cooler and from the intercooler/intake manifold. In other words, only two lengths of custom tube and 4 silicone joints.


One advantage to making my own exhaust header is that I can locate the turbo to facilitate the runs of tubing for the inlet and intercooler.

With the turbo hanging from the ceiling I think that a good height would be such that the charged air outlet could point horizontally away from the engine making the intercooler tubing fairly simple. This height also gives me a clear path to the inlet. I just have to figure out the air filter. Obviously I will be moving the rad back and altering the fan shroud.

The intercooler tubing will be cut and fabricated/welded so that there is only one length of tube between the turbo/cooler and from the intercooler/intake manifold. In other words, only two lengths of custom tube and 4 silicone joints.

Similar threads
Users who are viewing this thread
Total: 1 (members: 0, guests: 1)

