1978 LPB Teardown and Rebuild

This site may earn a commission from merchant affiliate
links, including eBay, Amazon, Skimlinks, and others.

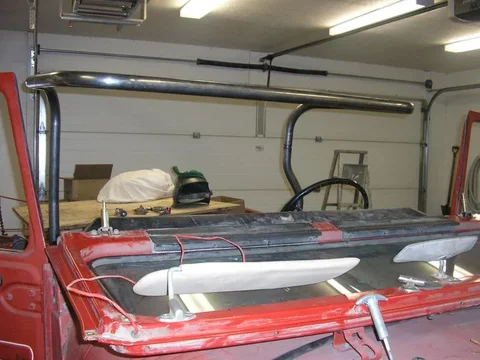
I used my I-beam lift to slid the top out of the way.
P1010009_2.webp

I am going to bring the A-pillar drop down to the dash - then through the dash and down to the floor. To do this I need to remove the stock dash pad in order to keep the roll cage tube tight to the A-pillar and not intruding into the cab by going over the dash pad. This shot also shows the front part of the main hoop that necessitated the top removal. I couldn't put it on with the top in place. I also wanted to take the top off cuz it's fun. ;)
P1010011_2.webp

In order to remove the dash pad I had to flop the windshield to access all the screws. See next post pic.
P1010012_2.webp
P1010009_2.webp
P1010011_2.webp
P1010012_2.webp
 
Thanks to a search on Mud I was able to find the screws I couldn't see. Removing these finishes the dash pad.
P1010013_2.webp

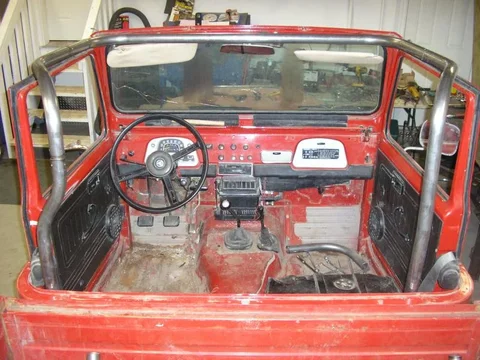
A shot of the main hoop
P1010014_2.webp

Here is a shot of the dash minus the pad and the side window defrost vents. I will be coming off the radius of the hoop and down the A-pillar and through the dash between the windshield anchors and the gauge/ glove box panels. I have decided to move the headlight switch to the center area of the dash. With the 3B I won't need the choke so maybe I'll put it there. I will also have to alter the right inner glove box wall.
P1010024.webp
P1010013_2.webp
P1010014_2.webp
P1010024.webp
 
Just a note: Watch your antenna when flopping the windscreen. I was gonna replace this one anyway - and now I have to. It got stuck in the frame as I was pushing on the other side:whoops:
P1010023.webp

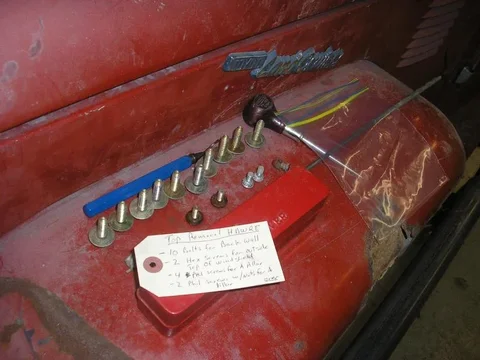
I've gotten to the point where I need to bag and tag everything.
P1010010_2.webp

Wonder if they are still around??
P1010018.webp
P1010023.webp
P1010010_2.webp
P1010018.webp
 
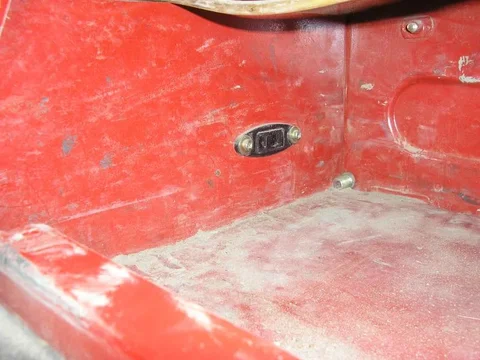
What is this??

Looks like a power outlet?
P1010026.webp

P1010025.webp

Sorry - tilt your head to the right for proper orientation.
P1010027.webp

Is that stock? What voltage? AC/DC? What's it for? Why am I asking you? I'll test it tomorrow.
P1010026.webp
P1010025.webp
P1010027.webp
 
That plug is for a inspection lamp.I think that it was a optional accessory when Cruisers were sold new.SOR and CCOT have them for sale.I have one in my cruiser,it works pretty good.
 
That plug is for a inspection lamp.I think that it was a optional accessory when Cruisers were sold new.SOR and CCOT have them for sale.I have one in my cruiser,it works pretty good.
ligemtroubli.html
coolfj402042516003113.jpg

think your local Toyo dealer have it too
Cheers
Peter
 
dude you are ONE master fabricator..... is this a hobby or a job?

Fellow Calgarian.
 
This truck is a hobby, but it has a lot of parallels with my job. I am the shop foreman for a mid sized CNC custom sheet metal manufacturing co.

The first question I usually get is "so you make duct work then?"

ah... no. Anybody with a hand brake can make ductwork/ HVAC.

We make EVERYTHING else. Computer chassis, exercise equipment, squash cannons (like a tennis ball tosser), stainless countertops for your Subway franchise, skeet target tossers, pay phone booths, custom electronics enclosures, steel cases for airless spray systems, parts for UV air sterilizers, stainless aircond. enclosures for P&H mine shovels, trophies for the Alberta Film Awards, custom water tanks for mobile steam cleaners, office furniture parts etc. etc.

If you need a hundred thousand of them, go to Taiwan or China. If you want two hundred custom aluminum enclosures for your fancy two way radio system powder coated purple and silkscreened with your logo; call me.

Let me be clear - we don't make finished products for end users, we make parts from sheet metal for our customers products. My software has just over 9000 different parts that we make or have made at least once.

I'll post a few pics tomorrow. That may give you a better idea of the kind of stuff we do. I always have trouble explaining to people what I do for a living. Unless someone is in manufacturing, they usually don't quite understand. Not that it's hard or anything, it's just not something you see everyday. For example, if you say your a machinist working a mill most people will know what that means. But if you say you run a turret punch or even a power brake (break), you are less often understood. Sorry to ramble on but I really do have trouble explaining it which is frustrating because I take a lot of pride in the things we make.


Annnyyway - basically I like to build stuff so my skills aquired at work (and the tools availiable to me there) allow me to make cool stuff for my cruiser.
:cheers:
 
Yeah - I did a search and found they are a big Toyota dealer in Edmonton. The 800 number is still good but the fax number has changed. Anybody know if Toyota dealers would divulge any history about the original sale?? Our privacy act here would stop any personal info but I'd like to know when, where and how much this thing was sold for and any maintenance history.


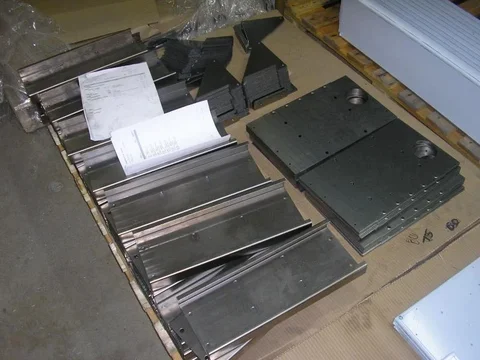
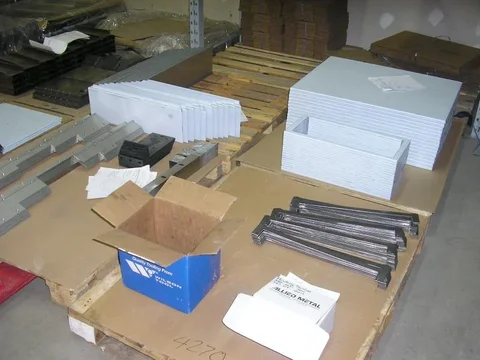
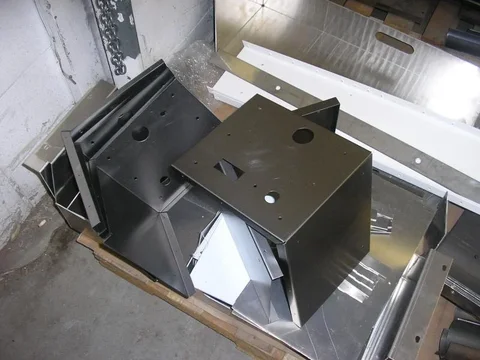
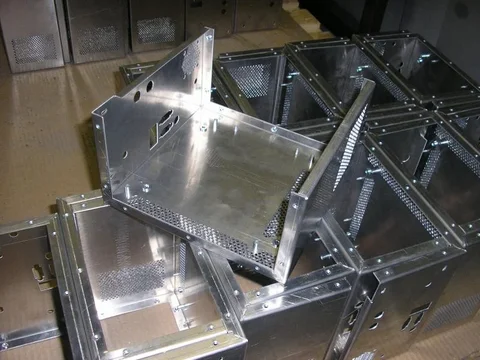
Took some pics at work

These are steel enclosures for electric motors and A bank of capacitors - I don't know what the application is..
P1010002.webp

These end up being steam heater cabinet parts for hazardous location application
P1010003.webp

These are parts of an air conditioner system for P&H strip mine shovels - all stainless
P1010001.webp
P1010001.webp
P1010002.webp
P1010003.webp
 
A few more..

This is an aluminum pay-phone booth
P1010004.webp

Parts of an airless paint sprayer for Lemmer Spray Systems
P1010005.webp

Parts of a digital imaging system used in hospitals
P1010007.webp

Lots of cool stuff. We often don't really know what the end application is but it doesn't matter. We don't normally design the parts ourselves, we just build whatever our customers draw up, though we often tweak the design to keep the cost to our customers reasonable. Engineers and designers often don't know how things are manufactured and therefore don't know the limitations. The only real limitation is cost. You can make anything if you have enough money for the tooling required.

Back to the build now :cheers:
P1010004.webp
P1010005.webp
P1010007.webp
 
Kevin,

WOW! I just found your thread, and I think it is my favourite now that Dan has finished the Mule and moved back to the US. I can't wait to see how yours turns out- I am SO glad you decided not to sell your 45.:clap:

Cheers,

Josh
 
Kevin,

WOW! I just found your thread, and I think it is my favourite now that Dan has finished the Mule and moved back to the US. I can't wait to see how yours turns out- I am SO glad you decided not to sell your 45.:clap:

Cheers,

Josh


Yeah, me too. I'm having a great time doing the work. Sometimes I think I'm not making any progress and other times I think going slow and thinking it through is better anyway.

I have been puttering on the roll cage but have hit the pause button due to needing to bend a couple more pieces. My friend with the tube bender has been difficult to hook up with because of conflicting schedules. So, I have moved on to the bed rebuild. Or rather getting ready for the bed rebuild. Today I installed the wiring harness on my Rav4 so I can tow my utility trailer. I need the trailer to move the bed to the sandblaster and get it cleaned up and find all the holes. If anyone is interested my other thread details the side line I am doing trying to reproduce the beds for the LPB 45's. A couple of years ago I made some bed sides for a local restoration co. - now I need some for my truck and will be making a few more sets for others. Now that I am into it I am going to make a complete bed and see if anyone wants them. I have a customer lined up for the first prototype so I'm getting stoked for the challenge.
 
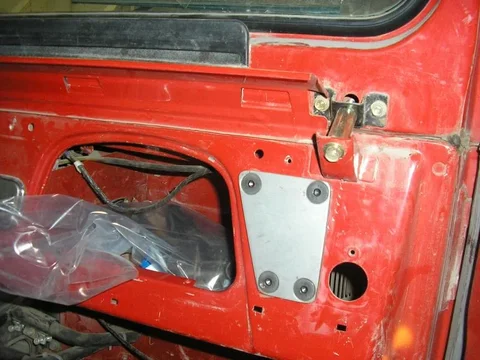
A couple of shots of my puttering with the roll cage. This is a 1/4" plate with counter sunk bolts on the outside and another 1/4" plate of the same shape on the inside with nuts welded to it. Eventually the outer plate will be the anchor point for the A pillar tube and the inner one will mount the tube that runs down to the floor. The drivers side mount required the relocation of the headlight switch - I'll likely put it where the choke is as I won't need to choke the 3B :D. The passenger side required a trimming of the glove box wall which I will finish out and clean up while doing the tub bodywork. The large holes are for the side window defrost vents which I had to miss. Also, I will be running a tube across the dash to connect the two A pillars. This will require removing the dash pad permanently and replacing it with my own custom dash pad that opens up for storage.

P1010003_4.webp

P1010004_4.webp
P1010003_4.webp
P1010004_4.webp
 
A blast from the past

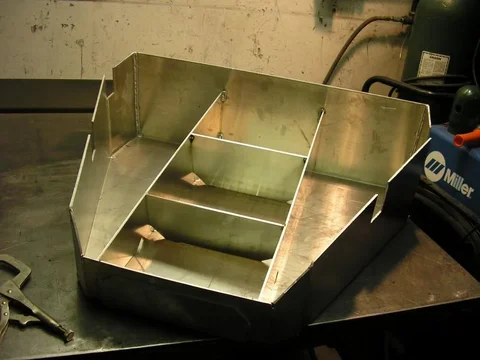
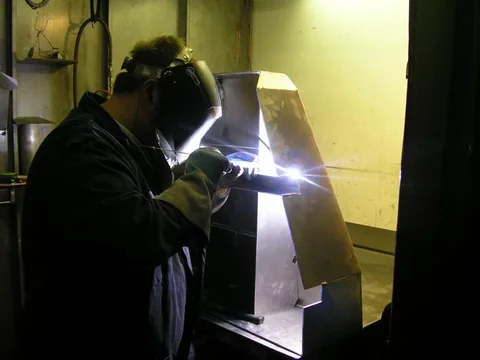
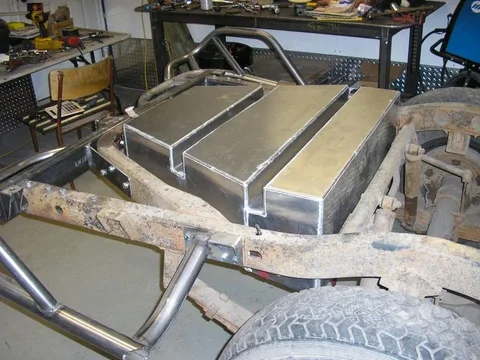
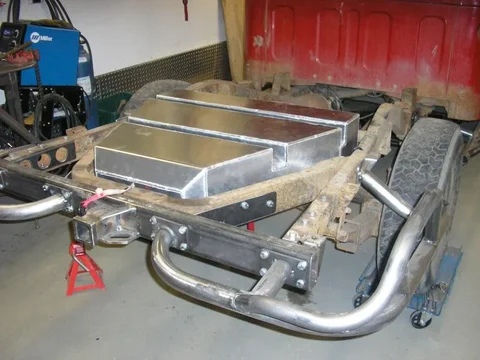
I haven't touched this tank in about 8 weeks but I had some time after work today and my welder was willing to stay and weld it up.

I tacked in the antislosh devise. My very first melting of aluminum :bounce:
P1010001.webp

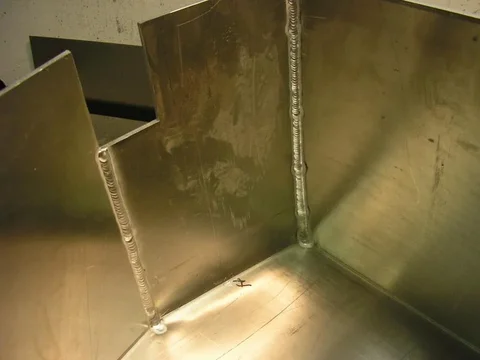
These are not my welds. My welder Shawn ran these beads on the inside of all the seams. The tank is made from one piece with a top added. That makes no welded seams along the bottom edge.
P1010002.webp

Ready for the top
P1010003.webp
P1010001.webp
P1010002.webp
P1010003.webp
 
Shawn just bought an old VW bug he is going to rally race and needs bunch of sheet metal work so he's trading his skills for mine.
P1010004.webp

Tank is done - at least until I make the mounting brackets, filler, drain, draw, sending unit...
P1010013.webp
P1010004.webp
P1010013.webp
 
If you look earlier in this thread you'll see where it goes. Also there will be another tank ahead of the rear axle.

dr_claw - I've got a tracking number for you - I'll send you a PM.
 
I'm working on mounting the tank - or at least making sure it fits :).
P1010001_14.webp

P1010002_13.webp
Setting the bed on
P1010003_11.webp
P1010001_14.webp
P1010002_13.webp
P1010003_11.webp
 

Users who are viewing this thread

Back
Top Bottom