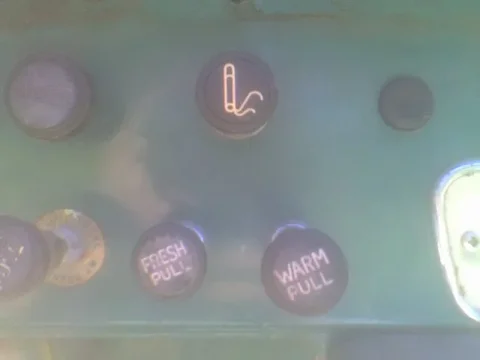
hi there..nice work...im just buy another fj40 1976. i was looking on all your photos..i will need the dash layout of all the switches and warning lights if you have one or 2 before your resto start..hard work there but better the satisfaction when you finish all..
Navigation
Install the app
How to install the app on iOS
Follow along with the video below to see how to install our site as a web app on your home screen.
Note: This feature may not be available in some browsers.
More options
Style variation
You are using an out of date browser. It may not display this or other websites correctly.
You should upgrade or use an alternative browser.
You should upgrade or use an alternative browser.
1976 FJ40 BUILDUP - Chief $*itty Pants
- Thread starter 4x4 Station Wagon
- Start date
This site may earn a commission from merchant affiliate
links, including eBay, Amazon, Skimlinks, and others.
More options
Who Replied?- Thread starter
- #142
No prob. I do have photos of the switch layouts however they are on a cheaper cell phone because that is all i had with me at the time. I can blue tooth them to my computer somtime in the next couple days and i will post for you.
Thanks on the cudos ! I want to only have to do it once so i am willing to go as far as it takes to ensure another 20-30 years out of it!
Thanks on the cudos
- Thread starter
- #143
- Thread starter
- #144
In regards to my rear sill questions I found this thread and one individual had the exact same idea as i had posted so i must be on to something so I will head this route.....
https://forum.ih8mud.com/40-55-series-tech/194494-rear-sill.html
Their idea:
I had posted:
https://forum.ih8mud.com/40-55-series-tech/194494-rear-sill.html
Their idea:
Make one out of two inch square tube and a flat 2 inch piece of 1/4 inch steel, weld it up very strong and nice, Larry
I had posted:
??? Use 2x2 box with a section of 2" x 1/4" flat bar placed offset on the top of the box, then weld the sides of the support where they curve around the tub back to the box... ??
Good build.
I have just recently rebuilt the rear sill/support in my forty.
There are quite a few pics of how i did it on page eight of my build thread (see sig line) if your interested


I have just recently rebuilt the rear sill/support in my forty.
There are quite a few pics of how i did it on page eight of my build thread (see sig line) if your interested


- Thread starter
- #146
That was perfect uted!! Thanks! Oh by the way holy crud that is some good work!!!!


- Thread starter
- #147
I have been busy doing body work. So far i have taken a hammer and dolly to the tub, cut the rear fenders, cut out the rear sill, trimmed untill the new CCOT one fit well, cut out the rear sill support, cut out a mangled spot on the tub and straightened, and cut out all the old seam sealer on the tub. I also made it to the metal shop and grabbed a chunk of 1/4 x 2" strap and 2x2 box tubing to make the rear sill support since i was lucky and my curved corner pieces were solid so i can reuse them. I have good photos and once i get them off my blackberry i will break this all down and post the pics...... I know isnt that the whole point of a blackberry so you can email them?? Ya try it! 

Oh and Orangefj45 I recieved the two pitman arms today so I will check and see which one is bet fit tomorrow! (And i will bring an actual camera i can get the pics off of)
Oh and Orangefj45 I recieved the two pitman arms today so I will check and see which one is bet fit tomorrow! (And i will bring an actual camera i can get the pics off of)

Last edited:
- Thread starter
- #148
In regards to my rear sill replacement I was able to get the rear support off with two lucky guesses at where the spot welds were. I thought i would go ahead and post two pics showing where the only spot welds were on mine to maybe help others.
This pic shows the spot weld on the passenger side (1976)
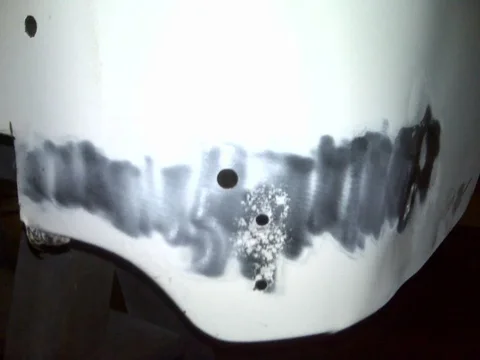
This pic shows the spot weld on the driver side right in between all the spare tire mounting bolts.

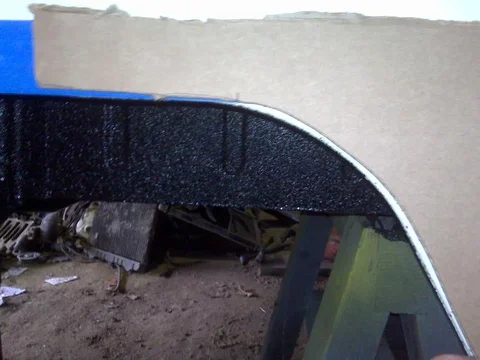
This pic shows that i was lucky and my curved pieces had minimal rust in which i was able to remove in the blasting cabinet. The stuff you see on them is the durabak in which would not come off!!


This pic shows the spot weld on the passenger side (1976)

This pic shows the spot weld on the driver side right in between all the spare tire mounting bolts.

This pic shows that i was lucky and my curved pieces had minimal rust in which i was able to remove in the blasting cabinet. The stuff you see on them is the durabak in which would not come off!!

- Thread starter
- #149
Here are some pics of my rear fender cut... I used a piece of card board as a template and cut with a die grinder. I only cut out 5" worth of material towards the rear...two inches up..... and about 1/2 - 3/4" towards the front only to remove the bent in lip so that it would be consistent throughout.
The blue tape was 2" so that made it simple and the regular masking was perfect width for the removal in the front so all I had to worry about is the arches. I wanted the rear to roll in the shape of factory both on the top and the bottom of the tub...
Here was my attempt at it:
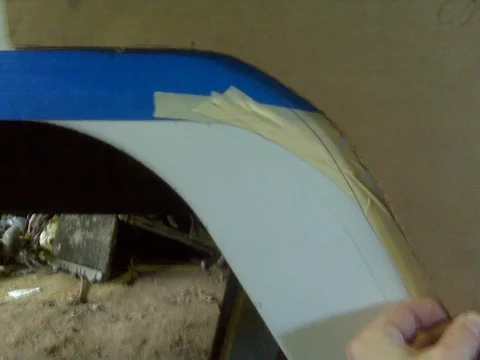


The blue tape was 2" so that made it simple and the regular masking was perfect width for the removal in the front so all I had to worry about is the arches. I wanted the rear to roll in the shape of factory both on the top and the bottom of the tub...
Here was my attempt at it:


- Thread starter
- #150
Here are some more:
Before:

After:
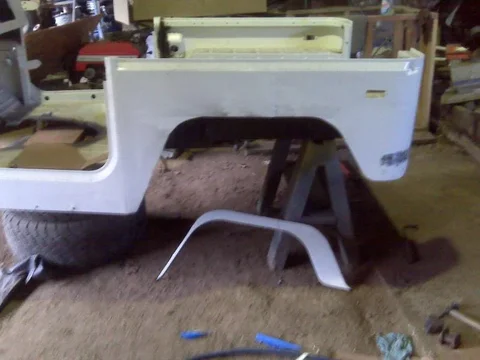
I know i should have probably gone a little farther back in the rear due to the 3" spring flip plus when you add my 3/4 cut out of the front but I will make up for it with axle position. I have been waiting till it is all over to set my pinion angle and i really have mixed emotions about how far back my rear axle is on the springs... I would think it is going to limit some articulation so i may split the difference and drill the perches allowing me to go back forward an inch for a total of two inches back.


Before:

After:

I know i should have probably gone a little farther back in the rear due to the 3" spring flip plus when you add my 3/4 cut out of the front but I will make up for it with axle position. I have been waiting till it is all over to set my pinion angle and i really have mixed emotions about how far back my rear axle is on the springs... I would think it is going to limit some articulation so i may split the difference and drill the perches allowing me to go back forward an inch for a total of two inches back.
- Thread starter
- #151
Ok I recieved the pitman arms from Orangefj45 as i had mentioned earlier so I ran over and tried them on for size..
The flat one only leaves for a 1/2" between the frame not enough for clearance on the TRE even though i am going upside down and the slightly dropped pitman arm leaves an inch and a half. This will be less once tightened down as you can see in the last pictures because the arm is not tight to the box maybe 1/4" to go still.
Orangefj45 you are the man!!! THANKS
and thanks to everyone else that helped in placing the box and answering my dumb pitman arm questions the pics were all very helpful!!


- Thread starter
- #152
Oh and before someone notices I will be putting GRADE 8 bolts in the box those are just to mock it up!! Good eye if you noticed though
- Thread starter
- #153
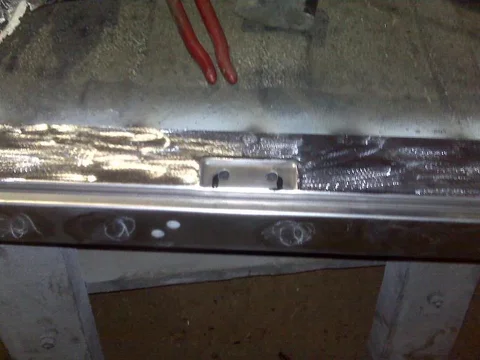
I made some progress today. I roughly fabbed up a rear support based off of a few others ideas. I used por15 on the tub where the rear sill support was and on the old corner pieces however the rest i had sprayed with weld through primer and then (i know kinda stupid but i poured too much) por15 over the top. I also welded up the damage I had to replace on the top of the rear corner along with several small holes through out the tub.
Here is what i started with:


I want this to be the last time i ever do this so i used a left over piece of the 2x2 box and boxed the mount holes in. I also boxed the ends:
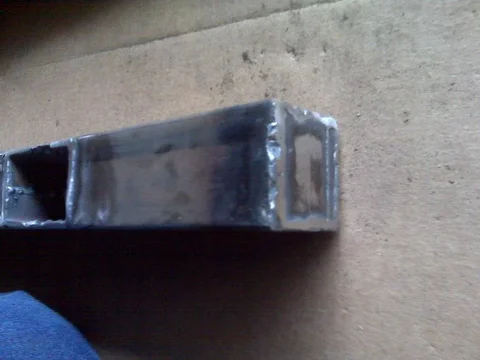
I got a little sloppy due to thin metal and no patience since it will be out of sight....


Here is what i started with:


I want this to be the last time i ever do this so i used a left over piece of the 2x2 box and boxed the mount holes in. I also boxed the ends:

I got a little sloppy due to thin metal and no patience since it will be out of sight....
Last edited:
- Thread starter
- #154
Here are a few more before the por15

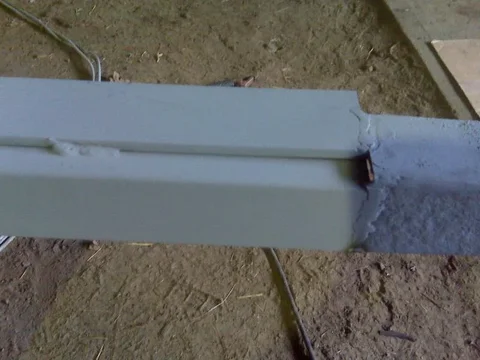
I placed a piece of 2 x 1/4 strap a 1/2 inch back from the face of the box for three reasons. One it will sit under the rear floor pan providing more support, two I will be able to tap and thread it for the rear door catch, and three hopefully it will mimic the factory rear sill support and limit available room for moisture and grime. ?? All opinion for sure!
I took a distance shot of the fender hack....

I am going to put in a full day tomorrow with hopes to weld in the rear sill support along with the rear sill. Then my goal is to start on one side of the cruiser and hopefully get most of the way done with the body work... well all except final blocking ofcourse.


I placed a piece of 2 x 1/4 strap a 1/2 inch back from the face of the box for three reasons. One it will sit under the rear floor pan providing more support, two I will be able to tap and thread it for the rear door catch, and three hopefully it will mimic the factory rear sill support and limit available room for moisture and grime. ?? All opinion for sure!
I took a distance shot of the fender hack....

I am going to put in a full day tomorrow with hopes to weld in the rear sill support along with the rear sill. Then my goal is to start on one side of the cruiser and hopefully get most of the way done with the body work... well all except final blocking ofcourse.
Last edited:
- Thread starter
- #155
- Thread starter
- #156
sweeeet! that sill came out awesome... bet you're glad you didn't go buy the rest of the channel from CCOT
- Thread starter
- #158
Thanks and Yes I am!!! After the first few times it is ok but after a while the whole 200 dollars here and 200 dollars there is starting to add up! But then again I dont have to tell you that..........
great Job
Great Job,
Looking good!
Great Job,
Looking good!
- Thread starter
- #160
Thanks Bsmith123! I wondered if you were still out there.....
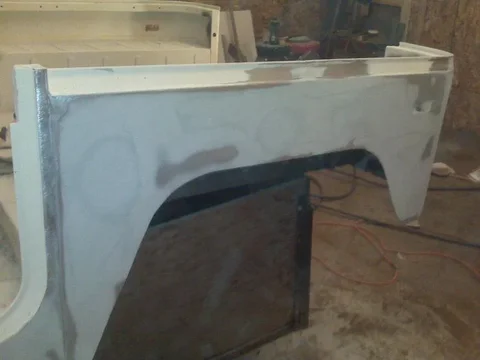
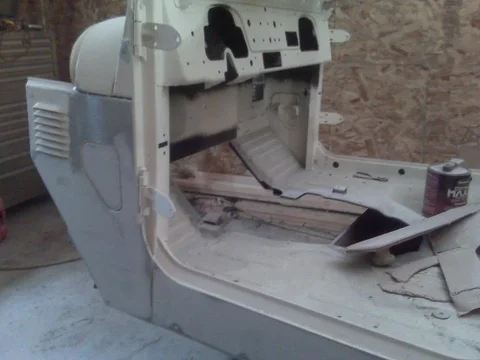
Another huge chunk of a day spent with both myself and my painter friend working on the tub. It worked out great he had another project in the shop so i was able to do the $%#% work while he blocked and layed mud. Afterwards .... afterwards..... and i mean afterwards we were able to lay sealer and primer surfacer on both my tub and the project (wrecked mazda door and fender). Here are some pics!!! (It feels great to finally start getting somewhere!! Now once the drive train is on the frame and the tub is set back on the pile of cruiser will be a lot smaller!!


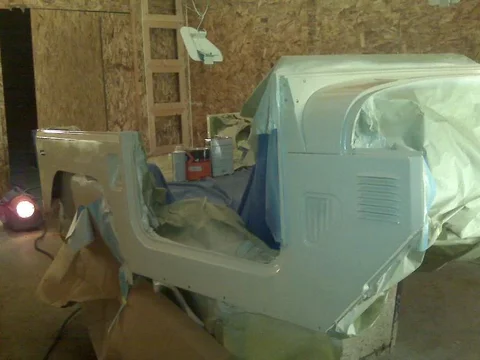


Another huge chunk of a day spent with both myself and my painter friend working on the tub. It worked out great he had another project in the shop so i was able to do the $%#% work while he blocked and layed mud. Afterwards .... afterwards..... and i mean afterwards we were able to lay sealer and primer surfacer on both my tub and the project (wrecked mazda door and fender). Here are some pics!!! (It feels great to finally start getting somewhere!! Now once the drive train is on the frame and the tub is set back on the pile of cruiser will be a lot smaller!!


Similar threads
Users who are viewing this thread
Total: 1 (members: 0, guests: 1)


