Width between corner channels 1975 40 (1 Viewer)

This site may earn a commission from merchant affiliate
links, including eBay, Amazon, Skimlinks, and others.

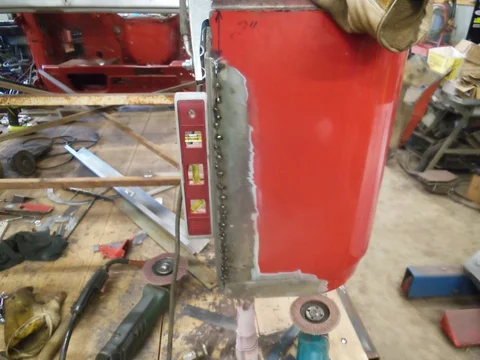
Started on the D/S corner, cut out that piece that attaches to the back side of the corner. Cut it right at the crease
DSCN0677.JPG
cut the lip off the quarter
DSCN0680.JPG
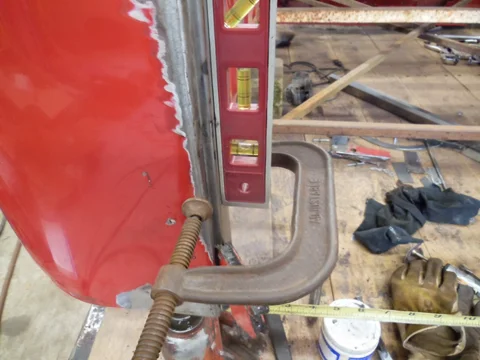
Fit the corner so I can follow it with the quarter and it will be square and plumb. DSCN0683.JPG
DSCN0683.JPG
DSCN0684.JPG
I'll add some to the quarter and put the lip back on, add some to the top edge. Then it will be sill time.... I think.
 
You're well on your way! What seems like a long time ago, I was handed this heap by the boss, and told to turn it into a presentable FJ40. It just takes time and patience. Every tack weld you do is one less than you had to do before. Soon it will start to look like a Cruiser again! (yes, I was ready to pull my hair out when I stepped into the room and saw the body with no floor and no bracing sitting on a sawhorse and buckets! I think I said "oh no!" a lot.)

I really have no contribution to this thread, other than maybe some motivation. It's looking great!

- Josh

1525507_10102133405894377_1122929796_n.jpg


20151006_112815_resized.jpg
 
Here's now
DSCN0687.JPG
and before, the attachment in the post before doesn't seem to work.
DSCN0670.JPG
 
Bout got the sill in place
DSCN0689.JPG
DSCN0696.JPG
DSCN0697.JPG
DSCN0691.JPG

DSCN0695.JPG

I'm within a 1/16" of where I need to be, shooting for 41 5/8" or little more. Man I could use another set of hands!
 
Well, I know you already are finished. I had a chance to take some measurements so I figure I'll post'em. My 40 is a 12/75. It still has the factory weld dimples and I believe it has not been messed with structurally.

This is the "inside" measurement I believe you were first asking for.
IMG_2937.JPG


This is the lip opening "the widest opening" from where the quarter panel meets the vertical post/pillar that helps support the weight of the hardtop sides.
IMG_2938.JPG


This is from the inside surface of the vertical post/pillar to the outside surface of the quarter panel.
IMG_2942.JPG


This is a bit of a guess. I assume the Previous owner taped off the seam where the sill met the actual bed paneling before he sent the tub to be Rhino lined. So I'll call this from the bed panel seam to the rearmost surface of the sill
IMG_2944.JPG


I'll call the following measurement...............from the bed paneling sill seam to the lower ambi door striker capture nut center.:hillbilly: In a previous edit I refer to the door striker as a door catch. Not certain what the official term is.
Edit: I fat fingered the 1 instead of a 2. Should be 1 23/32"
IMG_2945.JPG
 
Last edited:
Few more
I don't know all the proper lingo but I'll try to describe as best I can.

This measurement is from the first lip/ledge of the sill to the top of the rail that the hardtop sides bolt too.
IMG_2941.JPG

this is from the top of the fender well to the top of the rail that the hardtop sides sit on. My rig came to me with Rhino lining inside, I am not sure how thick the Rhino lining is. My guess is 3/16"
IMG_2943.JPG


These measurements are from the underside or bottom of the sill.

Mine is:
2" to the flat surface of the first lip/ledge
2 5/16" to the flat surface of the pocket/ledge for the door catch
2 3/8" to the top surface of the sill or "bed level"


IMG_2946.JPG


This measurement is from the "bed level" of the sill to the top surface the rail that the hardtop sides sit on.
IMG_2947.JPG


This is a photo of both measurement previously shown. The lip/ledge of the sill to the rail the hardtop sides sits on. Mine is 14 3/4"

And what I would call "bed level" of the sill to the top of the rail that the hardtop sides sit on and are bolted too. Mine is 14 5/16"

IMG_2948.JPG
 
Last edited:
Last edited:
Gator, I haven't had to wrap my brain around rear openings. I am not sure if I understand you. When you say "door catch" I'm thinking you mean the metal bracket that has the two phillips head screws, and it's fastened about in the center of the sill.

IMG_2949.JPG
 
Or, let's call this "guess #2"
Do you mean the narrow lip that I colored with a red line and arrows?
IMG_2952.JPG
 
Last edited:
I hear that. Another problem I have is having to walk by other projects that creep into my mind also. I'm driving to CO Springs on Friday to get a hood for my 66 Tempest, mines pretty bad and the one I'm getting is $75. I now know my where my kids get their short attention span.
 
Gator, I haven't had to wrap my brain around rear openings. I am not sure if I understand you. When you say "door catch" I'm thinking you mean the metal bracket that has the two phillips head screws, and it's fastened about in the center of the sill.

View attachment 1415111

Yes sir, that's what I'm talking about. I want to make sure I get it in the right spot, the sill is made so that the catch is off center. Can you measure from inside the right corner to the catch, then the inside of the left corner to the catch? That way I'll know if the sill needs to move left or right.

Probably over thinking again but, the lip on the corners where a little narrow even after working on them. That after market sill my be off a little as well. I hope the opening being a 1/16" small will be ok as its the best I can get square.
 
I hear that. Another problem I have is having to walk by other projects that creep into my mind also. I'm driving to CO Springs on Friday to get a hood for my 66 Tempest, mines pretty bad and the one I'm getting is $75. I now know my where my kids get their short attention span.

I'm the same way man, I'm waiting on tranny parts for my shovel, got it tore apart, got the harmonic balancer off the Chevell (OEM don't last long on a roller motor, that's #2) pickup in the high dollar dist. went bad in bad in my 77. As long as I keep working on the 40 Every Day, I think I'll be ok, I've made a suspence date for it.

One of the guys that I served with has a 66 Tempest rotting away, bout the only thing worth a damn now is maybe the trunk lid, hood and maybe the trim. There's not a dent in the car no where, been there so long its on the floor pans.
 
Last edited:
I'm the same way man, I'm waiting on tranny parts for my shovel, got it tore apart, got the harmonic balancer off the Chevell (OEM don't last long on a roller motor, that's #2) pickup in the high dollar dist. went bad in bad in my 77. As long as I keep working on the 40 Every Day, I think I'll be ok, I've made a suspence date for it.

One of the guys that I served with has a 66 Tempest rotting away, bout the only thing worth a damn now is maybe the trunk lid, hood and maybe the trim. There's not a dent in the car no where, been there so long its on the floor pans.
That's pretty much how I got my Tempest. Straight as an arrow with perfect gaps and good door hinges. Rust everywhere in the crevices. Oh well, price was right and sprint six OHC Pontiacs aren't a common item.

Keep up the good work.
 
Here are some mesurements from the passenger side ambi door pillar to the center of door catch screws
IMG_2992.JPG


IMG_2994.JPG


IMG_2993.JPG
 
Driver side ambi door pillar inside edge to door catch screw centers

Note: don't put Duct Tape on your spare tire catch:hillbilly:

IMG_2991.JPG
IMG_2995.JPG

IMG_2998.JPG
 
Last edited:
Some of the camera angles are deceiving, I wrote down the measurements while looking at the tape dead on.

Spare tire catch measurements

IMG_3005.JPG


IMG_3007.JPG


IMG_3006.JPG
 
Last edited:

Users who are viewing this thread

Back
Top Bottom