What have you done to your 100 Series this week?

This site may earn a commission from merchant affiliate
links, including eBay, Amazon, Skimlinks, and others.

Your pointer for checking the plastic trim flap led me to the culprit. I can finally say now I’m satisfied with my job on this fabrication, oddly days after I completed it.
I thought I had messed something up but I didn’t. Take a look at the picture you can see the torsion rod assist assembly hooks into a plastic clip and as I open and close the gate it pops in and out of that clip, which is what’s been making my noise that’s been driving me mad . Its completely harmless and I’m not sure if it’s supposed to pop out and pop back in like that, but it does it every time. Maybe it always did do that and I didn’t know it. That picture is taken right underneath the license plate.

View attachment 4139398

Not supposed to pop out/in. Maybe it’s because you cut the rods? Mine doesn’t do that.
 
Discovered these modular tool boxes from Harbor Freight are a perfect fit behind the third row!

IMG_0570.webp
 
Your pointer for checking the plastic trim flap led me to the culprit. I can finally say now I’m satisfied with my job on this fabrication, oddly days after I completed it.
I thought I had messed something up but I didn’t. Take a look at the picture you can see the torsion rod assist assembly hooks into a plastic clip and as I open and close the gate it pops in and out of that clip, which is what’s been making my noise that’s been driving me mad . Its completely harmless and I’m not sure if it’s supposed to pop out and pop back in like that, but it does it every time. Maybe it always did do that and I didn’t know it. That picture is taken right underneath the license plate.

View attachment 4139398
Back door torsion bar guide…

Toyota part # 68846-60010

$16 at your local stealership
 
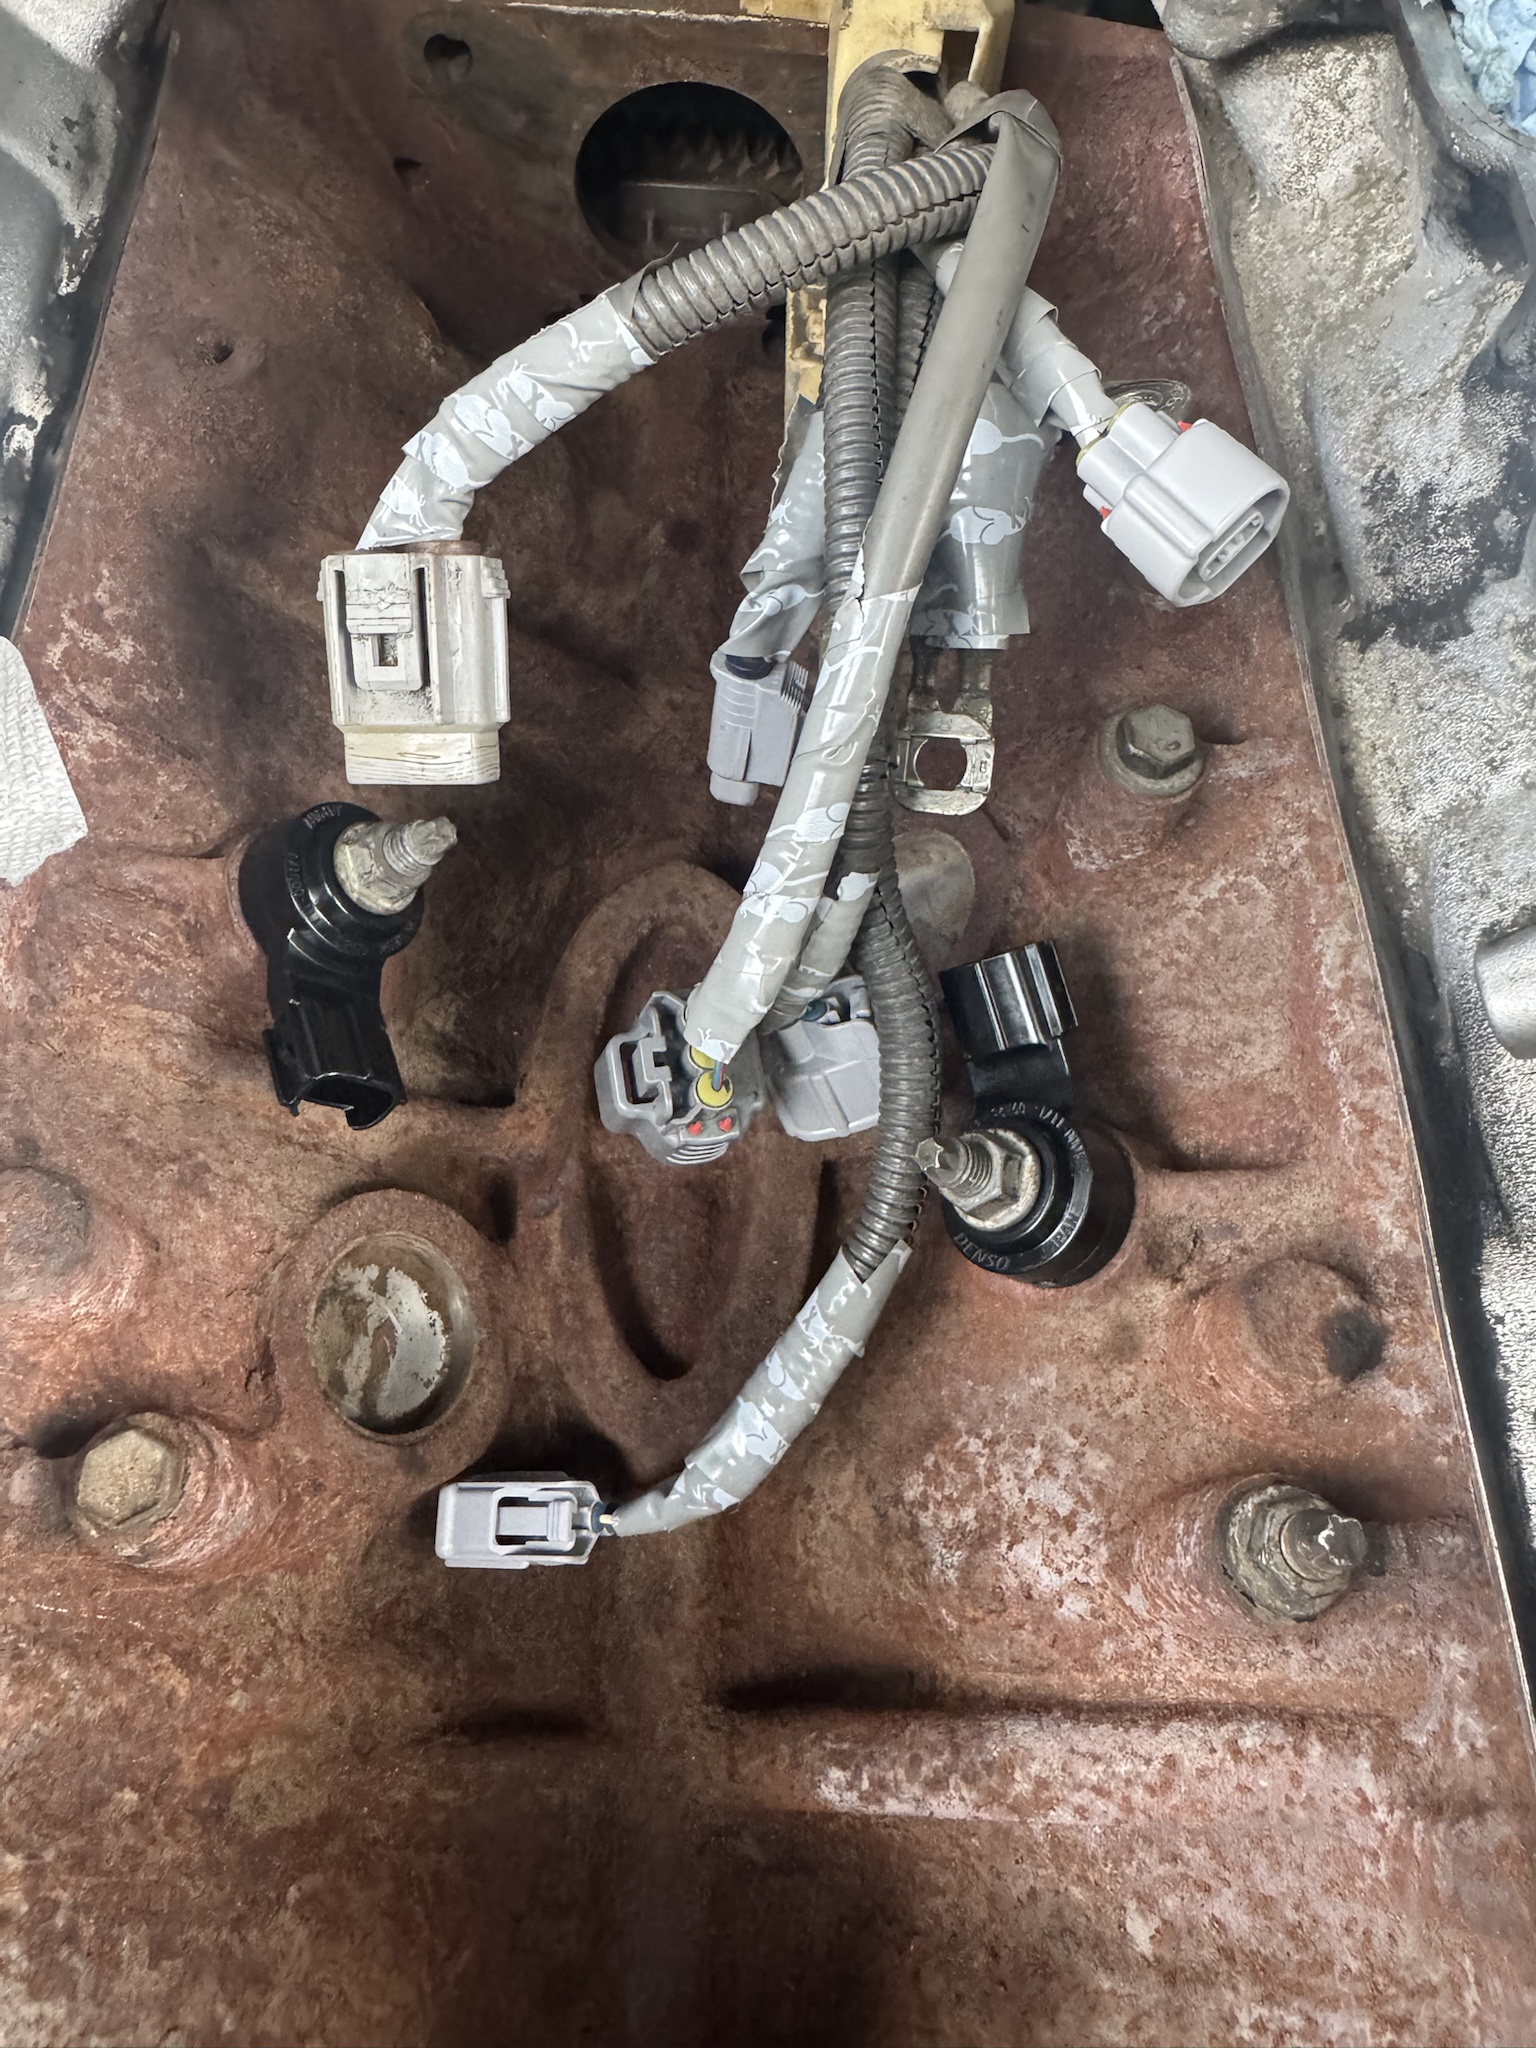
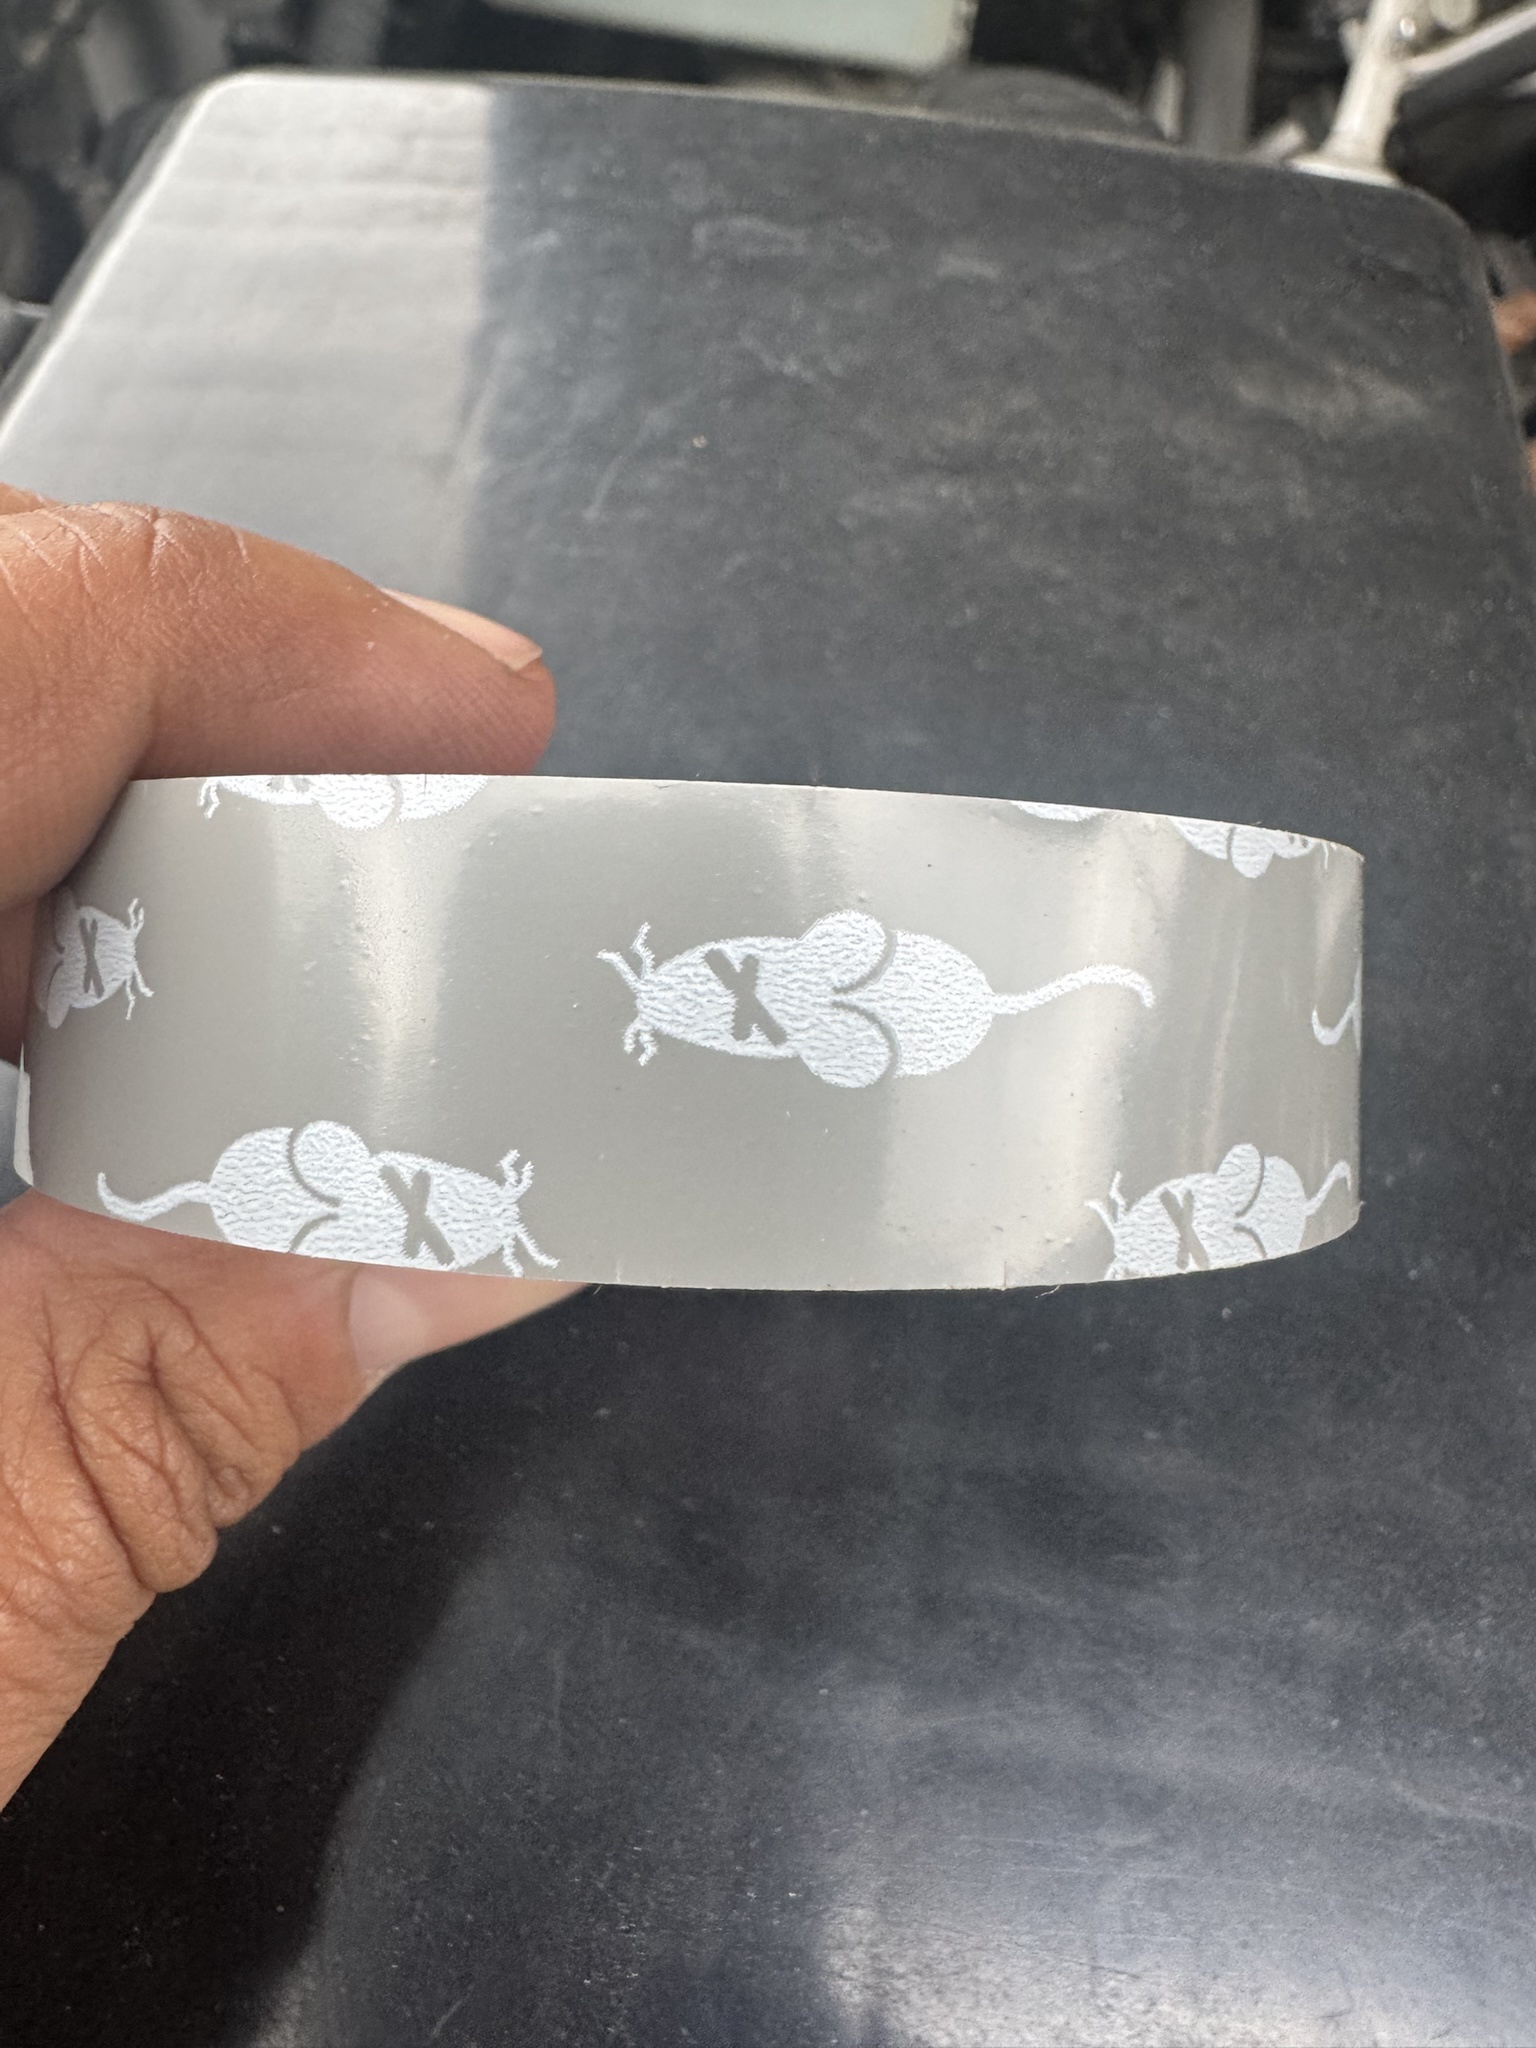
Redoing everything under the intake manifold. Got around to replacing all the broken connectors and installing new knock sensors. I found a rats nest in the starter valley but no damaged wires luckily. Added some capsaicin infused tape around the wiring for rodent deterrence.

b6Er2Lp.jpeg


Ia36BAY.jpeg
 
This actually looks good.
This is very tastefully done. Can you share any details about cost and timing and your experience with the upholstery shop? Assuming you did not do this yourself.
 
As a window tinter, the mirrored rear windows were driving me crazy not being able to make the fronts match. 5 films later I found one I'm happy with.

Not completely perfect but I think it's as close as you'll get. And no it's not Viper Ceramic, it's Edge Ultraview Dual Reflective 35% and yes it is made for houses and commercial windows. Lol!

1998 Lexus LX470
15475.webp
20260514_160720.webp
20260514_160724.webp
20260514_160727.webp
20260514_160732.webp
 
New transmission and engine mounts
IMG_6062.webp
IMG_6065.webp
IMG_6066.webp

Bluetooth mode engaged 😂

IMG_6070.webp

Ye olde

IMG_6041.webp
Ye new

EDIT: NO MORE VIBRATIONS WHILE IDLING IN GEAR. OCCASIONAL THUNK GOING INTO GEAR SEEMS TO BE GONE. WOO! I have already done most of the usual suspects (diff bushings, greasing joints, drive flanges, diffs rebuilt, etc)

This was the most helpful of the vids I watched:
 
Last edited:
using my gantry crane, a crescent wrench to bend flanges, and hammers, I've been working on getting the pillar back into shape. started by pulling with the crane while beating warped support metal back into shape, then reworking the flange into rough shape. made a shape template from the good side out of cardboard and used that to gage the appropriate curve, and will get the door put back on soon to gage from the inside.

got the good side cleaned up to make the shape gage,
1778955530043.webp

pulled with the gantry crane and chain hoist,
1778955554915.webp

roughly reshaped the flanges, (repeat step 2 and 3 a few times),
1778955601278.webp

... and looks like we're close.
1778955643731.webp

Keep in mind that there are two layers of sheet metal that will get welded back in. I'll get them clamped in place, remount the door, and check the door clearance before I start re-welding.
 
How difficult were the engine mounts? I already did the transmission, that was easy. Pair of engine mounts are ready to go in but I'm not exactly looking forward to the job.
It’s not too bad. I’m mostly sore from contorting my body to reach things. 2 banana job just a bit of a pita to reach. A long 17mm flex head ratcheting wrench (same one I used for the rear shock top nut!) comes in handy. A 17mm stubby socket and long ratchet would be an alternative. I did struggle a bit lining up the last two bolts but wasn’t being aggressive enough with the pry bar.

You’ll need to loosen the trans crossmember and trans mount to let the motor move enough for the engine mounts. The vid I posted was the best because they clearly explained sequencing to do it efficiently.
 
New inner (555 brand) and outer (genuine) steering ball joints on the right side of our ‘99 JDM.

I just did the left inner (caught during safety inspection) and used genuine for that but when a bunch of fluid came out of the boot I figured the rack isn’t going to be around long enough to justify genuine for the other side, which I found play in while doing the first side.

Not looking forward to paying for shipping for a RHD rack😬. Going to put some stop leak stuff in and keep an eye on things.
IMG_7531.webp
 
Where did you get the brake booster with accumulator from and how much was it. Thanks
If you wait for one of Serra Toyota’s sales you can get them for under 1500 shipped. I think I paid ~1100 for one a few months ago—this was for a 1999, non VSC.
 
using my gantry crane, a crescent wrench to bend flanges, and hammers, I've been working on getting the pillar back into shape. started by pulling with the crane while beating warped support metal back into shape, then reworking the flange into rough shape. made a shape template from the good side out of cardboard and used that to gage the appropriate curve, and will get the door put back on soon to gage from the inside.

got the good side cleaned up to make the shape gage,
View attachment 4141487
pulled with the gantry crane and chain hoist,
View attachment 4141488
roughly reshaped the flanges, (repeat step 2 and 3 a few times),
View attachment 4141489
... and looks like we're close.
View attachment 4141490
Keep in mind that there are two layers of sheet metal that will get welded back in. I'll get them clamped in place, remount the door, and check the door clearance before I start re-welding.
Dope! Love it. Bring that baby back! Great job!
 
New inner (555 brand) and outer (genuine) steering ball joints on the right side of our ‘99 JDM.

I just did the left inner (caught during safety inspection) and used genuine for that but when a bunch of fluid came out of the boot I figured the rack isn’t going to be around long enough to justify genuine for the other side, which I found play in while doing the first side.

Not looking forward to paying for shipping for a RHD rack😬. Going to put some stop leak stuff in and keep an eye on things. View attachment 4141573
I'm replacing my inner and outers right now too and came across a little fluid in the boots, gonna change the fluid and put some AT-205 in there too
 
Back
Top Bottom