Vel's '76 resto-mod (1 Viewer)

This site may earn a commission from merchant affiliate
links, including eBay, Amazon, Skimlinks, and others.

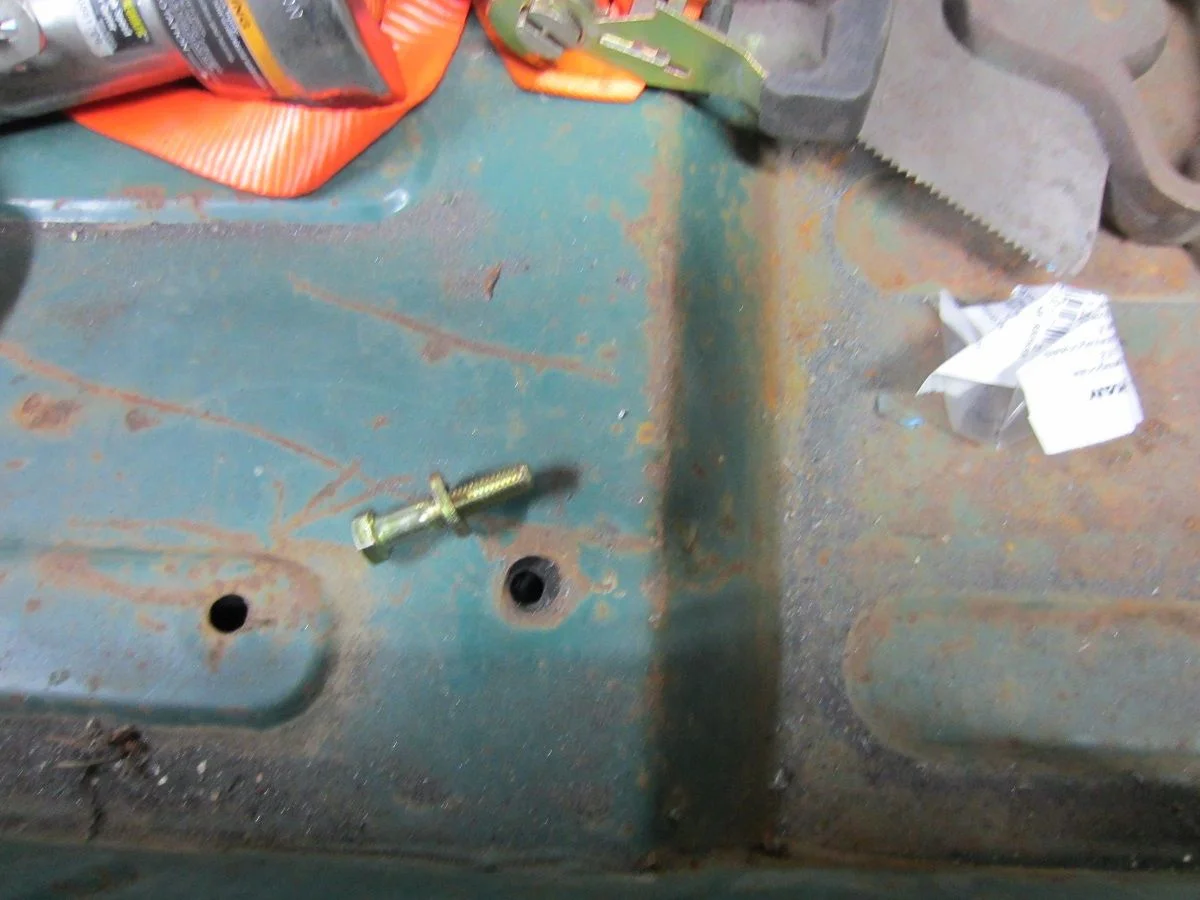
Spent a bit of time in the garage today. Nothing to exciting though. Removed some misc bolts out of the tub. Got the dash pretty well disassembled. Sadly some of the screw heads broke off while removing the dash pad so will have to get those out.

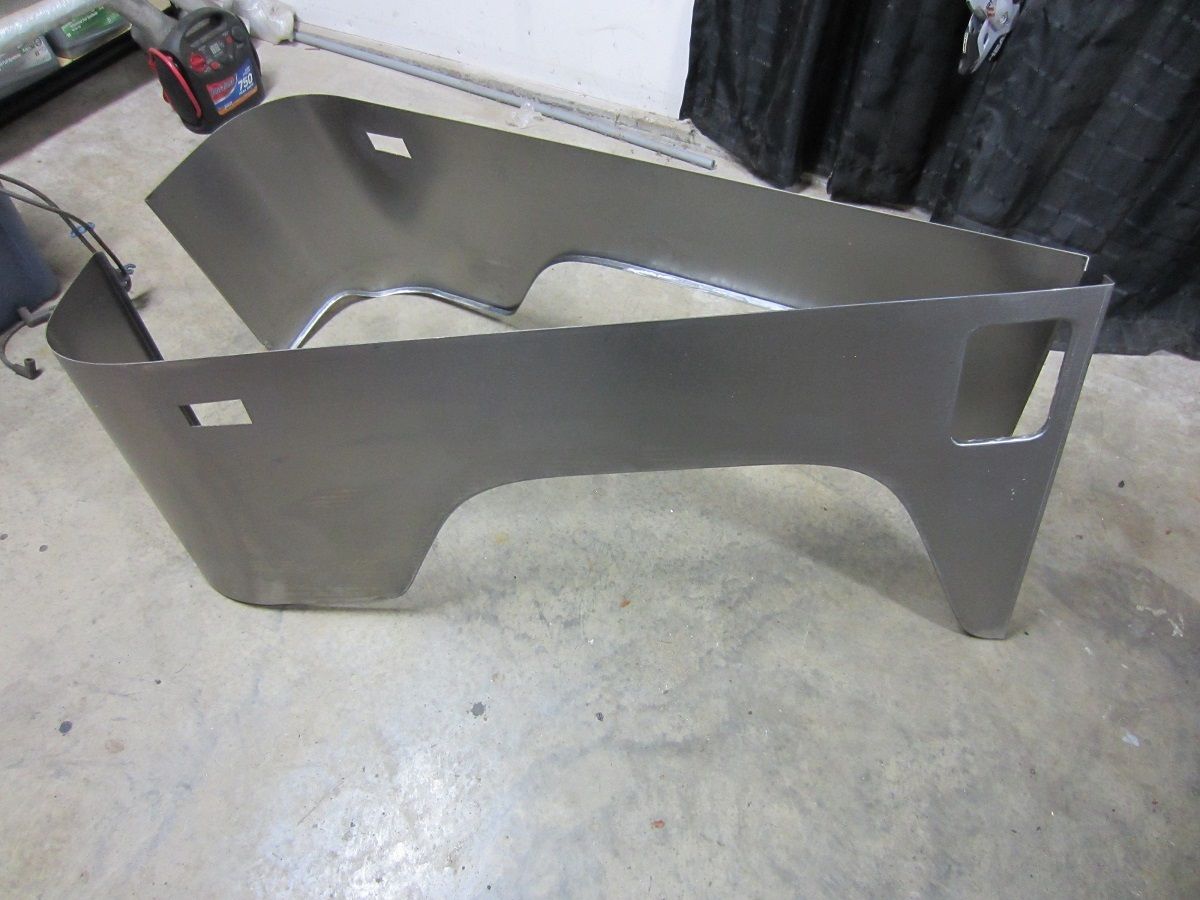
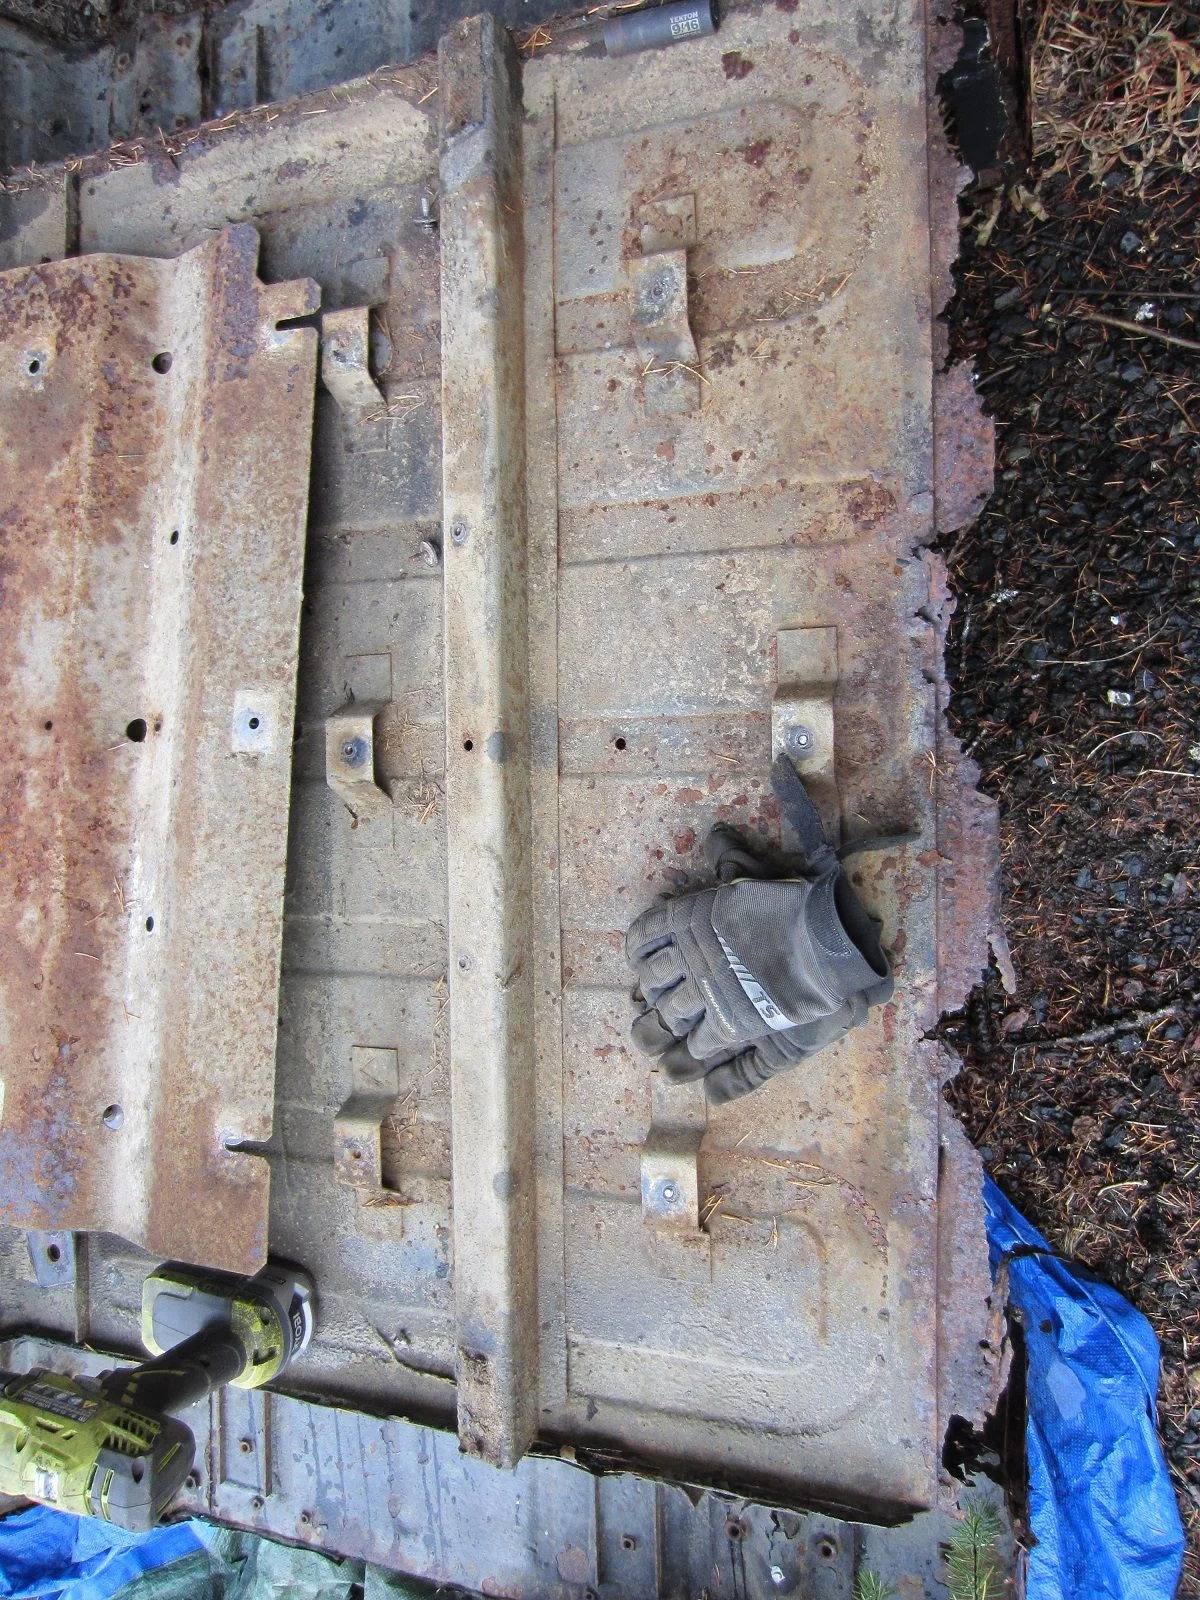
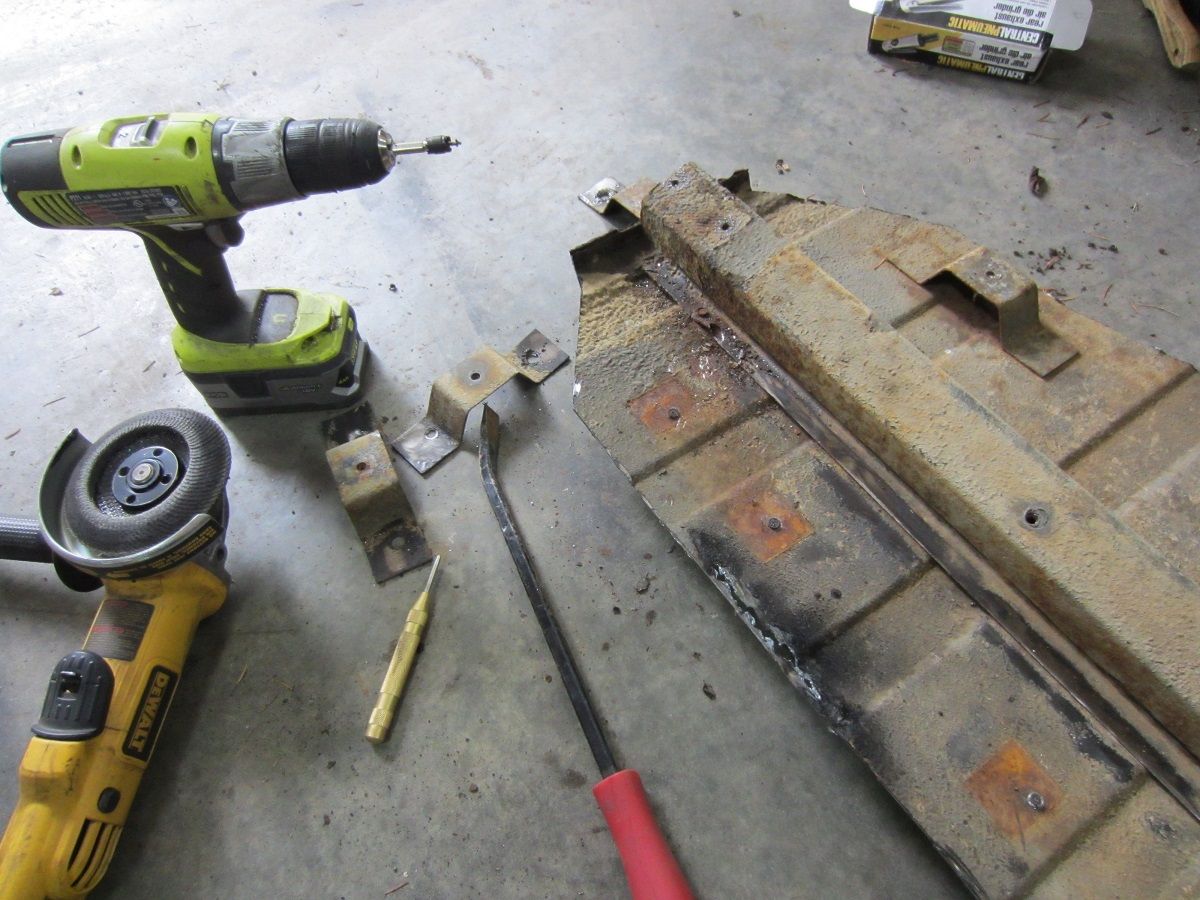
I did take advantage of the break in the rain to cut the brackets off the old tub. Got the "skid plate" off to find them in pretty dang good condition really.

full


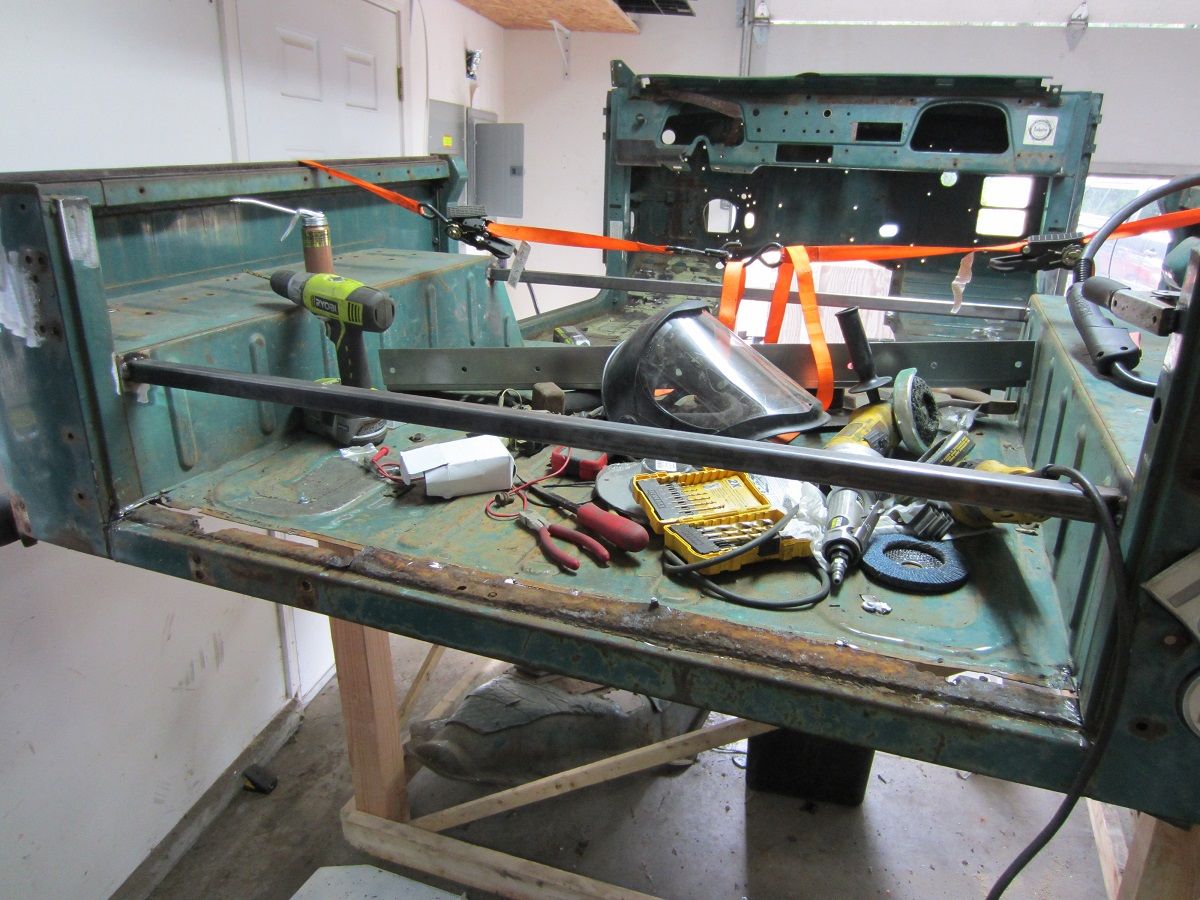
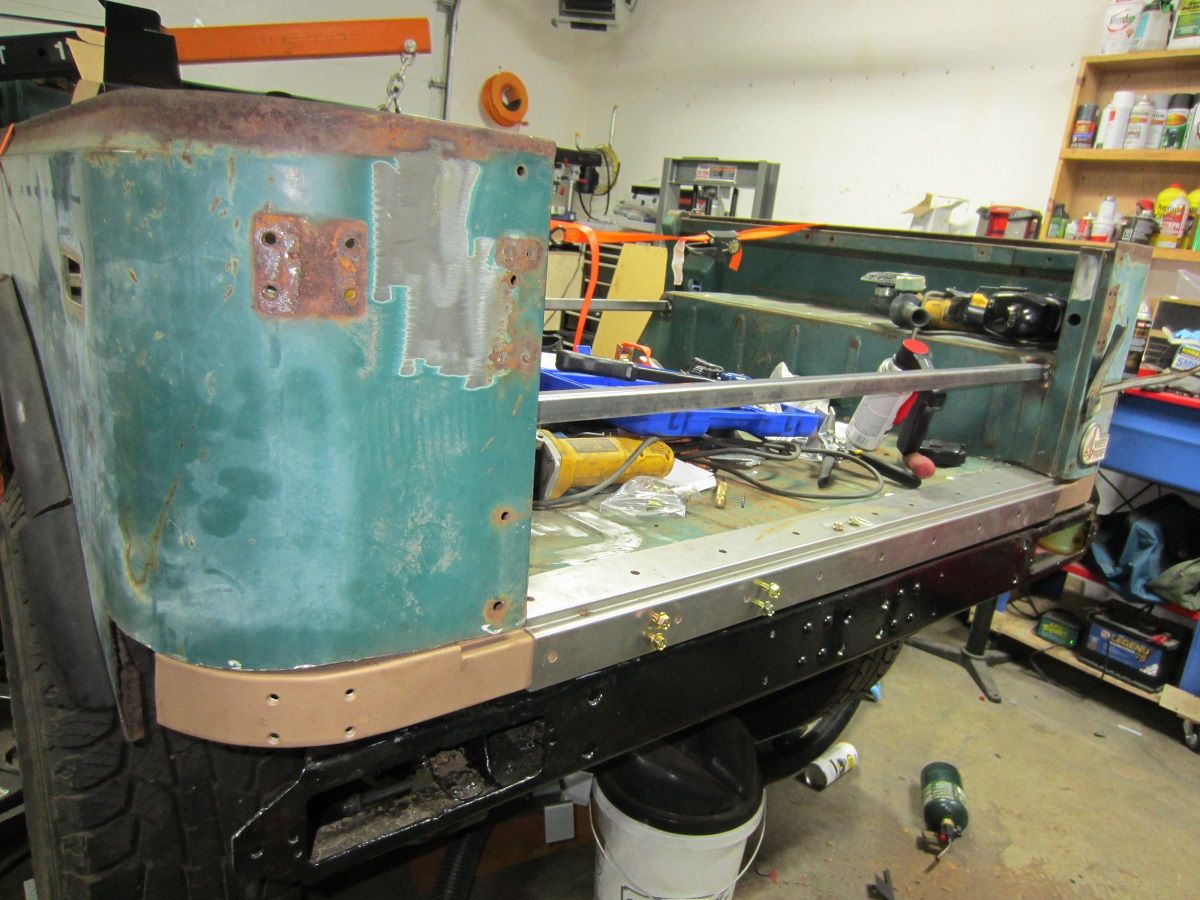
So i cut out the section and took it into the garage to work on it. Of course the rain didnt come back so i could have just done this on the old tub. But the old tub is scrap anyways.

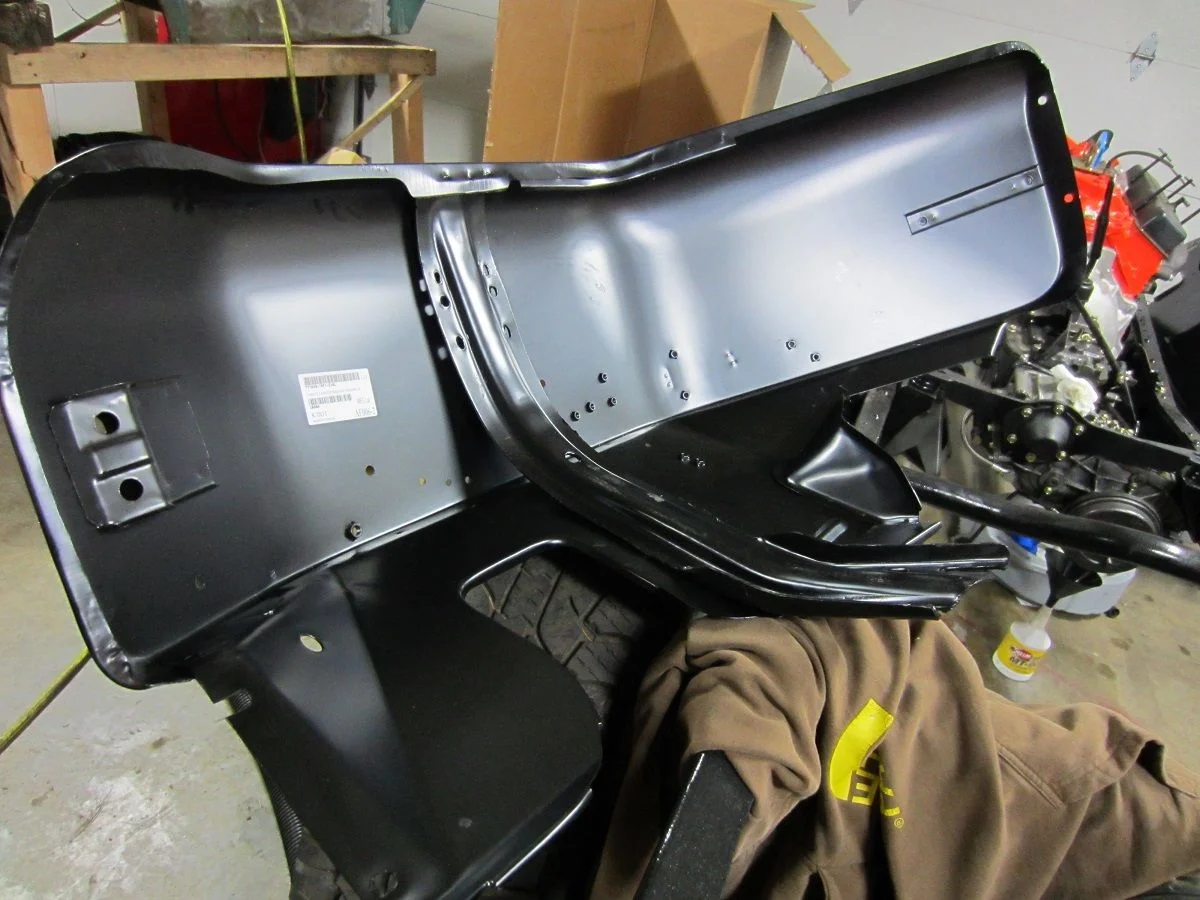
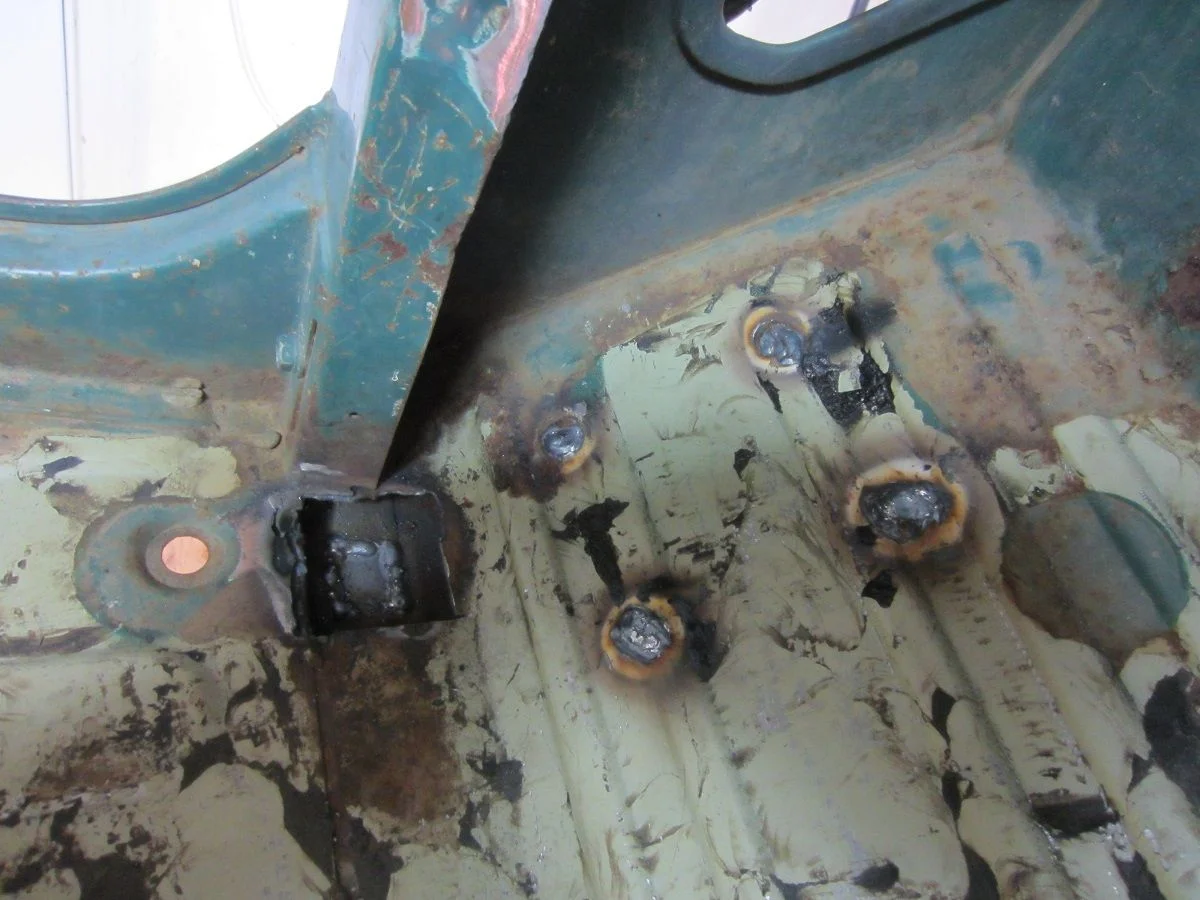
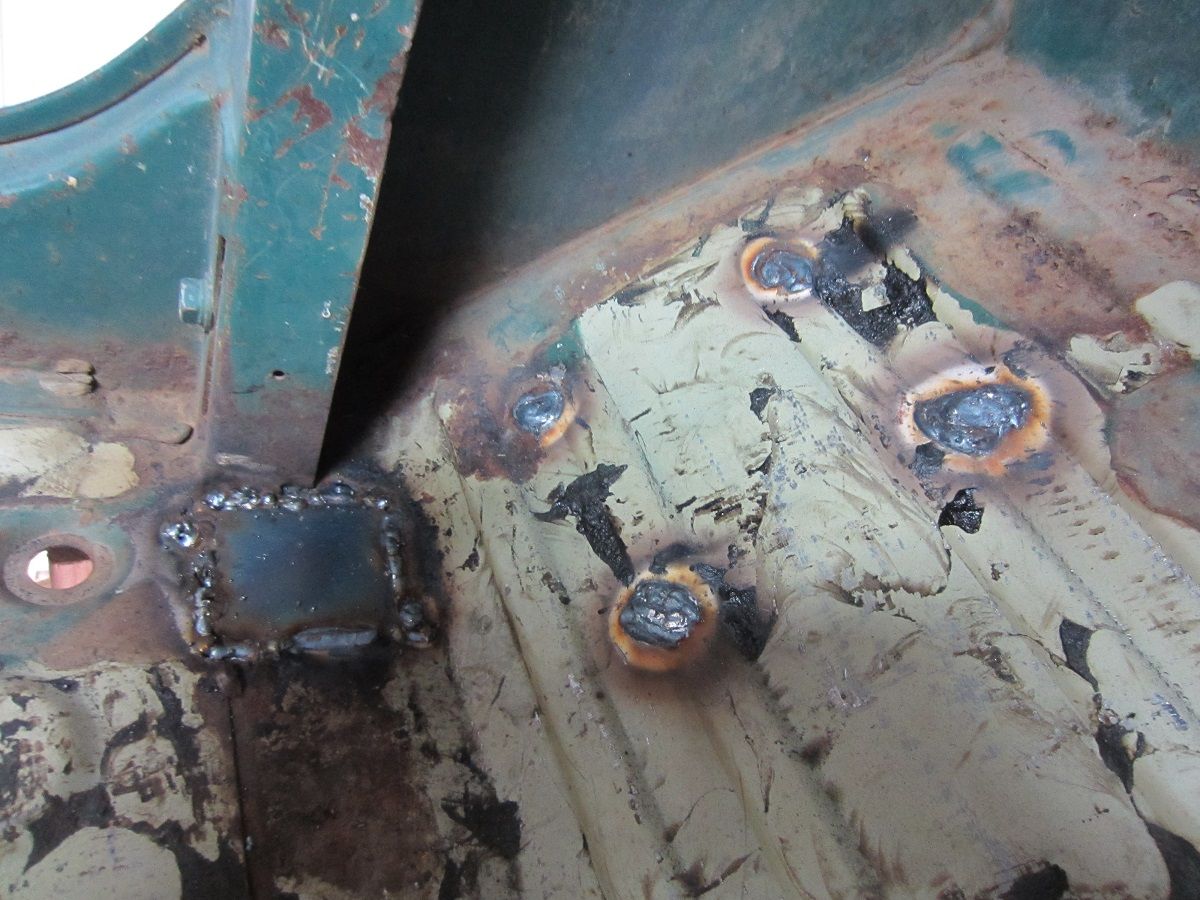
I tried out the harbor freight spot weld cutter and have to say it works pretty well. Hardest part is finding the spot weld. The brackets were easy but the channel piece doesnt seem to be as easy.

full


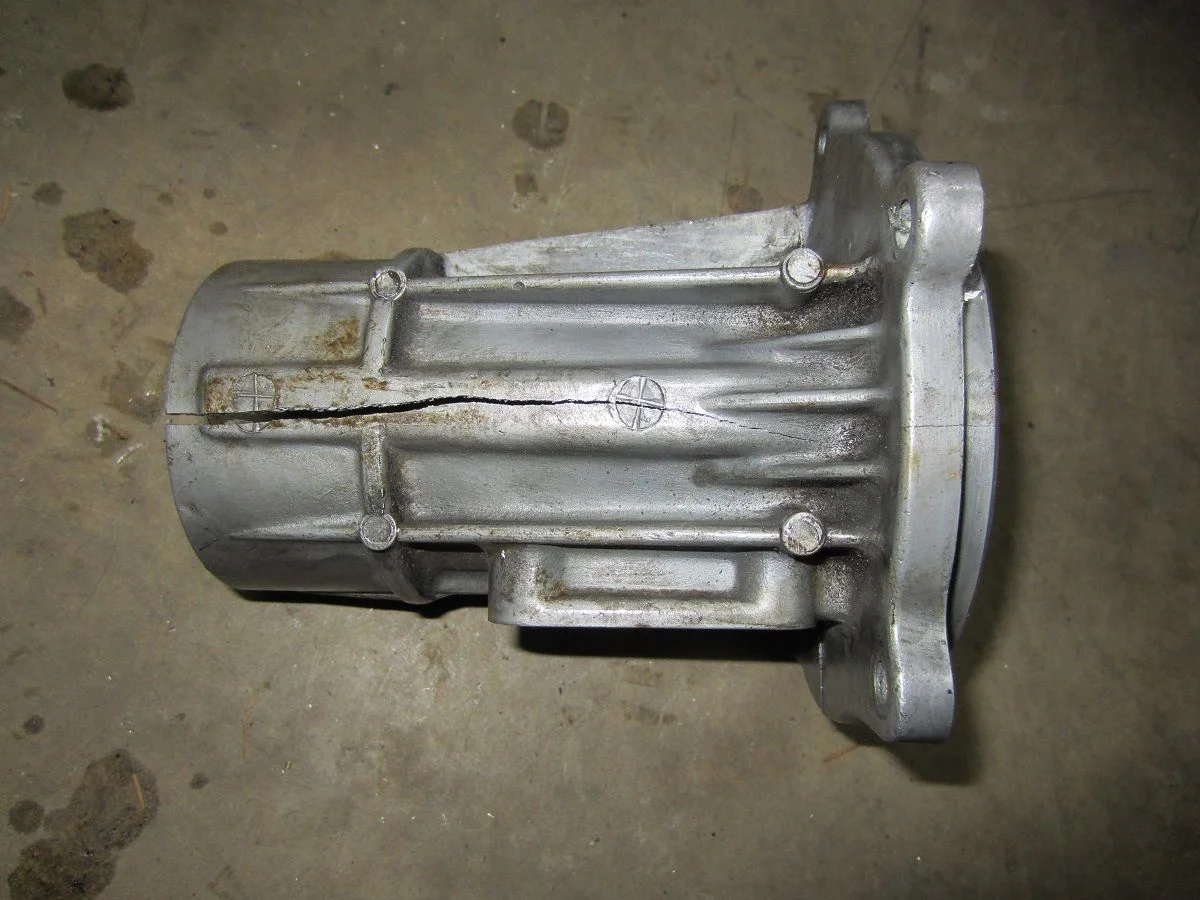
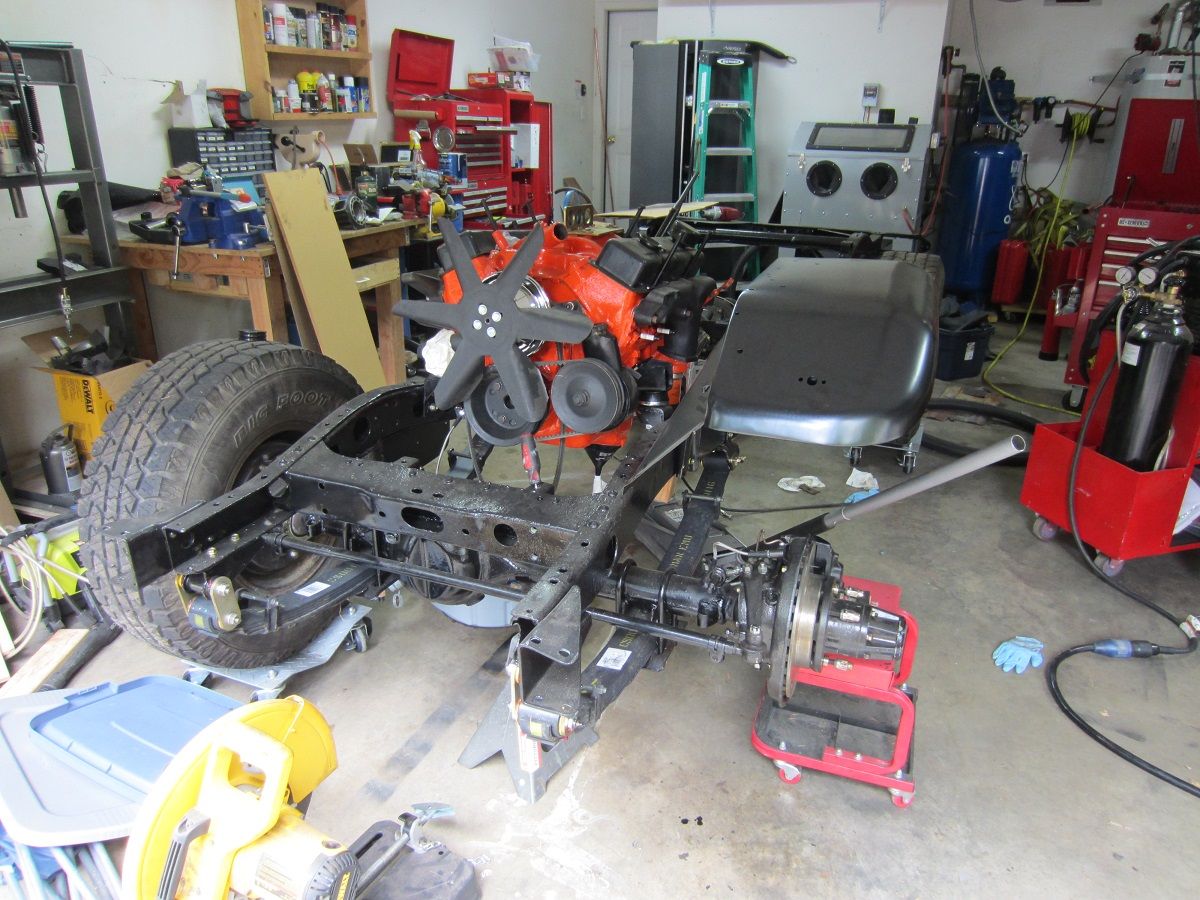
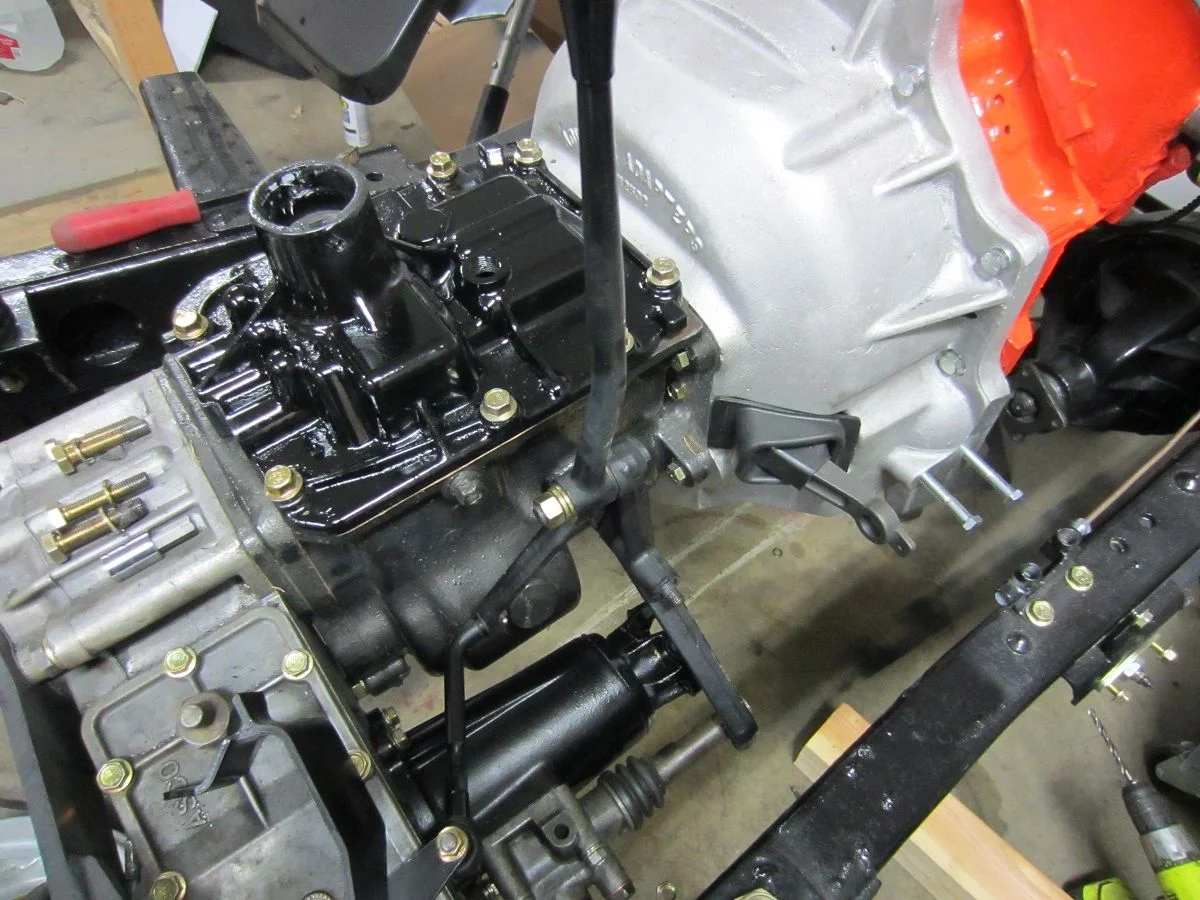
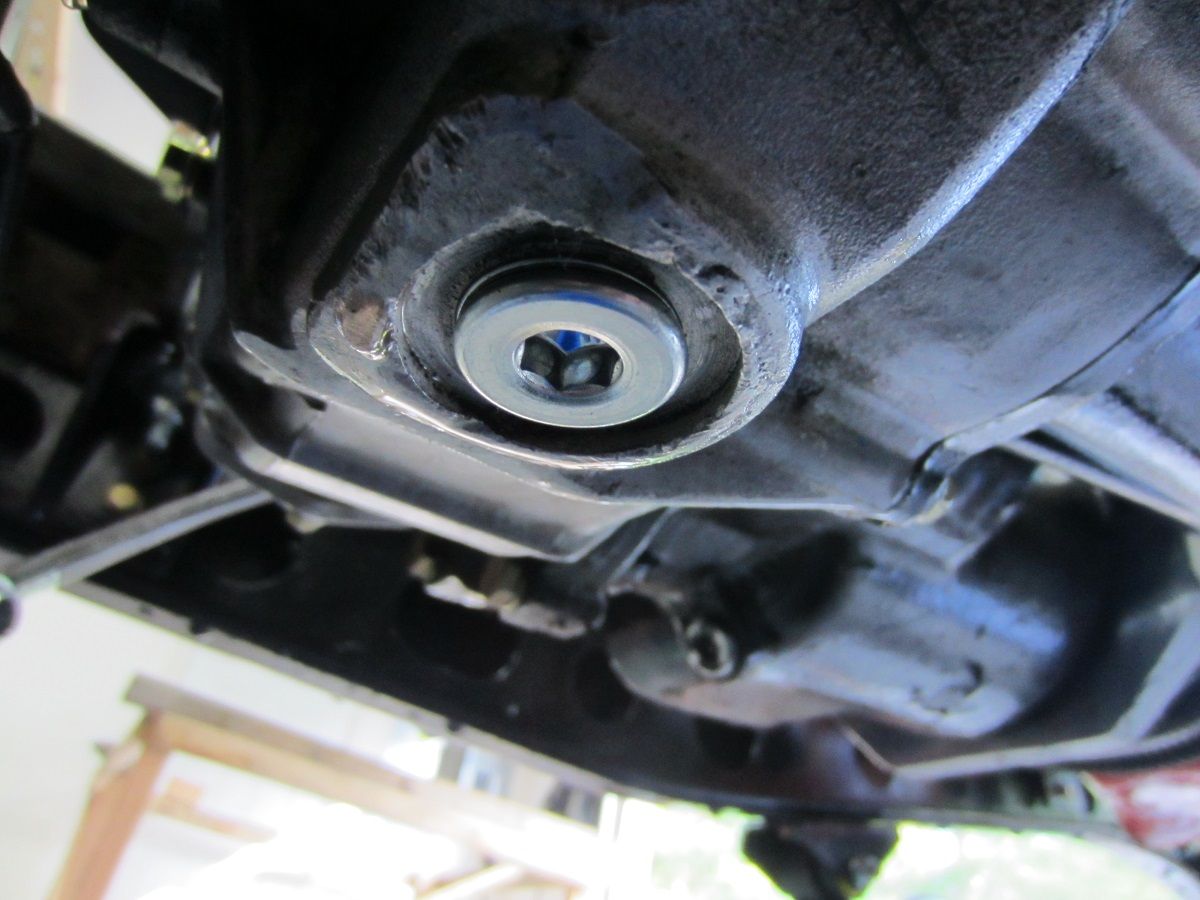
I also tackled a few little things too. Got the transfer case fill plug removed finally (needed the air hammer). So filled it up and attached the bypass hose finally. Also got the rear pinon nut torqued. So filled the rear axle with gear oil. Then checked the front and topped it off. Id filled it when not on the vehicle so it was a cup or two low.
 
And in my typical take 2 steps forward and one step back....I messed up! I noticed a small leak coming from the transfer case after filling it. I couldnt tell 100% where it was coming from (gasket on extension housing to case or elsewhere) so figured best bet would be remove the extension. Got it off just fine but noticed the bearing was in rough shape. Had noticeable rust on it. Figured hell why not replace it.

Now normally i check my FSM just to make sure I dont miss something stupid. Im still pretty new to internals of transfer cases and the such. But this time i figured it was simple so no need to. Put it in the press and started pressing down thinking the bearing would push the seal out and all would be good. Well got bout two "ugga duggs" from the air jack on the press and then a nice loud pop. And this is what I was left with

full


Yup should have checked the FSM and I would have realized there is a retaining clip holding that bearing in. Thankfully it just popped and nothing went flying (though i do stand to the side as much as i can and wear safety glasses in the garage).

Be a minorly expensive opps thatll push buying other things back a bit more. But at the same time Ill be contacting marksoffroad and probably picking up a couple other things .

Surprisingly no swearing was done. It happened, i saw it, walked away and went inside to see the dog scared (from the pop) standing at the door, went out and threw the ball for the dog for a few minutes, and then came in and looked at how bad the damage was

That retaining clip is a pain in the neck to get off anyway. I literally just wrestled with it.

It's funny how much your experience mirrors mine - We're pretty much building these things in parallel (though you're quickly pulling ahead)!
Looks like we're both due for a transfercase rebuild!

I need a new input shaft and my idler gear is toast (races pitted) - plus that same bearing in the nose cone was shot on mine as well.

You are still quite a ways ahead of me though! Plus you have actually gotten to drive yours! My "drive" was a actually pretty scary 30 feet forward and 20 feet backing up into the garage. Scary cause the shift linkage was broke so wasnt even sure what gear i was in, the brakes were all leaking, and the floor pan didnt give me lots of confidence lol. But I have looked through your build a few times, especially since you had the 283 and quadrajet lol.

Thankfully I wont need a full rebuild. I went through the case previously and replaced the gaskets and seals. This bearing was nasty on the inner side but looked fine on the seal side. Which is why I think I didnt notice it before. So for me itll just be finding a new extension housing and getting a couple other parts (gaskets, bearing, seal, and washer)
 
Its sort of like Christmas part 1. Today i got my quarter panels and fenders from CCOT.

The quarters look fine. Comparing them to mine I think I could have been fine without replacing mine but at least now Ill have a more factory wheel cutout instead of the more rounded one the PO did. kind of one of those lots of extra work for a bit of bonus sort of thing lol

full


The fenders....are OK. They will be just fine for my intended uses (ie a not afraid to go on a trail). They look just fine when installed. They get the OK rating more just from the final finishing. The edging was clearing just folded over and that was the extent of it. A simple sheet metal straightener tool would have smoother out the edging a lot. Then a lot of the edges on the non-fender skin portion (ie the fender support i think its called) were left rough. The passengers side was sharp...liek easily cut you sharp. The drivers side wasnt as bad, more just rough. So be a bit of cleanup. Am i happy with them? Yeah (especially since the drivers will be getting cut to fit the power steering) for my use I am. I would be a bit disappointing if i were going for more a OEM restoration type build

full


I should get to work on things tomorrow and Saturday but like everything who knows for sure. Then I have a nice package coming from Marks offroad on Tuesday !
 
Few more hours spent on it today.

Spent a bit of time fixing a few holes. The cut out section was the PO deciding to make access holes for getting to the body mount bolt. The other holes were from a role cage attachment point.

The first "patch" i dont think turned out to bad given i didnt want to cut to big of a hole. But that piece is welded all the way around.
full


Then I did the top piece
full


The holes were ok. Ill probably have ot go back and redo them though. I started grinding them down smooth and started getting pin holes. I think its cause the metal was a bit bent up and i didnt flatten it back up. I might go back on the other side and add some metal.

Then i played with the rear sill a bit. More cause i tried to fit up the new sill cover piece and was confused by it cause it seemed to long. But got the old cover piece separated from the bed and cut out the old one. The old sill definitely needs to be replaced now that i can see it. I also went ahead and braced the tub.

full


Then lastly I did a find other things. Replaced two knuckle studs with the correct fasteners and torqued them. Finally installed the rear cross member bolts (needed to drill new holes for them) and did another brake line or two. And finally i needed somewhere to put the new fenders so what better place than just install them :) Well got one on and then realized i forgot there was a broken bolt in the passenger side....D'oh!

full


At this point I am thinking my next attack plan is going to be to put the tub on the frame and do the rear sill and quarter panels. Once that is done Ill be able to take the tub off and finish up any other welding then blast the tub, then hopefully epoxy paint! We will see on the paint part though. If im reading the SPI directions right you really want to do the epoxy paint and then other layers within time frames.
 
You can use copper to back up the holes you are filling.
If large enough it takes away some of the heat, leaves a nicer botom finish plus you'll get a flatter weld on top.
 
You can use copper to back up the holes you are filling.
If large enough it takes away some of the heat, leaves a nicer botom finish plus you'll get a flatter weld on top.

Yup i did that on the side in the pictures. The other side i tried without and lets just say thats the side that needs a lot more work! It worked fine filling the holes i just didnt prep the area well enough. The PO had nuts on the backside (ie engine side) and when they tightened them down it pulled the metal around the holes in and deformed it.Instead of just filling a hole it was more like a cone. So basically i filled the hole but when trying to make it flush with the floor i was just grinding that deformed metal. So thats how i ended up "grinding through" so to speak.

I did do two holes in the passenger floorboard with the copper backer that turned out great. Hardly any grinding and nice smooth bottom (just needed a touch of the grinder). Of course I didnt take pictures of those lol.

But hey no matter what Im still pleased with everything. Lots of "firsts" for me so not to worried if it takes a try or two to get it the way I want it.
It is always best to find out and learn from your mistakes.
Next time you can flatten the cones first by slowly hamering them back with a dolly next to where you are hamering, hammer off dolly.
 
It is always best to find out and learn from your mistakes.
Next time you can flatten the cones first by slowly hamering them back with a dolly next to where you are hamering, hammer off dolly.

I definitely learn best by just doing. Especially real world situations and not just on scrap metal lol.

I was actually just looking at hammer and dolly sets. The harbor freight one actually has good reviews and for the little Ill need it I might just give it a shot.

Another option I have is to just cut the whole section out and replace it with the section from the old tub. I tend to forget i have the old tub that still has plenty of good metal left
Welding in sections is not as easy as it looks.
Take it slow, hammer the welds when they are still hot and let the metal cool after each stich weld.
 
Welding in sections is not as easy as it looks.
Take it slow, hammer the welds when they are still hot and let the metal cool after each stich weld.

I might actually give both things a try. Figure it cant turn out any worse lol. I actually cut the sections I would need (roughly) out of the old tub and mocked them up. Lined up just fine. I only really tested the drivers side which is the better of the two sides already so ill see how the passenger side looks. The passenger side would benefit a lot more from it than the drivers side but I didn't have a chance to blast the section to make sure it was good to go.

Ill ponder it so more till the dolly and hammer set arrives and see which route I end up going.
 
Well not getting as much done as I had hoped this weekend. Woke up Friday with a bit of a sore throat, yesterday it was a bit worse, then today its about the same. So just taking it easy for the most part. Thought I might get some karma points since the gf and I ended up helping a work party yesterday morning at the dog park. They are replacing a bridge over a muddy creek so needed some help so the dog got to play and we ended up helping them. Was a bit funny as one the female who was helping was quite proud of using power tools and was showing and telling the gf how to use them. The gf knew quite well how to use them but could tell the other lady was really proud she knew how to use them so the gf let her explain everything to her. Was cute to watch and could tell the other lady was proud to be teaching another female lol.

But back to the FJ40. I got the FJ60 H42 top all cleaned up. Took it all apart, blasted it, painted it, and reassembled. Of course one of the detent balls went flying to who knows where lol. Thankfully its an easy (and cheap) thing to replace. The PO had removed the detents for the shifter so I ordered the dowel pin kit from SOR. If i was feeling better Im sure i could figure out something to work but the brain isnt working at full capacity lol.

I also got the "new" extension housing for the transfer case. Got it all re-assembled with new bearing and seals. Blasted it clean and painted it too. I also did a heli-coil to one of the bolt holes since the threads were well out of spec (looseness) and might have been the reason for the leak to begin with. Added a single quart of oil to test things out. Was a small drip (1 drip every 10 minutes or so) coming from the drain plug so I tightened it down more and am hoping thats the end of leaks!

full


The rest of my order from Marks Offroad was a Aux Fuel tank kit with the sender. Was hoping to get it installed but just ran out of energy today. I did love the Bio-Hazaard bag the seal and retaining clip came in!

full


Hopefully ill feel better tomorrow and can get some more things done. If not I will have more time as I shouldnt be working 12s for awhile. Which means I can actually work on things in the evenings!
 
Thought i felt better so went to the garage. After a few minutes it was clear I still wasnt feeling the best. But I managed to get the body on and called it quits there.


Put the radiator support just to see how well the engine sits. The fan is probably within an inch of where the radiator is. So plenty of room between engine and firewall. I ordered the new body mount kit (energy suspension) as I didnt have enough of the old ones....plus those werent in the best of shape to begin with.
full


I put the heater in place to check things out. The shifter should clean the heater. I say should cause i cant test it till i get the dowel pins to install it to be 100% sure. The transfer case shifter....well crap lol. Its definitely to far forward (its in 2wd in the picture). Add it to the list of things to fix :(
full


And then the small leak out of the T-case. Im not sure if its the crush washer or what. Thankfully i have a couple more so its just a matter of taking the drain plug out and swapping it. I just didnt feel like doing it right now so Ive got the oil being cause back into the bottle so i can reuse it.
full


Then there is this guy. I came inside to a chewed up gasket. Thankfully not one i needed lol. But this is his playing stance. He will sit and chew on his toys like that for awhile before laying down. Pretty funny to watch.
full
 
Felt much better...now its just a bit clogged up and a runny nose so got back to work.

I got the new body mount bushings in. So went and installed them. Work fine but did discover the ones that go through the bed have quite a large hole. Like the washer for the bolt is pretty much the size of the hole. But the bolt was offset enough for it to catch a bit. So looks like yet another thing I will have to fix.
full


I then went on to the rear sill. Got the old one removed, the rear quarter panel area cut out, and the fit up the new one. It looks pretty good! Its not in the final spot quite yet as Im waiting for more weld-thru primer to come. But a quick test fit of the ambulance door (well more just holding it in place) seemed to show the strike plate was in the right spot.

full


Also got a new tool...a rivet-nut installer. So i drilled two holes in the rear frame to be able to install them for the aux tank. Just waiting on the paint to dry to install.

On another note the transfer case is still leaking oil. Very slowly but still not good. I tried changing out the crush washer and still leaked. Then did a bit of thread sealant and another new crush washer (some how i ended up with like 10 extra crush washers lol). It takes a couple hours for it to start leaking after draining and refilling (only doing about a quart each fill) but once it starts it keeps dripping. I dont see any cracks or anything.

Today is one of those days I actually feel like i took a step forward instead of 1 step forward 1 (or 2) step backwards lol
 
Hey Vel,

Not sure this would help at all but the rebuild kit Georg just sold me came with aluminum "gaskets" as opposed to the traditional crush washer. Essentially just a big flat washer. Might be worth a shot?

My case always seemed to have a bead of oil hanging off the drain plug too...I wonder if after 40 years the aluminum threads just don't seal anymore...
 
Hadnt heard of those before. I posted in the what have you done thread so see what other peoples thought are but I might be calling up Georg to give those a shot next. I also need to just watch it and see if i can really tell where its coming from. If i was better with technology id just setup a time lapse with a camera lol
 
Those washers have been standard issue in the aftermarket rebuild kits for about twenty years now.
 

Users who are viewing this thread

Back
Top Bottom