Builds TrophyFJ Build. (1 Viewer)

This site may earn a commission from merchant affiliate
links, including eBay, Amazon, Skimlinks, and others.

Joined
Jun 23, 2016
Threads
2
Messages
63
Location
BURBANK
Website
www.cinemilled.com
Yup I'm crazy.

it will be as it reads in the title.

...yes.....I could make my life easy and just build/buy a tacoma/tundra prerunner.....but what fun is that?

Plenty of nice pre-runners already built running around socal for sale.....that said, I'm in love with my FJ.

So fxxx it.


------------

I'm Lucky that I live in SoCal in the heart of Desert Racing and offroad community. Hard gained knowledge and skills are all around.

After many years of very happy FJ ownership, on my last blast in the Mojave desert I found myself pushing 60mph naturally I came up on some unexpected terrain feature and slammed my FJ hard and realized I was having too much fun and being stupid. My truck was simply not built for that kind of speed. So I toned things down a bit and enjoyed the rest of my trip....still the as an auto road racer and ex moto-roadracer the speed bug is strong inside me. At the same time I have really enjoyed my time on black diamond trails here in CA. My last trip thru John Bull in big bear left me itching for more....

Many things have conspired in my life to allow me to indulge my FJ fetish. I have top secret "work related" plans for the FJ that will be revealed in due time. That said, it means it will all be tax deductible business expense as I will use the truck for "work". Since now that helped me rationalize the expense....I looked at my options.

1-SAS
Around $20-25k+parts (doing it right)

This option was considered but ultimately I would be unhappy once I got to the desert.

2-Off the shelf "long travel" kits.

Around 13-15k+parts plus install labor so maybe $20k

After spending hours reading thru FJ NEWB thread and other LT threads. Seamed that Camburg with RCV axles would get me at best 13" front travel with 35" tires. Few problems. The general consensus is that you should be prepared to replace alot of broken CV's. As far as the rear LT options, the metal tech kit is "fake travel" (just moves the existing travel down) and the best option seamed to be wicked creations new rear cantilever LT FJ kit. 15" of travel for $5500.
more info
New option for the rear suspension
purchase here
Rear Cantilever Kit Complete

So in sum....maybe spend 15-20k to gain 3" in the front over my ICON stage 6 (aprox 9-10 travel) and then gain maybe an additional 5" in the rear since my Icon is around 10"

This math NEVER made sense to me. This reality always killed my LT FJ day dreams.....just not worth spending that much money for 3" in the front and 5" in the rear!! (assuming its really 5 in the rear, since no one has installed this kit yet besides the manufactuer)


I can see why at this point in the "FJ FEVER" people tend to SAS their FJ's....You spend close to the same amount but the performance gain on a SAS is light years ahead of the current "LT" FJ options. Most importantly....you can beat on a SAS and not break it.....you stare at a LT FJ the wrong way and the front CV can break....I talked to so many people who all said the FJ CV's and anything larger than 33" just dont mix.....lower your gearing and it just makes everything worse.


So I decided the best move was just to enjoy my FJ. Fight the FEVER to make it do more than it seamed it could do.

Except the SDHQ FJ....achieved 30" of rear travel....(strapped at 27 now I think".....but you look at what they did.......holy crap....took alot to achieve that.......then I finally saw the finish truck.

13" front travel and 27" rear just made no sense also. Not sure why they didnt go as crazy with the front as they did the rear.

The result if you watch the video,.. the rear seams to totally overpower the front...jacking up alot....going sky high...


The rest of that build is just insane perfection.

In any case the "off the shelf" LT kits and some of the builds on the forums made something abundantly clear.....they are all beating around the bush. There are no half steps when it comes to performance.

Desert racers have been racing for years. All this stuff has been figured out. No need to reinvent the wheel. I just needed to find the right group of racers that could would stop laughing long enough after I said the the word "FJ" to take a serious look at it.

No need to reinvent the wheel so to speak. Just takes talented fabricators, common sense, proven parts and a small stack of cash.

One thing to keep in mind that I realized after reading many threads on the forum.....you can spend alot of money and still get it wrong (in relation to how much you spent).

When you look at the numbers I laid out above......you can spend a good amount of money on a FJ and not end up with much to show for it.....that money in the right hands can go far.

So I THINK I have planned this right, given the budget I have....trying to get the most performance for the buck.

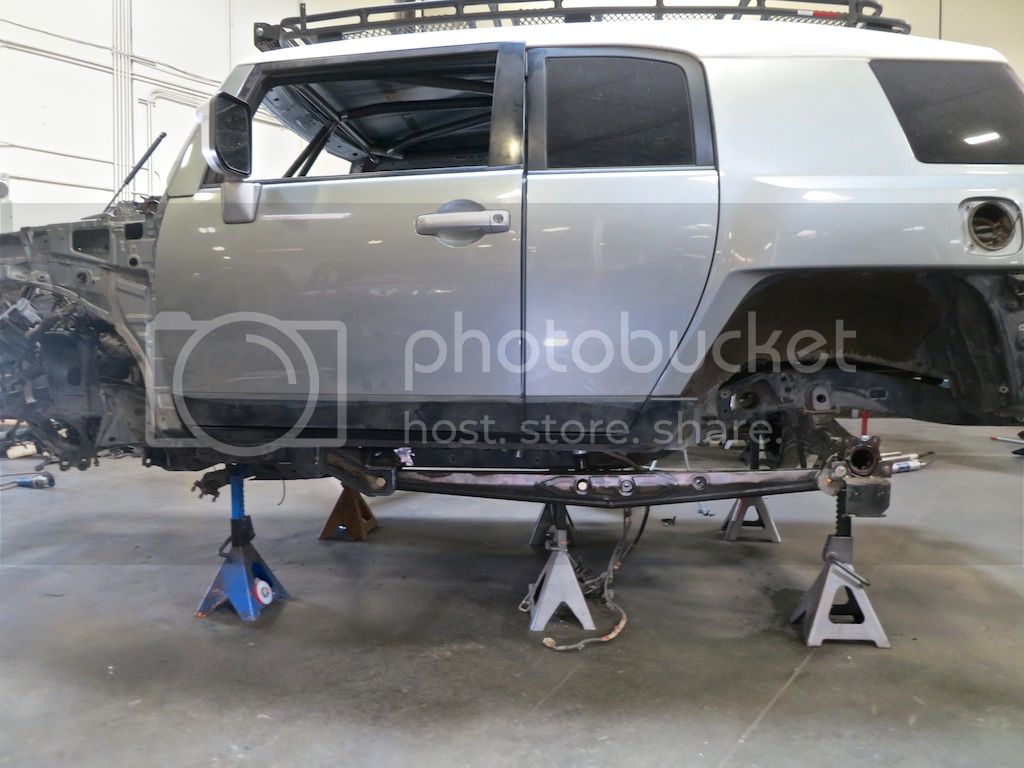
It will be an extensive build...for sure. Unlike many FJ's build before.

In the end what do I want? Since form follows function....A truck that looks the business when you see it. I want to be able to drive fast in the desert and have some fun in the rocks.

I dont expect to be hitting up the extreme rock crawling trails. Nor am I that intrested in that level of crawling....

I do plan on going fast enough to scare me.
I do plan on being able to get thru some tough rock trails, basically anything I did with my FJ before....I dont need or want to get thru some of the more extreme rock trails.


My goal, to have fun. For me that means more speed and a bit more performance in the technical rocky trails is enough.

The off the shelf LT kits just don't deliver that.

Just looking for the FJ to live up to it potential as the ultimate all around vehicle.


So with parts being ordered as we speak......down the rabbit hole I go. Wish me luck!


We sat down for a few hours and planned everything, made some choices, pushed some numbers around...set a schedule.

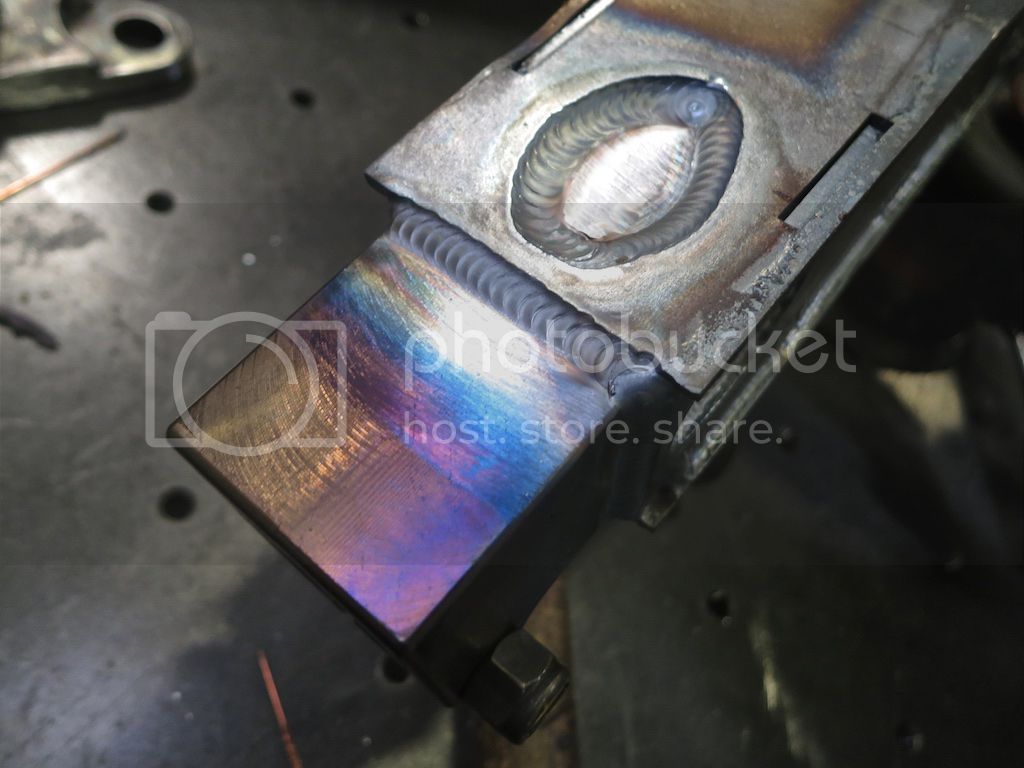
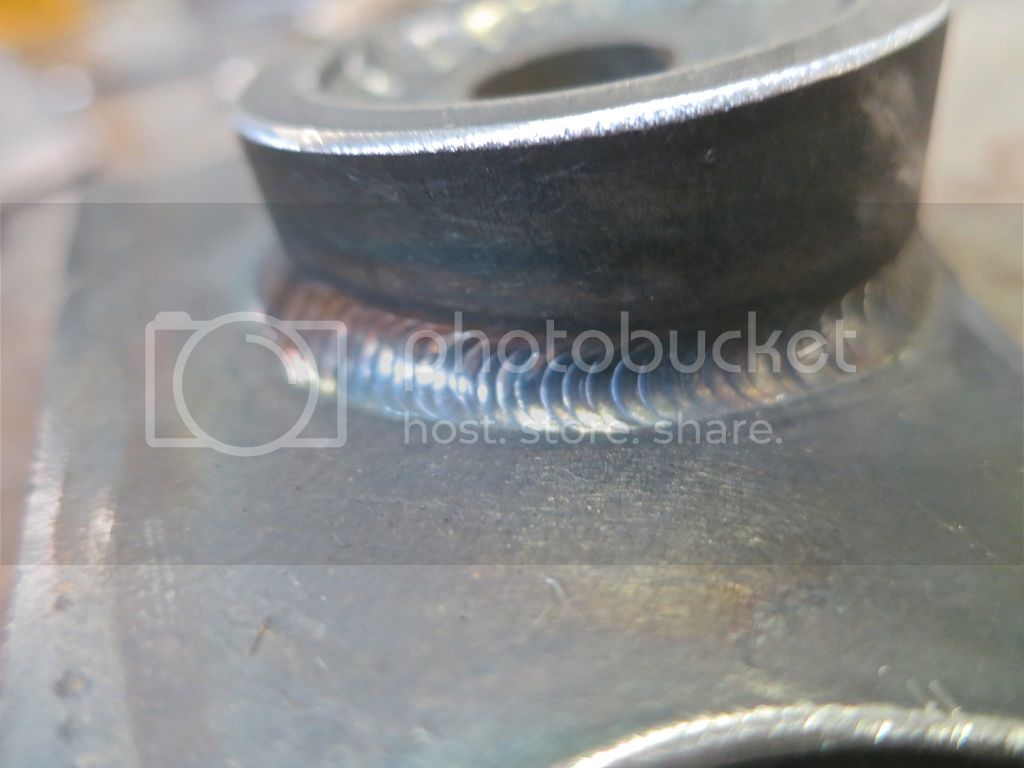
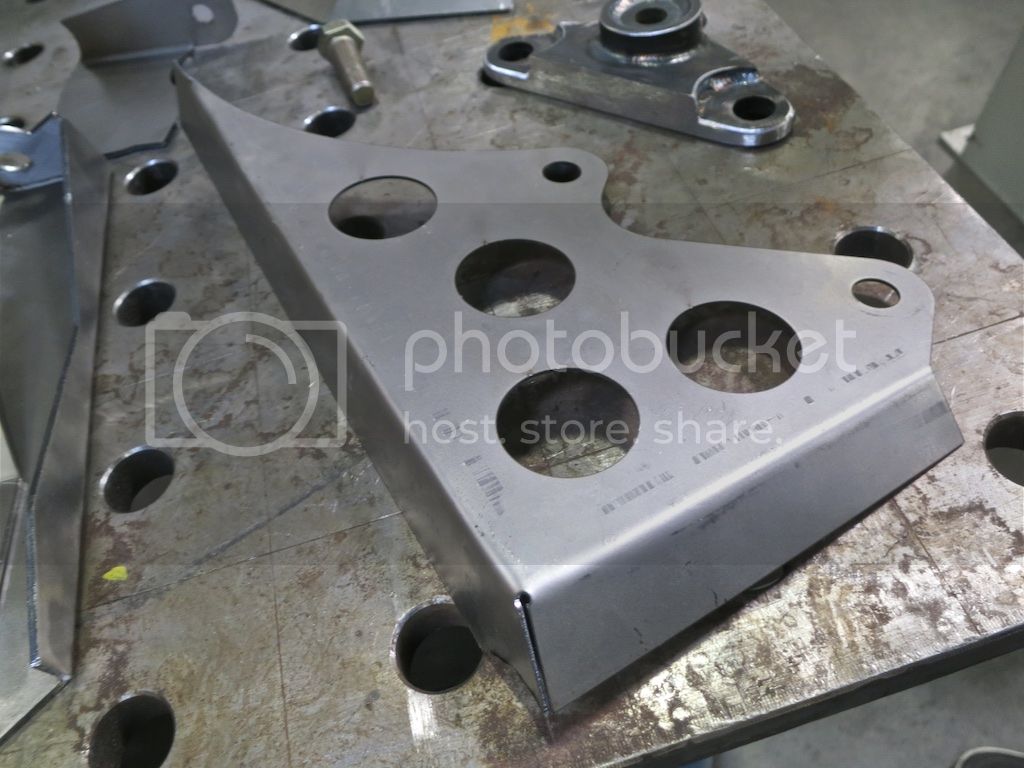
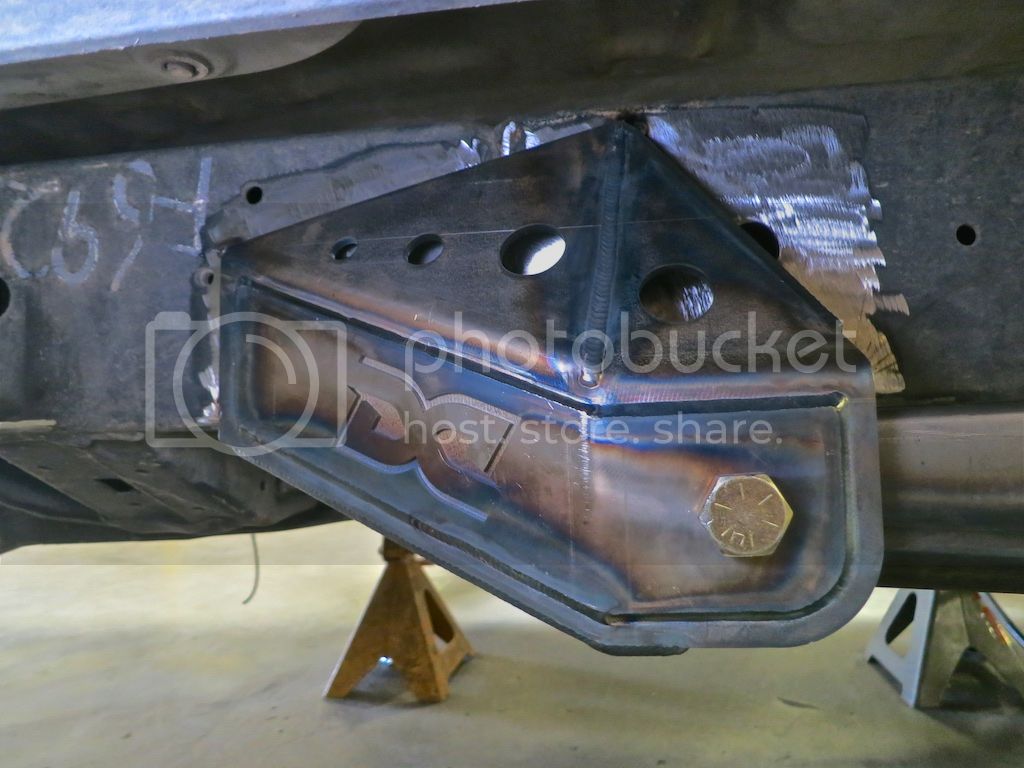
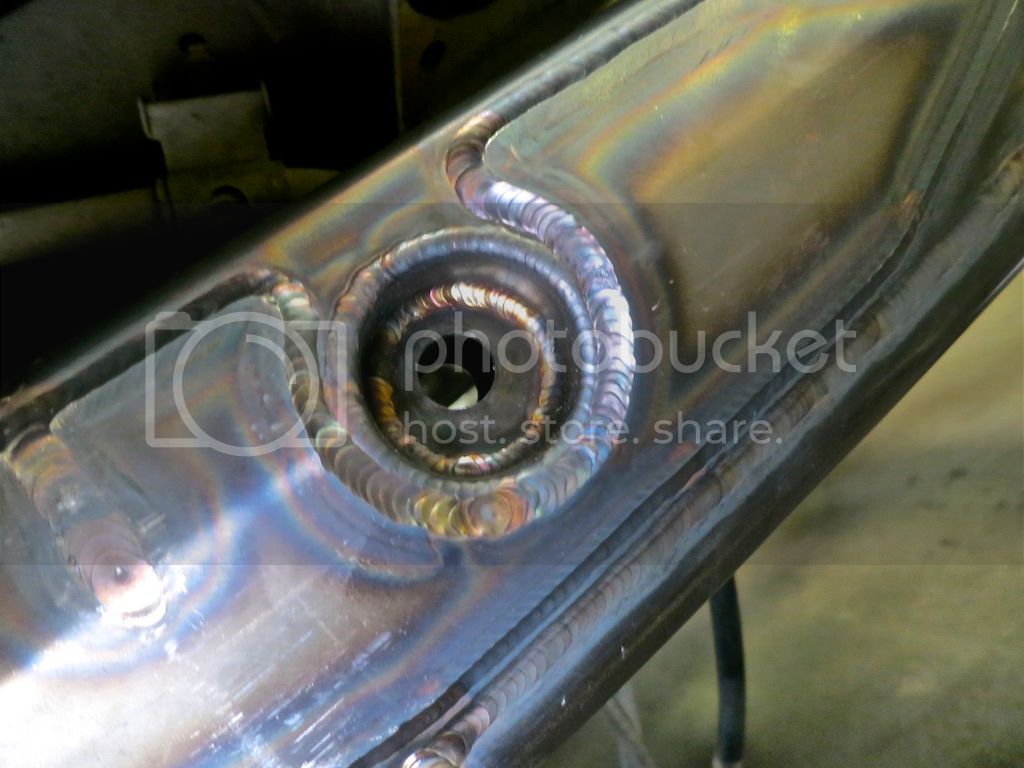
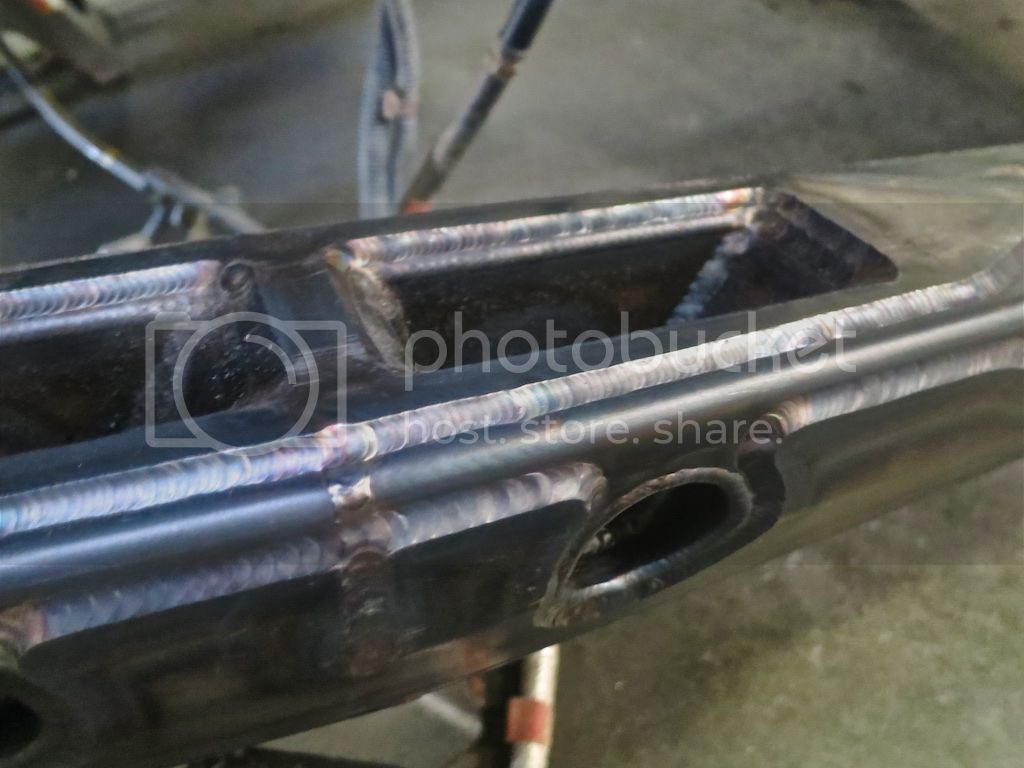
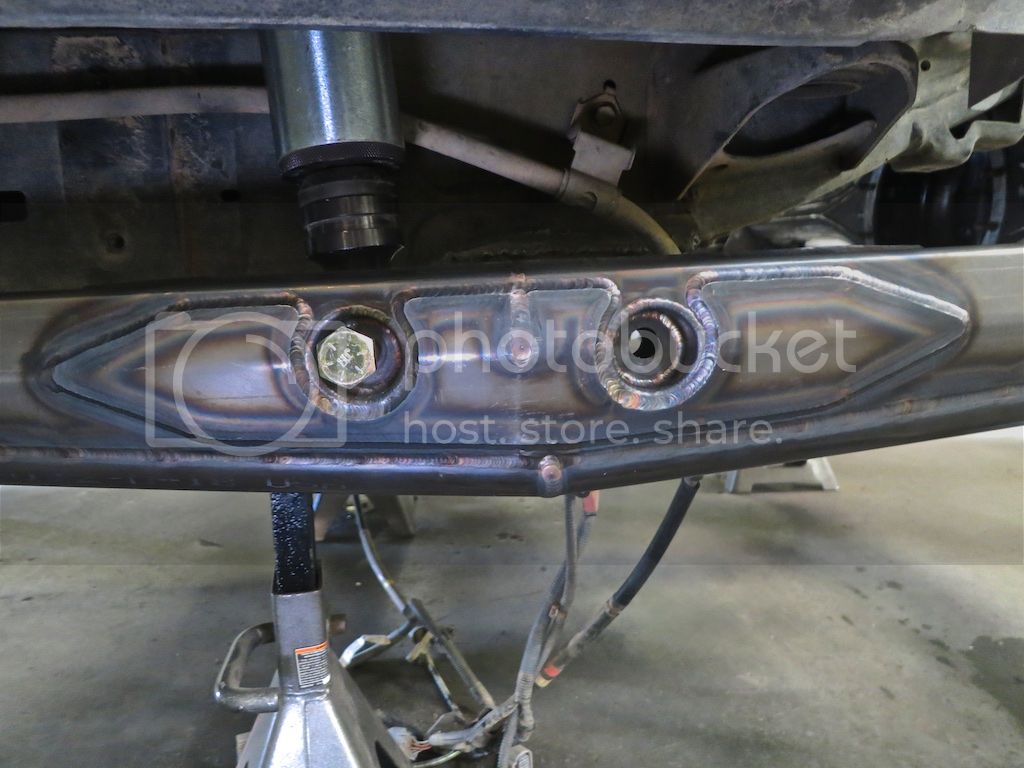
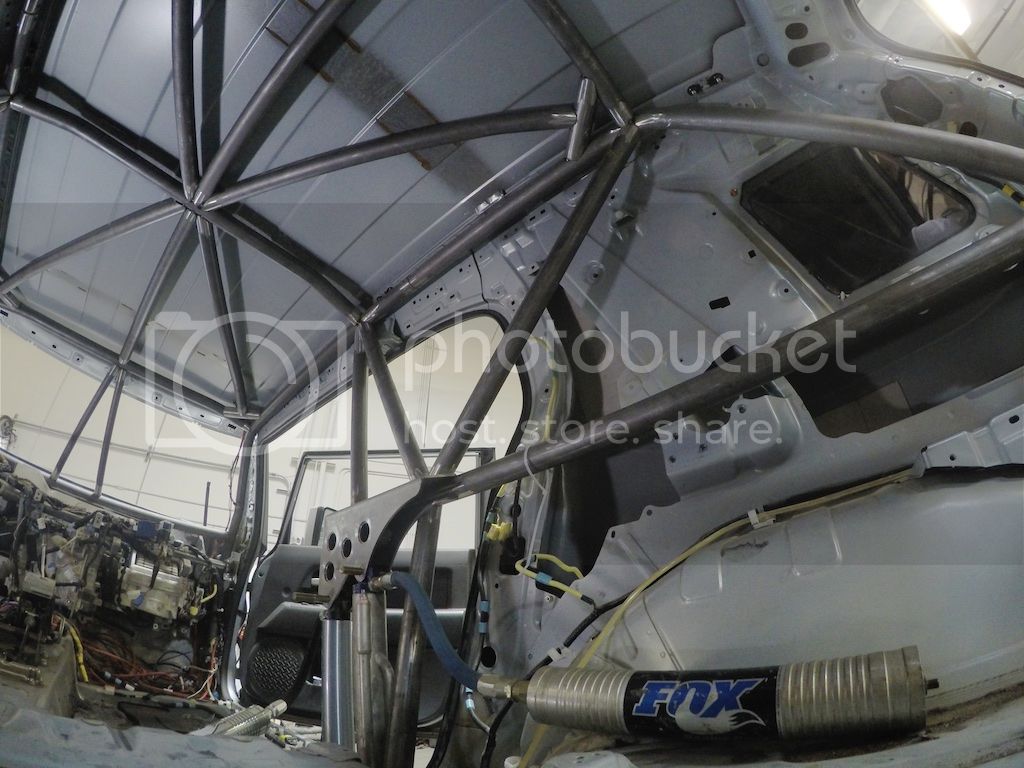
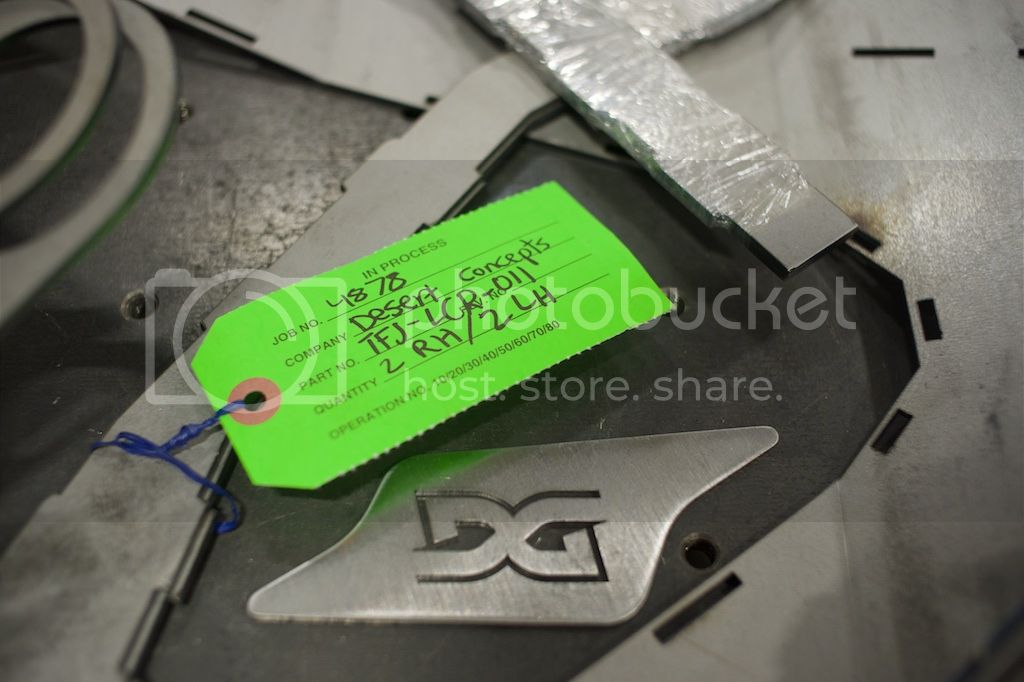
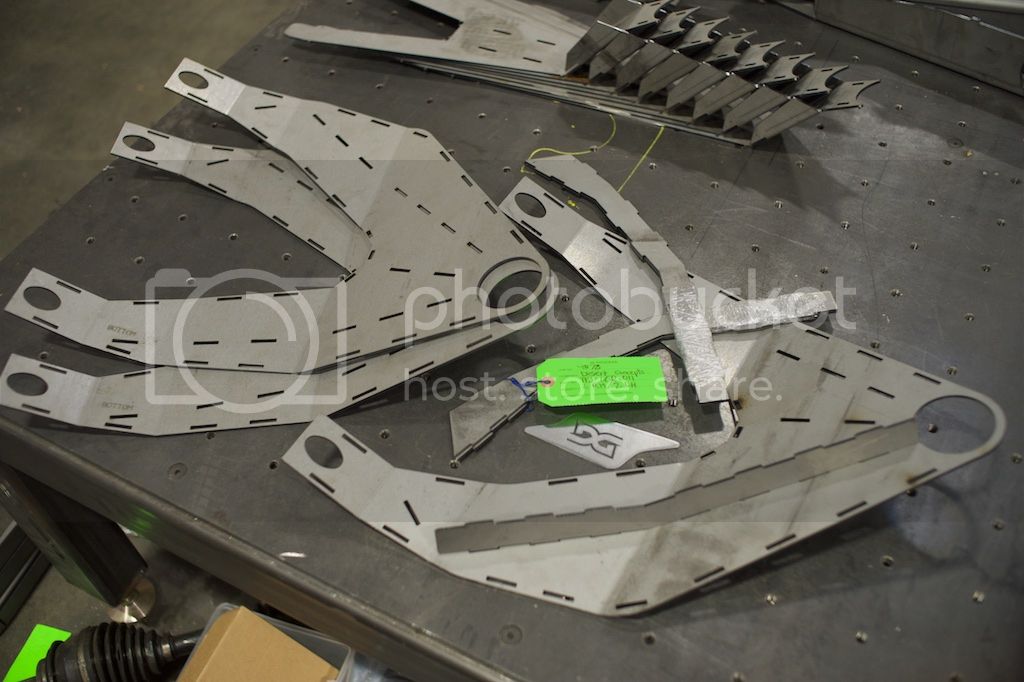
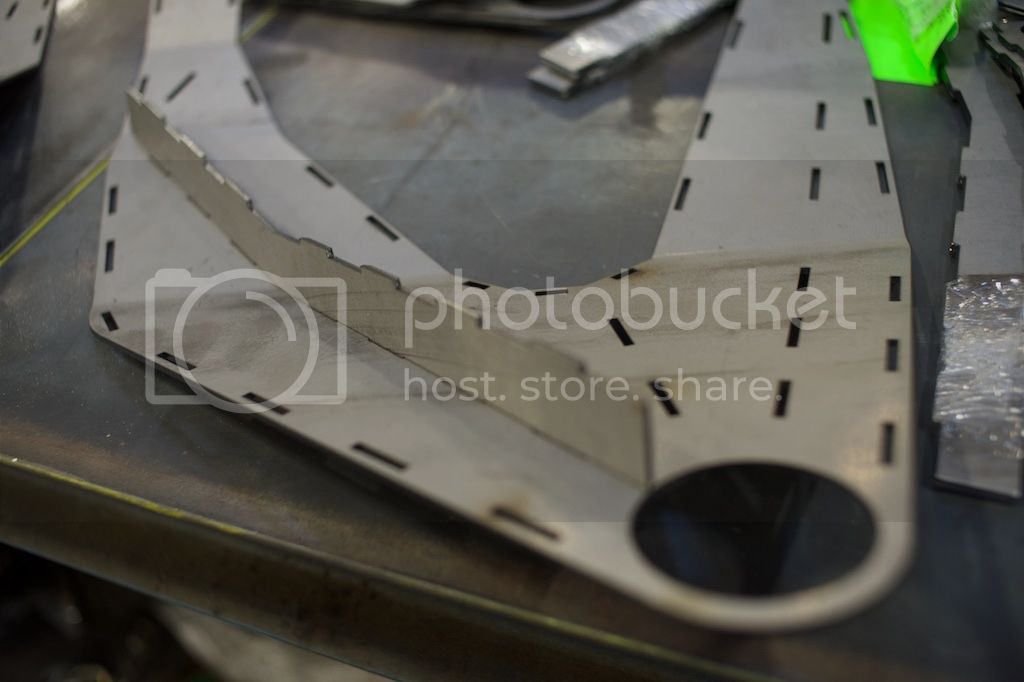
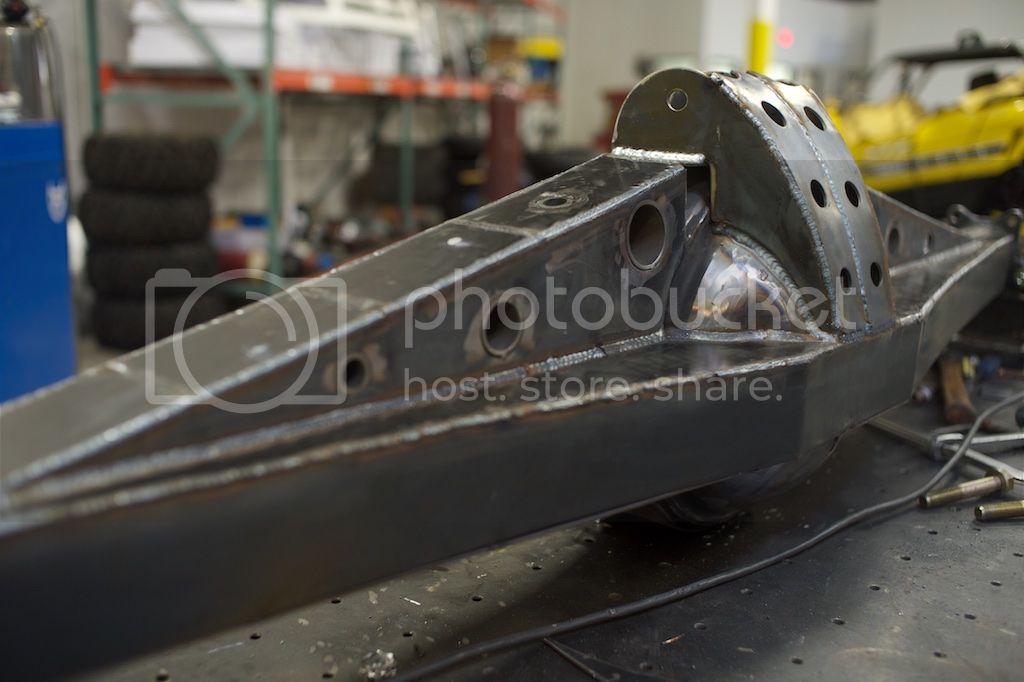
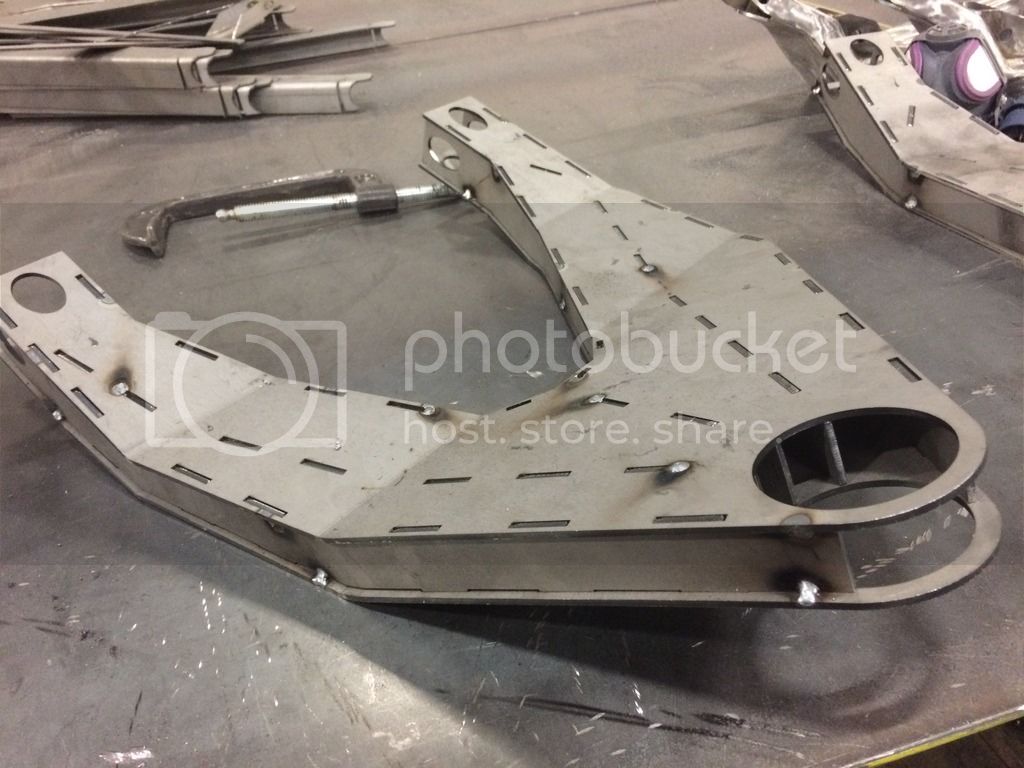
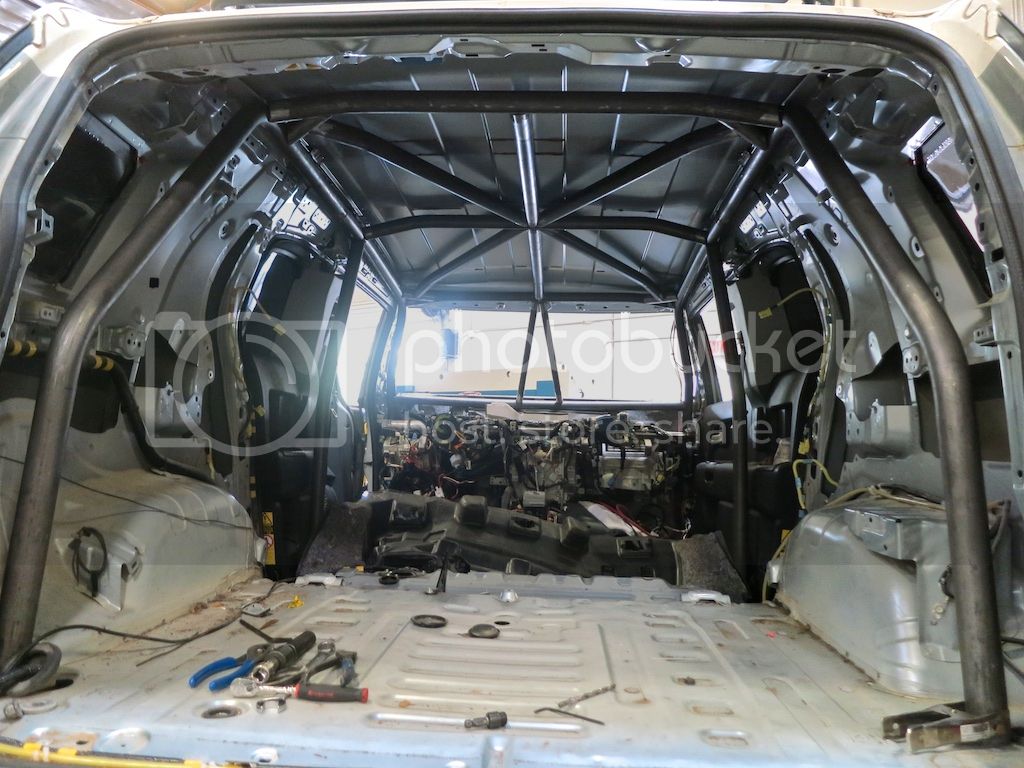
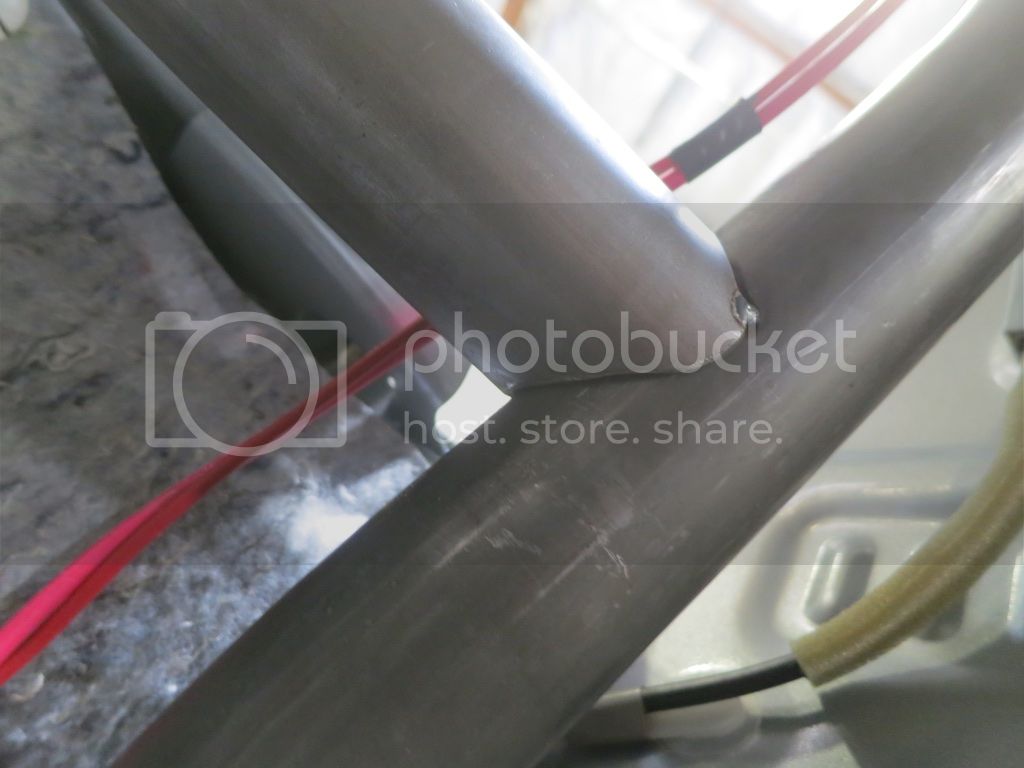
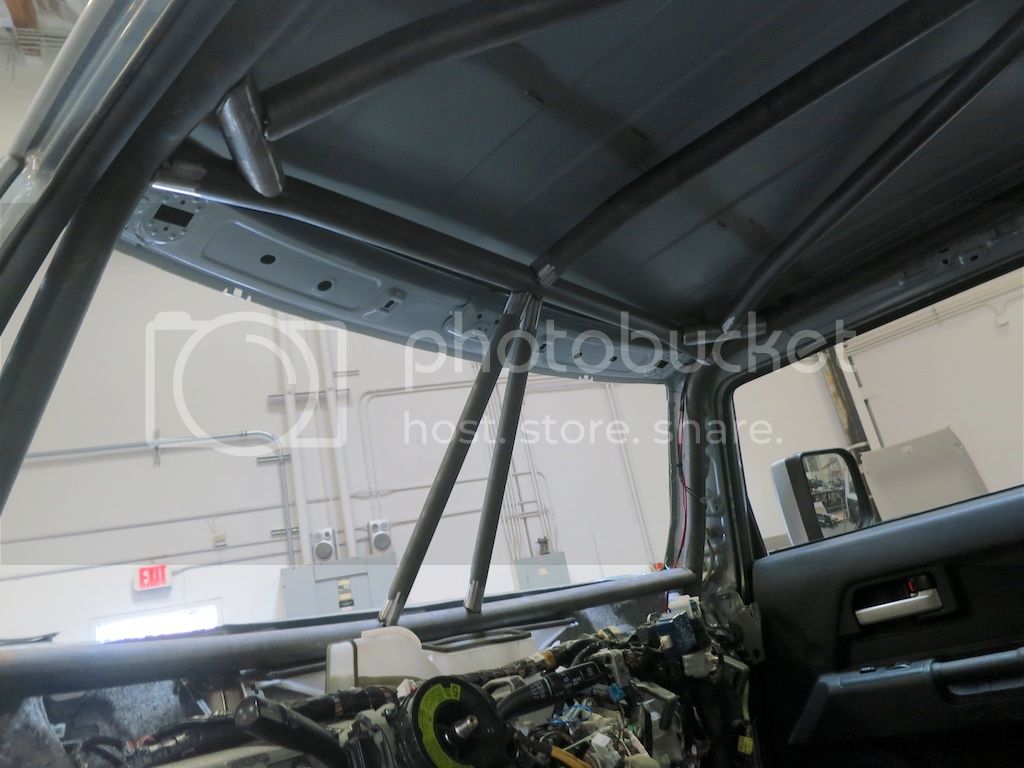
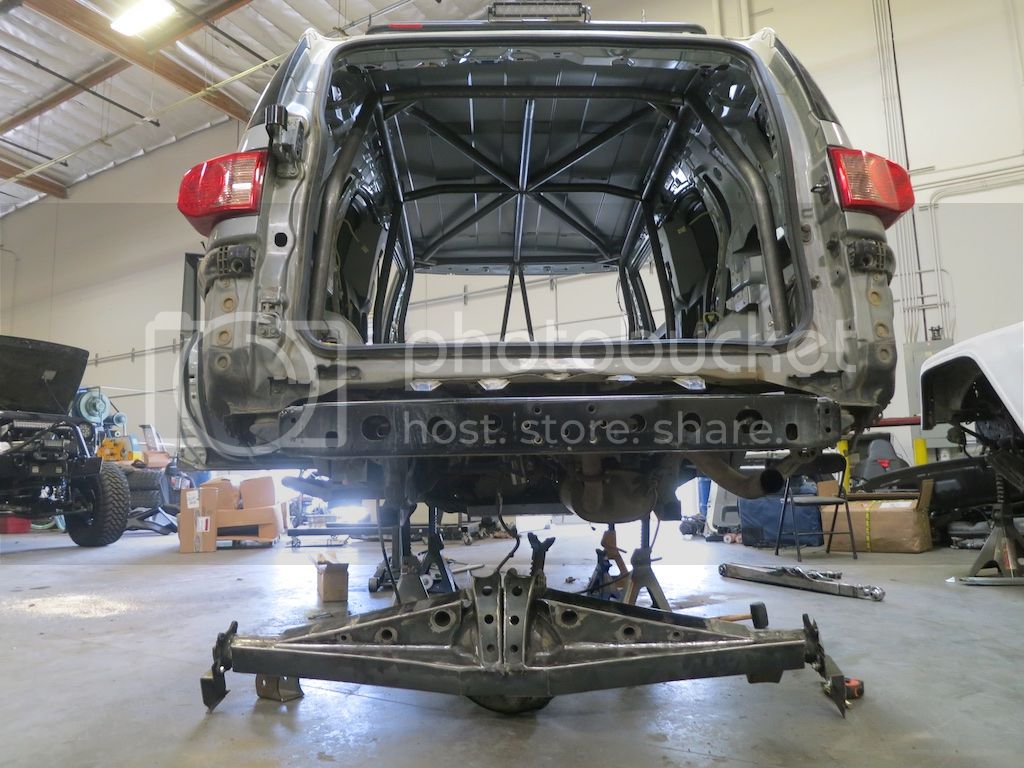
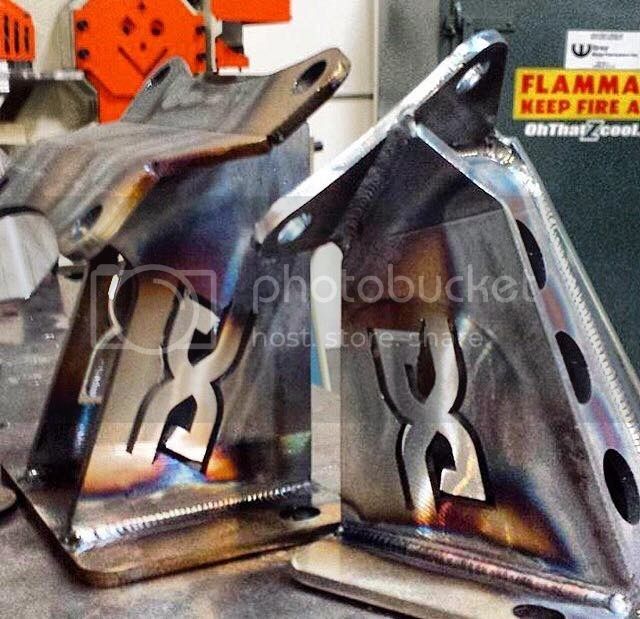
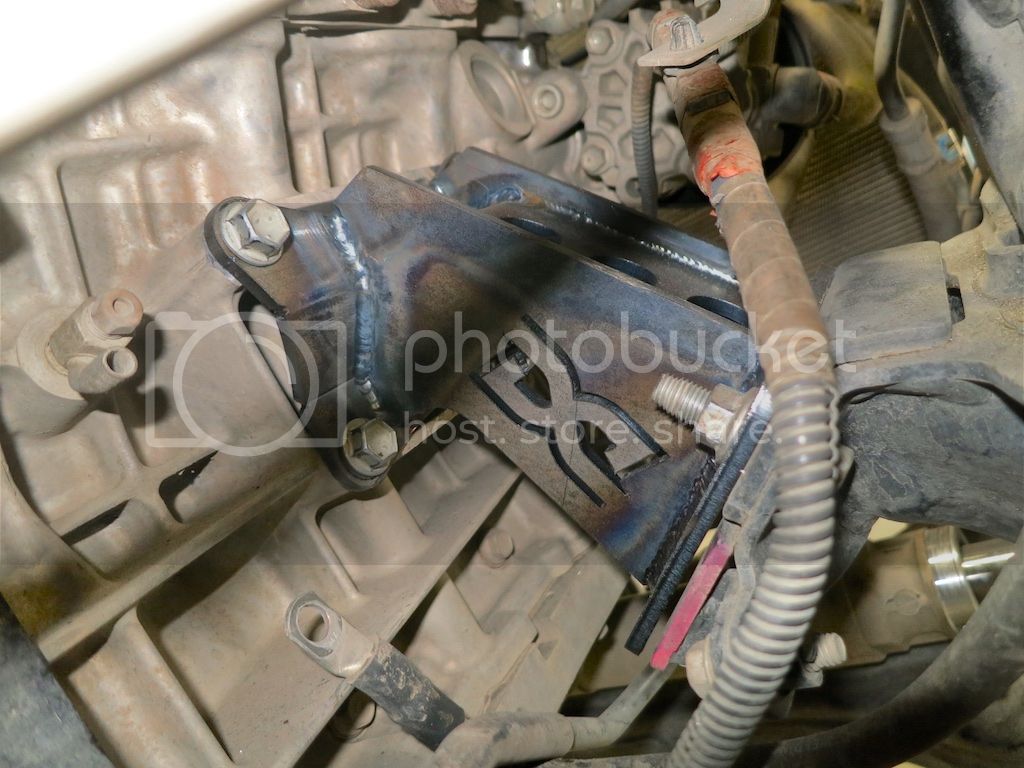
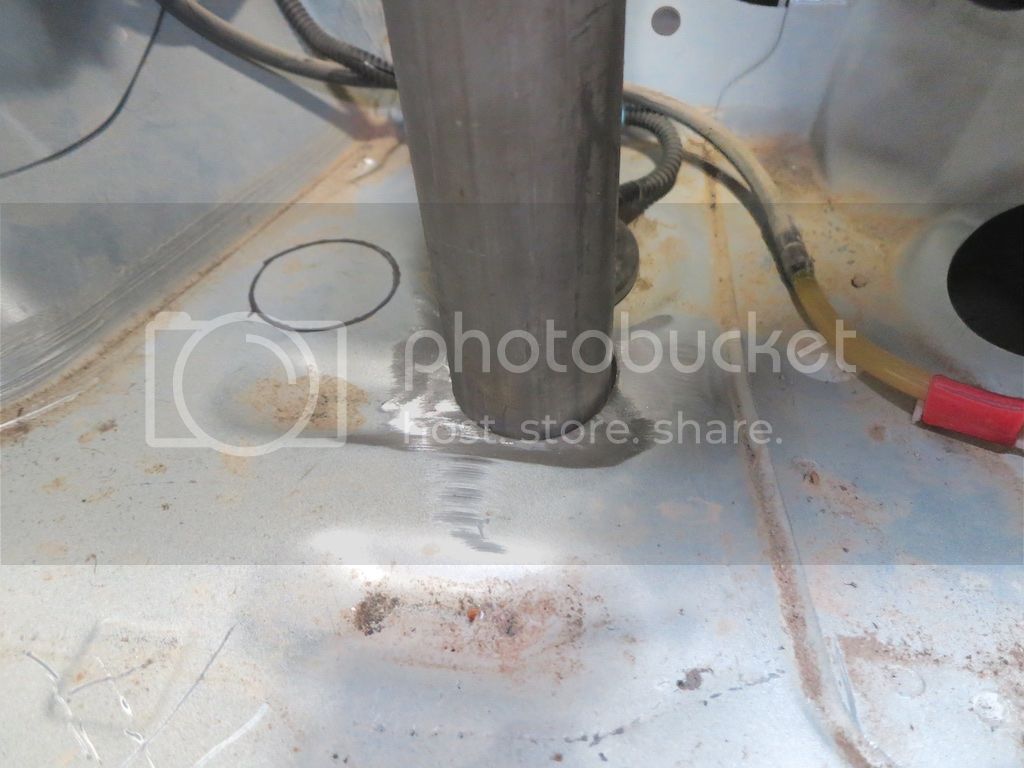
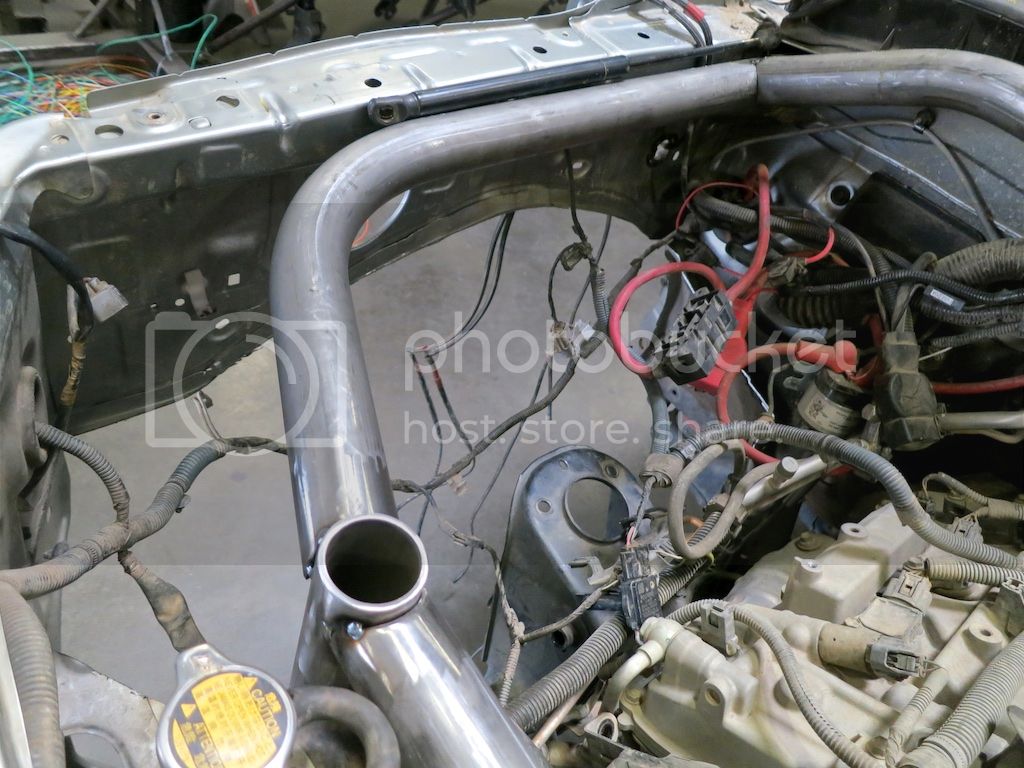
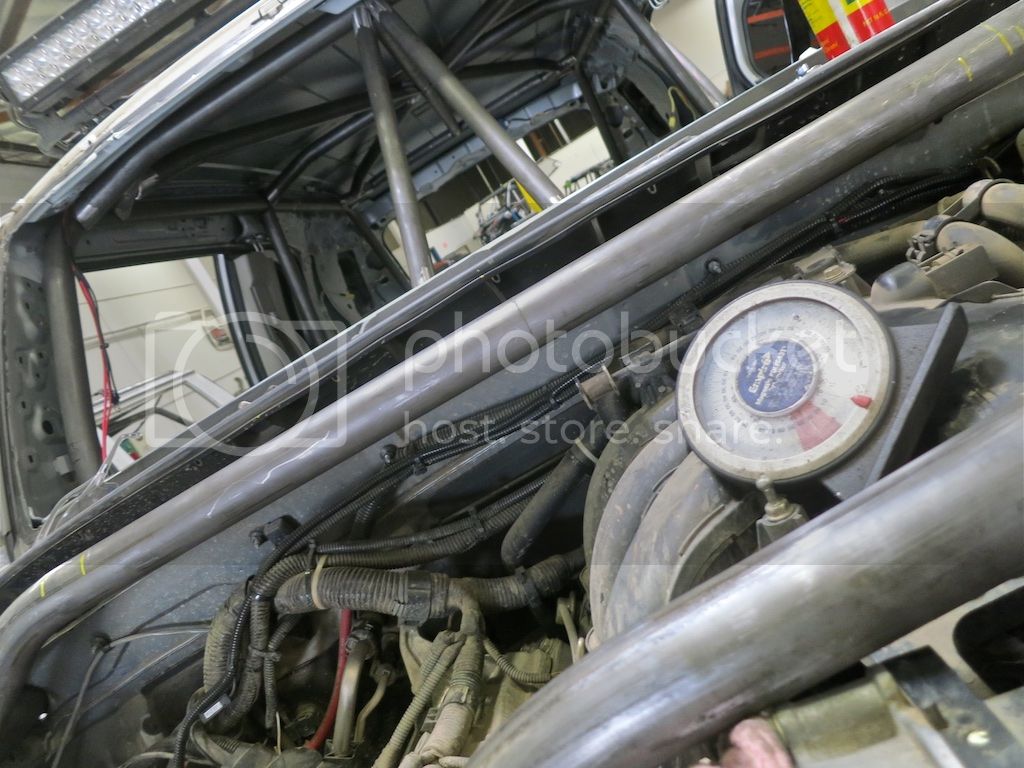
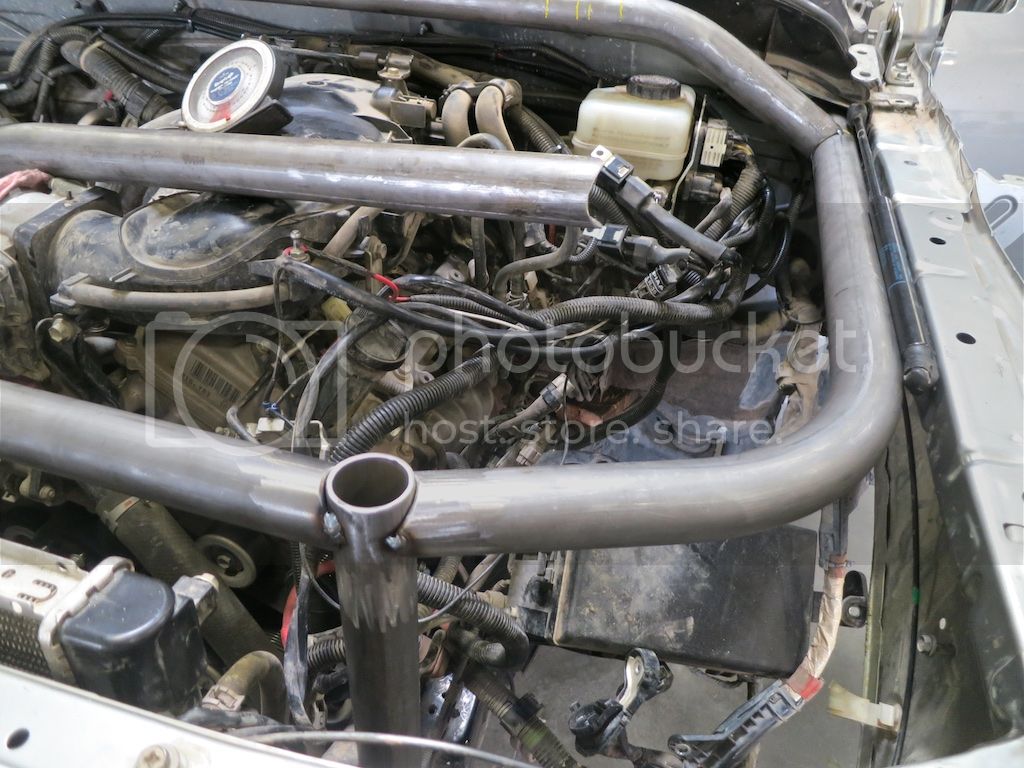
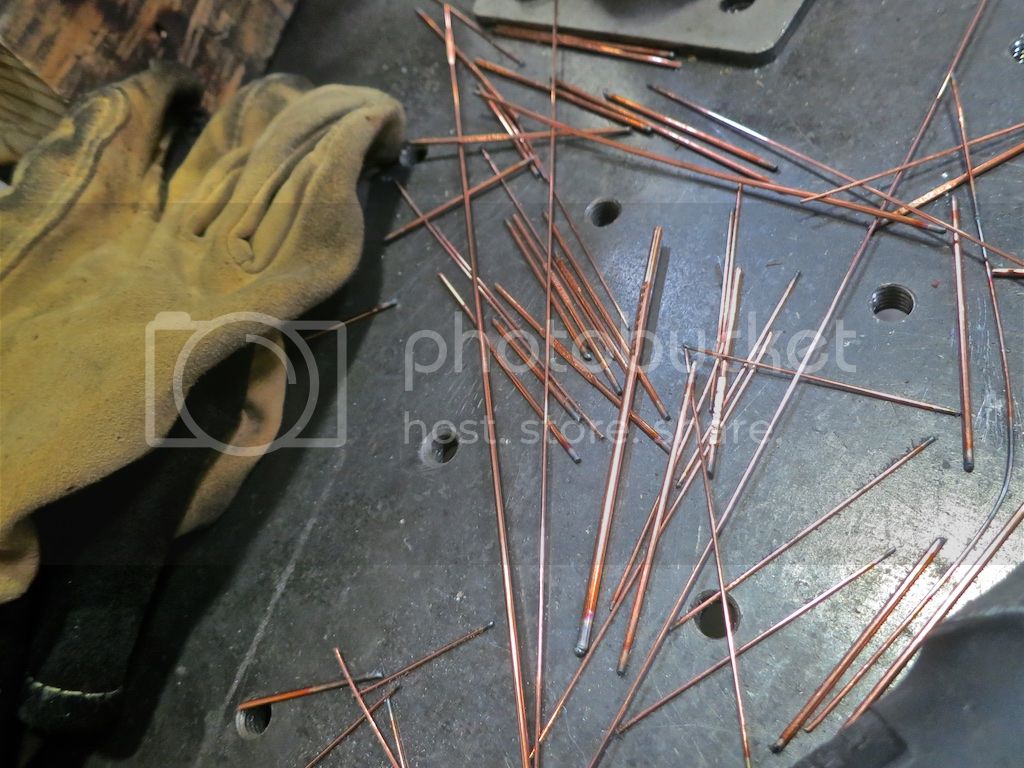
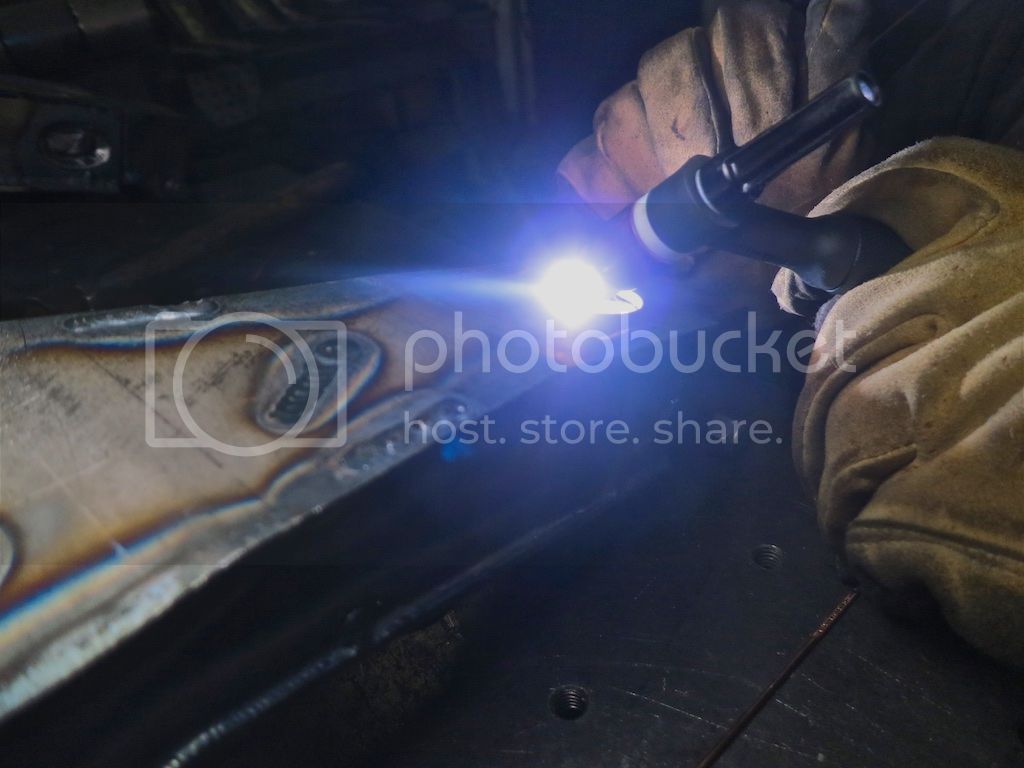
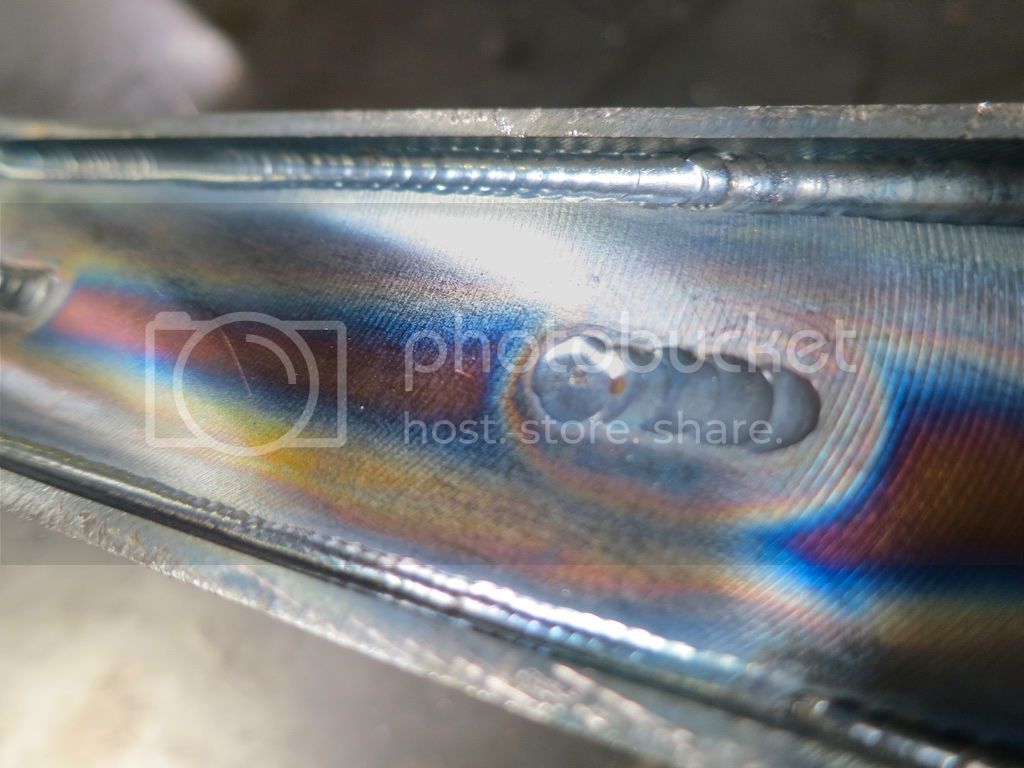
The work these guys do it "A" level. Here is one of their other projects. Beautiful welds, laser cut parts and smart ideas.

11889463_10207776809846575_7402534561340385935_n_zpsueolek2r.jpg


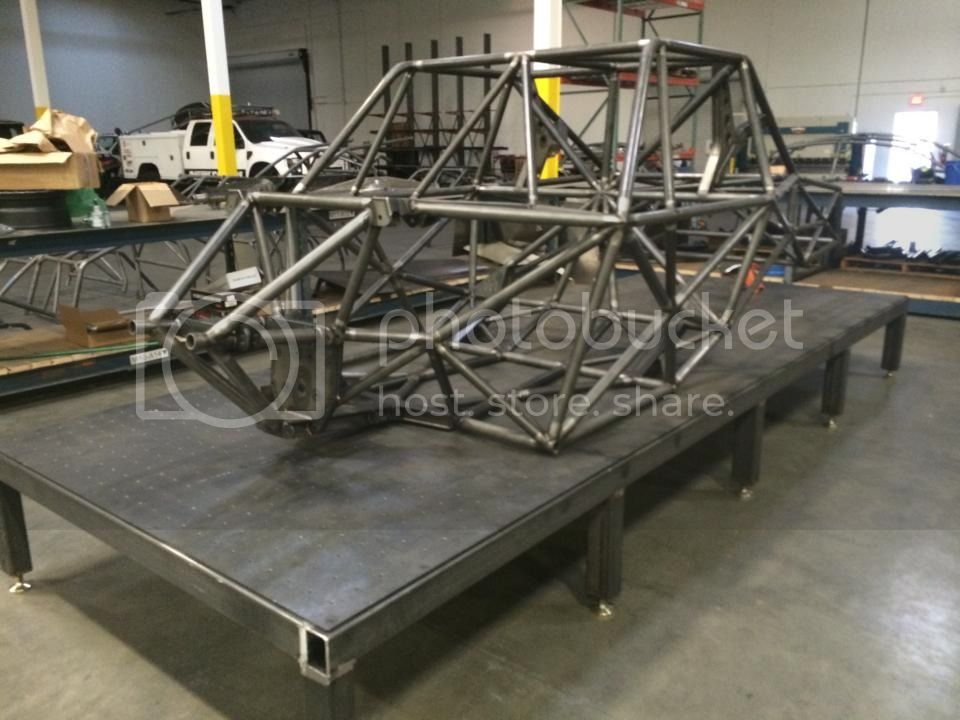
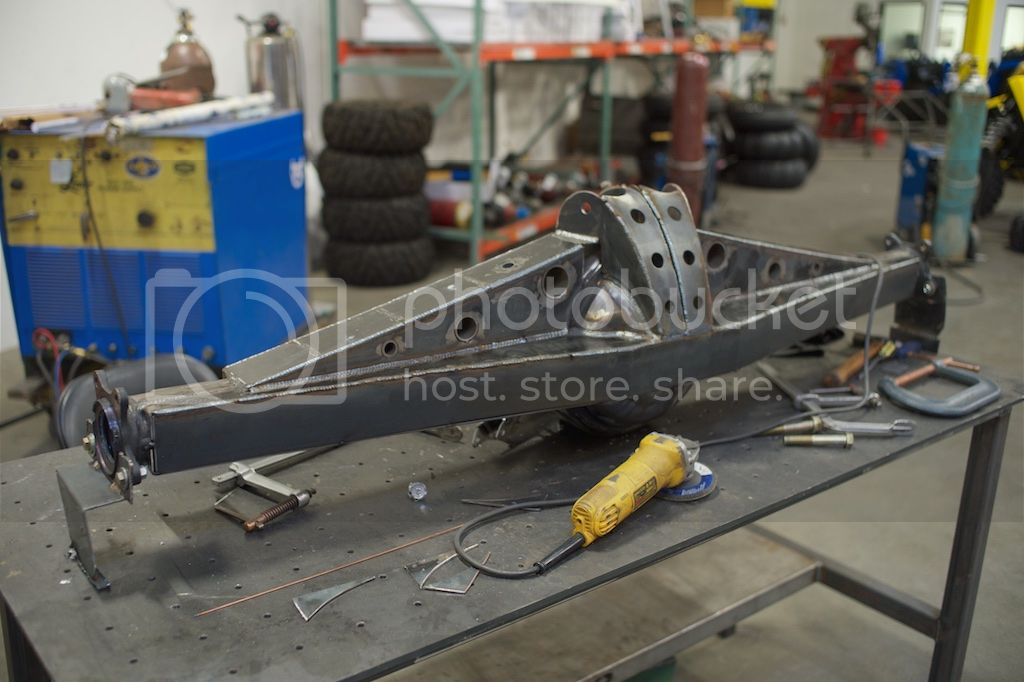
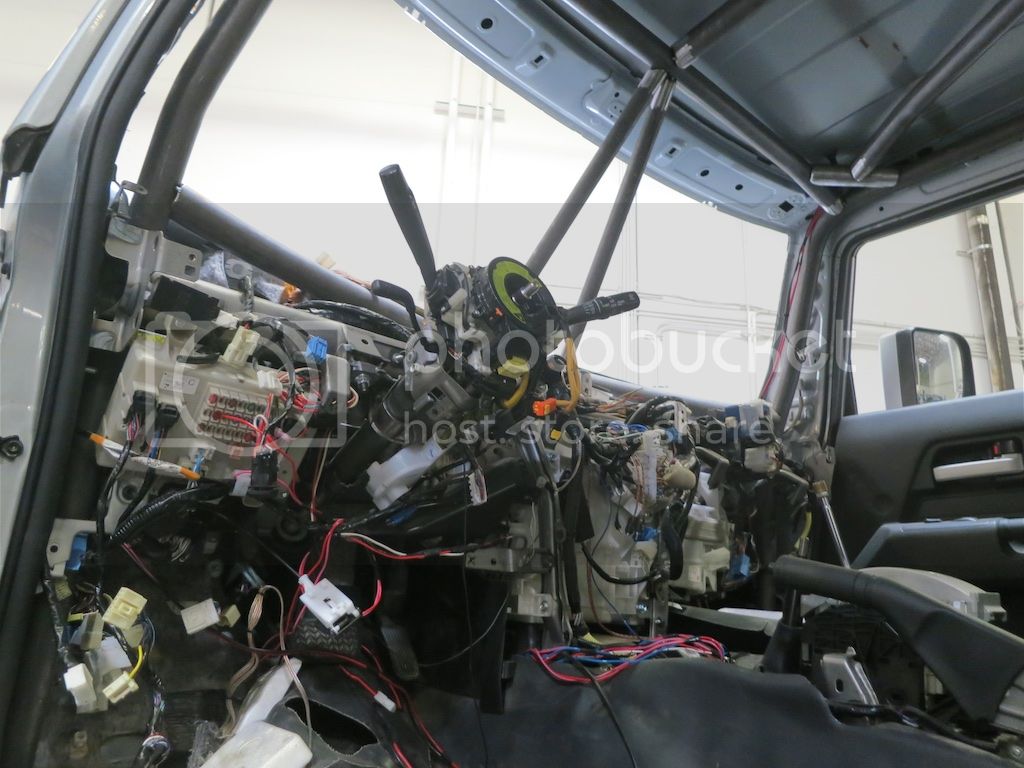
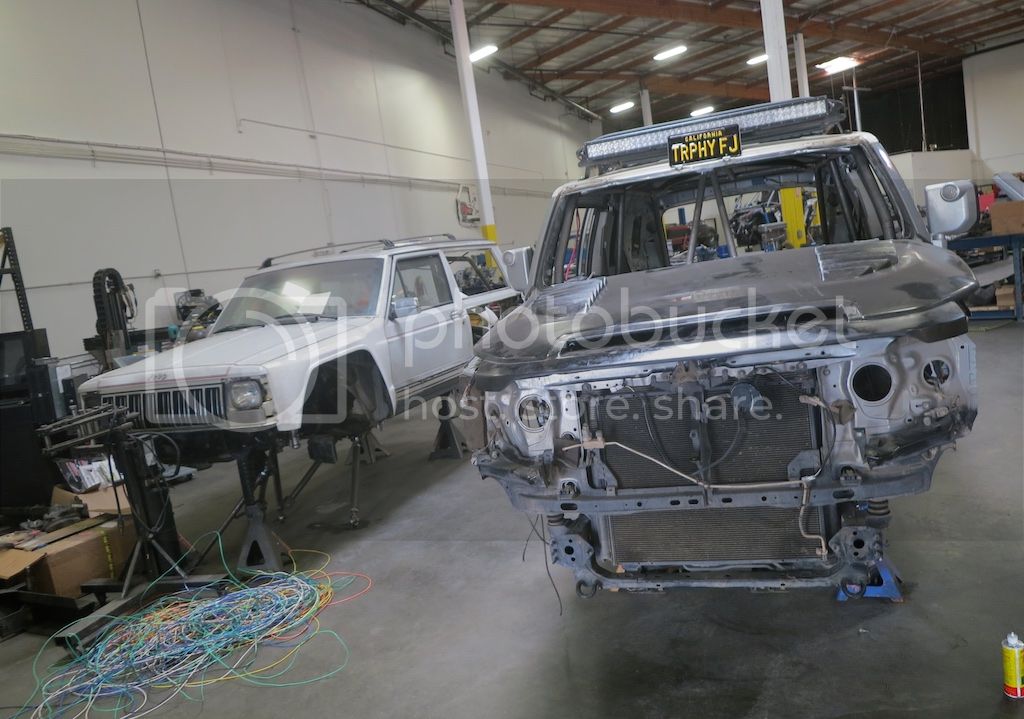
As you can see they have a large shop, clean floors and lots of race cars.
For me all good signs......so here we go.


The funny thing is when I bought my car back in 2010, I saw this picture online. I remained pinned to my wall in my office since then.....as a motivation picture.....and in a couple of months (with any luck) I should be the owner of a even better version of my dream FJ.

In the end we are all still kids dreaming about the cars on the posters in our room. Luckily thru LOTS of hard work in the last few years my dream will be coming true.

07-adam%20nagy%20fj%201-1000_zpsgyhjpktg.jpg


It's not by accident my car has the same DeMello bumper as the one in my favorite picture.


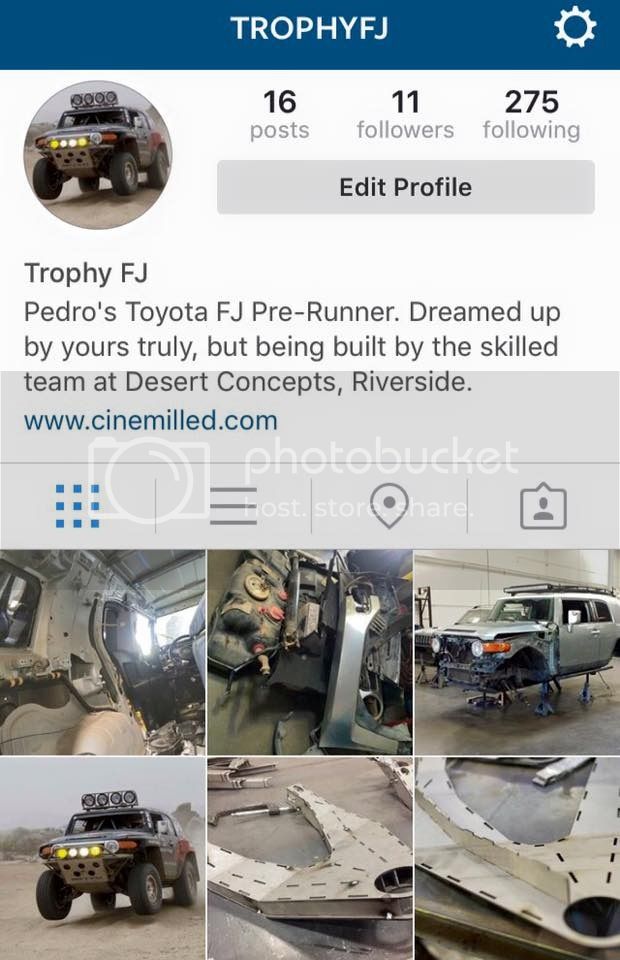
@trophyFJ on instagram

HERE we go!
 
1 month in....update.

They had a lot of work to do on some race trucks and bread and butter customers no major progress to report.... lots of parts got ordered, some prep work started on some of the donor parts....few design discussions and few changes as result....

Currently......the arms were designed in CAD and the front arms getting a redesign from the existing LT arm they had just finished making for another crazy FJ customer.

At the moment everything got sent to the laser cutter and we are waiting on them to deliver a bunch of pretty lasercut parts, tabs, gussets etc,etc,etc....then things will finally start coming together. Literally. Everything is designed in CAD software and exported to the laser cutter. You can even cycle the suspension in the software and that how he is working out geometry and design. Luckily since he just finished the other FJ project he had all the models and a lot of work has already been done. We are changing a few things from their previous FJ build. So what you get back from laser is steel plates with "tabs" that stick out that interlock with other plates much like a jigsaw puzzle........then you spark up the welder and make it all into one beautifully crafted part that almost makes me feel bad powder coating.

When they start welding, I'll go visit them and get some pics....

Meanwhile I'm trying to focus on work so I stop thinking about my truck.....and so I can pay the bill. Which as expected is growing a bit.


I wish I could wave a wand and have it done in a blink of an eye, some days I want to drive down there and help them!.......this is the first time I am not fabricating and building something I am driving/riding. New Experience. I never had the money to pay someone else before. If I can I would love to go down there and tig weld some of my parts.....but I should just focus on work.

Meanwhile the wait keeps me driven at work to continue to drive my company forward...Spending money on my cars, bikes has always kept me driven in life....


I could be spending it on coke and hookers.....so it could be worse.
 
Back to my build....

My Lower arm parts emerge from the CAD software and brought to life via a CNC laser cutter and bender....

_PBG0404_zpsplisfrjf.jpg


If they look big it's be cause they are.... will make the fiberglass fender look stock.

_PBG0401_zps3fsldtgo.jpg


All the parts are notched and fit together like lego blocks then it is fixtured to a jig and welded together. each "tab" is then plug welded. The result in the end is a very strong unit.

_PBG0389_zpsfvafwaza.jpg


So cool to see it all come together....The guys at Desert Concepts really pulling out all the stops.

_PBG0391_zpsa5b4r0oc.jpg
 
So the rear end....

We taking a 2014 Toyota Tundra crewmax rear end. It is much bigger than previous Tundras at 10.5". Bigger rear brakes and axle shafts too of course. Going to be one strong rear end....ready for the abuse I will be dishing out....

_PBG0386_zpszu6x5aot.jpg


Take a look at the guts.... the pictures don't do it's size justice. We will be adding 4.88 gears and ARB lockers front and rear.

_PBG0381_zpszt5yz8cn.jpg
 
The rear end.......

Looks so badass....the guys are doing great job with the rear axle housing.

Started out with a 2014 Tundra crewmax 10.5 housing. This way the truck stays full factory toyota parts...but I get larger, stronger rear end and larger brakes and axles also.

I cannot understate how massive this is in person......especially now that it has been trussed and linked.

Shes going have a serious rear end....

photo_zpszrxcq54w.jpg


Not quite finished yet, few details....but pretty much done.

_PBG0375_zpsczktwcwd.jpg


_PBG0376_zps98zlv2f7.jpg


Would of loved to TIG weld her, but would of taken easily twice the time and cost to do so and not really any appreciable difference in strength. I want to move the project along, keep the costs down in certain areas....so MIG is was.....nice work by the guys.

_PBG0379_zps6hul9xtd.jpg


_PBG0378_zps8vqzhgr6.jpg


Still a bit more work to do one her....some plug welds, but it will be going out to powder coat soon....

Should be up to the task of handling some whoops and landings at60mph+

Not to mention the occasional rock trail....

_PBG0377_zpse6lcrv4k.jpg


I'm so anxious I can even describe....not sure how I'm going to deal with waiting.......this is going be so bad ass....
 
Time to begin the teardown!

Finally dropped her off to start this crazy journey....

Yard sale time!! everything must go!!!

Long list of parts coming off that will be up for sale shortly.

Funny to see her naked....and it's just the beginning.

IMG_2197_zpsgcamia6p.jpg


everything must go!!

Amazing all the stuff inside a truck.....that is now useless to me.

Stopped by to pick up some my stock parts.....

want something? make me an offer.

IMG_2282_zpsosefwekf.jpg


she's naked!

IMG_2291_zps8zezv5vs.jpg


I was amazed how much stuff I was able to fit into my wife's Toyota Matrix.

IMG_2292_zps9pdcyf84.jpg


Front lower A arms tacked up.....

IMG_2162_zpsoo64wjgm.jpg


The guys over at Desert Concepts really doing great work and working with me to make my ideas a reality. Desert Concepts | UTV Jeep Fabrication

It begins.....
 
The motor and trans mounts are a known failure point. DMZ fab does make a gusset kit......but the guys designed and fabricated new engine and trans mounts.... here is the new engine mount. (hot fully welded of course) just a fitment mock up.

IMG_0924_zpsgnyjesoz.jpg


So....the basic cage is getting tacking in and fitted.....things starting to get real. No going back now! Into the deep end now.

There is more to it of course but these are the main tubes. But alot more will go in....harness cross tubes, seat mount tubes. The engine cage tubes will also go thru the firewall and tie in to the cage.

IMG_0912_zpsctghnidq.jpg


Great work by the guys as seen in the tight tube fitment/notches....having built and welded the cage on my race car I know first hand how hard it is to get roll cage tubing bent and notched to fit this tight.

No gaps=better welds, stronger welds, stronger cage.....safer and more rigid end result.

IMG_0919_zps10r1qbra.jpg


front tubes....

IMG_0915_zpswbo7bxtt.jpg


We went over some design issues/decisions with the rear end which will dictate the rest of the rear cage design/shock mounts. So we placed the axle housing on the ground and talked over some things...basically shock placement, arm lengths, pinion angles ....


IMG_0917_zpshlrlkyk9.jpg


Basically came down to either shorting the arms, reducing the travel in order to limit pinion angle deviation. This would be an attempt to place the shocks in a way where I could still used the rear seats....

The right thing to do is use the longer arms which we had planned on, place the shocks in the best position and angle resulting in more travel and less pinion angle deviation at max droop.... the down side? The shock would end up right behind the front seats (like most pickup truck pre-runners) more or less where the rear small FJ door is....making a impossible getting in and out of a rear seat area which I had wanted to maintain.

So we could compromise and use the shorter arms and move the shocks farther towards the rear and have easier access to the rear seats or put things where they work best. Function over convenience.

So .... i did the right thing. It's now officially a 2 seater. I can count the times I had people in the rear seats in 6 years on my hand. The rear seats lived folded down 90% of the time anyway so F-it I didn't come this far to cut corners engineering wise.


So she's is going be a beast for sure, I just hope I will have the balls to rise to challenge. >:D
 
Not happy with the first version of the motor mounts I posted up....the guys re-did them....

TIG welded this time.

Sexy, huh?

12576087_10209225845311556_1352768806_n_zpsyastnjgk.jpg


I love that they take pride is the smallest things.....that one one will ever see....makes me feel good about being in the right hands.

Installed...obviously lots of reinforcing and gusseting will also take place.

IMG_1058_zpsdqzecice.jpg


Ever wonder whats behind your dash in your FJ?

enjoy....

IMG_1097_zpsb5mps3g2.jpg


IMG_1098_zps3hdxnb1k.jpg


The guys at DC are magicians......How they cut a perfect circle at the end of a multibend tube (this is the rear downtube in the trunk) and managed to bend the tube just just in order for it to perfectly go thru the hole is just beyond me.

IMG_1044_zpsgfypz7fo.jpg


When I built my roll cage in my race car in my garage....I just cut a big square hole in the floor board since I had no idea where I was going to land. (later I put in thick plate and boxed the area per rulebook). If you have ever bent tubing are tried this yourself you will also gaze in amazement.

But I guess that is what separates a garage weekend hero and the PRO's.....once again it's the small things that impress me.


Next step? Fender bulges? what fender bulges? ahahaha....I didn't need those anyway.

Turned a new leaf....into the engine cage we go....

IMG_1065_zpstpvypu8a.jpg
 
Now with the inner fenders gone they have more freedom and access to start tacking in the engine cage main structure, plate the shock towers from inside and reinforce everything before we start running our shock mount tubing structure and figuring out the hydro bump stop placement etc, etc...it's coming together and it's a good day. (Tube goes thru the firewall to the main hoop...) We'll worry about finding a place for all the stuff that is missing later....(air box, batteries etc...)

IMG_1050_zpsslx1f1jq.jpg


Blank slate, or as close as we are getting to that anyways. Ok, now the work starts. This going look very different soon. Probably going make the 4" wide fiberglass flares look too small by the time we are done with this.

IMG_1064_zpsudoa5et1.jpg


Measure 10 times cut once right? The guys at the Desert Concepts making progress on the engine cage and tying it into the main rollcage thru the firewall.... Then start working on the shock mount tubes, shock tower reinforcement/plating.... Etc.... The list is long.... But getting shorter one item at a time.

IMG_1052_zpsboetqci9.jpg


IMG_1047_zpsdpqiqjtw.jpg


The main structure for the engine cage is in....good way to start the week. The guys working hard and moving the project forward still lots to do. Meanwhile I'm working hard to also keep the project on track. None of this comes easy, this project is the result of hundreds of hours of me sweating in a Steadicam vest humping 60lbs cameras and chasing actors in Hollywood with a camera. I am lucky enough to have a great job in the film industry but I had to work hard to get there and even harder now that I have had some success. The dream of building the dreamcar/truck in my head motivating me at every moment. Goals are everything in life. Whatever your hustle is keep working at it everyday.... While the steps forward may not be big at first they add up....love what you do and do it well. If you want to follow my life behind the camera follow @m3pedro on instagram.

IMG_1046_zpsdx4jcdue.jpg


IMG_1053_zpsnjprqcnw.jpg


Time to cage the engine compartment.... Someday there will be a fire breathing V8 insides those tubes.... For now she will be stock. We will see how far you can push the 4.0

BEFORE


IMG_1049_zpsqmx3u5km.jpg


AFTER

enginecage_zpsxo3kfqvq.jpg


Tack'd in... Clears the new hood fine....Naturally we will make the center section removable to service/remove the engine need be... We haven't started on shock mount/tubing structure... Plus hydro-bump mounting location so there is still a ton of work to go but starting to build momentum...

:rocker::rocker::rocker:
 
So it's official. The state of CA has blessed the build.

Also as you can see Deft racing Has contributed a badass fiberglass vented hood, way lighter than stock and works on factory hinges and hardware. If you want one check out their website/IG. Now the guys at have their work cut out for them to keep pushing and make sure we can live up to the nickname. Because with a lisc. Plate like that...I can't be running around on kit suspension.....

the flat black gel coat does make me think about a flat black paint job..... Hummm.....

IMG_1066_zpsp128rjlv.jpg


Burning rods....the time has come to strike the TIG torch and move that tiny pool of molten metal forward and take a pile of steel and turn them into pure speed. Who wants to see where all those rods have gone?

IMG_1080_zpsvh1dfnfu.jpg


Umm yeah, you can say I'm impressed with the mad skills going into my build. As someone who likes to think I can lay down some nice beads....my skills are not on this level...damn...proud of the craftsmanship going into my beast. Robert and the guys desertconcepts are absolutely killing it.

IMG_1081_zpsmvjfbvlu.jpg


Arc time...lots of it....Robert was burning rods all week... Welding up the lower A-arms... Then the lower rear links....

IMG_1151_zpsomzrycys.jpg


Turns out Robert used to weld the downhill mountain bike frames at Foes racing back when I used to race. I was CA state DH champ back in 98'. Then raced as a Norba Pro for few years.....He's doing beautiful work welding up the lower A-arms.....

IMG_1125_zps9wnxw5zk.jpg


Side of the lower a-arm and the beautiful TIG welding Robert from desertconcepts laying down... If I did this it would look a bit different ...

IMG_1093_zpsapyjchag.jpg


First A-arm coming together...heim bungs and uniball cup still need go in... Pretty awesome to hold these bad boys in my hands... Massive compared to stock arms... Even makes a +3.5 kit look small. Hard to tell the scale in this pic....

IMG_1077_zps4i9vzvsy.jpg
 
Jeep Speed race truck being built right next to mine...if I wasn't so FJ crazy I might consider it. it's a great class to go desert racing in...

IMG_1100_zpsxdaxgwu8.jpg


My rear axle housing coming to life on the welding table ... Thanks to @<a href="FJ Cruiser Forum" target="_blank">Desert</a>concepts for making the most from a 2014 tundra crewmax 10.5" housing.... Fitting creation for the #trophyfj ...... will house a ARB locker and 4.88 gears.....


[video=youtube;lqMSKruNmqM]


Now this picture gives you a good scale reference on the size of the A-arms!! Can you say #WideWednesday ? Robert working his magic, welding on the bung at the end of the arm here..... Lots of work going into each part of the build. Before, when they were in the computer and now....We trying to do this right the first time. #gottravel ?? Hahaha.

IMG_1148s_zpscjpsbzdr.jpg


Master welder Robert Wagner from @<a href="FJ Cruiser Forum" target="_blank">Desert</a>concepts working his torch on my new lower A-Arms ....awesome to watch him work and learn a few things. Good to be in such capable hands, not just his but all the guys at the shop too. Everyone plays a part and brings something valuable. I'm more anxious than all of you to see this project finished but you can't rush perfection.... Thanks to @cinemilled


[video=youtube;hnCmc1EEAX0]


Nice rig wish I had one of these in my garage....the machine behind most the welds on my beast. Time to burn some rods.....

IMG_1166_zps1sw2dwwt.jpg
 
Before..... Time to weld the bung in....yes I said bung.

IMG_1165_zpsgwfobyuu.jpg


AFTER .....now my bung is blue and purple ..... But I'm happy about it ;)

IMG_1218_zpsuhwzszn3.jpg


The backside....those welds tho... Always challenging to weld when you have a very thick material (bung) to a rather thin sheet metal of the arm. Controlling the arc to put enough heat into the thick material to ensure proper penetration without blowing out (fail) the thinner top material can be tricky. Anyone who has tried it with Oxy or TIG torch knows the struggle. Robert is a seasoned pro so he does this stuff in his sleep....once again proud of the skills and attention to detail that the team at @desertconcepts is putting into the build. Good Friday indeed....

IMG_1216_zpsposettnp.jpg
 
Didn't need any this stuff either....

IMG_1137_zpsypcrdtop.jpg


good riddance... amazing how much weight is coming off.....the seats alone weighed a ton. I'm so curious how much she will end up weighing.

Fresh tundra spindle gussets outta the laser cutter...there is a few more pieces not in this picture ....if you need some for your Tundra give them a call.

IMG_1163_zps3dw1j9xi.jpg


More #weldporn on my build...it's the small details I appreciate on parts no one will ever see again...

IMG_1161_zpsufmarb61.jpg


More quality craftsmanship from the guys at the shop... A-arms just about done now....

IMG_1210_zpsl0gd1q68.jpg


Drumroll..... Anyone have any guesses what this is going be?

IMG_1187_zpssbikiehb.jpg
 
The finished lower link mount. Thing of beauty. Tack'd in so we can put everything together and cycle the axle for the first time and start figuring out the rear shock mounts. ... FJ owners will laugh (like I did) when they see where this mount ended up.... It's one thing to have an idea, it's another to actually see it in person. Amazing to see it come together...


IMG_1173_zps9lx7nuco.jpg


So happy to say the lower links are done.... Fresh out of welding rod....

IMG_1185_zpsbebhg9an.jpg


Mmmm.... pure porn, It be a crime to powdercoat over it ..... Might just clear coat it, watcha think?

IMG_1202_zpspywducss.jpg
 
The welders working overtime at the shop...I wish I had this bad boy in my garage....has been my dream for a long time...

I have a Miller squarewave 170 in my garage.....I put some good arc time on it also...especially for aluminium....the Dynasty would be a dream setup....

12910307_10209533718888203_899423094_n_zps1s8dq0a7.jpg


anyway.... How long do you think my new lower links are? �� these things are beautiful and look insane mounted up on the FJ.

I think the stock links are what 23" or so? Lets just say.... ... Now it's starting to earn its nickname name now........

IMG_1184_zpsv6vd9yhz.jpg
 
Who needs a backseat anyways! I think I only had a couple of people back there a few times in 6 years anyways ...upper triangle will also get boxed to distribute the shock forces more, everything just tack'd in, it all will evolve a lot more as we continue.... Now things getting real interesting!!

IMG_1142_zpsclqguvzw.jpg


Shock mounts and rear cage coming together...the rear wells and sway bar will be a bit of a challenge... Still a lot to figure out....

IMG_1220_zpsbje5h6v6.jpg


Like a giant jigsaw puzzle.... One piece at a time.....

GOPR0765_zpsoytjmk0s.jpg
 
The first of many future #tuckedtuesday shots! We got everything tack'd together enough to link her all up and finally cycle her for the first time and start to see how everything lines up. Full bump! Quite a change from stock!! The stock/Icon links I had before are 26" long....we using fabricated boxed TT style Links 55" long! ... More than double, because If it's worth doing, it's worth doing right...

IMG_1140_zpsquddxttq.jpg


Same shot as before but doors open...all those forces have to go somewhere...shock mount will get more work done to spread the load more. The rear of the FJ has always been a problem, I think we fixed that ... Now it's the focal point.

IMG_1169_zpshueccyu6.jpg


Rear upper 4-link mounts tack'd in place so they can cycle everything and mock a bunch stuff up...once the stock gas tank is gone plenty of room down there....

IMG_1177_zpsmd2kqxin.jpg


Another view from below of the rear upper links tack'd in and at full bump!! Clears just about everything but we still going to give some "breathing room" in some places ....

IMG_1178_zpsznsohqkh.jpg
 

Users who are viewing this thread

Back
Top Bottom