intro The Pickle 94 fzj80
been somewhat lurking for awhile int he 80 section. I crashed my fj45lv last spring and decided I needed something a bit more modern. I had daily driven my lv for 5 years and before that daily drove an fj62 for 7 years , and before that I had an fj40 that I daily drive for 8 years. Daily drive is a relative term I guess. for me it means its my only vehicle but that does not mean they were on the road all the time
so I decided on an fzj80. my i wants were locked, lifted, and some accessories, on a small budget. What I got was "The Pickle" as the has named her, and while I was looking for a road worthy vehicle, this one has taken me a while to get to that level
what I got
- 94 fzj80
- triple factory locked
- 2.5" lift
- durabeked fenders
- arb front bumper with winch
- snorkle
- 315 bald cupped tires on 2 lexus wheels and two stock wheels
- cb
- foxfab sliders
- grean faded exterior with gray leather and third row seats
The bad (the fix)
- the O2 sensors were swinging free under the truck attached to chunks of exhaust( hole exhaust replaced with EMpowered stainless)
- it had sat for 8-9 monthes in water brakes were all locked up and needed new calipers and rotors all the way around
- shocks were rusted out ( replaced with OME)
-hacked up stereo (one rear speaker was mounted with zip ties , one zip had broken and the speaker was swinging and the magnet would stick th the window channel and ground out the sound. new pioneer speakers and HU, boss 2 channel amp in the rear with a 10" sub in a box. still had bad reception trying to figure out the wiring to run the speakers off the amp in the head unit, stock amp is unplugged.
-the 2.5" lifted was done with out caster bushings ( added OME)
- new 315 goodyear duratrac tires
Mods
- LED cabin lights
- Depo clear turns and tail lights
- HIR head lights
- Dual battery system using Blue Sea battery manager and switch
- Slee head light harness and aux light harness ( got in classifieds for cheap figure to give it a whorl
- slee tcase skid
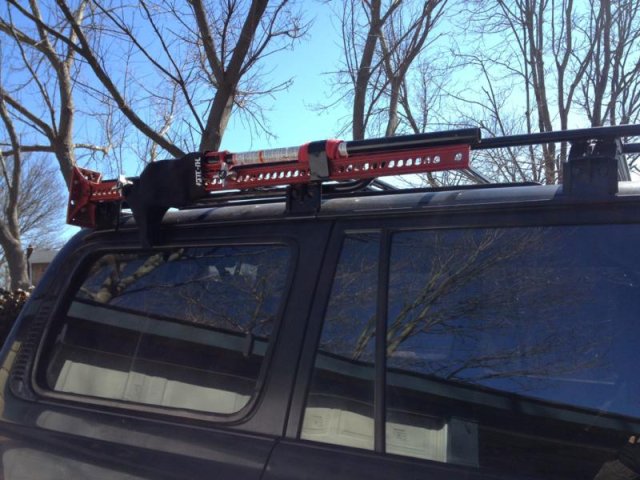
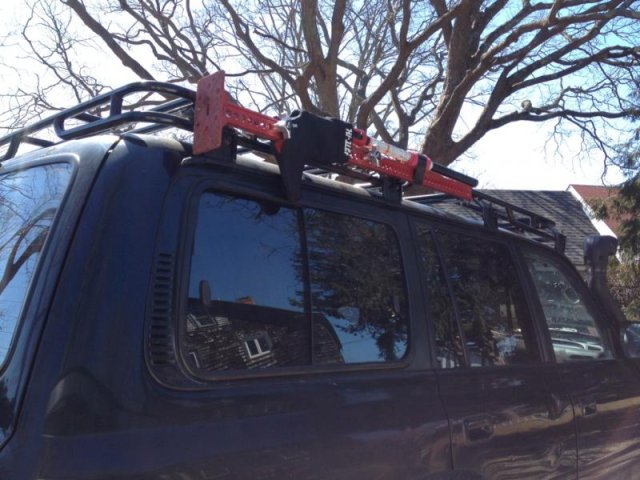
- 1" .096 walled tube rack built to be full length and to have the hole for the sun roof. the clamps are the low profile the rack is flat and will get a reverse basket on the front and sides so as to keep height low in order to fit in my garage
- bunch of other little fixes that I am forgetting
- 100 series hatch ladder fabbed for an 80 rear hatch
Plans
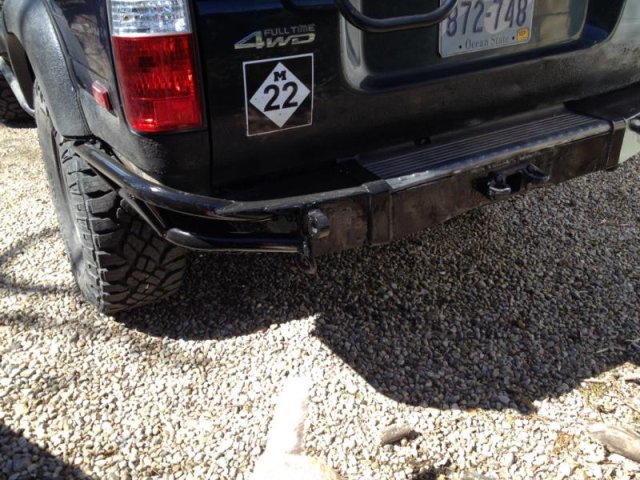
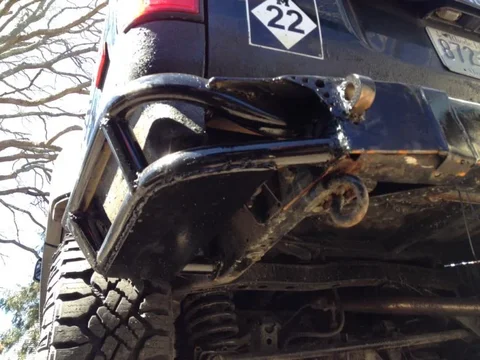
- rear bumper not sure how this will go yet. my garage is not deep enough to put the spare on the back and after 3 cruisers with a spare on the back I don't think I will have a swing out but I do wheel so I do need more protection than the stock bumper provides, will probable bend up some tube for wings will see.
-I eventually want to paint and will keep it green but not sure of the shade. thinking of vintage cruiser colors like rustic green or maybe even Seafoam green or one of the greens in between.
Questions
my passenger seat recline motor died can I replace this motor with a manual lever or do I need to replace with the electric motor. I took the motor off and can turn the wheel with some channel locks but I dare not ask the to do that
I have a new head unit and new speakers and new antenna but the reception seems poor I have unplugged the factory amp but in my searches people have used the rca jacks to power the speakers is there a plug and play harness or close to it or is this something I will have to create? I have used one set of rca's in the head unit for the rear sub woofer which hits just right but would like a bit richer sound from the speakers.
-
been somewhat lurking for awhile int he 80 section. I crashed my fj45lv last spring and decided I needed something a bit more modern. I had daily driven my lv for 5 years and before that daily drove an fj62 for 7 years , and before that I had an fj40 that I daily drive for 8 years. Daily drive is a relative term I guess. for me it means its my only vehicle but that does not mean they were on the road all the time
so I decided on an fzj80. my i wants were locked, lifted, and some accessories, on a small budget. What I got was "The Pickle" as the
 has named her, and while I was looking for a road worthy vehicle, this one has taken me a while to get to that level
what I got
- 94 fzj80
- triple factory locked
- 2.5" lift
- durabeked fenders
- arb front bumper with winch
- snorkle
- 315 bald cupped tires on 2 lexus wheels and two stock wheels
- cb
- foxfab sliders
- grean faded exterior with gray leather and third row seats
The bad (the fix)
- the O2 sensors were swinging free under the truck attached to chunks of exhaust( hole exhaust replaced with EMpowered stainless)
- it had sat for 8-9 monthes in water brakes were all locked up and needed new calipers and rotors all the way around
- shocks were rusted out ( replaced with OME)
-hacked up stereo (one rear speaker was mounted with zip ties , one zip had broken and the speaker was swinging and the magnet would stick th the window channel and ground out the sound. new pioneer speakers and HU, boss 2 channel amp in the rear with a 10" sub in a box. still had bad reception trying to figure out the wiring to run the speakers off the amp in the head unit, stock amp is unplugged.
-the 2.5" lifted was done with out caster bushings ( added OME)
- new 315 goodyear duratrac tires
Mods
- LED cabin lights
- Depo clear turns and tail lights
- HIR head lights
- Dual battery system using Blue Sea battery manager and switch
- Slee head light harness and aux light harness ( got in classifieds for cheap figure to give it a whorl
- slee tcase skid
- 1" .096 walled tube rack built to be full length and to have the hole for the sun roof. the clamps are the low profile the rack is flat and will get a reverse basket on the front and sides so as to keep height low in order to fit in my garage

- bunch of other little fixes that I am forgetting
- 100 series hatch ladder fabbed for an 80 rear hatch
Plans
- rear bumper not sure how this will go yet. my garage is not deep enough to put the spare on the back and after 3 cruisers with a spare on the back I don't think I will have a swing out but I do wheel so I do need more protection than the stock bumper provides, will probable bend up some tube for wings will see.
-I eventually want to paint and will keep it green but not sure of the shade. thinking of vintage cruiser colors like rustic green or maybe even Seafoam green or one of the greens in between.
Questions
my passenger seat recline motor died can I replace this motor with a manual lever or do I need to replace with the electric motor. I took the motor off and can turn the wheel with some channel locks but I dare not ask the
 to do that
 I have a new head unit and new speakers and new antenna but the reception seems poor I have unplugged the factory amp but in my searches people have used the rca jacks to power the speakers is there a plug and play harness or close to it or is this something I will have to create? I have used one set of rca's in the head unit for the rear sub woofer which hits just right but would like a bit richer sound from the speakers.
-
Last edited:


