Builds The new FJ 73 Build (1 Viewer)

This site may earn a commission from merchant affiliate
links, including eBay, Amazon, Skimlinks, and others.

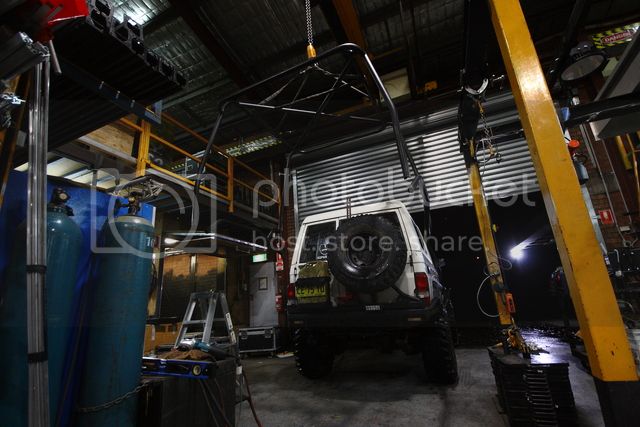
Bang for the buck its one of the better mods I've done so far, $195 delivered for the 78 springs.
All Four x 4 Dismantaling where super helpful and shipped super quick, picked up the bushes from them the week after too.
It definately helped combining the existing heavy kit with 78 pack.
Now started thinking of a hybrid pack in the front, using the rear main and armour leafs combined with the existing pack, with a shackle flip to boot.
 
Thanks on the feed back with the 79 springs the 60 series I brought for the 12ht engine has fairly new tough dog springs under it. I know the fronts will fit but the rears are way to short. I'm thinking of a hybrid pack with the two upper 75 leafs and the rest off the tough dog leafs.
If it still rides like a billy cart I go your idea with the 79 rears.
Thanks for sharing your build mate it's a inspiration watching you build stuff for your truck.
:beer:
 
Its a pleasure pal, but just to re iterate they are 78 springs not 79.

Knocked up a rear bar for a Bundy today,

20160602_123222_zps3prwv0eo.jpg


20160602_123232_zpsinqpthlc.jpg


20160602_151147_zpsqxffew1o.jpg


20160602_151155_zpsnhldehpz.jpg


20160602_153048_zpsjwtgnifl.jpg


20160602_162221_zpssjasoyts.jpg


20160602_162304_zps4tptleum.jpg


20160602_162327_zpsgyswmcuf.jpg
 
All good on the 78 springs if I go that way the longer 79 springs will be what I want for ride and spring travel on the ute.
 
That is one of the sweetest builds ive seen
 
I cant imagine how much time you have spent doing this
 
How thick is the material on that rear bumper? Looks good, great corner protection.
 
Thanks guys, turned out a nice compact little bar, main plates and recovery are 12mm plate, the rest is either 6mm or 5mm plate, the tube ends are 32NB (42.4mm OD) 3.2mm wall, its mounted with 3 off M12 each side and 3 off M10 across the rear apron.

The rear roof basket exo cage build continues.

IMG_8191_zpsibfrx8bd.jpg


20160603_212417_zpsbmmysfiy.jpg


Painted

IMG_20160603_231154_zpsdfm1atdj.jpg


20160603_222054_zpswmwuinfp.jpg


20160603_222141_zpssgi8piyg.jpg


IMG_8199_zpstr0fkyph.jpg


IMG_8206_zps2cpj6loi.jpg


IMG_8234_zpskd3z00rf.jpg


Stoked,

IMG_8240_zpsrxslj2r4.jpg


IMG_8241_zpsislh2kjh.jpg


IMG_8221_zpswl0din2u.jpg


IMG_8247_zps14opruyd.jpg


IMG_8213_zpsy1ipc8je.jpg
 
Cheers pal,
I was alwys worried how it would turn out as they can go south very easily.
But im fairly happy with the result.

So went for a drive today and the car was acting really strange, at first i thought a caliper was stuck and then maybe the rear axle was floating off the locator pins. It was super wet and couldnt really get a good feel for what was going on.

But on inspection I was very suprised, all 6 studs sheared on the rear passengers side, Thank god for the spacer as the thickness of it bolted to the wheel saved the wheel from laying over.

Still not sure how it drove for so long without the wheel falling off. Pretty damm lucky.

Gotta lay off those burn outs I guess.

IMG_20160605_164921_zpsapn5xusi.jpg


20160605_164330_zps6qkm1yz1.jpg


20160605_164416_zpskx75lhxi.jpg
 
Got hold of some guaranteed 10.9 studs, they are m12x1.5 with a knurl of 14.1mm not sure on the overall length.
They actually have a 12 month warranty.

Loving the full floating rear end, after taking it apart and putting it back together I can see the advantages over semi or fixed axle set ups.

Did the drivers side rear while I was at it, second side took no time at all, pretty easy job.
All the studs where intact on the driverside.

Special tool what? another bastard tool,
The rear lock nuts are so much nicer than the fronts.

20160611_142354_zpsxusdtwty.jpg


The rear locking nut, nice design, out bound bearing and cone washers and so on.

20160611_142609_zpsyvxwqw5z.jpg


Shaft Out.
20160611_150328_zpswywxkcme.jpg


20160611_142655_zpsayydkinq.jpg


20160611_142823_zpsogubai3j.jpg


used a centre punch and knocked out the old studs,

20160611_143519_zpsjsojxvtn.jpg


New v old

20160611_143556_zpsamvzfdny.jpg


Decided to press the new studs in,

20160611_144506_zpshj2cvrk9.jpg


20160611_144603_zpsjzj1cwaj.jpg


20160611_144831_zps2zj6z3ro.jpg


Re-greased and going back together.

20160611_145827_zpskverssqr.jpg


Note the line on the stud on the locking nut that lines up with a notch on the hub,

20160611_150249_zps0wjeafvk.jpg


Double checking the the pre load, specced to be between 0.1 to0.9mm.

20160611_150304_zpsvrpfb8gm.jpg


The screws thread into the locating washer and lock the nut, great design.

20160611_150448_zps1zl7vxsn.jpg


Shaft back in,

20160611_150613_zpspjy4puzv.jpg


Cone washers going back on.

20160611_150916_zpskbhmqtn9.jpg
 
I like the rear FF locking nut design way better than the front. I didn't know about the 0.1-0.9 spec. I was
more concerned with proper bearing preload before that part. Mind you I have only rebuilt a 60 rear FF.
Haven't got to the 74 rear yet. To remove the cone washers, do you give it a good solid strike on the outer
face of the hub right outside of the cone? With the mud, road salt, general crud on Canadian roads, they
are a real nuisance to remove. Just wondering if it's an issue for you or not.
 
Alex Gee, this is a wicked, wicked build.

Unless i missed it, you haven't mentioned what engine you have in there; care to let me know please?
 
I just hit the head of the studs with a copper hammer, I use a Thor copper hammer the size 2 one which is the 1260gram version, they separate super easy, have in the past used a aluminium drift but the direct hit with the copper hammer seems to shift them better. That is how its recommended in the Toyota manuals. I checked the preload with a strain guage but the manual recommended the measurement step as well. I have done a handful of wheel bearings on heaps of cars and feel like I have a good feel for it.

I am running a GMH 308 5L v8, its running a quadrajet carb, double row timing chain , extractors, brash button extra heavy duty clutch, HDT inlet manifold, Gilmer drive, aluminium radiator, 20 inch davies and craig thermos fan, Msd blaster coil,9mm leads, B&M line locker hooked to the front brakes, mechanical vac, water temp and oil pressure gauges, 4 inch k&n filter custom box and snorkel, fabricated high lift rocker covers and a splattering of mud and dirt.

20160612_165118_zpsjwb0rra0.jpg


Never liked the drag link mount I did when I first did the tie rods.
It rolled the drag bar on the bearing ends and loading the bearing ends out of plan isn't the best.

Revised the mount so it holds the drag bar square as it travels through its cycle.
Much nicer now, you could actually feel the bar rolling as you changed directions.

20160612_162605_zps21gzvghn.jpg


Welded and painted,

20160612_165012_zpsqkfhxxqr.jpg


20160612_164952_zpsco6gesqy.jpg


Pretty damm happy with the truck I must say.

IMG_8278_zpsynqcoqxa.jpg


IMG_8286_zps8bfucak0.jpg


IMG_8287_zpsv4zs1uqd.jpg


IMG_8281_zpscpmmjucq.jpg
 
Got out for an early start at Ourimbah,

The truck performed so well , new rear end flexes amazingly and is so nice and soft, but not to tippy.

The new bar work copped a canning saved the panels a handful of times, Truck is running very well.

IMG_8312_zpswjseirar.jpg


IMG_8305_zpsqusobqfk.jpg


What exo cage.

IMG_8317_zpsp5tbfcxg.jpg


IMG_8318_zpssgimfwmy.jpg


As the strom rolled in,

20160619_105849_zps91m8ol7l.jpg
 
Alex
Love the vidio mate the bar work is doing its job after seeing it bouncing out off some of those ruts. Nice work on the truck mate keep it coming
Cheers
 
The barwork worked very well on the last outing, saved all 4 corners more than once.

Need to repaint, the surface rust doesn't take long.

20160626_113811_zpsw2umzzqm.jpg


20160626_113707_zpstrqwslx6.jpg


20160626_113638_zpswg0qzd57.jpg


20160626_113619_zpsxifoeeyc.jpg


Had read about the rear leaves fitting well on the front, I was pleasantly surprised.

Took the main and armour leaf's from the old rears and combined them with the front pack.

Turned out spot on , great shackle angle and only lost 10mm in height, not bad when you look at the new shackle angle.

Full front pack with rear main and armour.

20160626_132307_zpstpvhplfu.jpg


Front and rear main and armour.

20160626_144842_zpsrbykakbk.jpg


Had to heat and bend the clamps, hardest part of the job.

20160626_134140_zpscvdqcj5k.jpg


Side by side

20160626_143714_zps7kwntwce.jpg


Pin location on the rears and fronts is almost exactly the same from the static end. Too easy.

20160626_143723_zpshfxouzxh.jpg


20160626_143736_zpseozqcpgu.jpg


Machined down some cap heads for new centre pins.

20160626_135659_zpsmnnyndzu.jpg


Used a spacer plate when resetting the clamps, cherry red with the oxy and then hammered home, turned out very tidy.

20160626_150701_zpsrsna7m6o.jpg


20160626_150722_zpsizgoazpt.jpg


Factory finish.

20160626_151642_zpsq8q9yqbw.jpg


Results are impressive , need to look at the front bump stops again.

20160626_162504_zpsabplqfij.jpg


20160626_162657_zpsdtkktviu.jpg


20160626_162804_zpsygmr68qx.jpg


20160626_162815_zps5goenw7b.jpg


Full flex shackle angles, textbook.

20160626_162732_zpsqclqlx2h.jpg


new vs old, noticeable difference.

IMG_20160626_181206_zpsblxhdzqq.jpg
 

Users who are viewing this thread

Back
Top Bottom